

When Windows crashes because of a faulty update or when it doesn’t boot correctly, you can try fixing it with a recovery USB drive. Creating a recovery drive involves plugging a USB memory stick into a working Windows computer and running the Recovery Media Creator wizard. Here’s how it all works and how to create a recovery USB drive that works on any PC with Windows 10 or Windows 11, regardless of whether it’s yours or someone else’s:
 You can create a recovery drive on any kind of USB drive
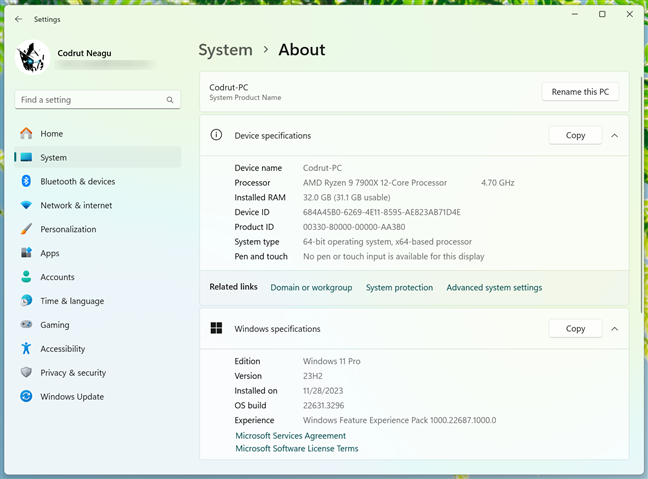
Some sites on the internet tell you that you can use the USB recovery drive only on the Windows 10 or Windows 11 PC where you created it. That is not true. The recovery drive works on any computer using the same architecture (64-bit or 32-bit) and the same version of Windows 10 or Windows 11, or at least a relatively close version to the one used to create the recovery drive. If you don’t know these details about your computer, here’s how to check your Windows 10 version and how to find your version of Windows 11.
Even if the computer you want to repair doesn’t use the same Windows version as the PC on which you created the recovery drive, you can still boot from the USB recovery drive and use most of the recovery options available. However, you might be unable to use all the recovery tools. Some may not work, like the option to reinstall Windows, because the USB recovery drive has the system files for a different Windows version than the one found on the PC you want to recover. This is especially true when you use a USB recovery drive created on an older version of the operating system to repair a PC with a much newer Windows 10 or Windows 11 version.
You can create a recovery drive on any kind of USB drive
Some sites on the internet tell you that you can use the USB recovery drive only on the Windows 10 or Windows 11 PC where you created it. That is not true. The recovery drive works on any computer using the same architecture (64-bit or 32-bit) and the same version of Windows 10 or Windows 11, or at least a relatively close version to the one used to create the recovery drive. If you don’t know these details about your computer, here’s how to check your Windows 10 version and how to find your version of Windows 11.
Even if the computer you want to repair doesn’t use the same Windows version as the PC on which you created the recovery drive, you can still boot from the USB recovery drive and use most of the recovery options available. However, you might be unable to use all the recovery tools. Some may not work, like the option to reinstall Windows, because the USB recovery drive has the system files for a different Windows version than the one found on the PC you want to recover. This is especially true when you use a USB recovery drive created on an older version of the operating system to repair a PC with a much newer Windows 10 or Windows 11 version.
 You can create a Windows recovery USB on other computers, too
You can use any USB memory stick. However, it must have at least 8 GB of free space if you’re creating a Windows 10 recovery drive or at least 16 GB if you’re creating a Windows 11 recovery drive. These are the storage capacities Microsoft recommends. Oh, and another aspect to remember is that USB 2 memory sticks are much slower than USB 3 ones. Therefore, if you don’t want this procedure to take forever, try to find a faster USB stick.
CAUTION: While downloadable Windows recovery USB drives are available online, their safety cannot be guaranteed. It’s unnecessary to risk using these when you can create a personal recovery drive on any computer running Windows 10 or Windows 11. If you don’t have a second PC, consider asking for help from a friend. It’s a safer and more reliable approach.
You can create a Windows recovery USB on other computers, too
You can use any USB memory stick. However, it must have at least 8 GB of free space if you’re creating a Windows 10 recovery drive or at least 16 GB if you’re creating a Windows 11 recovery drive. These are the storage capacities Microsoft recommends. Oh, and another aspect to remember is that USB 2 memory sticks are much slower than USB 3 ones. Therefore, if you don’t want this procedure to take forever, try to find a faster USB stick.
CAUTION: While downloadable Windows recovery USB drives are available online, their safety cannot be guaranteed. It’s unnecessary to risk using these when you can create a personal recovery drive on any computer running Windows 10 or Windows 11. If you don’t have a second PC, consider asking for help from a friend. It’s a safer and more reliable approach.
 Click or tap on the Recovery Drive shortcut from the Start Menu
Before the Recovery Media Creator opens, you see a UAC prompt asking you to allow this app to make changes to your device. Press Yes to continue. Note that if you are using a standard user account to start this app, you must enter the administrator account password in the UAC window.
Click or tap on the Recovery Drive shortcut from the Start Menu
Before the Recovery Media Creator opens, you see a UAC prompt asking you to allow this app to make changes to your device. Press Yes to continue. Note that if you are using a standard user account to start this app, you must enter the administrator account password in the UAC window.
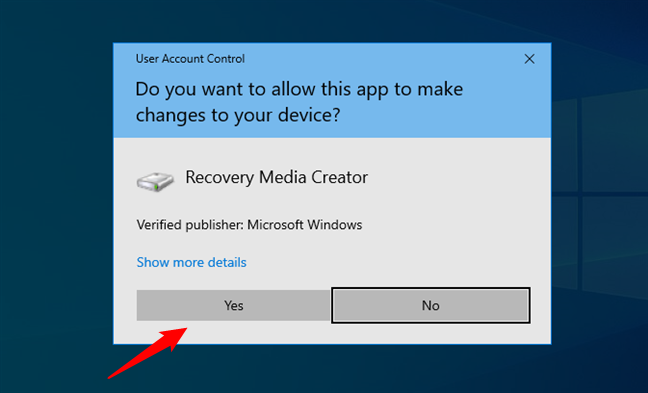
 In the UAC prompt, click Yes to run the Recovery Media Creator
Another way to open the wizard to create a recovery drive is to use search. Type “recovery drive” in the Windows 10 search box and then click or tap on the Recovery Drive result or the Open option on the right.
In the UAC prompt, click Yes to run the Recovery Media Creator
Another way to open the wizard to create a recovery drive is to use search. Type “recovery drive” in the Windows 10 search box and then click or tap on the Recovery Drive result or the Open option on the right.
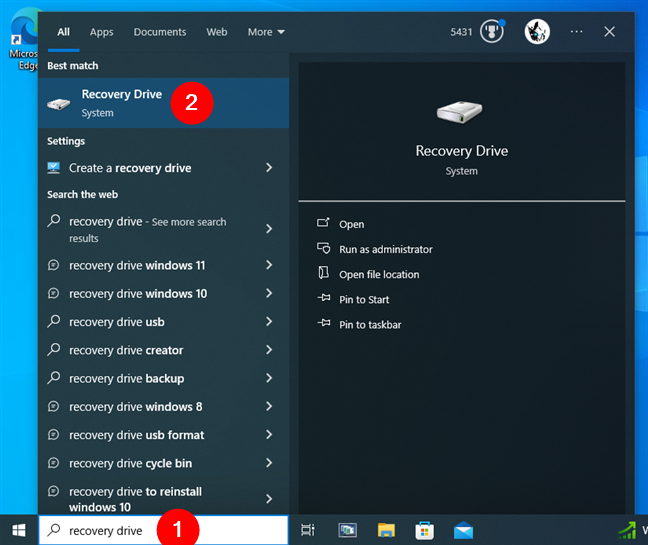
 Use search to find Recovery Drive
And last but not least, you can also open the Recovery Drive application using its executable. Open File Explorer and navigate to this location:
Use search to find Recovery Drive
And last but not least, you can also open the Recovery Drive application using its executable. Open File Explorer and navigate to this location:
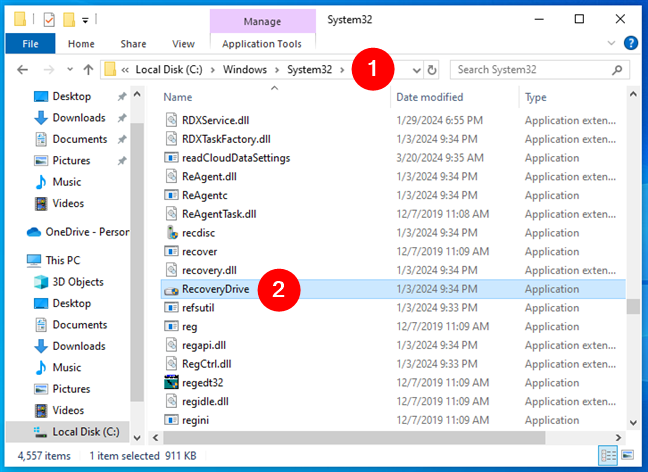
 The path to the RecoveryDrive.exe file
NOTE: Before you use the Recovery Media Creator, plug a USB memory stick into your Windows 10 computer. It should ideally have more than 8 GB of free space.
The path to the RecoveryDrive.exe file
NOTE: Before you use the Recovery Media Creator, plug a USB memory stick into your Windows 10 computer. It should ideally have more than 8 GB of free space.
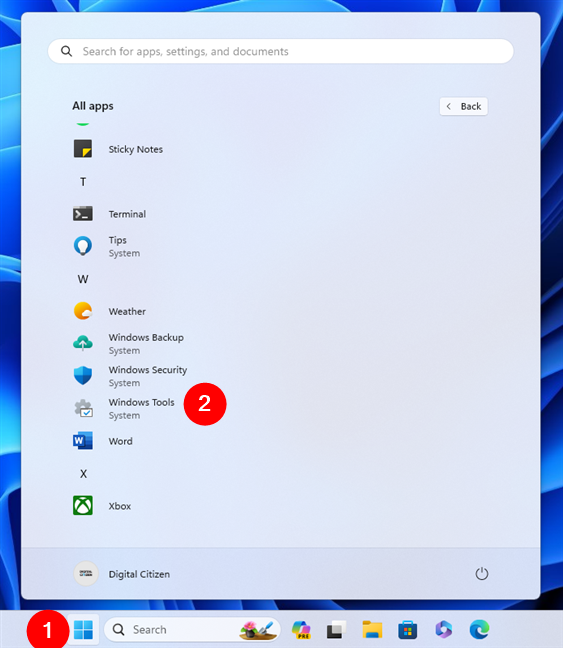
 Open the Windows Tools in Windows 11
In the Windows Tools window, locate and double-click or double-tap the Recovery Drive shortcut.
Open the Windows Tools in Windows 11
In the Windows Tools window, locate and double-click or double-tap the Recovery Drive shortcut.
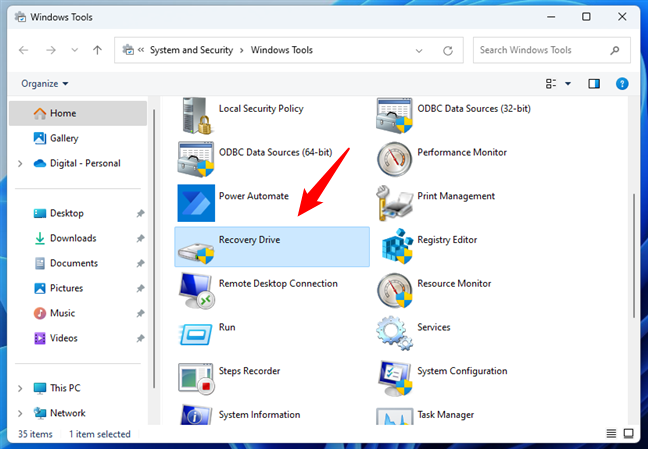
 Double-click on Recovery Drive
A User Account Control (UAC) prompt will appear, asking you to authorize the Recovery Media Creator app to make changes to your device. Press Yes to grant it permission. Note that if you’re launching the app using a regular account without admin privileges, you’ll also be prompted to enter the administrator account password in the UAC window.
Double-click on Recovery Drive
A User Account Control (UAC) prompt will appear, asking you to authorize the Recovery Media Creator app to make changes to your device. Press Yes to grant it permission. Note that if you’re launching the app using a regular account without admin privileges, you’ll also be prompted to enter the administrator account password in the UAC window.
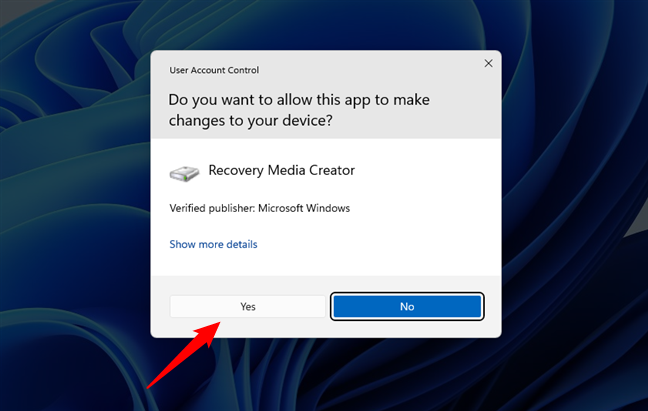
 Approve the launch of the Recovery Media Creator
Alternatively, you can use Windows 11’s search function to access the Recovery Drive wizard. Type “recovery drive” into the search field on the taskbar, then click/tap the Recovery Drive result or press the Open option on the right.
Approve the launch of the Recovery Media Creator
Alternatively, you can use Windows 11’s search function to access the Recovery Drive wizard. Type “recovery drive” into the search field on the taskbar, then click/tap the Recovery Drive result or press the Open option on the right.
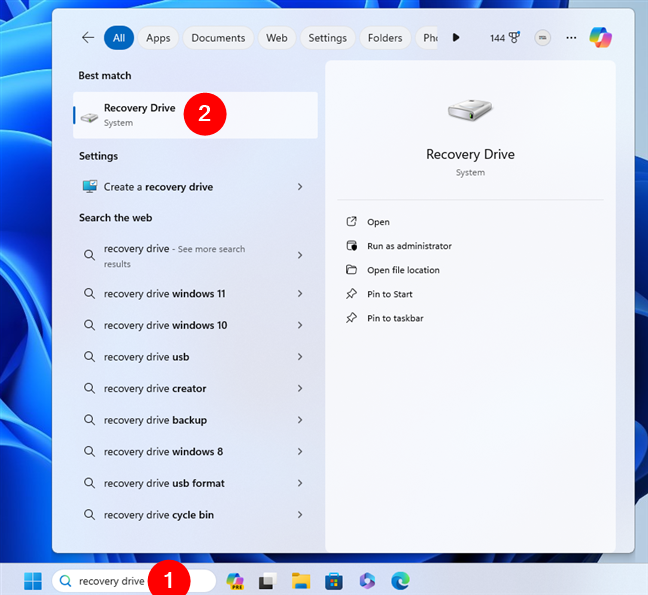
 Searching for Recovery Drive in Windows 11
A third method to open the Recovery Media Creator tool involves using File Explorer. Launch it and follow this path:
Searching for Recovery Drive in Windows 11
A third method to open the Recovery Media Creator tool involves using File Explorer. Launch it and follow this path:
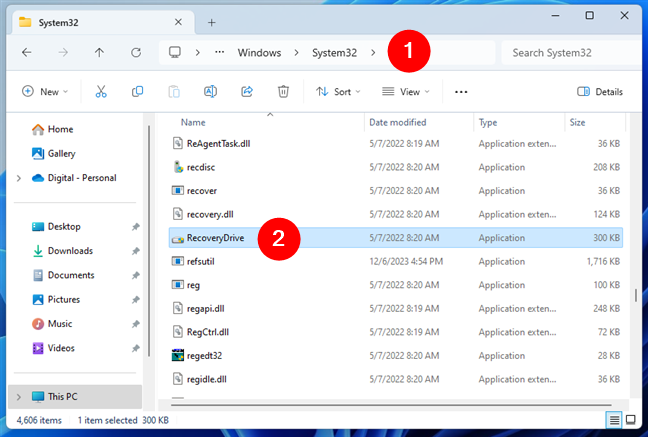
 The RecoveryDrive.exe file in Windows 11
NOTE: Don’t forget to insert a USB memory stick into your Windows 11 computer before you use the Recovery Media Creator. For Windows 11, this drive should have more than 16 GB of free space.
The RecoveryDrive.exe file in Windows 11
NOTE: Don’t forget to insert a USB memory stick into your Windows 11 computer before you use the Recovery Media Creator. For Windows 11, this drive should have more than 16 GB of free space.
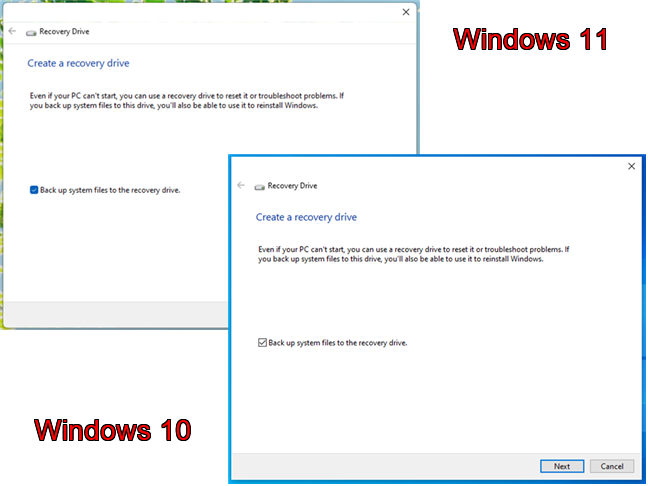
 Creating a recovery USB drive is the same in Windows 11 and Windows 10
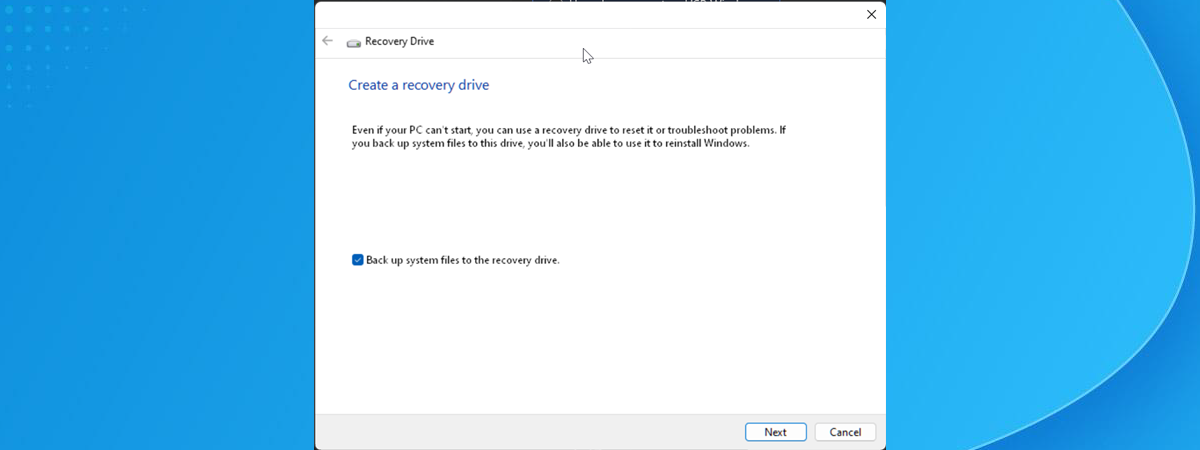
In the Recovery Drive window, you first see a description of the recovery drive’s usefulness and the option to “Back up system files to the recovery drive.” If you check the box next to this option, the recovery drive will include Windows 10 or Windows 11 system files that allow you to reinstall Windows on a PC with problems. It’s a good idea to leave it checked and press Next. However, remember that this option also increases the free space required on the USB stick. Therefore, if your USB memory stick has limited free space, you may want to uncheck this option.
Creating a recovery USB drive is the same in Windows 11 and Windows 10
In the Recovery Drive window, you first see a description of the recovery drive’s usefulness and the option to “Back up system files to the recovery drive.” If you check the box next to this option, the recovery drive will include Windows 10 or Windows 11 system files that allow you to reinstall Windows on a PC with problems. It’s a good idea to leave it checked and press Next. However, remember that this option also increases the free space required on the USB stick. Therefore, if your USB memory stick has limited free space, you may want to uncheck this option.
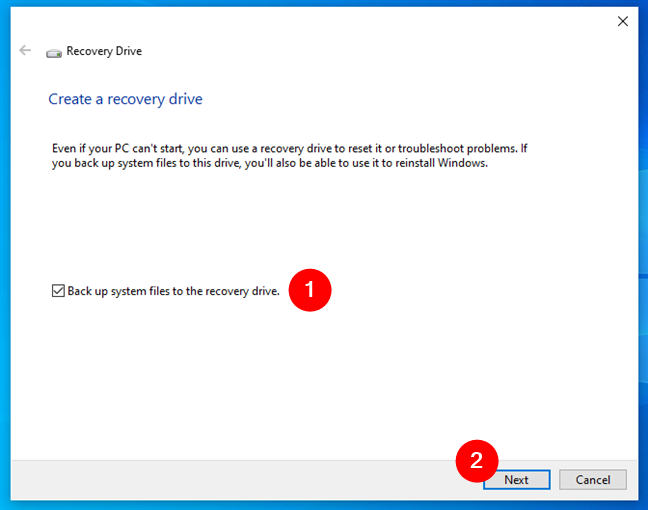
 Create a Windows recovery USB drive
The Recovery Drive wizard detects and lists all the USB drives connected to your computer. Select the USB flash drive you want to use for recovery by clicking or tapping it and pressing Next.
Create a Windows recovery USB drive
The Recovery Drive wizard detects and lists all the USB drives connected to your computer. Select the USB flash drive you want to use for recovery by clicking or tapping it and pressing Next.
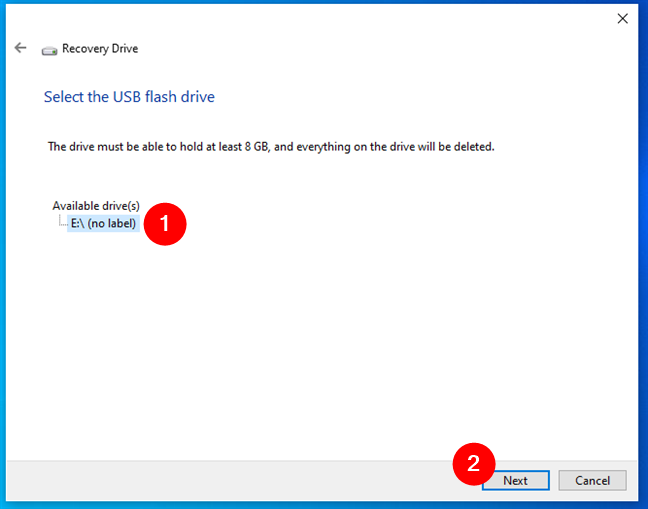
 Select the USB drive you want to use
You are warned that everything on the drive is going to be deleted. If you have any data that matters to you, back it up before the next step. When you’re ready to create the USB recovery drive, press Create.
Select the USB drive you want to use
You are warned that everything on the drive is going to be deleted. If you have any data that matters to you, back it up before the next step. When you’re ready to create the USB recovery drive, press Create.
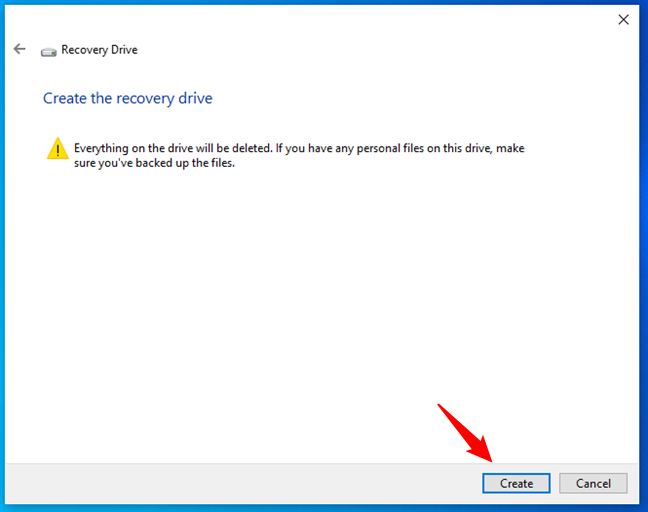
 Start the process of creating the recovery USB drive
The Recovery Drive wizard will format your USB drive and copy the required Windows recovery utilities and system files. This process may take a long time, especially if you have an old USB 2.0 memory stick, so give it between 30 and 60 minutes to finish. Even with USB 3.0 flash drives, the process can take a while, although the wait will be less frustrating because these drives are faster.
Start the process of creating the recovery USB drive
The Recovery Drive wizard will format your USB drive and copy the required Windows recovery utilities and system files. This process may take a long time, especially if you have an old USB 2.0 memory stick, so give it between 30 and 60 minutes to finish. Even with USB 3.0 flash drives, the process can take a while, although the wait will be less frustrating because these drives are faster.
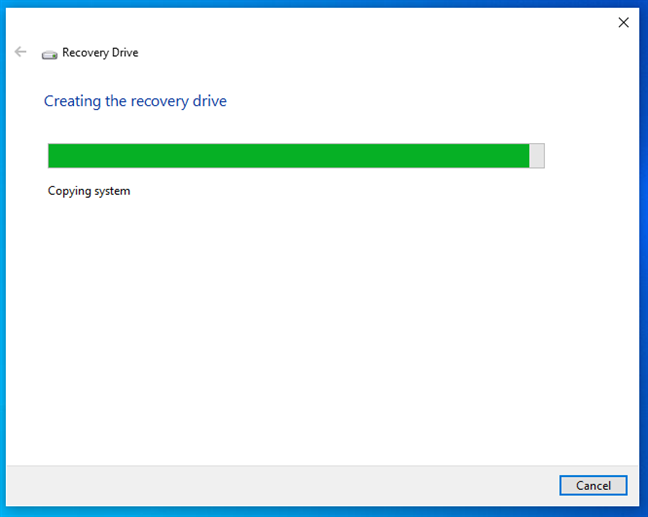
 Creating the recovery USB drive may take a long time
When the Windows USB recovery drive is ready, you are informed, and all that is left to do is press Finish.
Creating the recovery USB drive may take a long time
When the Windows USB recovery drive is ready, you are informed, and all that is left to do is press Finish.
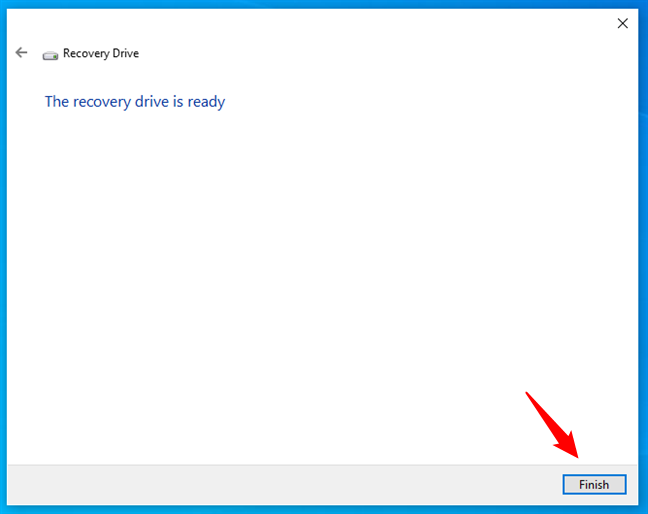
 Click Finish when the recovery drive is ready
You can then use the recovery USB drive to troubleshoot your Windows PC when you encounter a problem or on other Windows devices that no longer work as they should.
Click Finish when the recovery drive is ready
You can then use the recovery USB drive to troubleshoot your Windows PC when you encounter a problem or on other Windows devices that no longer work as they should.
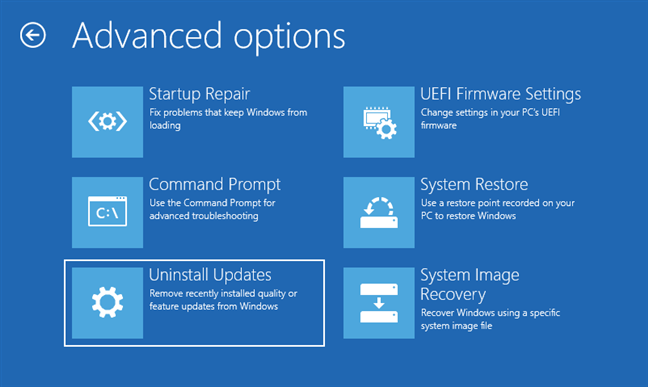
 Troubleshooting options on a Windows recovery drive
If the USB recovery drive doesn’t work and your Windows PC or laptop can read DVDs, you can create a system repair disc and boot from it. If that option isn’t available, you can create a USB stick with the Windows 10 installation kit or Windows 11 setup and use that drive for repairs.
If this doesn’t work either, one last resort is reinstalling your operating system from scratch. These guides will help with the whole process: How to install Windows 10 from a USB drive, DVD, or ISO and How to install Windows 11 from USB, DVD, or ISO.
Troubleshooting options on a Windows recovery drive
If the USB recovery drive doesn’t work and your Windows PC or laptop can read DVDs, you can create a system repair disc and boot from it. If that option isn’t available, you can create a USB stick with the Windows 10 installation kit or Windows 11 setup and use that drive for repairs.
If this doesn’t work either, one last resort is reinstalling your operating system from scratch. These guides will help with the whole process: How to install Windows 10 from a USB drive, DVD, or ISO and How to install Windows 11 from USB, DVD, or ISO.
Important things to know about creating a Windows recovery USB drive
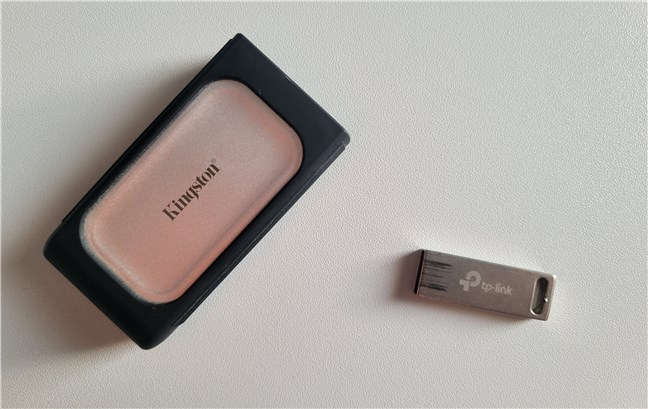
You can create a recovery drive on the same computer you intend to use or on a different PC. Furthermore, you can use a USB memory stick or a USB external hard drive. In my tests, the procedure worked well on both types of devices.How to start the Recovery Drive wizard in Windows
There are many ways to start the Recovery Media Creator wizard you use to create a USB recovery drive. Depending on whether you’re using Windows 10 or Windows 11, follow the steps in one of the following sections:How to open the Recovery Media Creator in Windows 10
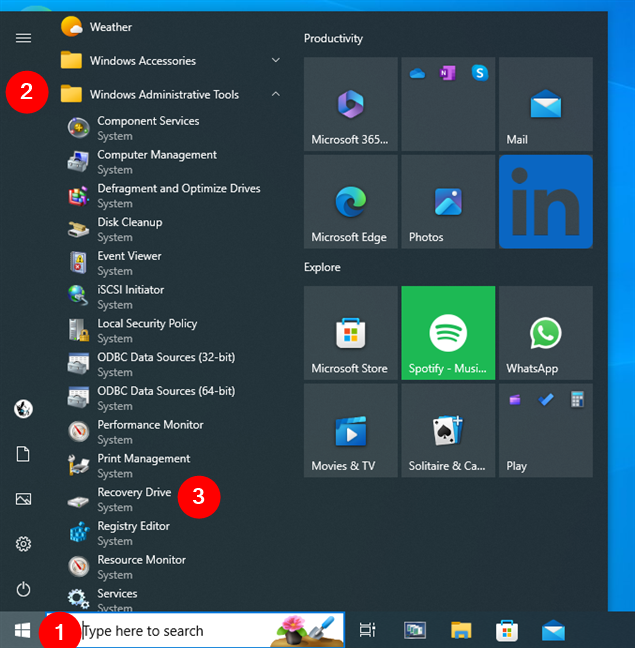
The standard way to launch the Recovery Media Creator in Windows 10 is via the Start Menu. Open the Start Menu, navigate to the Windows Administrative Tools folder, and click or tap the Recovery Drive shortcut.C:\Windows\System32\
Inside this folder, you’ll find a file called RecoveryDrive.exe. Double-click or double-tap it to run the Recovery Media Creator.
How to open the Recovery Media Creator in Windows 11
The conventional method to start the Recovery Media Creator in Windows 11 is to access it through the Start Menu. Open the Start Menu, access its All apps list, and click or tap the Windows Tools shortcut.C:\Windows\System32
Here, you’ll find a file called RecoveryDrive.exe. Double-click or double-tap it to start the Windows USB recovery drive wizard.
How to create a Windows recovery USB drive
Whether you’re creating a recovery drive on a Windows 10 or Windows 11 computer, the wizard looks and works the same. To simplify this tutorial, I will use screenshots taken in Windows 10 for this chapter.How to use the Windows recovery USB drive
The Windows recovery USB drive allows you to reset your system, restore to a previous state, remove problematic updates, recover from a system image, repair startup issues, execute Command Prompt troubleshooting, and access your computer’s UEFI firmware settings. I covered all these maintenance and troubleshooting tasks in a separate article: How to use a Windows recovery USB drive. Follow it to repair your malfunctioning Windows 10 or Windows 11 laptop, tablet, or PC.
Discussion (13)
Useful tutorial. Thank you. I needed some instructions for Windows 11.
What happens if I can’t even get past the Preparing Automatic Repair screen? This is where it freezes
what if i have 15 gb usb but it needs 16 gb atleast.
After many failed attempts at restoring a system image to my new SSD using a system repair disc and external hard drive, I am going to attempt to use the USB recovery drive to restore the system image. Thanks for the info!
hay my hat goes off to you for helping me out and making me a recovery for my parents window’s 10 have a great day
Happy to help.
What would I also need to do to create a UEFI USB recovery flash drive for Windows 10? Or is that not possible?
Thanks for your input.
It should work with UEFI BIOSes too. However, you may need to edit the settings of the UEFI BIOS, to allow booting from USB drives.
very help full
Very useful.
Thanks heaps guys saved me money and saved my Commputer
Happy to help. 😉
Superb, thanks a lot!