If you want to install or reinstall Windows 10 on any device, you must create installation media, such as a bootable USB flash drive, a DVD, or an ISO file containing the Windows 10 setup. While there are various tools available for this purpose, Microsoft recommends using the Media Creation Tool. In this guide, I'll explain what the Windows 10 Media Creation Tool is, how to download it for free, and how to use it effectively:
What is the Media Creation Tool?
Some people don’t know what the Windows 10 Media Creation Tool is, and they’re further confused that when they run this tool, its window is named Windows 10 Setup, as shown below.
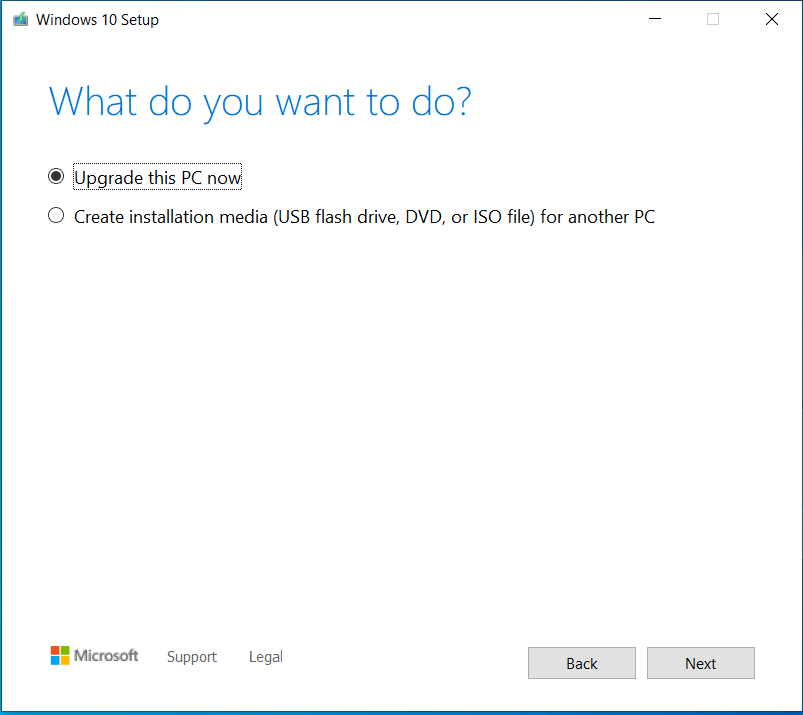
The Windows 10 Media Creation Tool
The Media Creation Tool for Windows 10 is a small file named MediaCreationTool_22H2.exe, which is only 18.5 MB in size. It can be used to upgrade the PC you run it on to the latest Windows 10 version and create Windows 10 installation media on a USB flash drive, DVD, or ISO file. Since most people have already upgraded to Windows 10, the Media Creation Tool is mostly used to create ISO files with the Windows 10 setup or USB flash drives with the Windows 10 installation files.
What you need to use the Windows 10 Media Creation Tool
Before creating an ISO file, a USB memory stick, or a DVD with the Windows 10 setup, you should first check these requirements and recommendations about using the Media Creation Tool:
- You must have a working internet connection
- You must have sufficient free storage space on your computer to download the Windows 10 installation files through the Media Creation Tool. Microsoft recommends at least 8 GB of free space.
- If you want to create a bootable USB flash drive with the Windows 10 setup, note that any stored data gets deleted. The Media Creation Tool needs to format the drive before creating the bootable media.
- To create installation media for Windows 10, you'll need a DVD or a USB flash drive with 8 GB of storage space. The amount of storage space required varies depending on whether you're installing the 64-bit or 32-bit version of Windows 10:
- 64-bit installation media: Requires at least 4.55 GB of storage space.
- 32-bit installation media: Requires just 3.27 GB of storage space.
- If you're creating installation media for both the 64-bit and 32-bit architectures, you'll need at least 7.86 GB of storage space.
- If you intend to upgrade your computer or device to Windows 10, ensure it meets the system requirements. You can check them here: Windows 10 Specifications.
- You must be logged in as an administrator on your computer to use the Media Creation Tool.
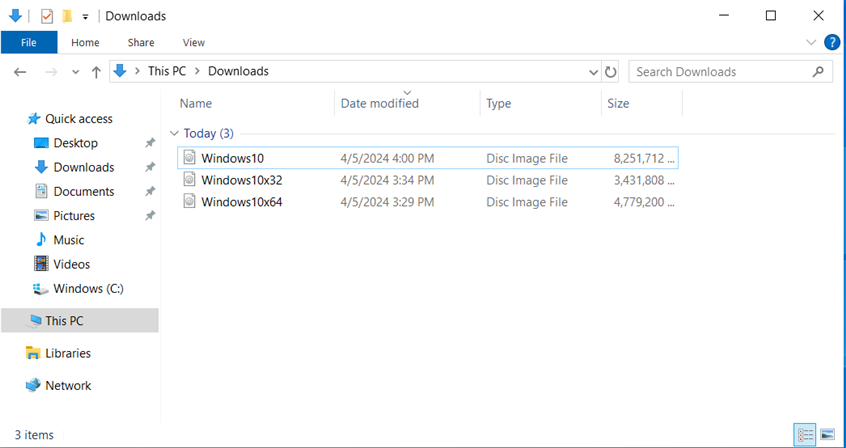
Windows 10 ISO files for different architectures
Now that you know the requirements for using the Windows 10 Media Creation Tool, let’s see how to download and use this app.
How to download and start the Windows 10 Media Creation Tool
If you’re asking yourself, "How do I get Windows 10 Media Creation Tool?" you’re in the right place. First, open Microsoft Edge, Google Chrome, or any other web browser you prefer and go to the Download Windows 10 page. You can download several tools on this page, including the Windows 10 Media Creation Tool. Scroll until you reach the "Download tool now" button in the "Create Windows 10 installation media" section and click or tap on it. Your web browser will download a file named MediaCreationTool_22H2.exe.
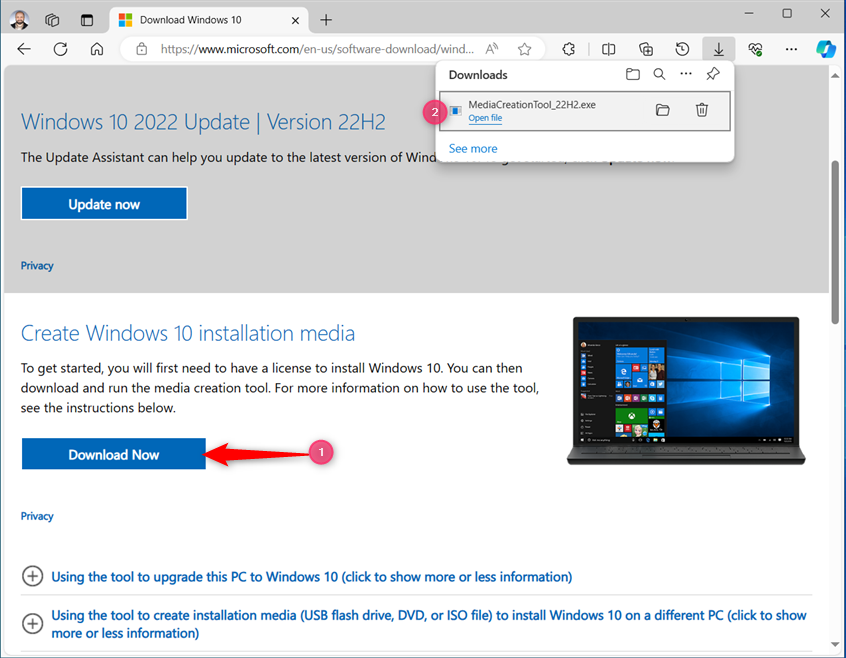
Download the Windows 10 Media Creation Tool
As you can see, the Media Creation Tool file name ends with the version number of the latest Windows 10 22H2 update. Double-click (or double-tap) on the MediaCreationTool_22H2 to run this tool and create Windows 10 installation media on a USB memory stick or save it as an ISO file.
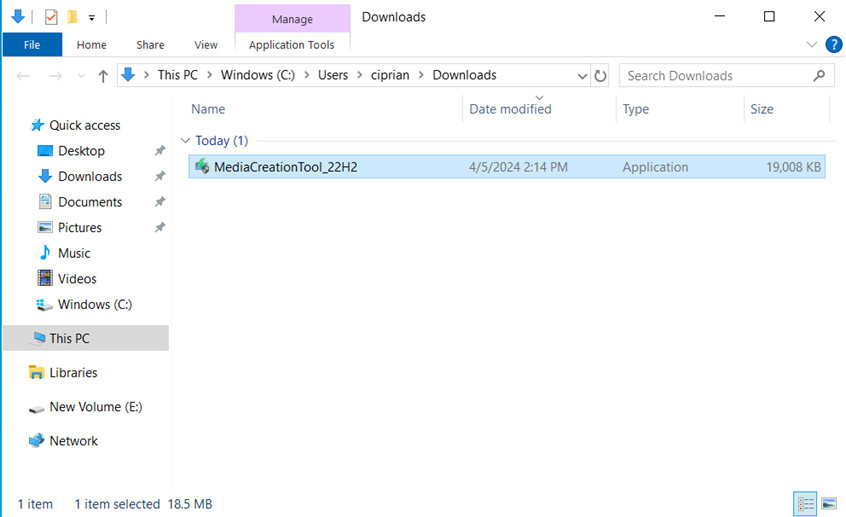
Run the MediaCreationTool_22H2 file
You then see a UAC prompt on your screen, asking whether you want to allow this app to make changes to your device. Press Yes to use the Media Creation Tool.
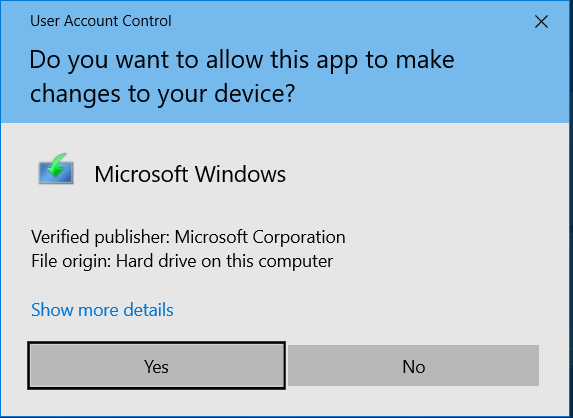
Press Yes when you see the UAC prompt
The app spends a couple of seconds getting things ready before loading its user interface.
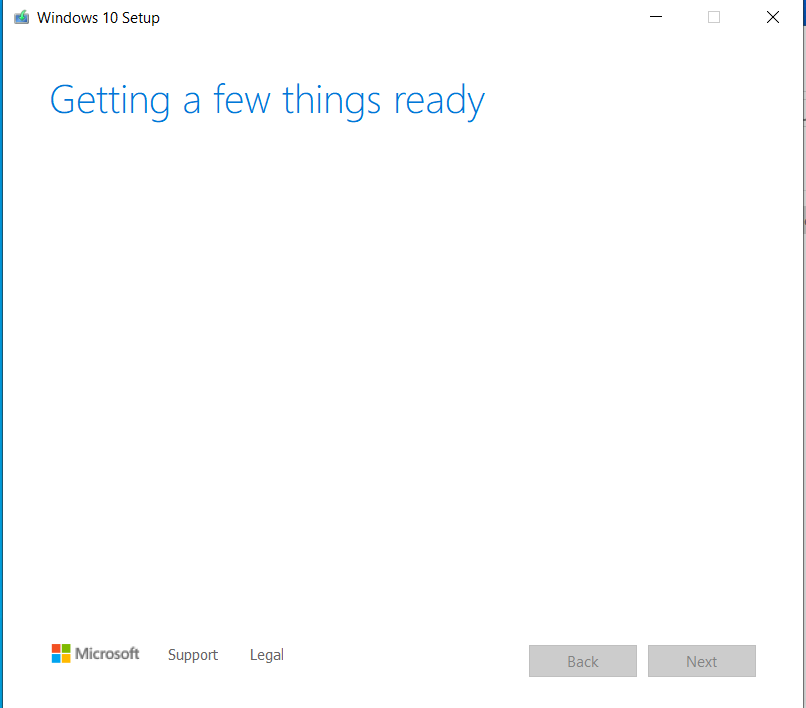
Media Creation Tool takes some time to get started
Depending on what you want to do (create a USB drive with the Windows 10 installation media or create a Windows 10 ISO with the setup program), read the next section of this tutorial or the one after it.
Use the Windows 10 Media Creation Tool to create a bootable USB flash drive with the Windows 10 setup
You can use the Media Creation Tool as a Windows 10 USB tool. In other words, it can download the Windows 10 setup files and automatically create a bootable Windows 10 USB memory stick or another USB drive, which you can then use to install or reinstall Windows 10 on any computer, including the one you’re using right now. When the Windows 10 Media Creation Tool loads its user interface, it asks you to accept its license terms. Read the terms, and click or tap Accept to continue.
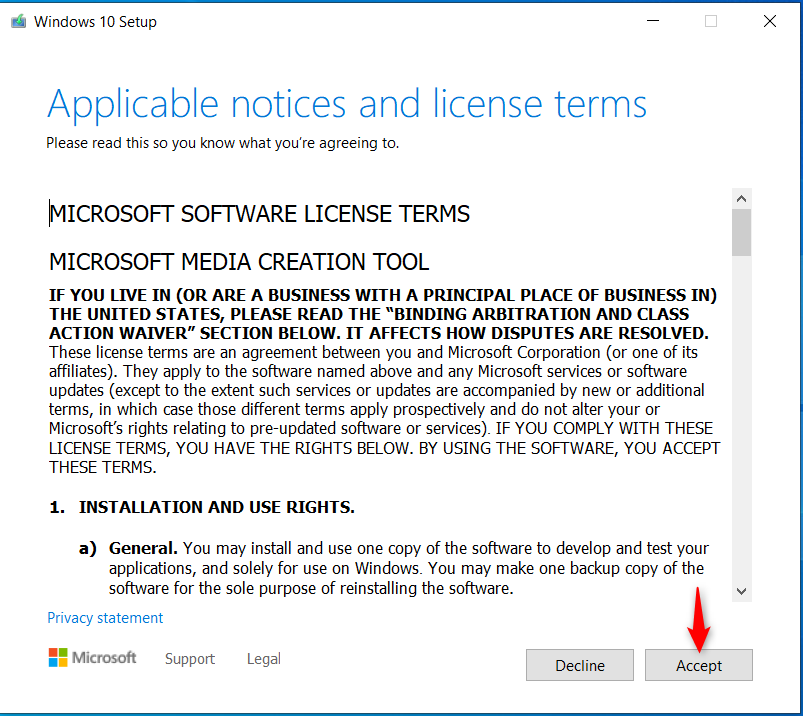
Accept the license terms for the Windows 10 Media Creation Tool
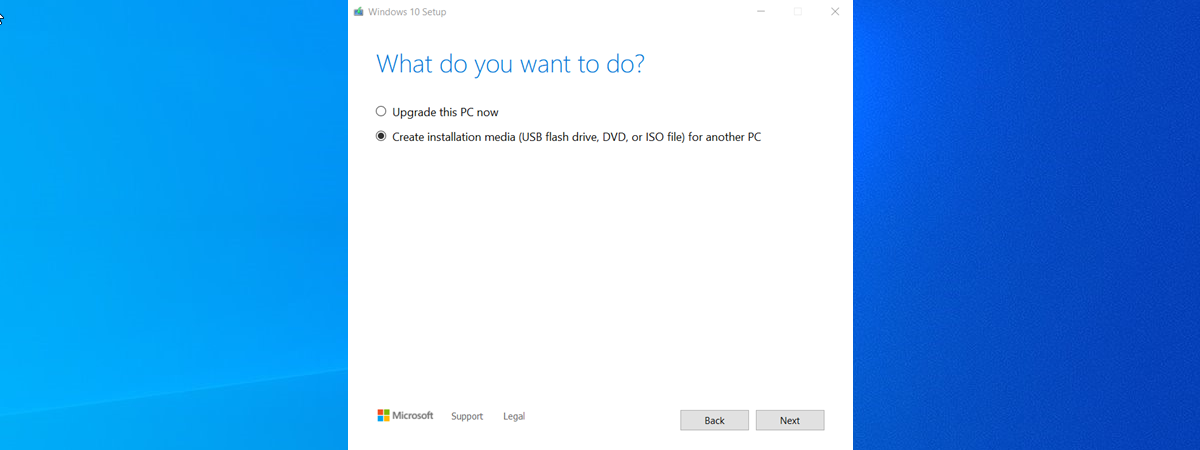
The Media Creation Tool asks whether you want to upgrade your PC or create installation media for Windows 10. Select "Create installation media (USB flash drive, DVD, or ISO file) for another PC," and press Next.
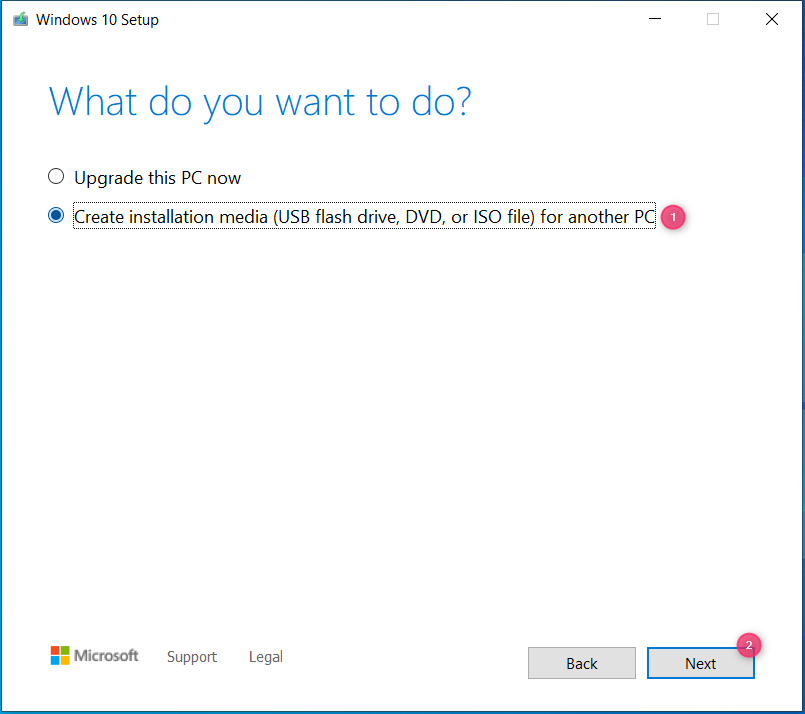
Select Create installation media and press Next
Next, you can choose the Language, Edition, and Architecture (32-bit, 64-bit, or both) you want to use for the Windows 10 setup media. By default, the Media Creation Tool uses the recommended options for your PC. Most people will be happy with this option and can go straight to pressing Next.
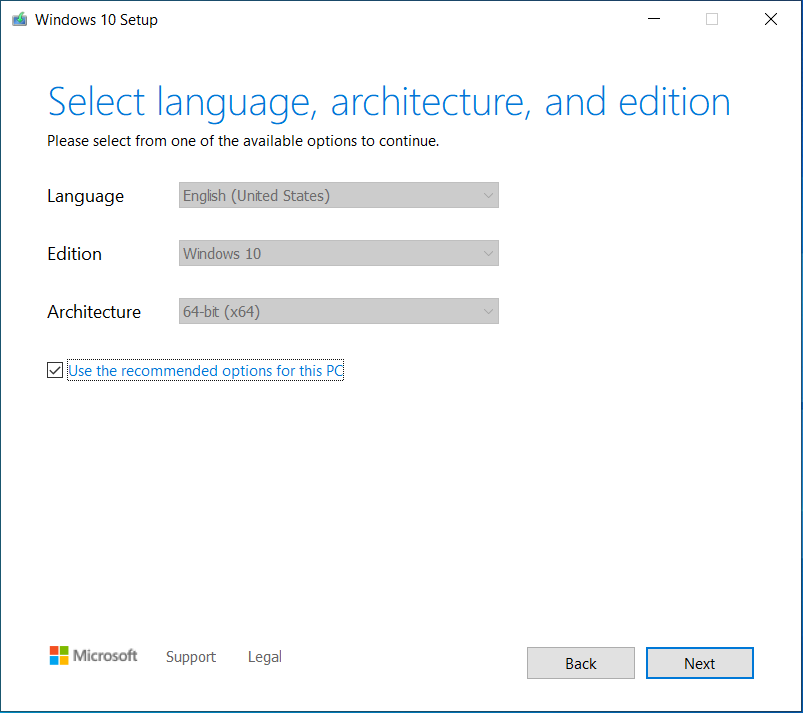
Use the recommended options and press Next
However, if you want to choose a different language for the Windows 10 setup or a different architecture, uncheck “Use the recommended options for this PC,” click the appropriate drop-down lists, and make your selections. Who knows, maybe you want to create x86 Windows 10 installation media or x64 setup media. When you are done making your selections, click or tap Next.
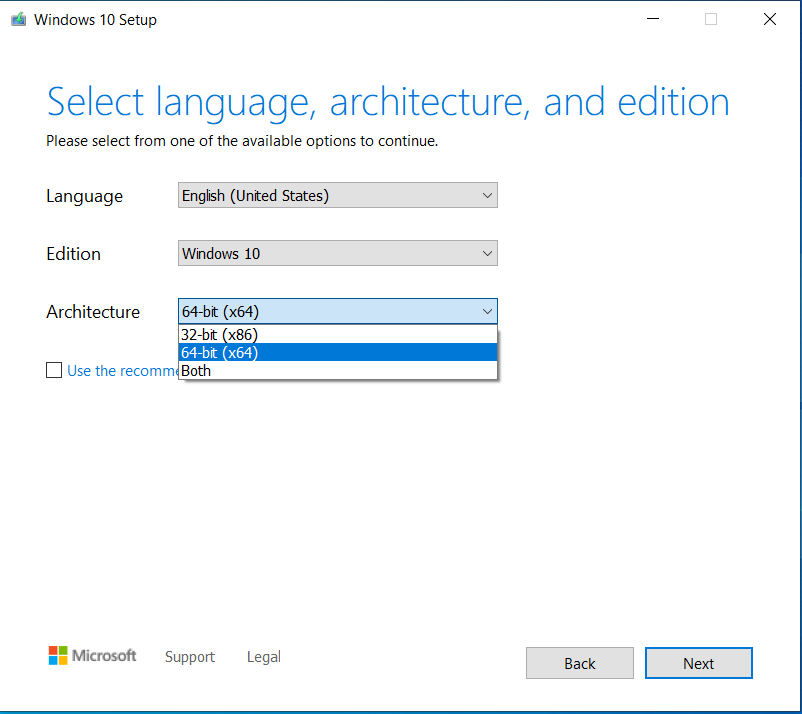
Choose the language and the architecture you want
You are asked to choose which media you want to use. Plug in the USB memory stick or the USB drive where you want to store the Windows 10 setup files. Wait until your PC detects it, choose USB flash drive, and click or tap Next in the Media Creation Tool.
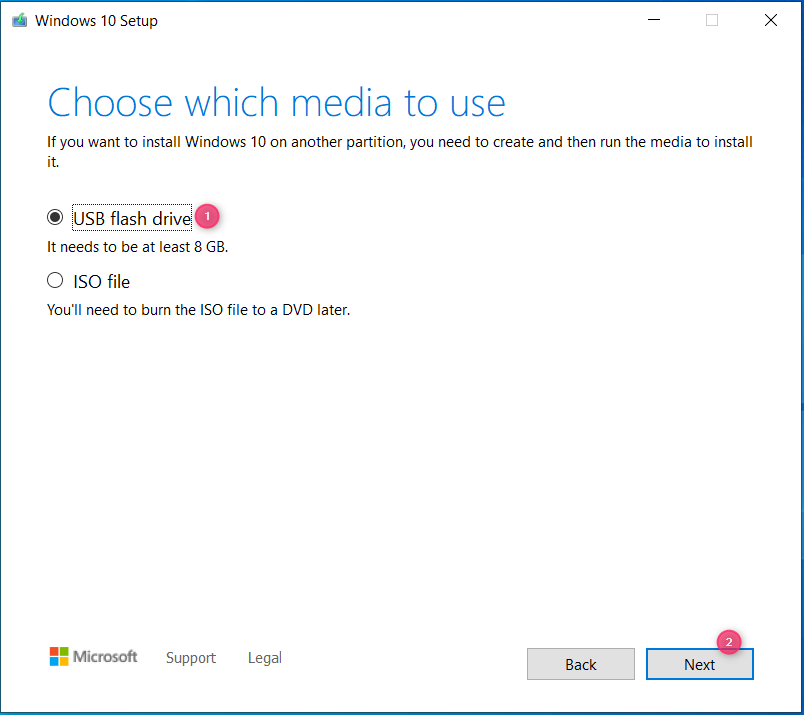
Choose to create a bootable USB flash drive with the Windows 10 setup
You see all the flash drives and external hard disks connected to your Windows computer or device. Select the drive you want to use to create a Windows 10 installation media. Do not forget that all the data on the drive will be wiped during this process. Make sure that you have a copy of it before moving forward. When you are OK with proceeding, click or tap Next.
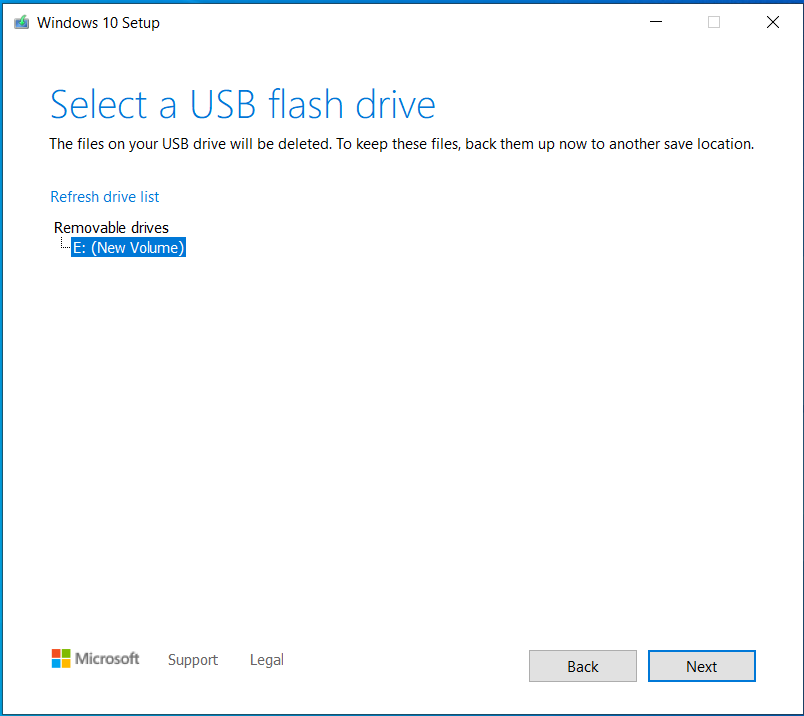
Select the USB drive on which you will create Windows 10 installation media
The Windows 10 Media Creation Tool starts downloading the latest installation files. Depending on your internet connection speed and the load on Microsoft's servers, this may take a while. Luckily, you can keep an eye on the download progress, as seen below.
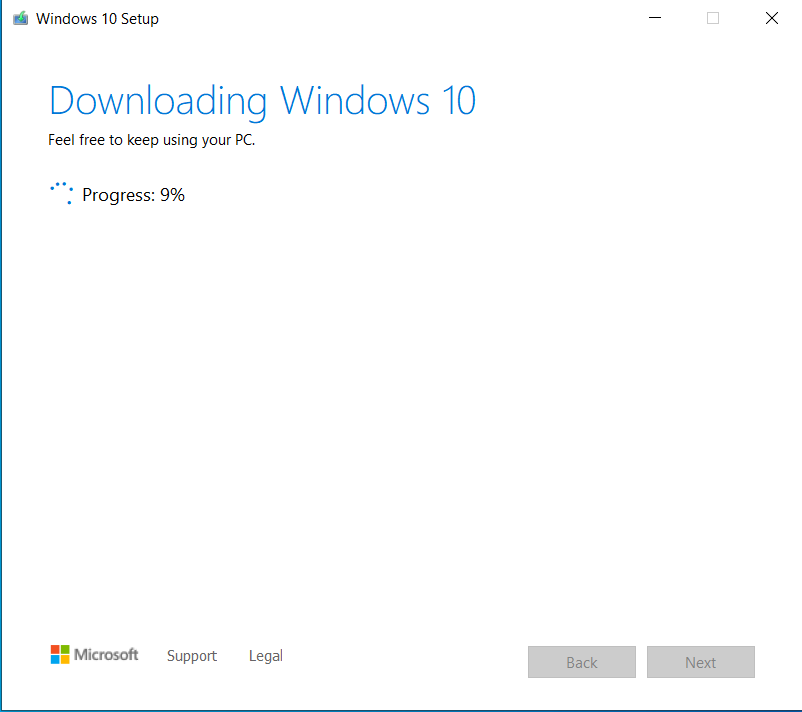
Downloading the Windows 10 setup files
Once the Windows 10 setup files are downloaded, they are verified for integrity. Then, all the data is written on the USB drive you selected, and the drive is turned into a bootable device with the Windows 10 setup on it. This process may take another few minutes, and it will finish faster if you use a USB 3.0 flash drive.
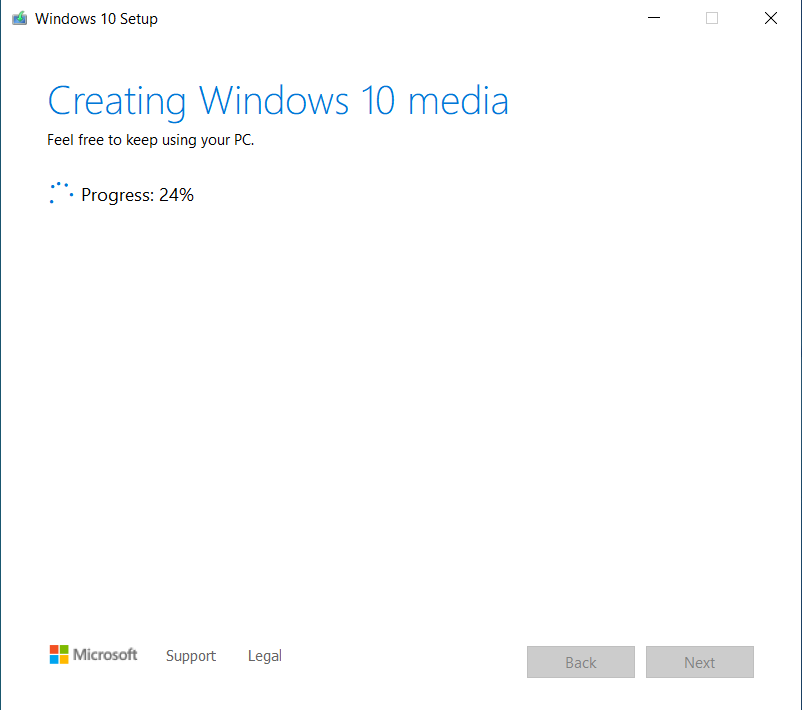
Creating the Windows 10 installation media
When the Windows 10 installation media is created on the flash drive, you are informed that the drive is ready, and you see its drive letter. Click or tap Finish and wait another few seconds until “Setup is cleaning up before it closes.”
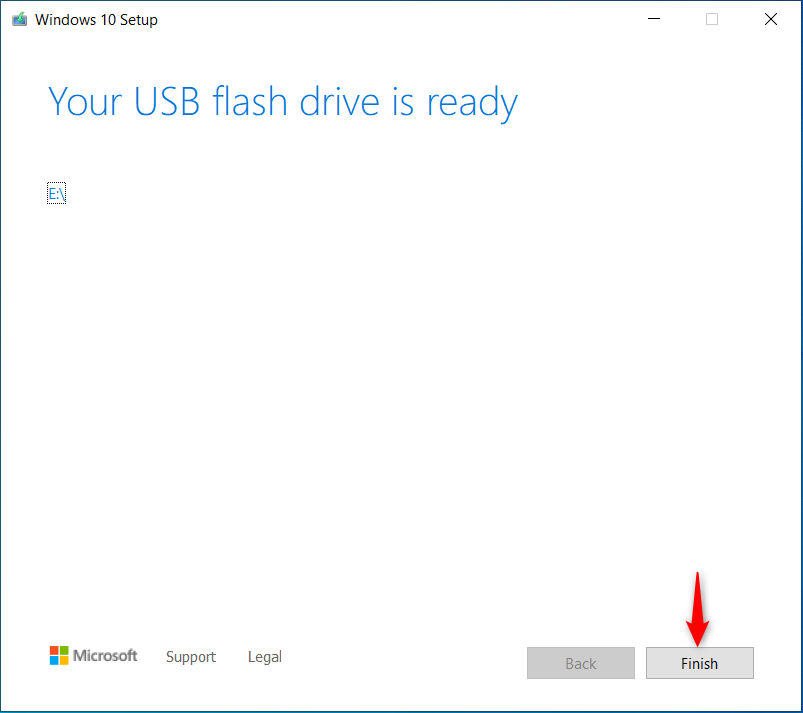
Click or tap Finish and wait a bit
If you open File Explorer and go to the flash drive you created, you’ll see it named ESD-USB. If earlier you chose to create x64 Windows 10 installation media on it, the whole Windows 10 setup will take around 4.57 GB of space on that drive.
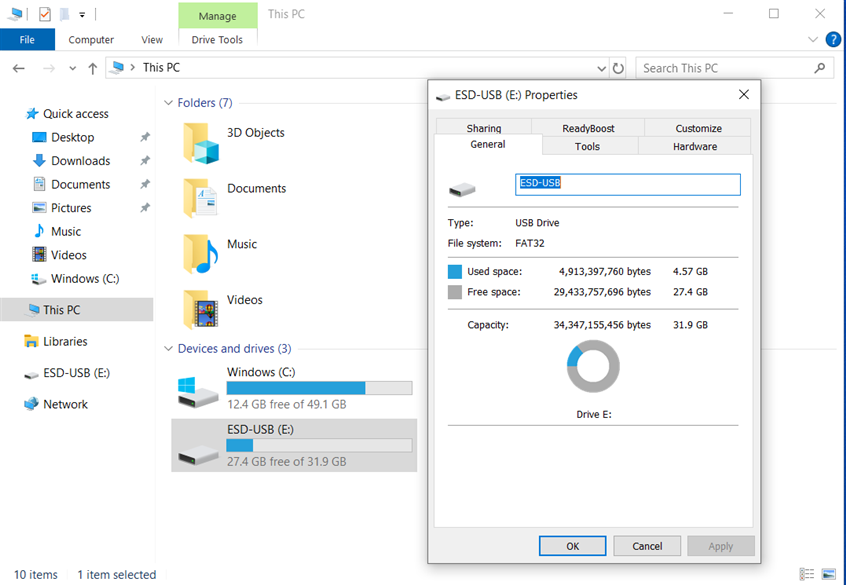
The flash drive with the Windows 10 Setup
You can eject the drive from your computer and then use it to install or reinstall Windows 10 on any computer. If you need help with this task, read: How to install Windows 10 from DVD, USB, or ISO file.
How to use the Media Creation Tool to download an ISO file with the latest Windows 10 setup
You can also use the Media Creation Tool to create a Windows 10 setup ISO file. When the Windows 10 Media Creation Tool loads its user interface and asks you to accept its license terms, read them and click or tap Accept.
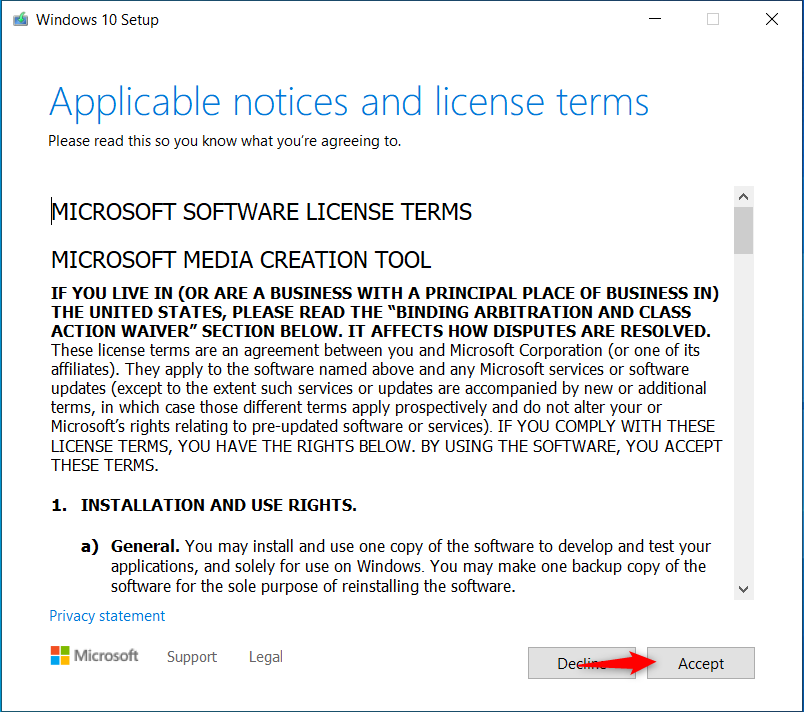
First, accept the license terms
You are asked to choose what you want to do. This time as well, you must select "Create installation media (USB flash drive, DVD, or ISO file) for another PC" and press Next.
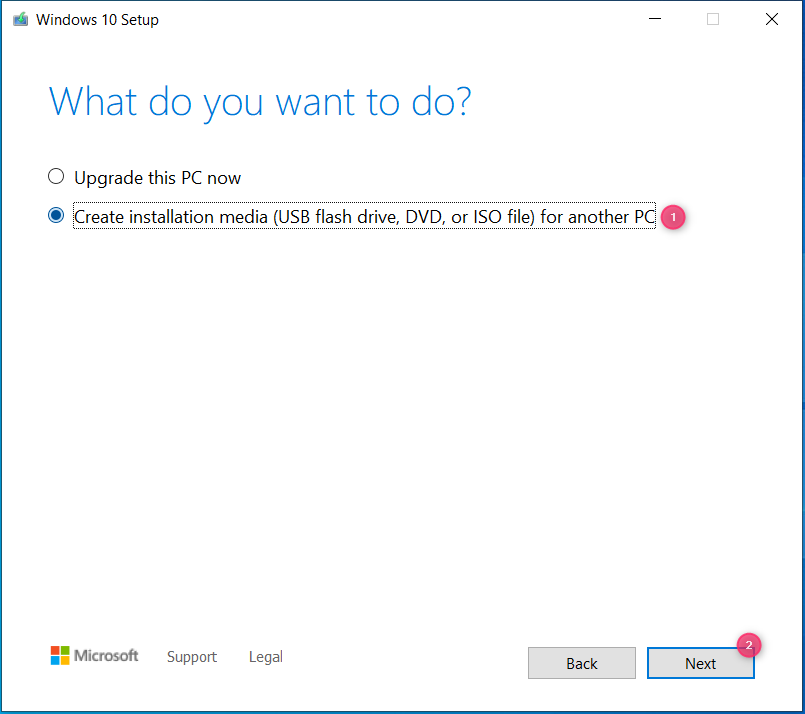
Select Create installation media
By default, the Media Creation Tool recommends a language, architecture, and Windows 10 edition. These settings are OK for most people, so all they have to do is press Next.
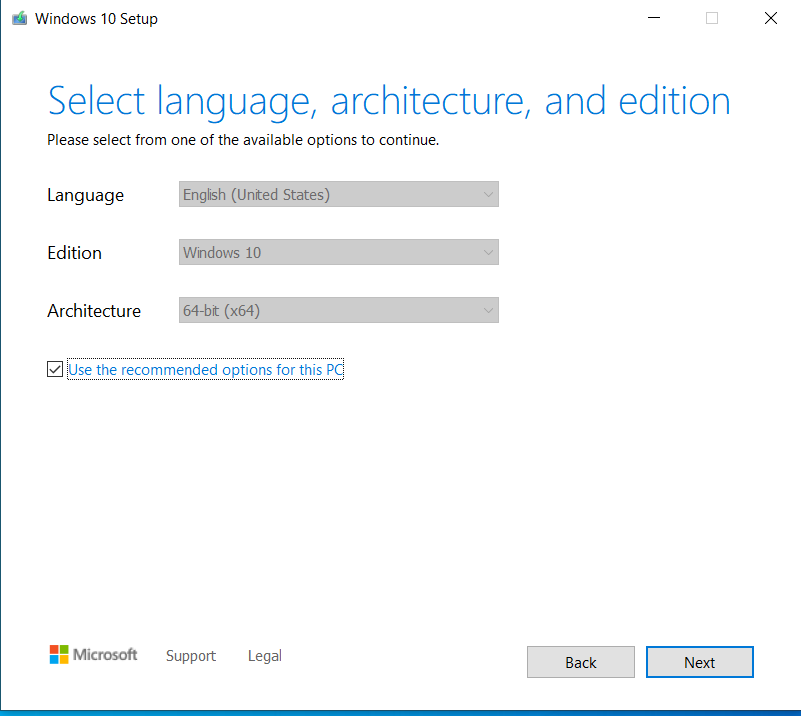
You can use the recommended options for your PC
To personalize these settings, uncheck the box for "Use recommended settings for this PC." Some people may want to choose a different language for the Windows 10 installation media, while others want a specific architecture: 32-bit or 64-bit. A few may want to create an ISO file with both architectures (x86 and x64), which almost doubles the size of the file. When you are done making your selections, click or tap Next.
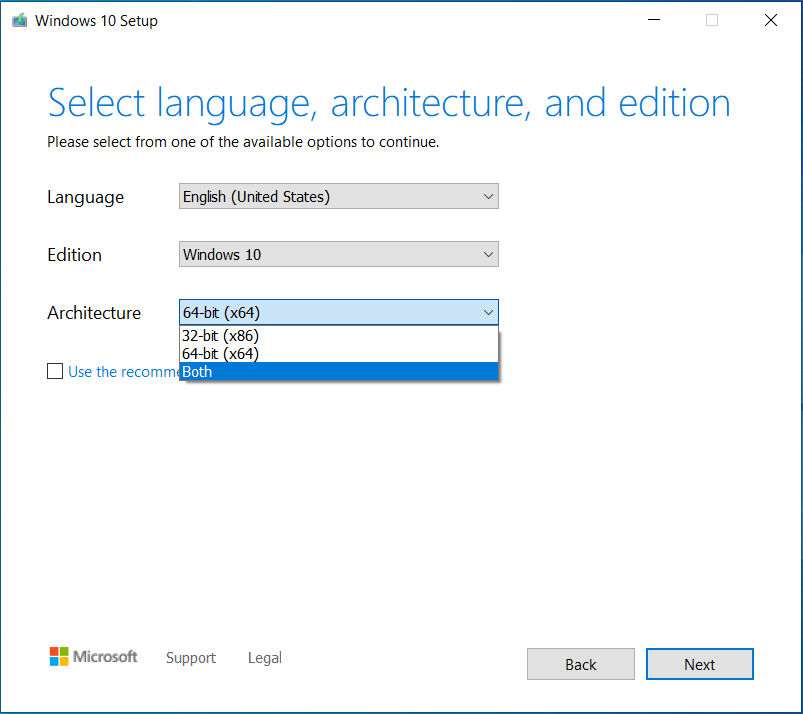
Select the language and the Windows 10 architecture
You are asked to choose which media to use. Select ISO file and click or tap Next.
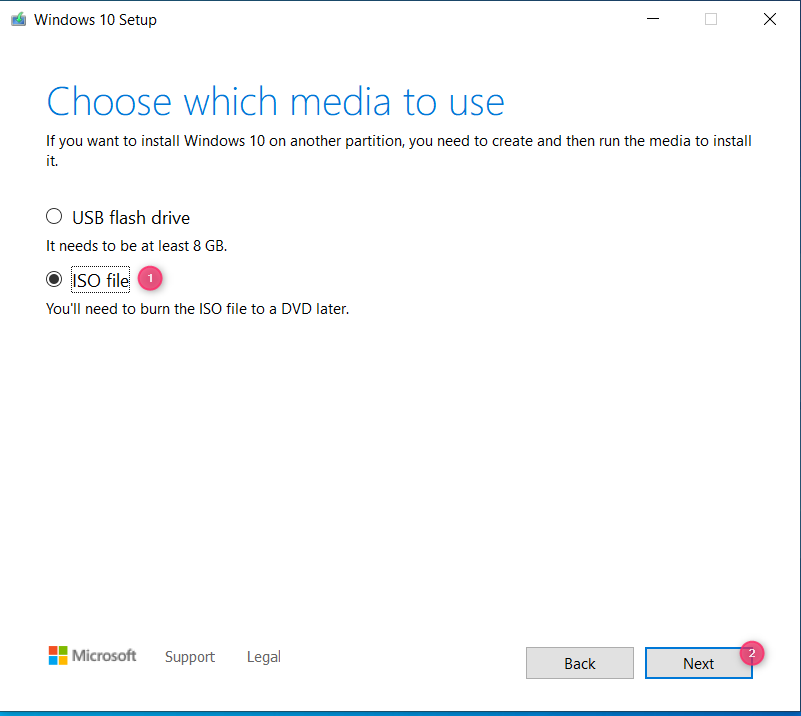
Choose ISO file and press Next
The Windows 10 Media Creation Tool asks you to select where to save the ISO file and the name you want to give it. By default, it’s saved in your Downloads folder and named Windows.iso. However, you may want to be more specific and name it Windows10.iso or even add x86 or x64 to its name so that you know the architecture of Windows 10 setup files.
Browse your computer or device, choose your desired location, type the filename (if you want a different one), and then click or tap Save.
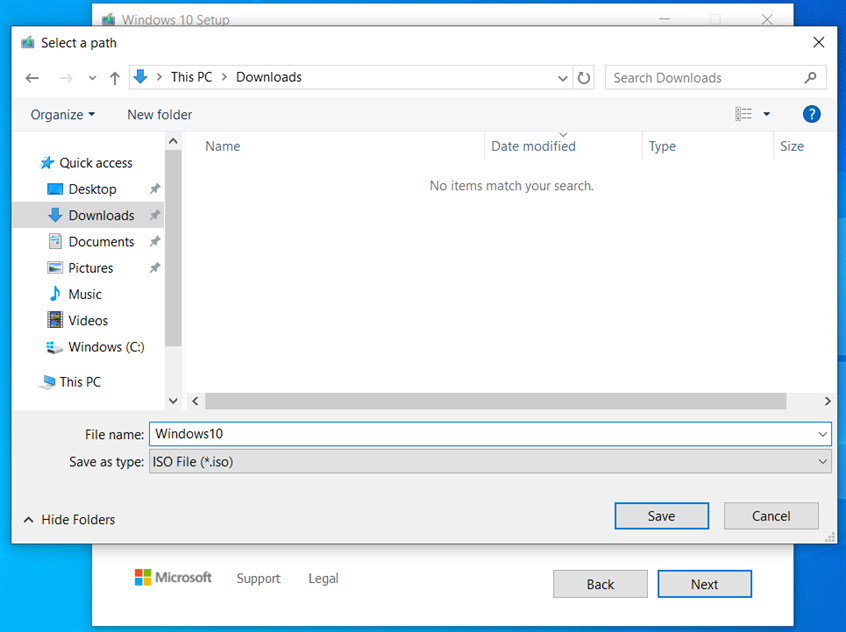
Save the Windows 10 ISO file
Media Creation Tool downloads the latest Windows 10 installation files to your computer or device. Depending on your internet connection speed and the load on Microsoft's servers, this may take a while, so give it a few minutes. As you can see below, the progress is shown in percentages. You can minimize the Windows 10 Media Creation Tool and do your work during this time.
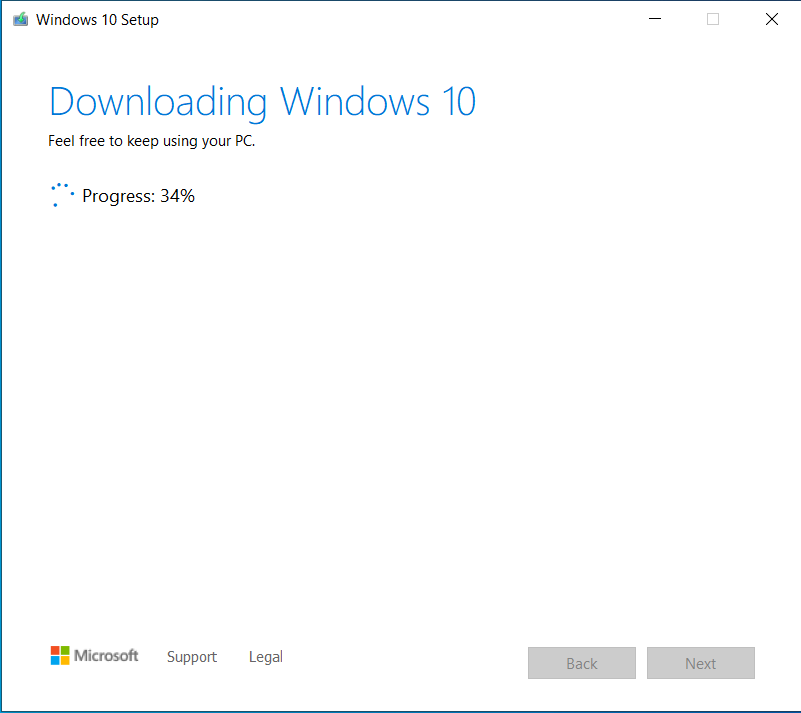
Media Creation Tool starts downloading Windows 10
Once the download is over, it is verified for integrity to ensure everything is OK. Then, the Windows 10 ISO file is created in the folder you selected with the file name you chose. The progress is also shown as a percentage throughout this stage.
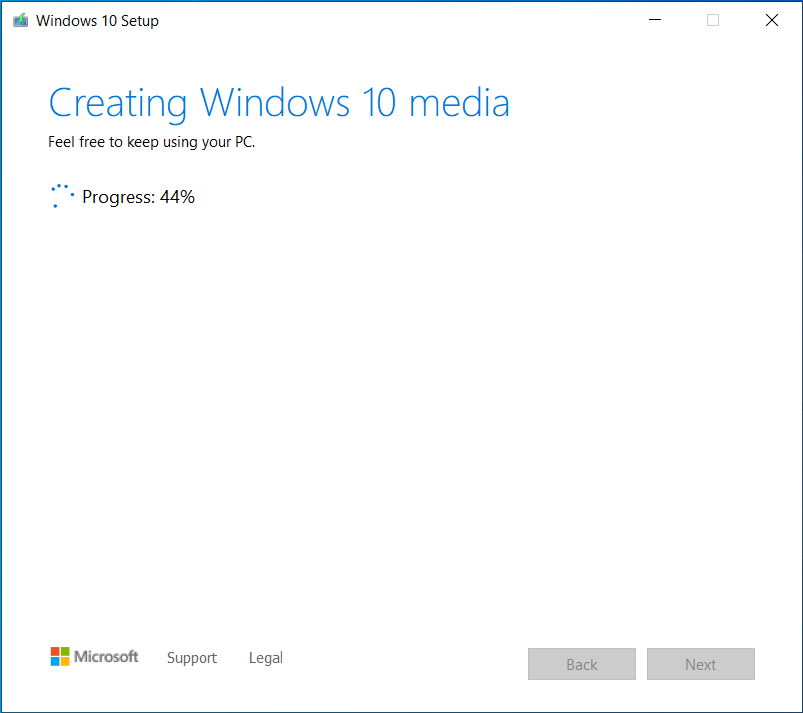
Media Creation Tool creates the Windows 10 ISO file
When the Windows 10 ISO file is created, you are shown where it was saved. If you click on the ISO file link, its location is opened in File Explorer. Click or tap Finish to close the Windows 10 Media Creation Tool. The app takes a few seconds until “Setup is cleaning up before it closes.”
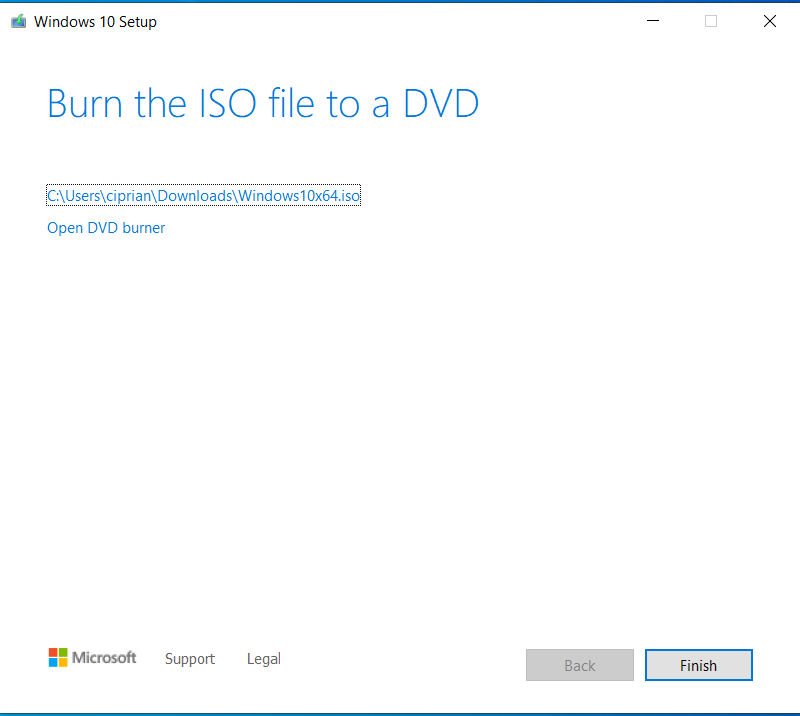
The ISO file is ready
You can then burn the ISO file with the Windows 10 setup to a DVD, mount the ISO file to see its contents in File Explorer, or mount it in a virtual machine and install Windows 10.
Did you have issues using the Windows 10 Media Creation Tool?
Even if you're not tech-savvy, the Media Creation Tool is straightforward and user-friendly. Following the instructions in this guide, you should be able to create your Windows 10 ISO setup file or a bootable Windows 10 USB memory stick with the installation files without any issues. However, if you encounter any problems or have unanswered questions, feel free to ask using the commenting options provided below.


 12.04.2024
