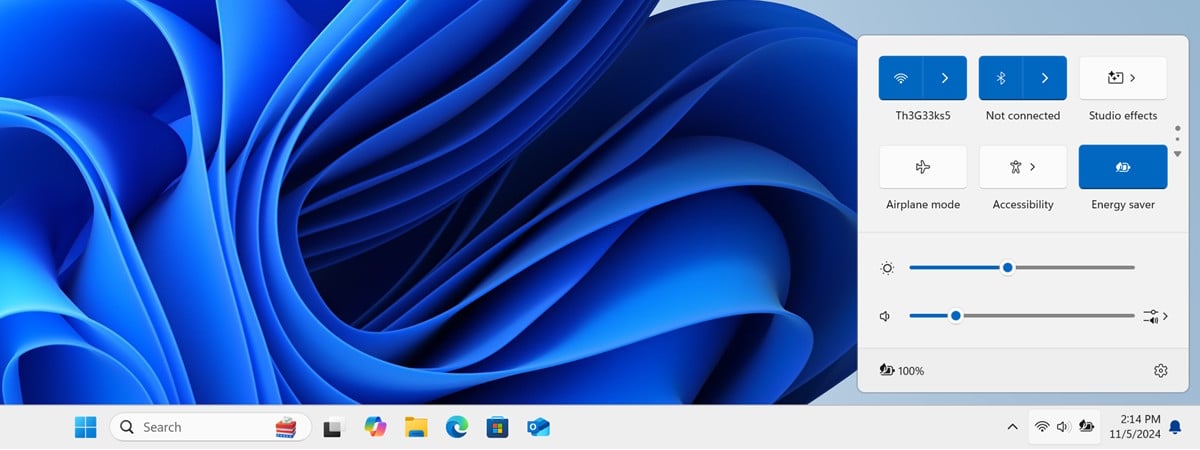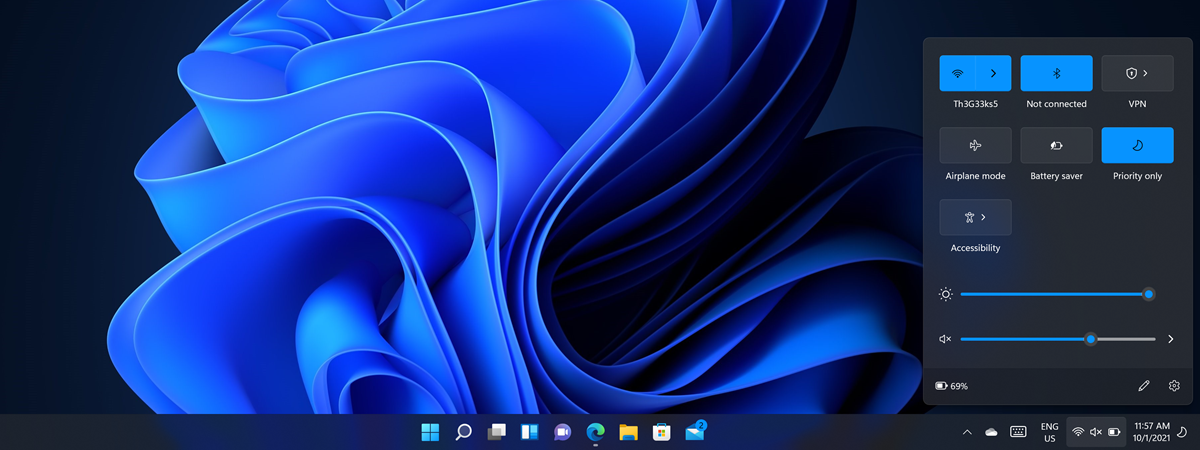
The Quick Settings in Windows 11 allow you to change the status or modify frequently used settings without digging through menus or memorizing keyboard shortcuts. For instance, you can use the Windows 11 Quick Settings panel to adjust the volume of your speakers or the brightness of your laptop's screen, switch Wi-Fi networks, activate Night light, or turn off Airplane mode. If you’re using a modern Copilot+ PC device, you can also enable exclusive features like Studio Effects for your webcam or Live captions. On top of that, you also get media playback controls when playing videos on Microsoft Edge or listening to music on apps like Spotify. Read this guide to find out more about the Quick Settings in Windows 11 and how to save time using them:
NOTE: I made this tutorial using the latest Windows 11 version 24H2, which will be released in late September or early October. If you're unsure which version your device is running, here's how to check the Windows 11 version and edition.
How to open the Quick Settings panel in Windows 11
The easiest way to access the Windows 11 Quick Settings panel is by clicking or tapping the network, volume, or battery icons in the system tray. They're in the bottom-right corner of the desktop, next to the time and date.
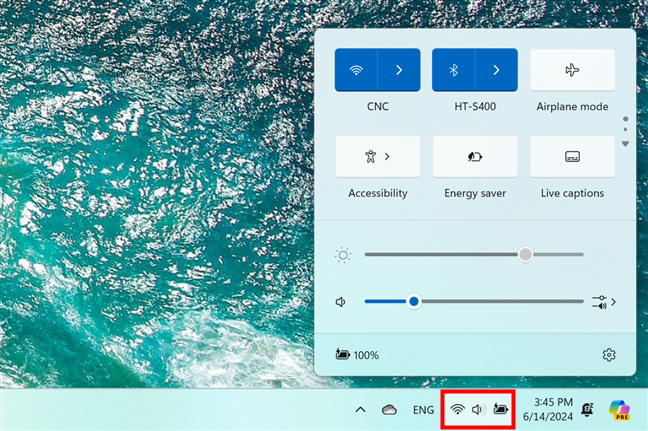
Use the buttons next to the clock to bring up the Quick Settings
Alternatively, you can open Windows 11's Quick Settings using your keyboard. The Quick Settings shortcut is Windows + A. When you press these keys, the Quick Settings panel will slide out of the bottom right corner of your main display.
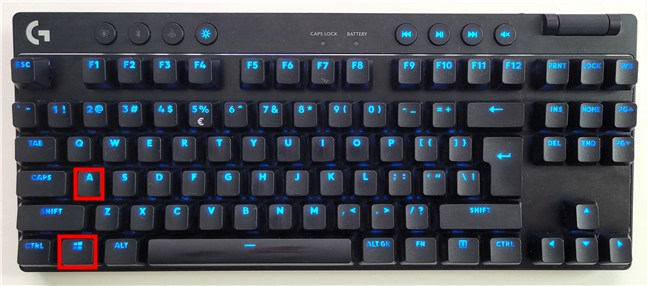
Windows 11's Quick Settings shortcut on the keyboard
IMPORTANT: If you use a cable (Ethernet) network connection for internet access like I do on my desktop PC, you get a computer icon in the system tray instead of the Wi-Fi one. Still, things work the same: click or tap the icons available - computer or sound - to bring up the Windows 11 Quick Settings.
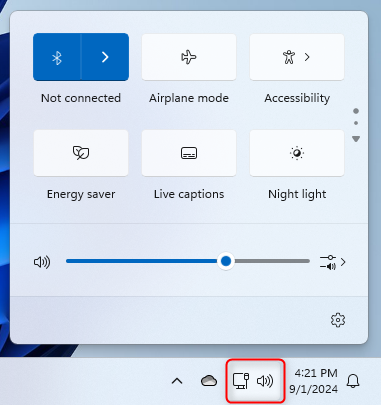
On PCs with Ethernet connections, you can click on the computer icon
Windows 11’s Quick Settings and how to use them
The number of available Windows 11 Quick Settings depends on your device:
- On a desktop PC, you get nine quick settings;
- Copilot+ PC laptops get access to twelve quick settings, the largest number available;
- On older laptops lacking Copilot+ PC capabilities, you get ten or eleven quick settings.
In older versions of Windows 11, you could choose which quick settings were shown, but this changed in Windows 11 2024 Update (version 24H2). You see all those available for your specific computer or device, and you can only adjust their position in the list.
To view all Quick Settings, scroll through the list by clicking or tapping the Next Page icon, represented by a downward arrow.
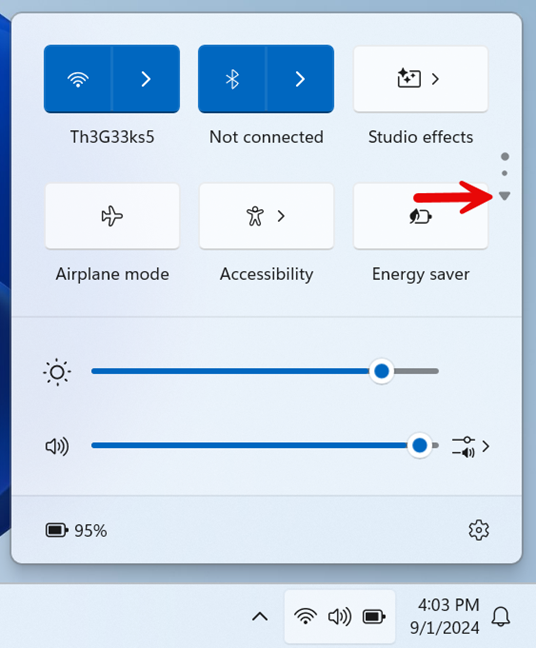
The Quick Settings panel is scrollable
On the second page of Quick Settings, you can scroll up by clicking or tapping the upward arrow to access the Previous Page.
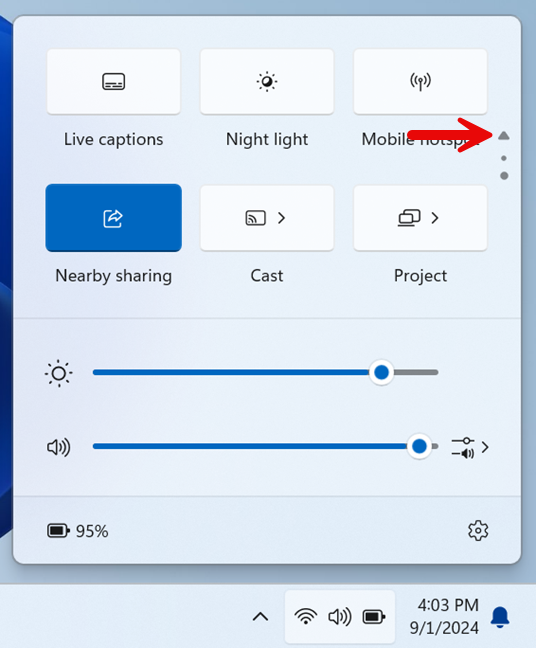
Click or tap Previous Page to scroll up through your Quick Settings
Moreover, you can also move Quick Settings around to rearrange them according to your preferences. However, before that, let's see what you can do with each quick setting. On any Windows 11 computer or device, alongside your Quick Settings, you should also see two sliders and two shortcuts.
What do the buttons in the Quick settings panel do?
As I said before, Windows 11 offers a variable number of buttons in the Quick Settings menu that depends on the type of device you’re using. Here are some of the buttons you see on its first page:
- Wi-Fi - Helps you enable or disable Wi-Fi, connect to a Wi-Fi network, and disconnect from one. For more details, check out our guide on connecting to Wi-Fi in Windows 11.
- Bluetooth - Turns the Bluetooth chip on or off and allows you to connect to Bluetooth devices or disconnect from them.
- Studio effects - You can use it to turn on all kinds of effects and filters for your webcam, which are powered by artificial intelligence. This feature is exclusive to Copilot+ PC laptops and devices with a built-in webcam, and once enabled, your settings apply to all video calls you make from your devices.
- Airplane mode - Turns the Airplane mode on or off.
- Accessibility - Opens a menu where you can enable Windows 11 accessibility features like Magnifier, Color filters, Narrator, Mono audio, Live captions, and Sticky keys.
- Energy saver - Enables or disables the Energy saver feature to conserve energy and keep your device running longer.
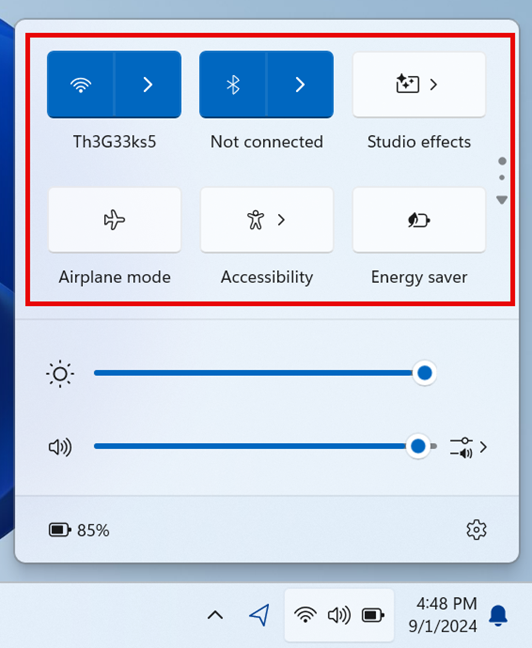
The first six buttons in Windows 11's Quick Settings
Moving on to the second page of Quick Settings, here’s what you’re likely to find:
- Live captions - Enables or disables Windows 11's accessibility feature bearing the same name. It automatically generates captions and translations for audio in supported languages, helping users understand spoken content.
- Night light - Activates or deactivates the Night light display mode to reduce eye strain in dark environments.
- Mobile hotspot - This button turns the mobile hotspot on or off, allowing you to use your Windows 11 device as a Wi-Fi hotspot and share your internet connection with others.
- Nearby sharing - Enables or disables Nearby sharing, which allows you to share files and other types of content with devices in range through Bluetooth and Wi-Fi.
- Cast - Allows you to expand the display wirelessly on other devices, like your Smart TV.
- Project - Opens a menu to select how to project your screen on another display. This is useful when you’re working with multiple monitors or a projector.
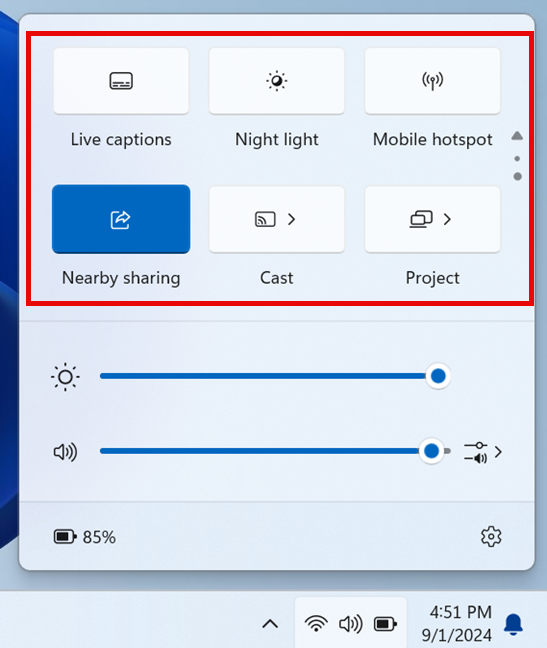
The second page with Quick Settings
Right-clicking or pressing and holding on any Quick Settings button opens a contextual menu. This menu contains a single option: Go to Settings. If you click or tap it, Windows 11 opens the corresponding section of the Settings app. For example, if you do this with the Wi-Fi button, you reach the Network and internet > Wi-Fi page in Settings.
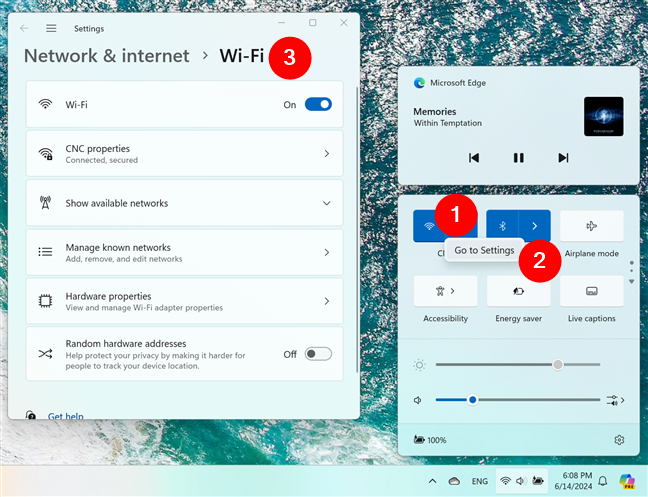
Use the right-click menu to access Settings related to a Quick Settings button
Next, let’s see…
What are the sliders in the Quick settings panel for?
In addition to all the Quick settings buttons mentioned, the panel also includes two sliders:
- Brightness - You can modify your display's brightness level by moving the slider.
- Volume - Helps you adjust the volume. You can also use the button next to the slider to select the active speakers on your Windows 11 device, enable or disable spatial sound effects, and use the Volume mixer.
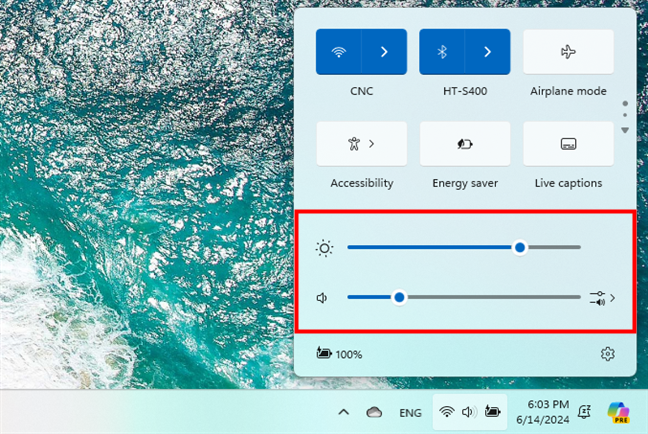
The brightness and volume sliders in the Quick Settings panel
Where do the shortcuts in the Quick Settings panel take you?
Besides all the buttons and the two sliders, the Quick Settings panel also comes with two special shortcuts in its bottom-left and bottom-right corners:
- On the left, there's an icon that shows the current charge of your Windows 11 device's battery. Clicking or tapping it takes you to the Power & battery page in the Settings app.
- On the right, you have a small cogwheel icon. Clicking or tapping it launches the Settings app.
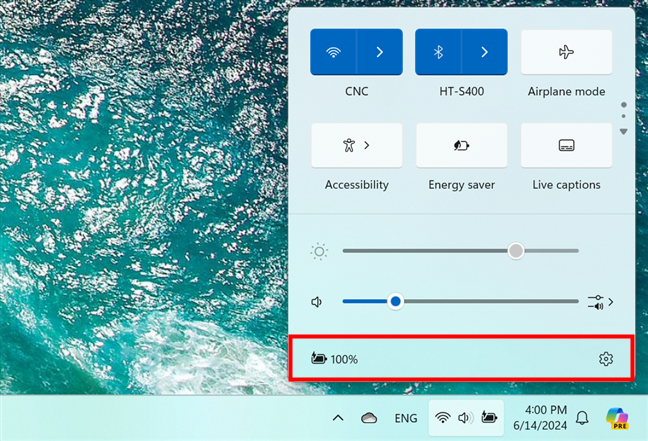
The Power & battery and Settings shortcuts in the Quick Settings
And that's not all.
What about the media controls above the Quick Settings panel?
You see a separate media controls panel above the Quick Settings when you’re playing media on your device. It gives you details about what's playing and also lets you pause/play. Moreover, if the audio track or video file playing is part of a playlist, you can skip to the next or previous track.
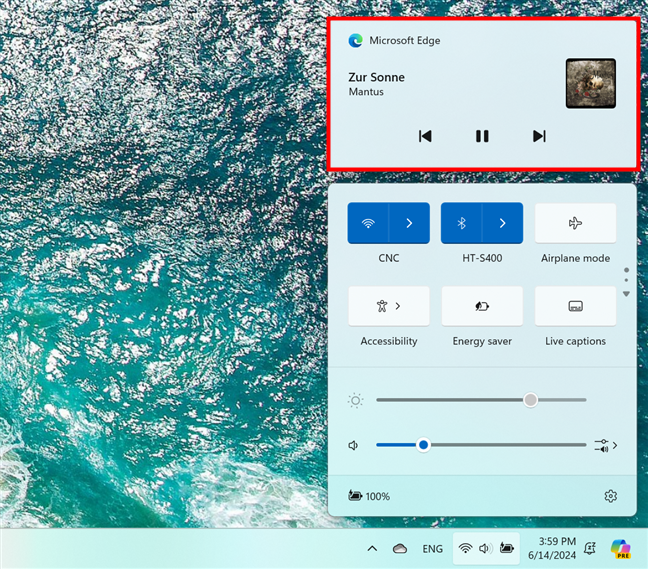
The media controls panel above the Quick Settings
The media controls panel works with most applications capable of playing audio or video, including Windows 11's Media Player, Microsoft Edge, and Spotify.
How to customize the Quick Settings in Windows 11
As mentioned earlier, you can't decide which Quick Settings are displayed in the panel. However, you can move them around to arrange them in a way that makes sense. To do so, drag and drop the buttons you want to move.
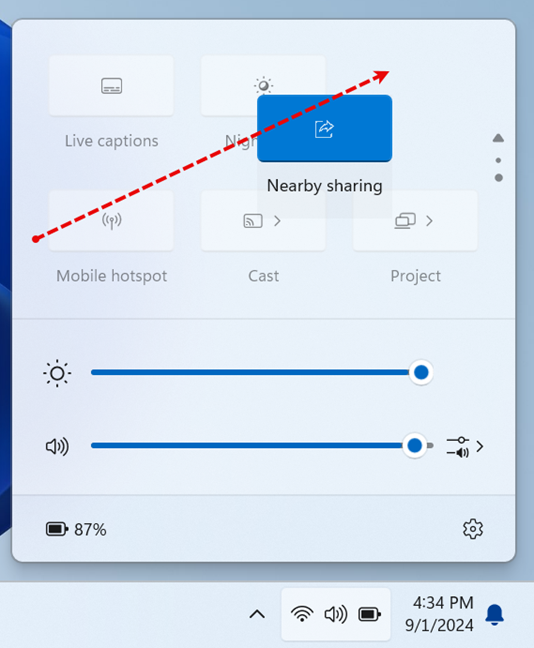
You can drag and drop Quick Settings buttons
IMPORTANT: The ability to add or remove buttons from Quick Settings used to be available in Windows 11, but Microsoft decided to take it out as of Windows 11 version 24H2.
What would you improve in Windows 11's Quick Settings panel?
The Quick Settings panel is an efficient way to adjust and enable the options you use the most in Windows 11. Since its launch, Microsoft has been improving this feature, but while some things have evolved for the better, a few aspects don't feel like improvements. For instance, although I appreciate the option to scroll through the Quick Settings panel, I can't understand why Microsoft removed the option to edit which buttons you see. I would still want to be able to remove or add Quick Settings buttons, depending on my preferences. This being said, before you close this article, I would like to know your opinion: do you like Microsoft’s latest changes? Is there any button you would like to see in Quick Settings, but it’s not there? Comment using the options below and let me know.


 05.09.2024