


One of the most common things every laptop or tablet user does is connect to wireless networks. It’s something Windows 11 users need to know how to do also. Although many people know that manually connecting to Wi-Fi in Windows 11 or any other version requires selecting the network and entering its password, some may wonder where to find everything. That’s why we decided to show you how to connect to Wi-Fi on Windows 11 devices. Read on and see how simple it all is:
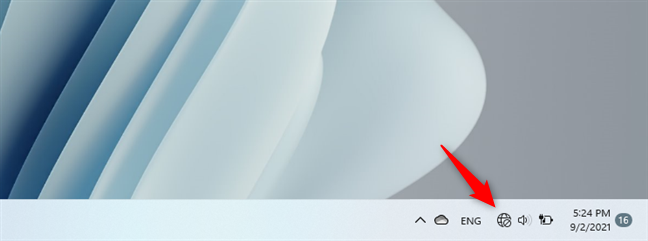
 The network and internet icon from Windows 11's system tray
If you hover the mouse cursor over the internet icon, you get a tooltip that tells you that you have "No internet access." In case there are any wireless networks broadcasting in your area, you also see that there are "Connections available." Otherwise, it tells you that there are no connections near you, so to connect to Wi-Fi, you’ll first have to move closer to a router or access point that broadcasts a wireless network.
The network and internet icon from Windows 11's system tray
If you hover the mouse cursor over the internet icon, you get a tooltip that tells you that you have "No internet access." In case there are any wireless networks broadcasting in your area, you also see that there are "Connections available." Otherwise, it tells you that there are no connections near you, so to connect to Wi-Fi, you’ll first have to move closer to a router or access point that broadcasts a wireless network.
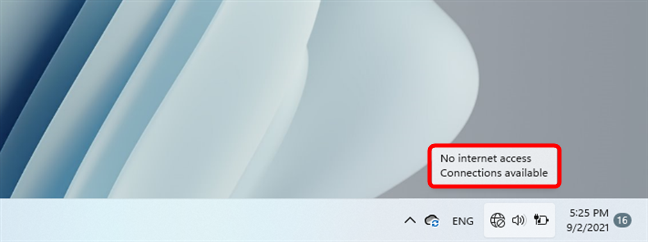
 No internet access but connections are available
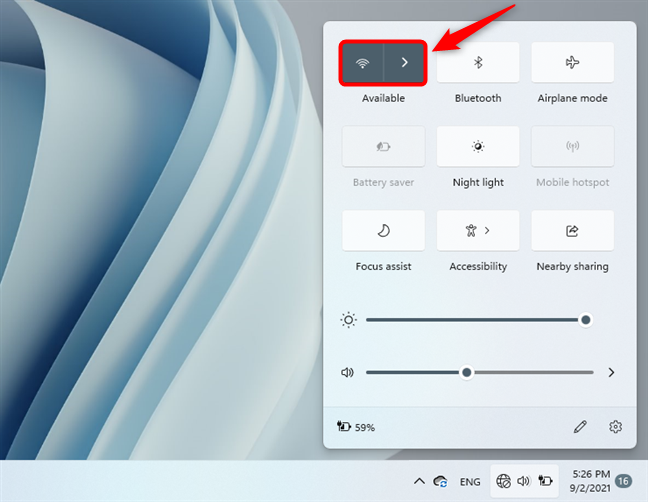
Supposing that there is wireless coverage in your area, the next step to connect to Wi-Fi in Windows 11 is to open the quick settings fly-out. To do that, click or tap on the internet icon from your taskbar. Then, in the quick settings panel, make sure that the Wi-Fi is enabled by checking whether its button is on, and press the caret (>) button next to it.
No internet access but connections are available
Supposing that there is wireless coverage in your area, the next step to connect to Wi-Fi in Windows 11 is to open the quick settings fly-out. To do that, click or tap on the internet icon from your taskbar. Then, in the quick settings panel, make sure that the Wi-Fi is enabled by checking whether its button is on, and press the caret (>) button next to it.
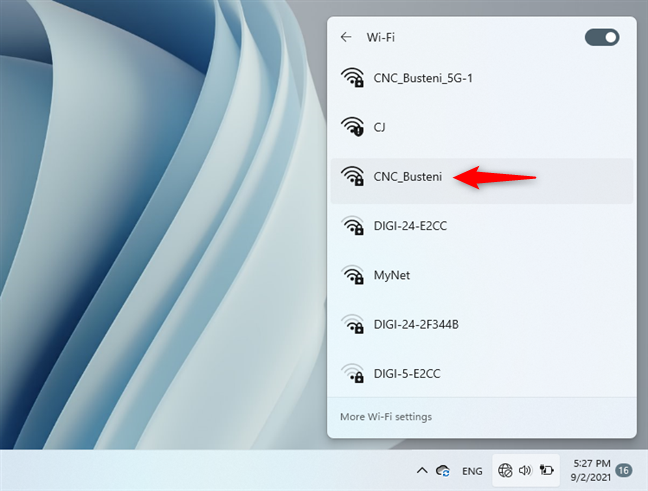
 Opening the list of available Wi-Fi networks
This makes Windows 11 display the list of all available Wi-Fi networks in your area. Locate the Wi-Fi network you wish to connect to and click or tap on it.
Opening the list of available Wi-Fi networks
This makes Windows 11 display the list of all available Wi-Fi networks in your area. Locate the Wi-Fi network you wish to connect to and click or tap on it.
 Selecting the Wi-Fi network to connect to
If you regularly connect to that Wi-Fi network, check the "Connect automatically" option so that your Windows 11 PC can automatically use it whenever it’s in the Wi-Fi’s coverage area. Then, press the Connect button.
Selecting the Wi-Fi network to connect to
If you regularly connect to that Wi-Fi network, check the "Connect automatically" option so that your Windows 11 PC can automatically use it whenever it’s in the Wi-Fi’s coverage area. Then, press the Connect button.

 How to connect to Wi-Fi in Windows 11
As soon as you press Connect, Windows 11 asks you to "Enter the network security key." In simpler words, you need to type the Wi-Fi password in order to connect to it. Do so, and press Next.
How to connect to Wi-Fi in Windows 11
As soon as you press Connect, Windows 11 asks you to "Enter the network security key." In simpler words, you need to type the Wi-Fi password in order to connect to it. Do so, and press Next.
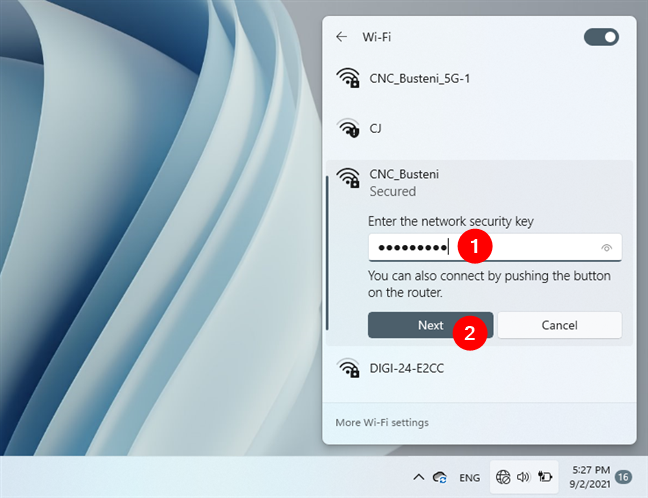
 Entering the Wi-Fi password in Windows 11
TIP: If the router that broadcasts the Wi-Fi network has WPS turned on, instead of entering the Wi-Fi password, you can also push the WPS button on the router.
For a second or two, Windows 11 tells you that it’s "Verifying and connecting" to the Wi-Fi network you chose.
Entering the Wi-Fi password in Windows 11
TIP: If the router that broadcasts the Wi-Fi network has WPS turned on, instead of entering the Wi-Fi password, you can also push the WPS button on the router.
For a second or two, Windows 11 tells you that it’s "Verifying and connecting" to the Wi-Fi network you chose.
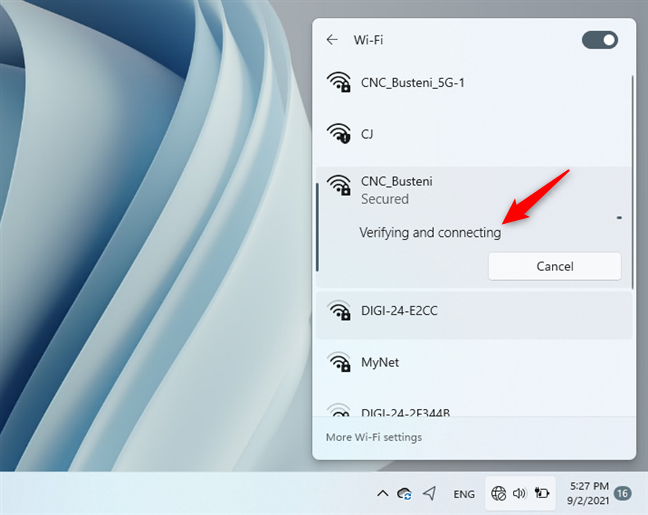
 Verifying and connecting to Wi-Fi
Then, if everything worked out well, the connection to the Wi-Fi is established. You’re now Connected to the Wi-Fi network.
Verifying and connecting to Wi-Fi
Then, if everything worked out well, the connection to the Wi-Fi is established. You’re now Connected to the Wi-Fi network.
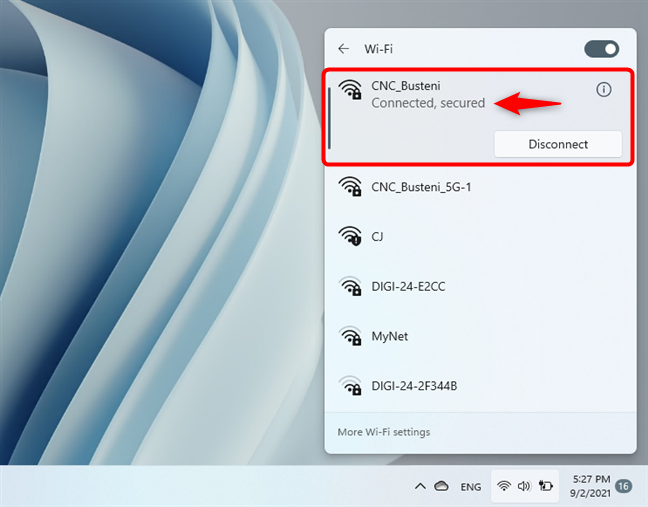
 Windows 11 has connected to Wi-Fi
TIP: If you need to connect to a hidden wireless network, read this guide: 3 ways to connect to hidden Wi-Fi networks in Windows 11.
Windows 11 has connected to Wi-Fi
TIP: If you need to connect to a hidden wireless network, read this guide: 3 ways to connect to hidden Wi-Fi networks in Windows 11.
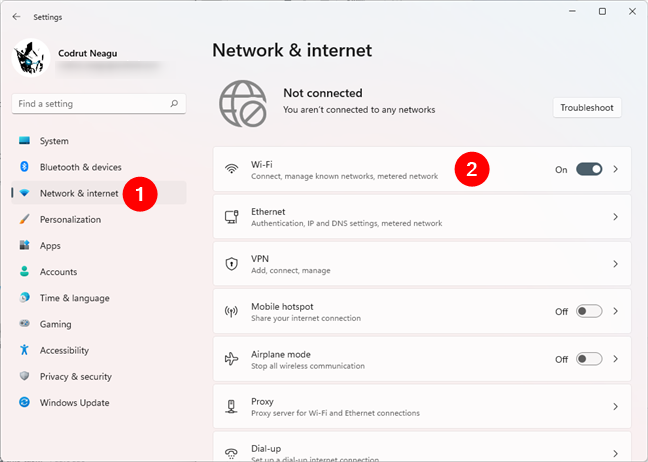
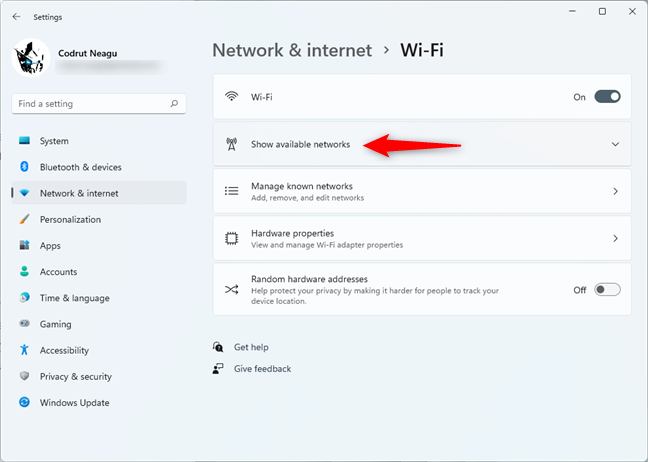
 The Wi-Fi section from Windows 11's Settings app
This brings you to the Wi-Fi page from the Settings. Make sure that the Wi-Fi switch is On (at the top of the window), and then click or tap on "Show available networks."
The Wi-Fi section from Windows 11's Settings app
This brings you to the Wi-Fi page from the Settings. Make sure that the Wi-Fi switch is On (at the top of the window), and then click or tap on "Show available networks."
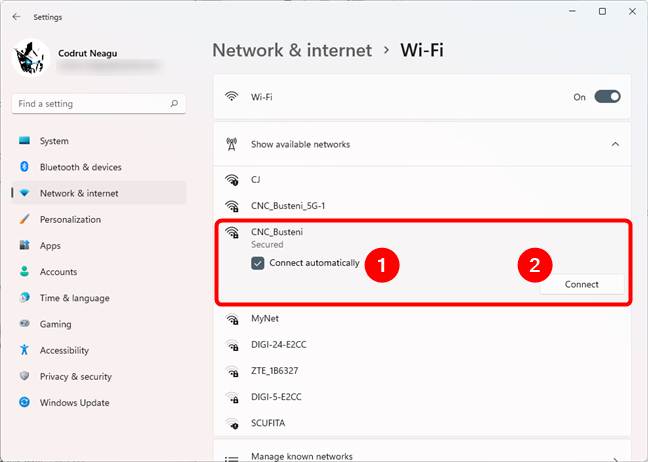
 Show available networks
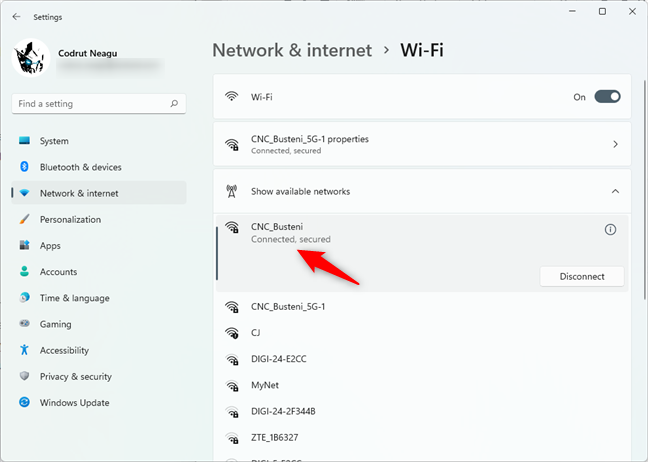
Windows 11 now shows you the list of all the wireless networks available in your area. Find the one you want to connect to, and click or tap on it. Check the "Connect automatically" option if you intend to use this Wi-Fi network regularly, and then press the Connect button.
Show available networks
Windows 11 now shows you the list of all the wireless networks available in your area. Find the one you want to connect to, and click or tap on it. Check the "Connect automatically" option if you intend to use this Wi-Fi network regularly, and then press the Connect button.
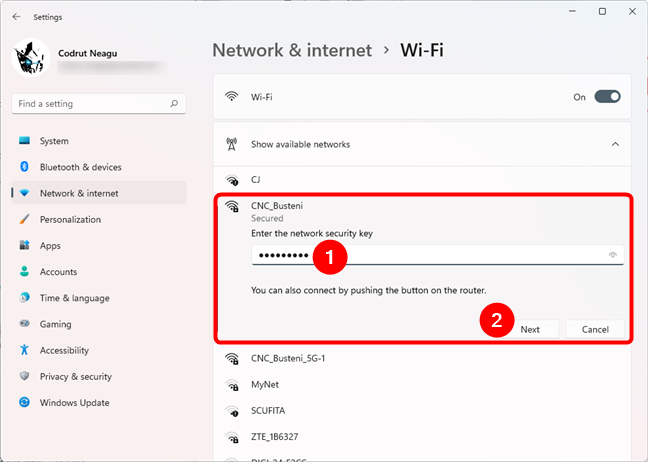
 Selecting the Wi-Fi network you want to connect to
Next, you have to "Enter the network security key," also known as the Wi-Fi password. Type it in, and press Next.
Selecting the Wi-Fi network you want to connect to
Next, you have to "Enter the network security key," also known as the Wi-Fi password. Type it in, and press Next.
 Typing the password of the Wi-Fi network
TIP: If the Wi-Fi network you want to connect to also has WPS enabled, you can simply press the WPS button on the router instead of entering the Wi-Fi security key.
Wait for a moment until Windows 11 is "Verifying and connecting" to the Wi-Fi network.
Typing the password of the Wi-Fi network
TIP: If the Wi-Fi network you want to connect to also has WPS enabled, you can simply press the WPS button on the router instead of entering the Wi-Fi security key.
Wait for a moment until Windows 11 is "Verifying and connecting" to the Wi-Fi network.
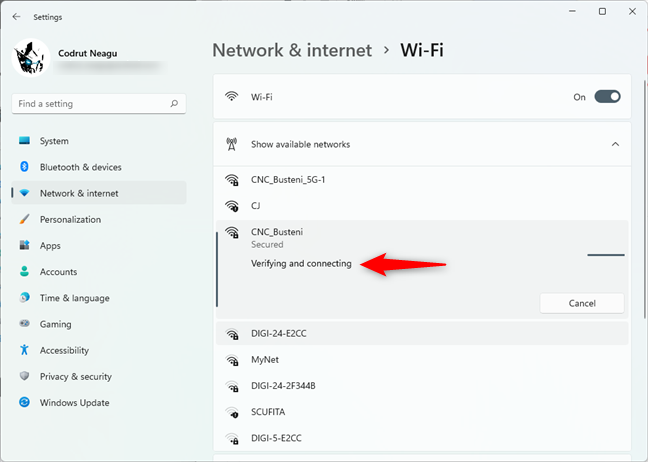 Verifying and connecting to the wireless network
If everything’s OK, you should now be Connected to the Wi-Fi network you chose.
Verifying and connecting to the wireless network
If everything’s OK, you should now be Connected to the Wi-Fi network you chose.
 Windows 11 is now connected to Wi-Fi
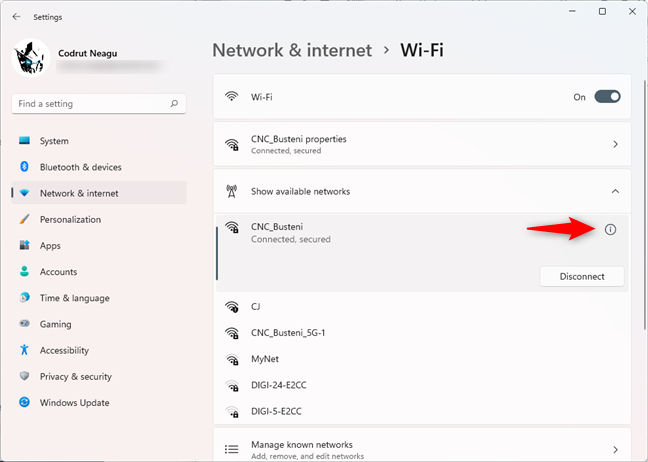
 The Properties button of the Wi-Fi network
And this is what you should look for if you prefer getting to your Wi-Fi via the Settings way:
The Properties button of the Wi-Fi network
And this is what you should look for if you prefer getting to your Wi-Fi via the Settings way:
 Opening the Wi-Fi Properties from the Settings app
As soon as you press the i (Properties) button, Windows 11 takes you to that Wi-Fi network’s details page from the Settings app. There, in the "Network profile type," select Private or Public, depending on what you prefer.
Opening the Wi-Fi Properties from the Settings app
As soon as you press the i (Properties) button, Windows 11 takes you to that Wi-Fi network’s details page from the Settings app. There, in the "Network profile type," select Private or Public, depending on what you prefer.
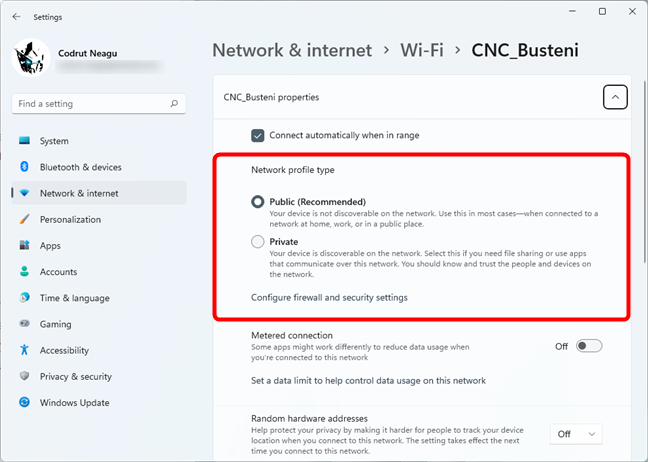 How to set the Wi-Fi network as Private or Public in Windows 11
The network profile change is immediately applied, so now you can close the Settings.
How to set the Wi-Fi network as Private or Public in Windows 11
The network profile change is immediately applied, so now you can close the Settings.
 Disconnecting Windows 11 from Wi-Fi
And here’s what you need to do if you choose to use the Settings app to disconnect your Windows 11 PC from Wi-Fi:
Disconnecting Windows 11 from Wi-Fi
And here’s what you need to do if you choose to use the Settings app to disconnect your Windows 11 PC from Wi-Fi:
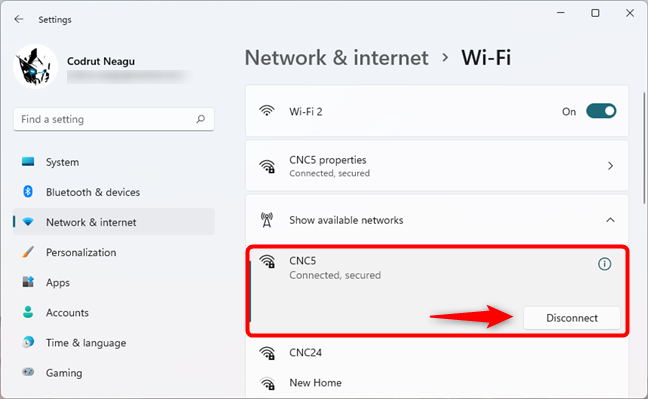
 Disconnect Wi-Fi from the Settings app
That’s it!
Disconnect Wi-Fi from the Settings app
That’s it!
1. How to connect to Wi-Fi in Windows 11 from the desktop
How do I connect my Windows 11 computer to Wi-Fi? First, head to your desktop and look at the system icons from the right side of the taskbar. Assuming you’re not already connected to Wi-Fi, you should see a small globe with a disconnected sign on it. That’s the internet (network) icon indicating that you don’t have internet access right now.2. How to connect to Wi-Fi in Windows 11 from the Settings app
There’s another way to connect to a Wi-Fi network in Windows 11, too, via the Settings app. It’s a bit lengthier, but it works nonetheless. First, open the Settings app - a quick way to do it is to use the Windows + I keyboard shortcut. In the Settings app, select Network & internet on the left sidebar, and click or tap Wi-Fi on the right.How to change the Wi-Fi network profile in Windows 11 to Private or Public
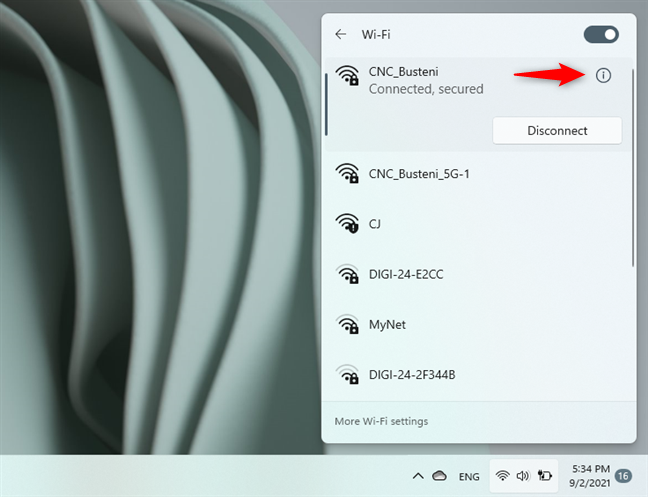
Note that, by default, Windows 11 treats every Wi-Fi network as a Public network. However, if you connect to a home network and want to be able to access all its resources and shares, you can change it to Private. Or, if you already set it as Private, you might want to go back to Public. Either way, first, open the Wi-Fi networks list from the quick settings panel or from the Settings app’s Network & internet > Wi-Fi page. Then, identify the network you’re connected to and click or tap on its small i (Properties) button. This is what it looks like in the Wi-Fi list from the quick settings fly-out.How to disconnect from a Wi-Fi network in Windows 11
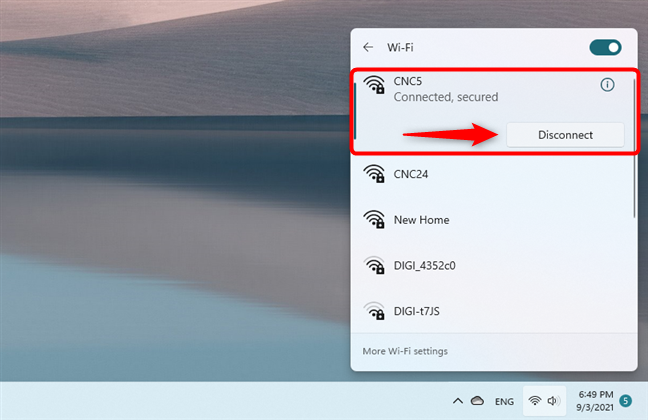
If you want to disconnect from Wi-Fi, regardless of your reasons, the process is just as simple as connecting to Wi-Fi. First, follow the same steps we’ve shown in the previous sections of this guide. When you reach the list of Wi-Fi networks, select the one to which you’re connected and press Disconnect. Here’s how it looks if you use the quick settings panel to get to the Wi-Fi list:

Discussion (0)
Be the first to comment.