

Easily working with network shares is essential for small businesses. It’s also useful for people who like to keep data on network computers, drives connected to their routers, or even NAS devices. And, to make things faster and more friendly, some users want to map network drives or even FTP locations on their Windows 11 computers. That makes network shares available directly through File Explorer and accessible with just a simple double-click. Do you want to know how to map a network drive or add an FTP location to Windows 11’s File Explorer? If you do, read on:
IMPORTANT: Windows 11 can map network drives, and the process is fast and easy to go through. If that’s what you want, read the first section of this guide. It also lets you add shortcuts to FTP sites in File Explorer, as you can see in the second section of the tutorial. However, note that you can’t mount FTP as a drive in Windows 11 because the operating system doesn’t let you add a drive letter to an FTP location.
 Select This PC in File Explorer
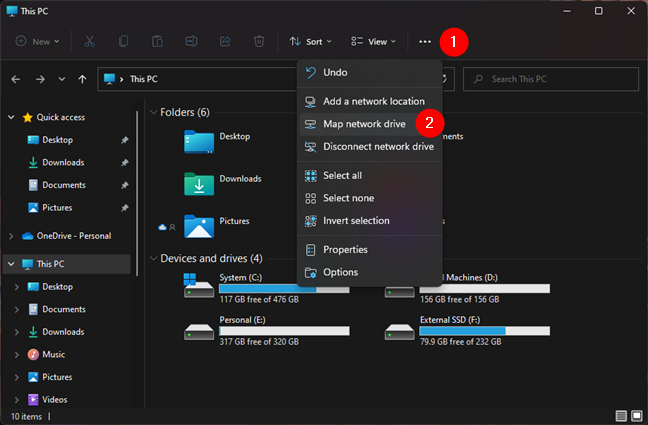
On File Explorer’s toolbar from the top, click or tap on the See more button represented by three suspension dots. Then, in the menu displayed, click or tap on “Map network drive.”
Select This PC in File Explorer
On File Explorer’s toolbar from the top, click or tap on the See more button represented by three suspension dots. Then, in the menu displayed, click or tap on “Map network drive.”
 The Map network drive option from File Explorer's See more menu
This starts the Map Network Drive wizard, where you begin by choosing the drive letter for the network drive you intend to create in the Drive field. Then, type the path to the network folder you want to map in the Folder field.
The Map network drive option from File Explorer's See more menu
This starts the Map Network Drive wizard, where you begin by choosing the drive letter for the network drive you intend to create in the Drive field. Then, type the path to the network folder you want to map in the Folder field.
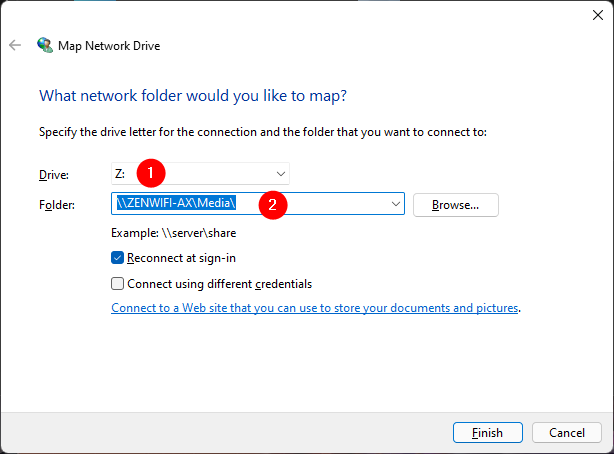
 Choosing the mapped drive letter and the folder to map as a network drive
Alternatively, you can also Browse your local network and select the folder to map as a network drive. Once you find it, select it and press OK.
Choosing the mapped drive letter and the folder to map as a network drive
Alternatively, you can also Browse your local network and select the folder to map as a network drive. Once you find it, select it and press OK.
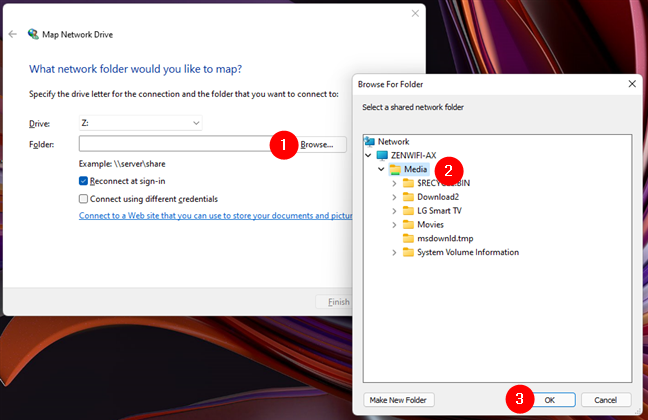
 Browsing for the folder to map as a network drive
Then, in the “Map network drive” wizard, enable the “Reconnect at sign-in” option if you want the network drive to be automatically mapped by Windows 11 each time you start your PC.
If the computer or device where the network drive is found requires a different user name and password than the ones of your current user account, you should also check the “Connect using different credentials” option. Then, click or tap on Finish.
Browsing for the folder to map as a network drive
Then, in the “Map network drive” wizard, enable the “Reconnect at sign-in” option if you want the network drive to be automatically mapped by Windows 11 each time you start your PC.
If the computer or device where the network drive is found requires a different user name and password than the ones of your current user account, you should also check the “Connect using different credentials” option. Then, click or tap on Finish.
 Connect using different credentials
If you chose to use a different user account to connect to the network folder, you need to enter its name and password on the next step. Windows 11 may have already selected a user account. If it’s the one you intend to use, simply type its password and, if you want, check the “Remember my credentials” setting so that you don’t have to enter your password each time you open the mapped network drive. Then, press the OK button.
Connect using different credentials
If you chose to use a different user account to connect to the network folder, you need to enter its name and password on the next step. Windows 11 may have already selected a user account. If it’s the one you intend to use, simply type its password and, if you want, check the “Remember my credentials” setting so that you don’t have to enter your password each time you open the mapped network drive. Then, press the OK button.
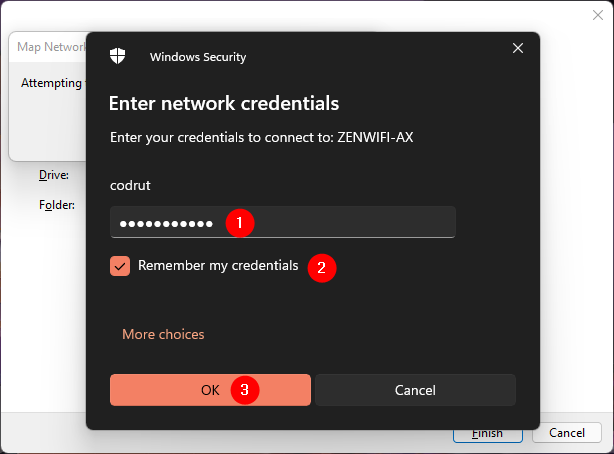 Enter the network credentials to use with the mapped network drive
If Windows 11 didn’t select the user account you want to use, you can choose another one by clicking or tapping on More choices, and then “Use a different account.” Next, type the name and password of the user account you’d like to use. Check the option to “Remember credentials” if you want that, and press OK.
Enter the network credentials to use with the mapped network drive
If Windows 11 didn’t select the user account you want to use, you can choose another one by clicking or tapping on More choices, and then “Use a different account.” Next, type the name and password of the user account you’d like to use. Check the option to “Remember credentials” if you want that, and press OK.
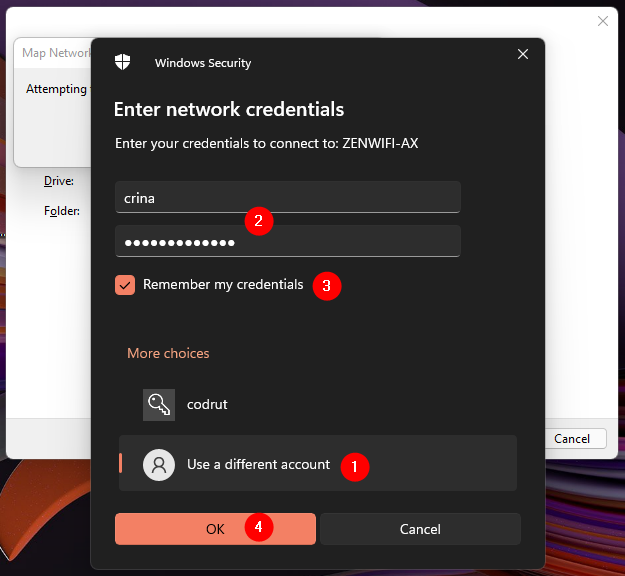
 Use a different user account for the mapped network drive
Next, Windows 11 attempts to connect to the new mapped network drive. If all is right, you should see it almost instantly in File Explorer.
Use a different user account for the mapped network drive
Next, Windows 11 attempts to connect to the new mapped network drive. If all is right, you should see it almost instantly in File Explorer.
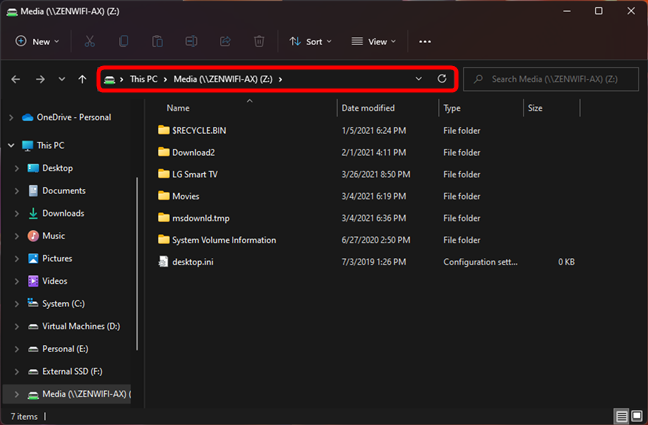 Your new mapped network drive is opened in Windows 11's File Explorer
Later on, whenever you need to access your mapped network drive, you can simply open File Explorer, select This PC, and double-click or double-tap on its entry from the Network locations section.
Your new mapped network drive is opened in Windows 11's File Explorer
Later on, whenever you need to access your mapped network drive, you can simply open File Explorer, select This PC, and double-click or double-tap on its entry from the Network locations section.
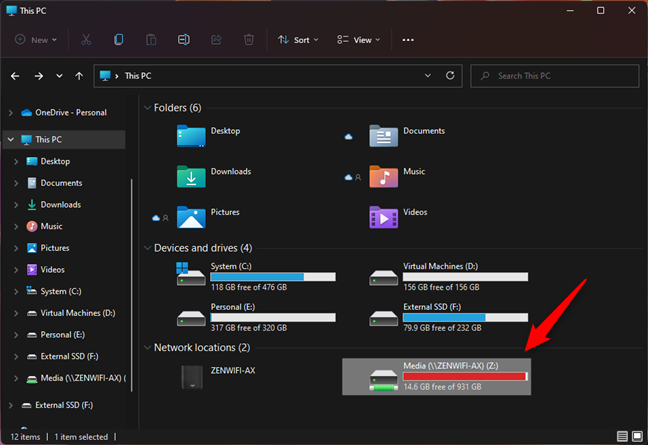
 File Explorer shows all the mapped network drives in its Network locations section
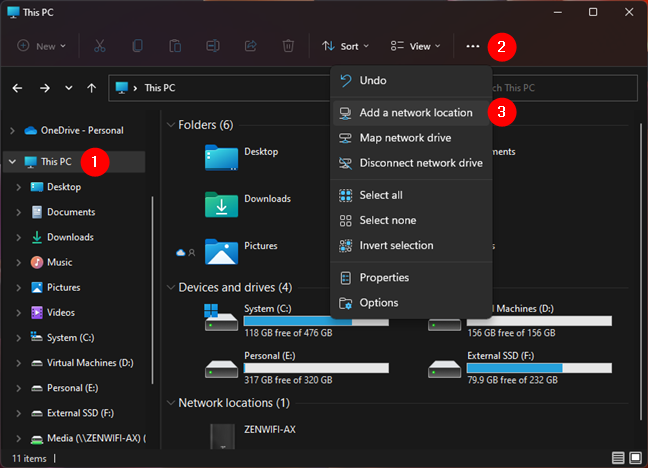
 Add a network location in File Explorer's See more menu
This launches the “Add Network Location” wizard. Read what it says, if you want, and then press Next.
Add a network location in File Explorer's See more menu
This launches the “Add Network Location” wizard. Read what it says, if you want, and then press Next.
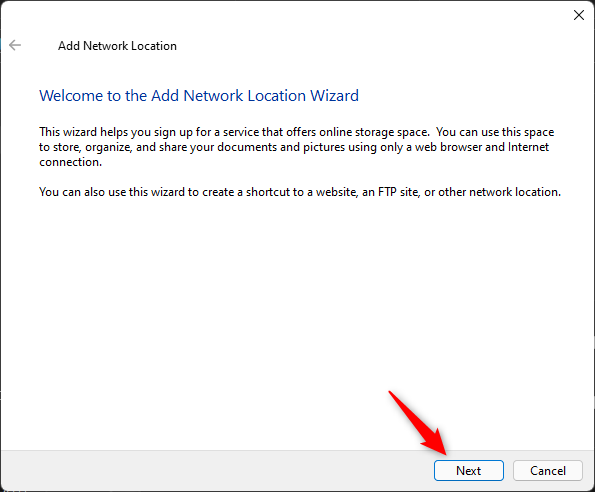
 Press Next in the Add Network Location wizard
Click or tap on “Choose a custom network location” and then press Next.
Press Next in the Add Network Location wizard
Click or tap on “Choose a custom network location” and then press Next.
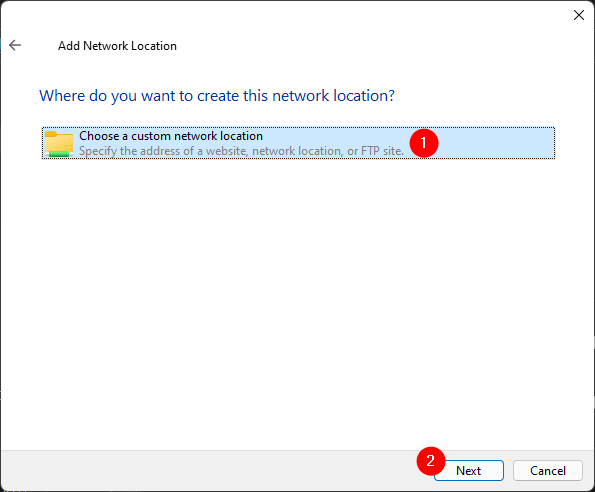 Choose a custom network location
When the wizard asks you “Specify the location of your website,” type the FTP address that you intend to add to File Explorer in the “Internet or network address” field. The address of an FTP site should look like this: ftp://ftp.example.com or ftp://ftp.microsoft.com:21 (if you also need to specify the port used, which in this case is 21). After you’ve entered it, click or tap Next.
Choose a custom network location
When the wizard asks you “Specify the location of your website,” type the FTP address that you intend to add to File Explorer in the “Internet or network address” field. The address of an FTP site should look like this: ftp://ftp.example.com or ftp://ftp.microsoft.com:21 (if you also need to specify the port used, which in this case is 21). After you’ve entered it, click or tap Next.
 The address of an FTP location
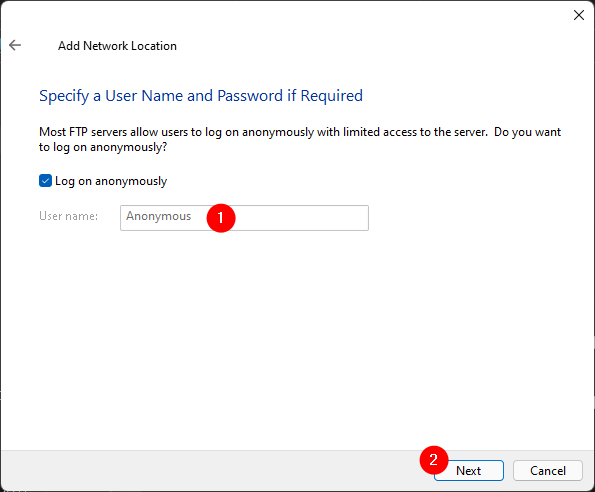
Next, Windows 11 asks you if you’re going to need an FTP account and password to access the FTP location you’ve added earlier. If that FTP site doesn’t require credentials, check the “Log on anonymously” option. If it does require credentials, uncheck it and enter the name of the FTP user account. Then, click or tap on Next.
The address of an FTP location
Next, Windows 11 asks you if you’re going to need an FTP account and password to access the FTP location you’ve added earlier. If that FTP site doesn’t require credentials, check the “Log on anonymously” option. If it does require credentials, uncheck it and enter the name of the FTP user account. Then, click or tap on Next.
 Select whether the FTP server requires authentication or allows anonymous logins
Now type the name you want Windows 11 to show for the FTP location, and then press Next once more.
Select whether the FTP server requires authentication or allows anonymous logins
Now type the name you want Windows 11 to show for the FTP location, and then press Next once more.
 Type a name for the FTP site
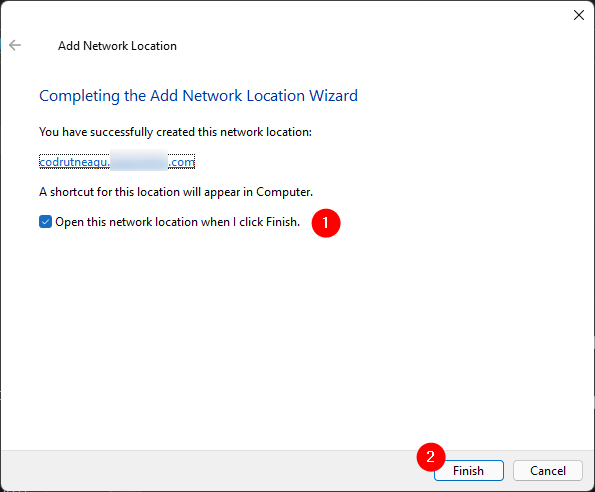
Finally, Windows 11 asks you whether you’d like it to open the FTP site when you close the “Add Network Location.” Choose what you prefer, and click or tap on Finish.
Type a name for the FTP site
Finally, Windows 11 asks you whether you’d like it to open the FTP site when you close the “Add Network Location.” Choose what you prefer, and click or tap on Finish.
 The end of the Add Network Location wizard
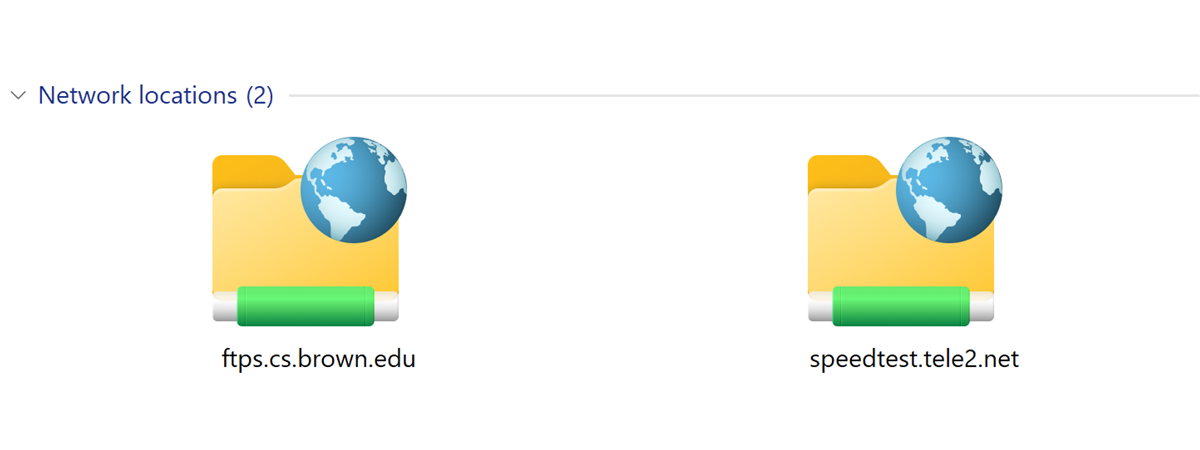
From now on, the shortcut to the FTP location is always shown in Windows 11’s File Explorer, under Network locations.
The end of the Add Network Location wizard
From now on, the shortcut to the FTP location is always shown in Windows 11’s File Explorer, under Network locations.
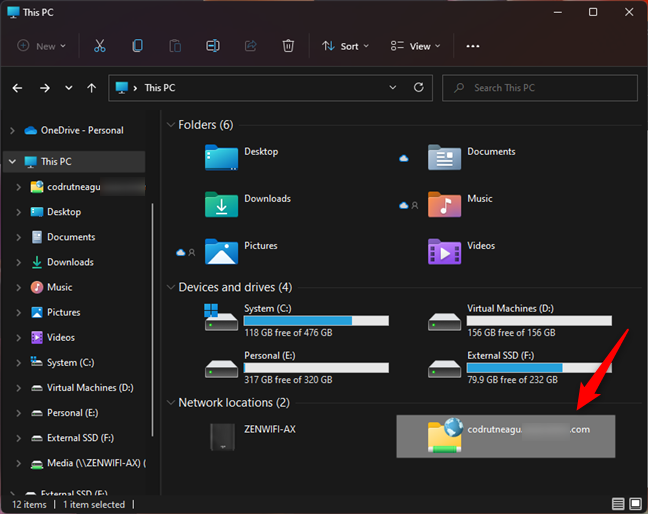
 FTP servers are shown in the Network locations from File Explorer
To open an FTP location, all you have to do is double-click or double-tap on its shortcut from File Explorer. However, note that if it requires credentials to allow access, you will need to enter an account and password each time you try to open it. If it’s set to allow anonymous connections, then it will simply load its contents in File Explorer.
FTP servers are shown in the Network locations from File Explorer
To open an FTP location, all you have to do is double-click or double-tap on its shortcut from File Explorer. However, note that if it requires credentials to allow access, you will need to enter an account and password each time you try to open it. If it’s set to allow anonymous connections, then it will simply load its contents in File Explorer.
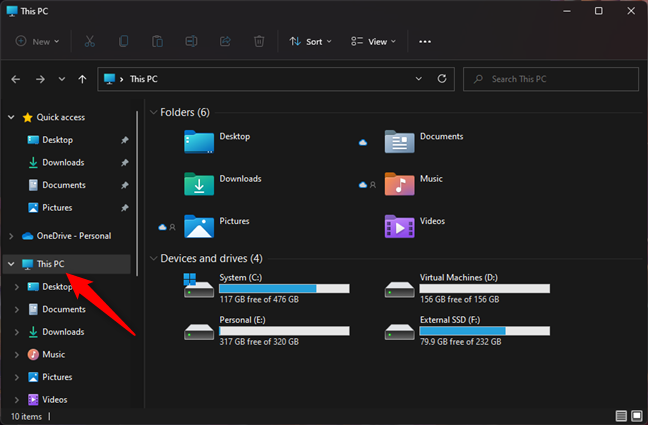
How to map a network drive in Windows 11
When you often need to access a shared drive or folder in the network, mapping it as a network drive can ease your life quite a bit. What does mapping a network drive mean? Well, the mapped network drive gets its own drive letter, and it becomes available directly from File Explorer. Let’s see how to do that in Windows 11: First, open File Explorer and select This PC on its left navigation pane.How to add an FTP location to Windows 11
Similarly, Windows 11 also lets you add FTP locations to File Explorer but, unfortunately, it doesn’t let you map FTP locations as network drives. This operating system can create special shortcuts for FTP and other web shares in File Explorer, but it has no built-in feature that would allow you to mount FTP as a drive in Windows 11 and give it a drive letter. In File Explorer, select This PC on the left navigation pane. Then, click or tap on the “See more” button whose icon depicts three suspension dots, and click or tap on “Add a network location” in the menu displayed.
Discussion (0)
Be the first to comment.