07.06.2023
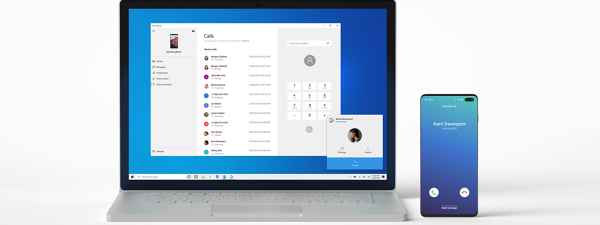
Phone Link is Microsoft’s attempt to keep you in front of your Windows computer even while using your Android device. The app syncs your Android smartphone to your Windows 11 or Windows 10 PC, helping you get notifications, calls, and texts on your desktop. This tutorial illustrates how to set up and use Phone Link to connect your Android smartphone or tablet and your Windows computer or device:
NOTE: The features presented are available in Windows 11 and Windows 10 22H2 or newer. If you are using an older version of Windows, you may not have access to all the features. This guide applies to Android 13, and it was created using a Google Pixel 4a and a Samsung Galaxy S20 FE.
What is Phone Link? What else is needed to connect an Android phone to Windows?
Phone Link is an app developed by Microsoft that enables you to connect an Android smartphone or an iPhone to a Windows PC. This may sound simple, but the app is not exactly perfect, so you need a bit of patience to set it up. To clarify any confusion, I’ll start by presenting each app and feature illustrated in this tutorial.
In order to connect your Android smartphone to Windows 11 or Windows 10, you must have the Phone Link app installed on your PC. If Windows is up to date, the app should be installed by default on your computer. However, if you can’t find the Phone Link app on your PC, you can get it from the Microsoft Store.
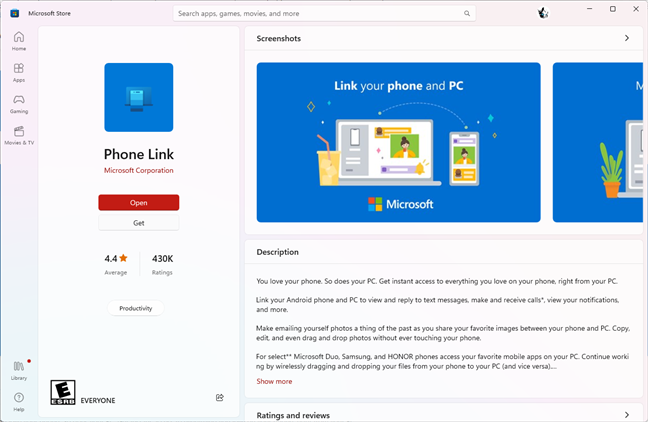
Phone Link is available in the Microsoft Store
TIP: If you want to learn how to find and install apps from the Microsoft Store, here are some of the things you can do in the Microsoft Store for Windows.
The app you need on your Android devices is Link to Windows (formerly also known as Your Phone Companion or My Phone Companion), and you can get it from the Google Play Store. If you’re using a Microsoft Surface Duo, a Samsung Galaxy, or an Honor smartphone, you don’t have to install any app, as Link to Windows is built-in.
If you have already signed in to one of Microsoft’s apps on your Android, your account is already linked to the device, so skip those steps in the tutorial.
Phone Link is still a work in progress, with new services and features expected to come to it. If you stumble upon issues, there are a few things you can try to make sure that everything works as intended:
- Use a Microsoft account to log in on your Windows PC. Phone Link doesn’t launch if you’re using it on a local account. The Microsoft account doesn’t have to match the one you use to connect to the app. You can change it during the setup.
- The devices you’re trying to pair must be connected to the internet, preferably on the same wireless network.
- Your Android smartphone or tablet should have an active SIM card.
- Turn off any blocking features (battery saver, Airplane mode, Do not disturb) on both devices.
- Make sure that the Phone Link app can run in the background. On your Windows 10 PC, you can do that in Settings > Privacy > Background apps by activating the switch next to the app. If you’re using Windows 11, head to Settings > Apps > Installed apps > Phone Link, press the ellipsis button next to it, select Advanced options, and then make sure that the “Let this app run in background” setting is set to either Power optimized or Always.
- Turn on Nearby sharing and Share across devices. If you’re using Windows 10, you can do it in Settings > System > Shared experiences. In Windows 11, you’ll find Nearby sharing in Settings > System and Share across devices in Settings > Apps > Advanced app settings.
- Restart the app(s) and your device(s). Especially if you changed any settings, closing and reopening the app(s) may help establish the connection between your Android device and your Windows PC.
If you want to connect your Windows PC to your Android smartphone, there are a couple of steps you need to take on both devices. Here’s what you’ll have to do to get everything up and running in no time:
Step 1. Open the Phone Link app on your Windows PC
First, you must open the Phone Link app on your computer. One of the easiest ways to do that is to use its Start Menu shortcut. In Windows 11, you have to access the All apps list, scroll until you reach the letter P, and then click or tap on Phone Link.
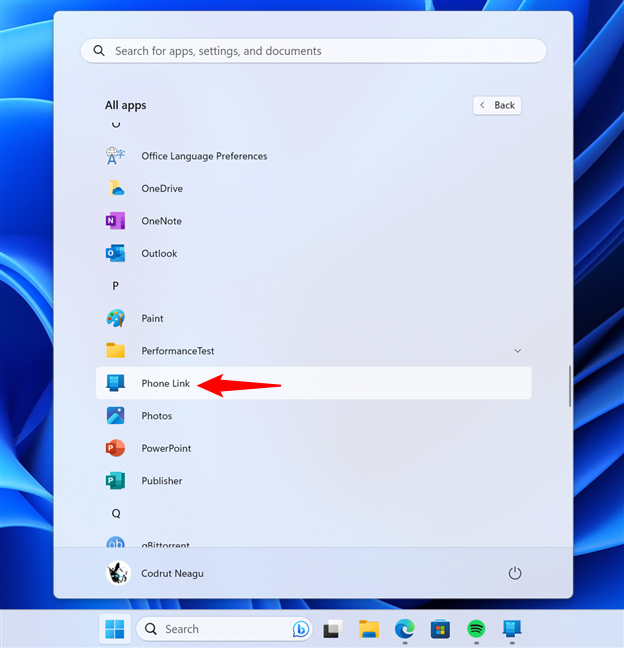
The Phone Link shortcut in Windows 11
If you’re using Windows 10, open the Start Menu and scroll the apps list on the left until you get to the letter P. Then, you should see the Phone Link shortcut: click or tap on it.
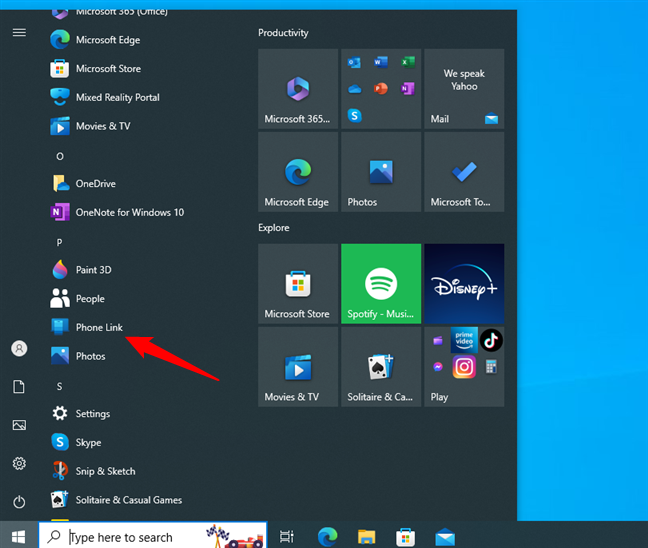
The Phone Link shortcut in Windows 10
Another way to access Phone Link is to search for the app. Type “phone link” in your taskbar’s Search bar, and then click or tap the Phone Link result.
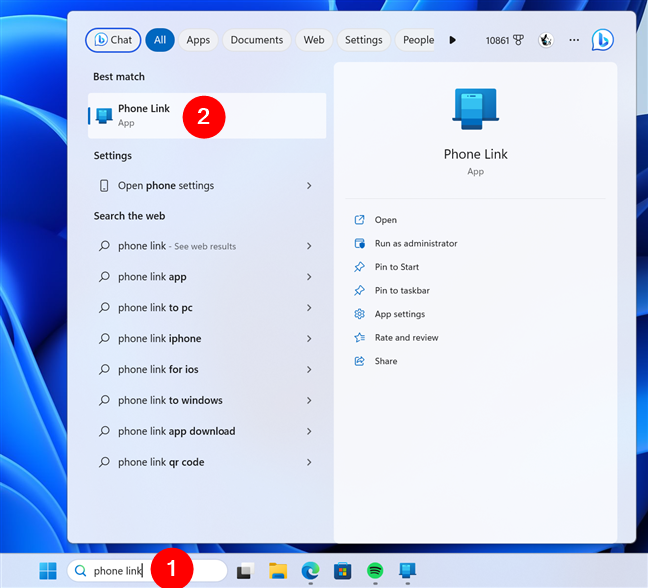
Access Phone Link from the Search bar
Regardless of your chosen method, when you open the Phone Link app for the first time, it asks you to select the type of phone you want to connect to Windows. Click or tap on Android to continue.
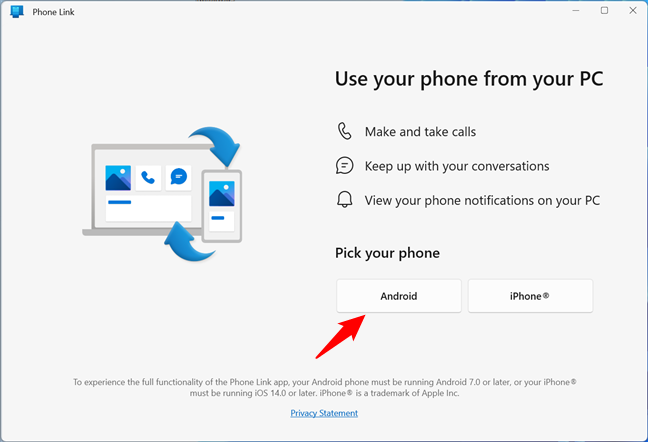
Click or tap on Android
On the next page, you are required to install the Link to Windows app on your Android phone. At the top, there are instructions and a short link (www.aka.ms/yourpc) you can type in your smartphone’s browser to access the app. But before you do that, let’s get your Windows PC ready.
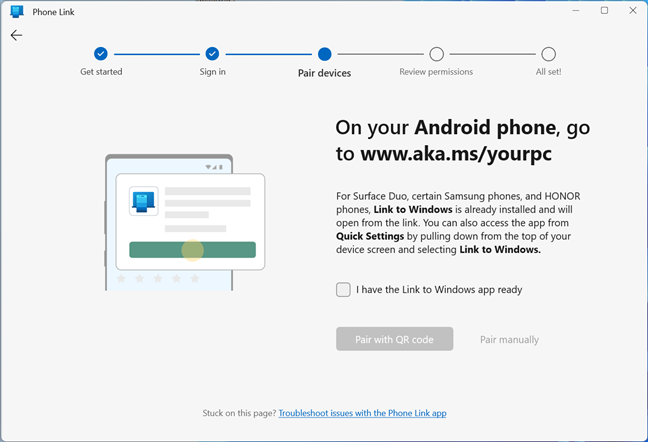
Install Link to Windows on the Android smartphone
Check the “I have the Link to Windows app ready” box and press the “Pair with QR Code” button.

Open QR Code in Phone Link
Next, the Phone Link app on your Windows PC opens a new window and displays a QR code. You have to scan this code with your Android smartphone, so let’s switch to your Android and get it ready for that.
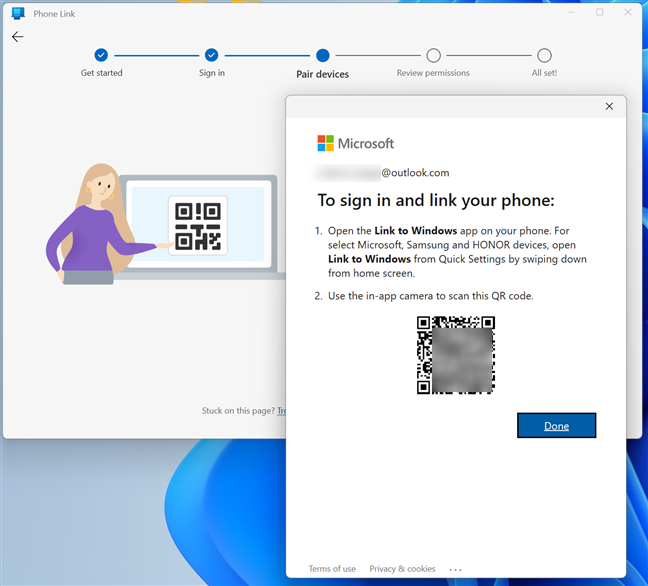
Use your Android to scan the QR code in Windows
Step 2. Install and open the Link to Windows app on your Android smartphone
Now that your Windows PC is ready to link with your Android device, you need to set up your Android smartphone or tablet too. Here’s how:
2.1. Get Link to Windows on a standard Android phone
Switch over to your Android, fire up the Play Store, and get the Link to Windows app. You can also use the link shown earlier on your Windows PC to access the app’s page in the Play Store.
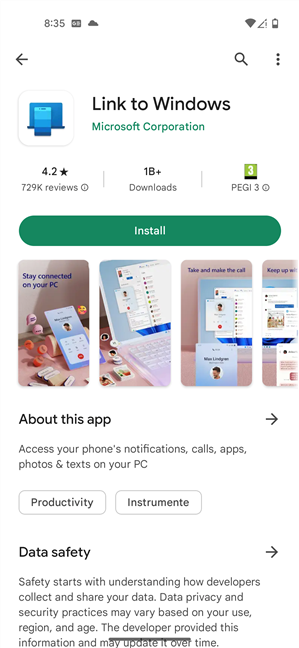
Get the app from the Google Play Store
TIP: If you need help installing apps on your Android devices, this guide provides step-by-step instructions.
Once you’ve installed Link to Windows on your Android smartphone, launch it and move on to the third step in this tutorial.
2.2. Launch Link to Windows on a Samsung Galaxy phone
Samsung Galaxy devices come with Link to Windows as a built-in feature. To begin using it on your Samsung Galaxy smartphone, swipe down from the top of the screen to access Quick Settings. Swipe down again to open the extended Quick Settings menu, where you can find the „Link to Windows” button. Tapping on it enables the feature while touching and holding it opens its settings. As this is the first time you’re connecting your Samsung Galaxy to your Windows PC, make sure you touch and hold the Link to Windows button to configure the app.
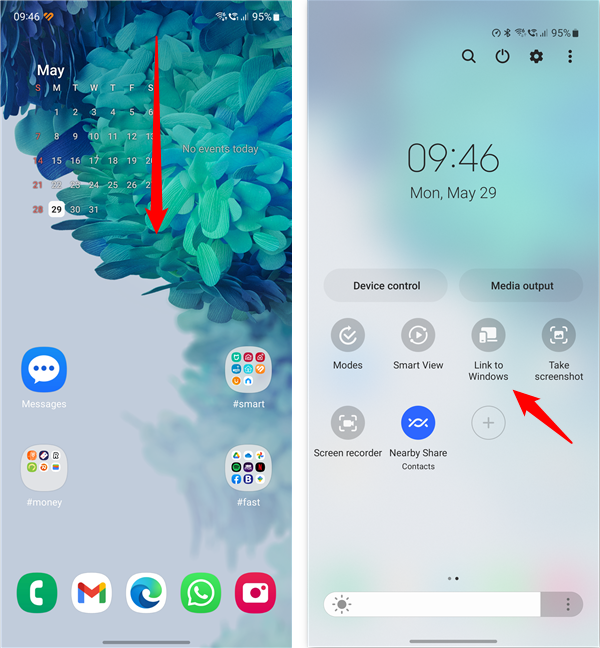
Activate Link to Windows from Quick Settings
TIP: If you use the feature often, you should consider customizing the Android Quick Settings menu to make Link to Windows more easily accessible (check out the dedicated Samsung section).
Alternatively, you can open the Settings app, tap on Connected devices, and enable the Link to Windows switch. Then, tap on Link to Windows to get to its configuration page and tap „Sign in to add computer.”
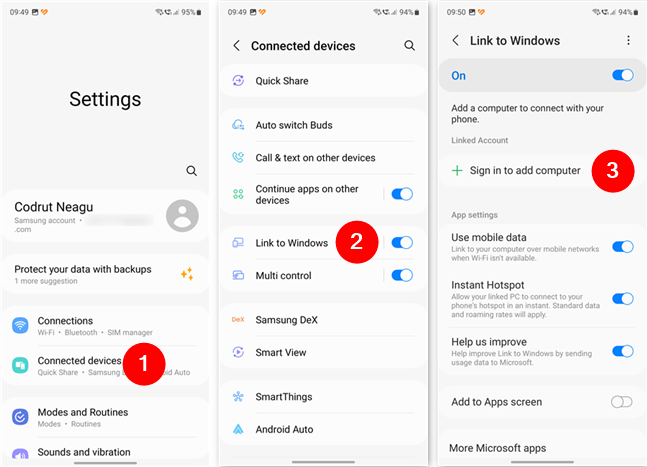
Start configuring Link to Windows on a Samsung Galaxy
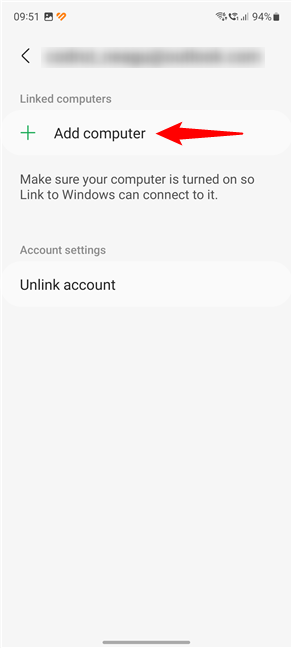
If you haven’t already connected a Microsoft account to your Samsung Galaxy device, you are prompted to do so. If you’ve done that previously or after you’ve signed in, you should see a screen like the one in the next screenshot. Tap the Add computer option and follow the instructions in the next step of this guide. They’re identical on Samsung Galaxy devices and standard Android smartphones.
Add computer to a Samsung Galaxy
Step 3. Set up Link to Windows on your Android smartphone
Now that you’ve launched the Link to Windows app, you should see a screen like the one on the left side of the next screenshot. Tap the “Link your phone and PC” button at the bottom, and then tap Continue on the next screen.
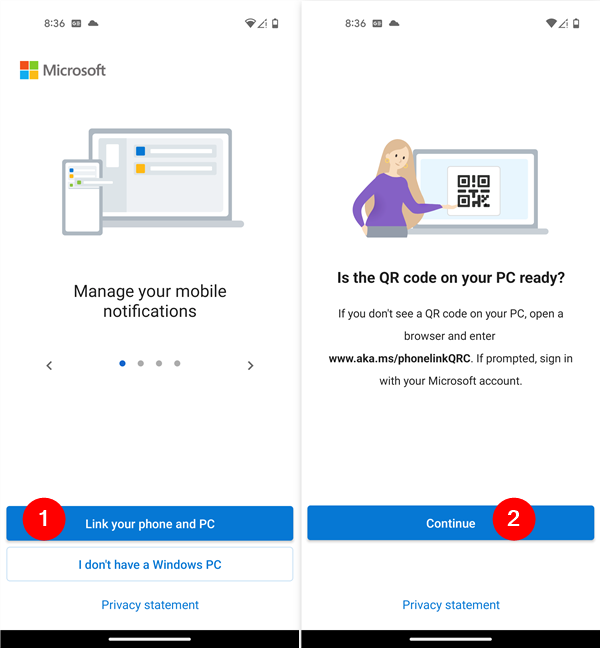
Choose to Link your phone and PC
Link to Windows asks you to allow it to take pictures and record video on your Android device. Tap the “While using the app” option and point your camera to the QR code displayed on your Windows computer.
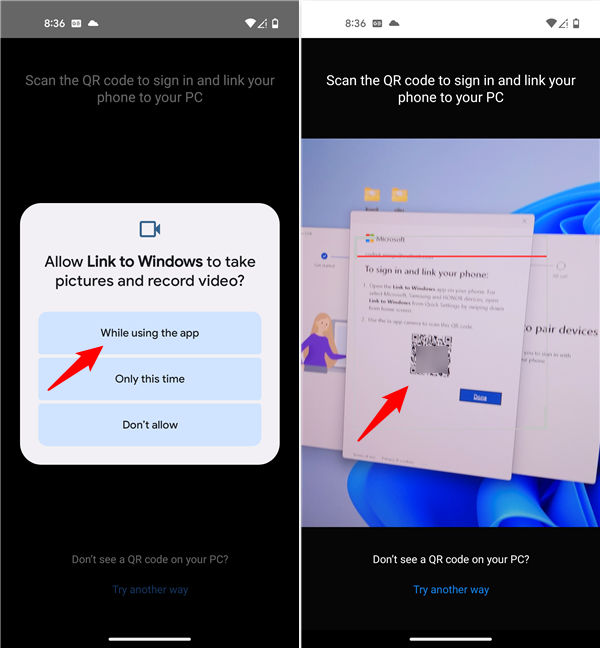
Scan the QR code on the Windows PC
TIP: In case you don’t know what QR codes are, here’s an article that explains them: What is a QR code? What are QR codes used for?.
After scanning the code, Link to Windows informs you that it’s now Pairing with PC. Then, it lets you know that you’ll need to give it “[...] a few permissions to help your phone and PC work together.” Tap Continue.
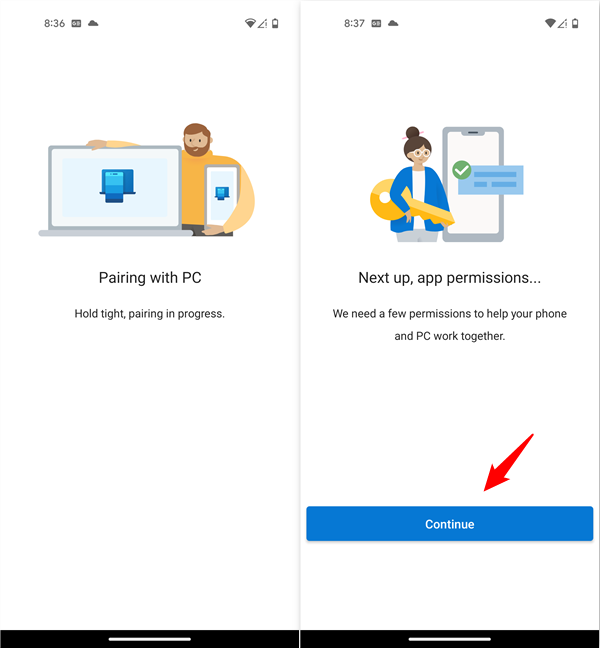
Pairing the Android phone with the Windows PC
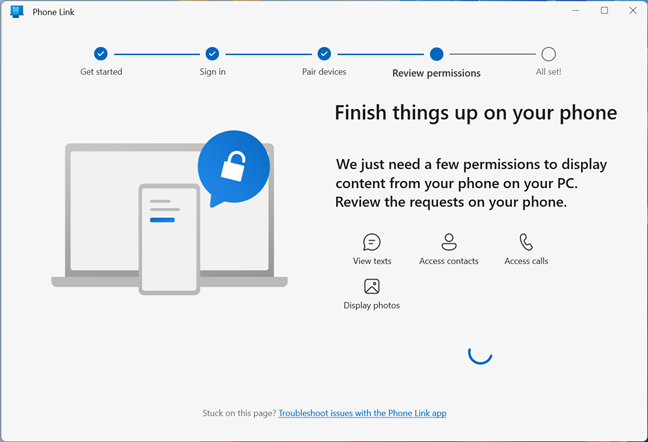
Next, you are prompted to allow the Phone Link app to access your contacts, photos, media, and files, make and manage phone calls, and send and view SMS messages. I’m afraid to imagine what many permissions mean in Microsoft’s book. 🙂

The app needs permissions
There is one more permission required, one that lets the app sync to your Windows PC at all times. Tap Continue, and you can allow this on the next screen.
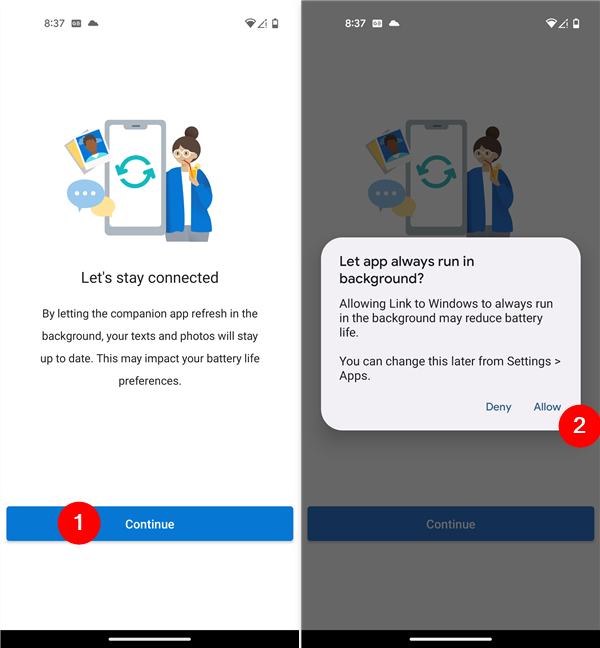
The app needs permission to always run in the background
That’s it! Tap Done to complete the process on your Android.
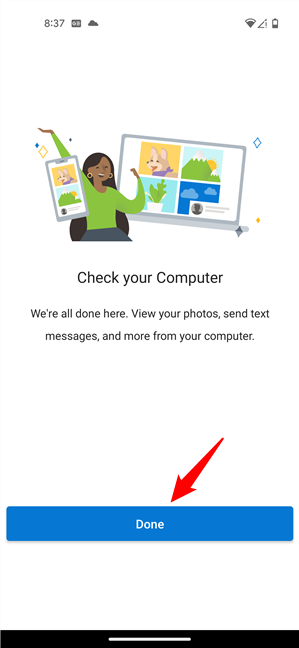
Press Done to finish the process
As soon as you see the “Your phone and PC are linked” message on the screen, your Android is good to go.
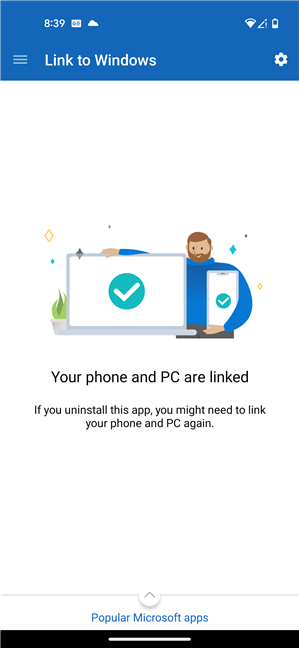
Your phone and PC are linked
Step 3.1 Finish linking your phone to your computer on the Windows PC
During this whole time, the Phone Link app on your PC kept on showing information about every step you took on your Android device.
Finish things up on your phone
And now that it’s done, you should see a message that “You’re all set” and that “Your device is now connected with the Phone Link app.” Under that, there’s a Continue button: click or tap on it.
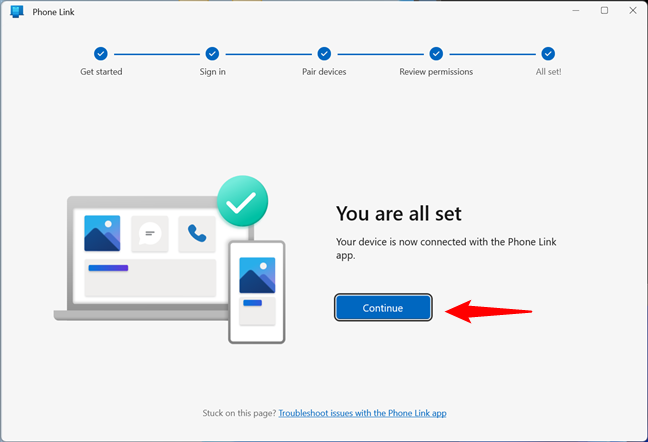
You're all set
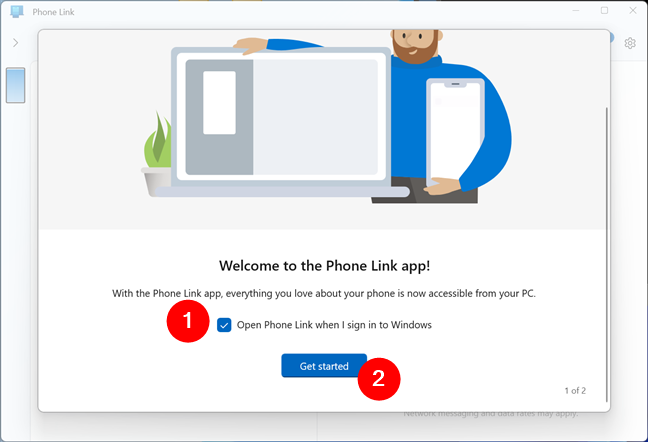
Then, you can enable the “Open Phone Link when I sign in to Windows” option by checking the appropriate box. Check the box if you want your Windows PC and Android phone to link each time you boot up your PC, and then click or tap on Get started to begin using your smartphone on your computer.
Open Phone Link at startup and Get started
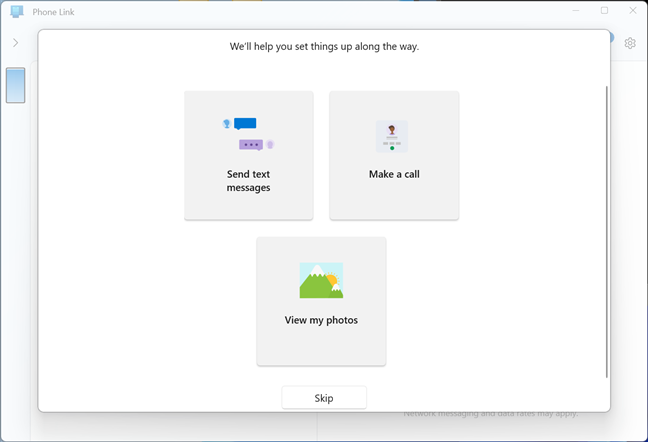
Finally, the Windows Phone Link app shows a few instructions on how to use it and may also require a couple more permissions for some of its features. Follow the instructions on your screen to send notifications from your PC and grant permissions from your Android, and you’ll get access to everything the app has to offer.
Information on how to use Phone Link
Then, you can enjoy using your Android smartphone directly from your Windows PC. 🙂

Access your Android device from your Windows PC
NOTE: If the two devices have trouble syncing, consult the first chapter of this tutorial again, and follow the instructions in the bullet points. Also, if you grow tired of Phone Link, you can always uninstall the app from your Android smartphone, as well as disable it in Windows.
Connect your PC to your Android device when you install Windows with Phone Link app
When you install Windows 11 or Windows 10, as well as when you upgrade to the latest version of Windows, you get the option to link your smartphone and PC. When you see the screen below, use your Android phone’s camera to scan the QR code. Then, press Next to move forward with the installation process.
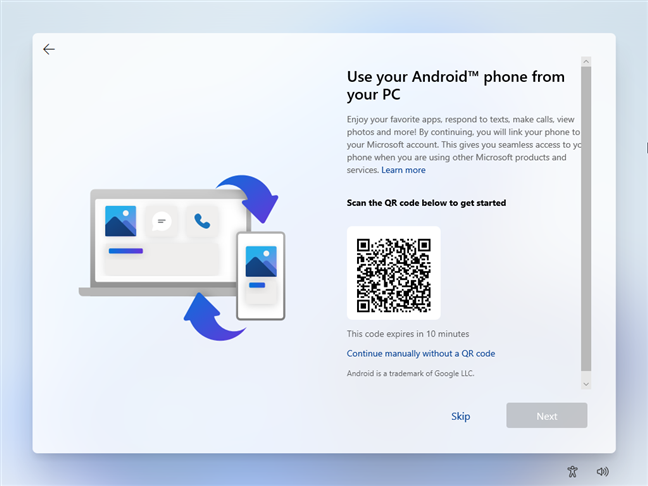
Set up Phone Link during the Windows installation
If you don’t already have it on your Android smartphone, you are asked to install the Link to Windows app. Then, you have to take the same linking steps presented in the earlier section of this tutorial. And when you’re done, the Windows installation wizard should tell you that “Your Microsoft account and phone are now linked.”
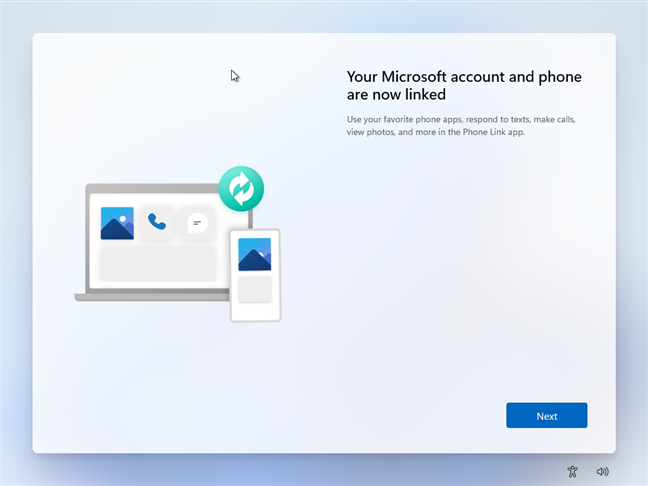
Your Android phone is linked to your Windows PC
When Windows finishes installing on your computer or device, the Phone Link app opens, and you can start using your phone on your PC.
Did you link your Android to Windows?
Connecting an Android to Windows with the Phone Link app is not difficult, and the app may surprise you, as it’s invaluable when it comes to sharing photos and texting. Still, I certainly hope that Phone Link continues to improve even more in future Android and Windows updates. Until then, would you mind sharing what your experience with Phone Link was? Did you manage to use Phone Link to connect your Android to Windows? How well does it work for you? Comment below, and let’s discuss.