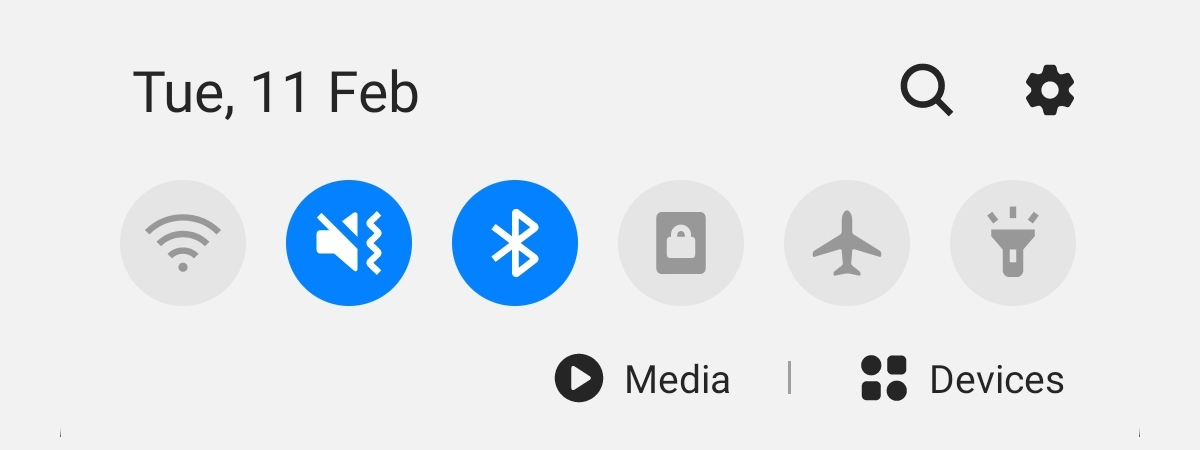
As implied by their name, the Android Quick Settings provide fast access to different features on your smartphone or tablet. Instead of wasting time digging through settings and menus, you can use the switches in the Quick Settings menu to toggle features like Bluetooth, Wi-Fi, or the Flashlight on your Android device. And there are so many Android Quick Settings available that you rarely have to open the Settings app these days. This tutorial illustrates how to make the most of your Quick Settings menu by adding, hiding, and rearranging the available tiles:
NOTE: This guide applies to Android 10, and it was created using Nokia 5.3 and Samsung Galaxy Note20 Ultra 5G. If you do not know your Android version, read How to check the Android version on your smartphone or tablet. The procedures are similar on most Android-powered devices, although you might come across some small differences, depending on your device's manufacturer. If you're using a Samsung smartphone, the steps are quite different, so don't miss the dedicated section towards the end of this guide.
How to open Quick Settings on your smartphone or tablet
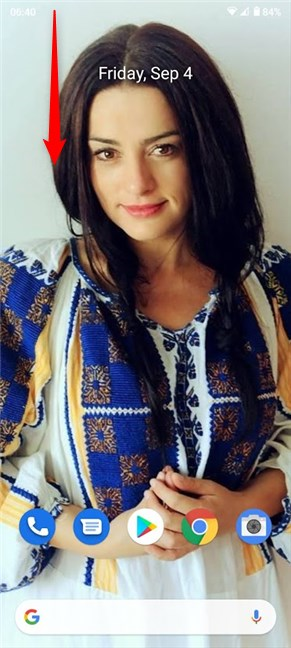
To open the Quick Settings menu, swipe down from the top of your screen.
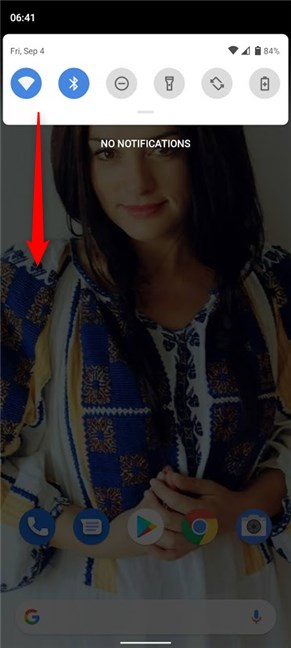
This opens either the compact or the expanded view of the Quick Settings menu, depending on your smartphone or tablet and on the screen you are swiping from. You can even access the Quick Settings from the Lock screen, but you might be asked to unlock your device when it comes to some of them.
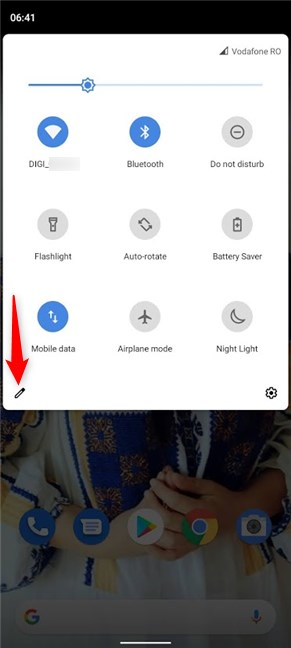
The compact Quick Settings menu has one row of tiles. The number of tiles included on it depends on the device, but most smartphones display five or six. This is where you should place the Quick Settings you use the most or those you want to have readily available, like the Flashlight. In the compact view, swipe down again to access the expanded Quick Settings menu.
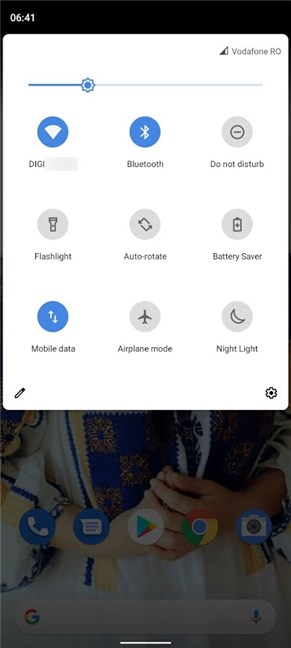
You can now see the entire Quick Settings menu. The switch on top controls the screen brightness and, on our device, can't be moved or hidden from the menu. Active Quick Settings are colored, while inactive ones are greyed out. Tapping on any tile enables or disables that feature. Tapping-and-holding on most Quick Settings lets you access more options for them inside the Settings app.
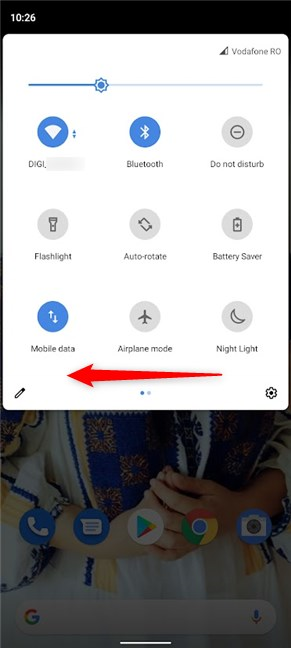
Depending on your device and the number of Quick Settings you're using, there can be several pages of tiles in the expanded version of the menu.
As seen above, our expanded Quick Settings menu only has one page by default. However, if we add more items to it, another screen becomes available, as indicated by the two dots at the bottom of the menu - shown in the image below. You can swipe left or right to navigate the different pages of your Android Quick Settings menu.
How to customize the Android Quick Settings menu
You can edit the Android Quick Settings menu to only include the tiles you need in the order you want. Depending on your device, the Edit button can be available in the compact view, or you might have to access the expanded Quick Settings view. Either way, look for a pencil icon shown on one of the edges of the Quick Settings menu and then tap on it.
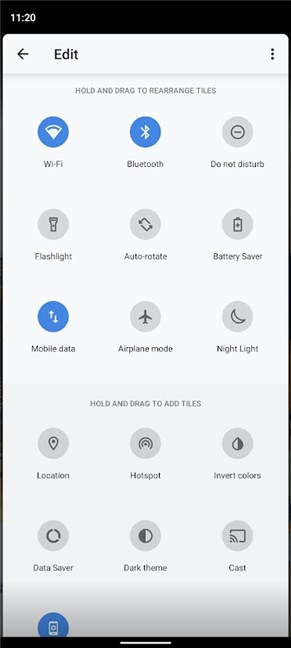
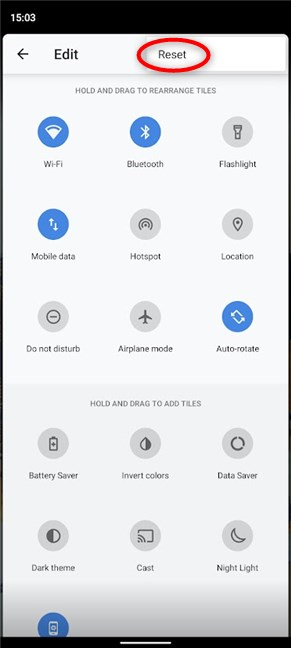
On the Edit screen, you can see all the Quick Settings available on your Android. The section on top displays the tiles currently present in the Quick Settings menu, while the other(s) display the rest of the available features. Scroll down to see all the Quick Settings you can add to the menu.
The defaults are different depending on your device, and some apps add their own tiles for you to use. However, the following Quick Settings should be present on your Android smartphone or tablet:
- Wi-Fi - turns Wi-Fi on or off. It also displays the name of the network you're using under its tile in the Quick Settings menu.
- Bluetooth - turns Bluetooth on and off. For more ways to do this, read our tutorial on the subject.
- Do not disturb - lets you turn this mode on or off, allowing you to control the calls and notifications you receive on your Android device.
- Flashlight - turns the flash module on your smartphone on or off, helping you find your way in the dark. For more ways to do this, read How to turn on the flashlight on your Android smartphone.
- Auto-rotate - controls whether or not your device enters landscape mode when you rotate it. For details about this feature and more, check out our guide about Android Home screen customization in 6 easy steps.
- Mobile data - lets you turn mobile data on or off, which comes in handy if you're using a limited data plan. To avoid additional charges, you might also want to learn How to check the data usage and limit it on Android.
- Airplane mode - turning this mode on disables your device's Wi-Fi, cellular data, and Bluetooth at the same time, preserving your battery.
- Night Light - protects your eyes by reducing the harmful effects of the blue light emitted by your device. If this sounds like a good idea, you can also check out 6+ best Night Light apps for Android.
- Location - turns on or off the GPS on your device. This feature must be on if you want to send your location to someone or need to use Find My Device when you lose track of your smartphone or tablet.
- Hotspot - turn it on or off to share your smartphone's mobile data plan with other devices. To learn more about this feature, read How to turn your Android smartphone into a mobile Wi-Fi hotspot.
- Data Saver - turns on the Android Data Saver, helping you control the mobile data consumption of apps in the background.
In its expanded view, the Android Quick Settings menu shows all the tiles found in the top section of the Edit menu, while the ones in the other section(s) are hidden from view. To add one of the hidden Quick Settings to the menu, tap and hold on it, and then drag and drop it to the desired position in the section at the top.
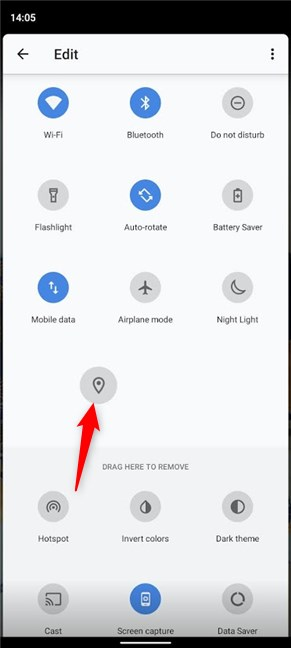
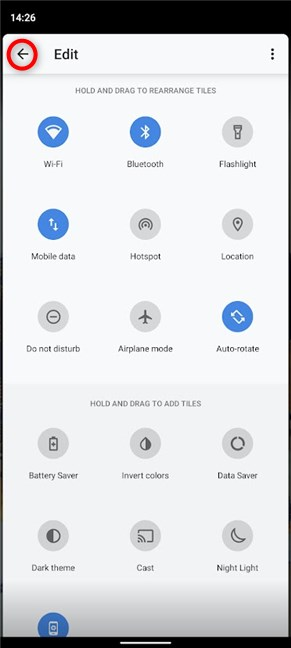
Removing Quick Settings is just as easy: drag and drop the tiles from the top to the "Drag here to remove" section. You can also drag and drop to move a tile to the desired position. When arranging your tiles, keep in mind that the compact Quick Settings menu only shows the first five or six tiles, so make sure to place the ones you use often on top. As soon as you are done organizing everything, press the Back button on the top-left corner of the screen.
The next time you access the Quick Settings on your Android device, they are displayed in the order you have set.
How to customize the Android Quick Settings menu on Samsung devices
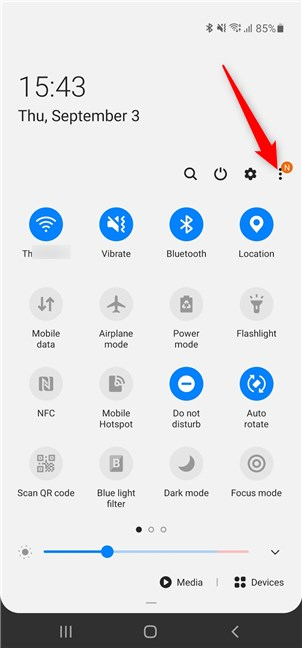
If Samsung is your device's manufacturer, you have to follow different steps to customize the Quick Settings menu. Go to Quick Settings and tap on the More options button from the upper-right corner. Its icon looks like three vertical dots.
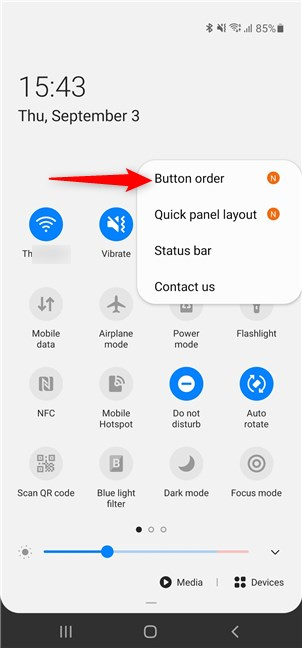
This opens a dropdown menu. Tap on Button order.
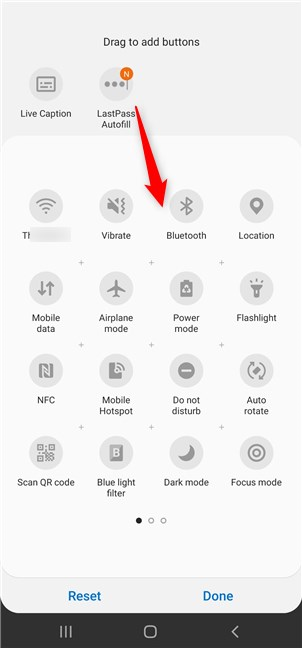
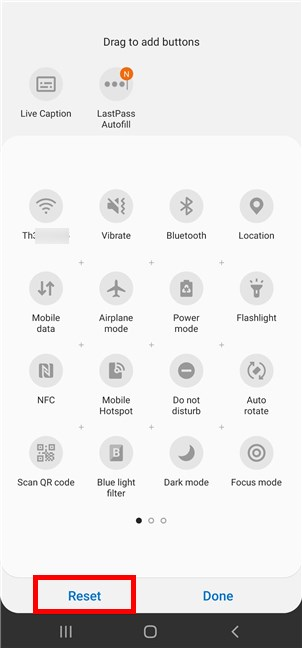
To add a button to the Quick Settings menu, tap and hold on it, and then drag it to the bottom.
You can also hold and drag to change the order of the existing buttons on your Samsung device.
TIP: Tap on the name of a tile to access the feature's settings from the Quick Settings menu on your Samsung smartphone or tablet.
How to reset the Android Quick Settings menu
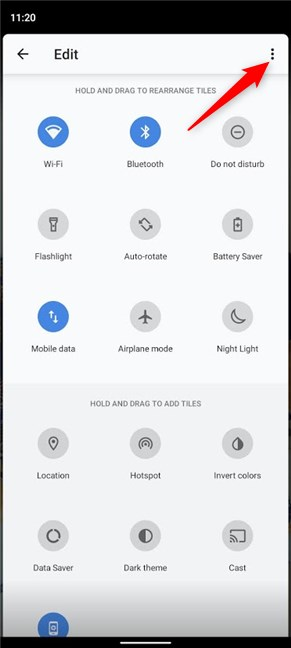
To reset the Quick Settings menu, first access the Edit screen and tap on More from the upper-right corner. Its icon looks like three vertical dots.
This opens a menu with just one option. Tap on Reset.
On some smartphones, you might get a Reset button instead. Tap on it, confirm your choice if required, and all the Quick Settings are reset to the defaults set on your Android device.
Which Android Quick Settings do you use the most?
We always customize the Quick Settings on our Android smartphones and tablets to get fast access to features that we turn on and off frequently, like Bluetooth**,** Wi-Fi, Mobile data, or Hotspot. Before closing this tutorial, tell us in a comment which Quick Settings you use the most. We are curious to know.


 11.09.2020