There are many reasons why you might want to connect your iPhone to your Windows 10 PC. Maybe you want to move some music from one device to the other, add some videos on your iPhone to watch while commuting or even create a manual backup of everything important on your iPhone. Whatever your reasons are, here is how to connect an iPhone to a Windows 10 PC, both using a cable and over Wi-Fi:
Step 1. Download and install iTunes
To connect your iPhone to your Windows 10 PC you have to use the iTunes app. It is the only way in which you can transfer and sync things like music or videos between the two devices.
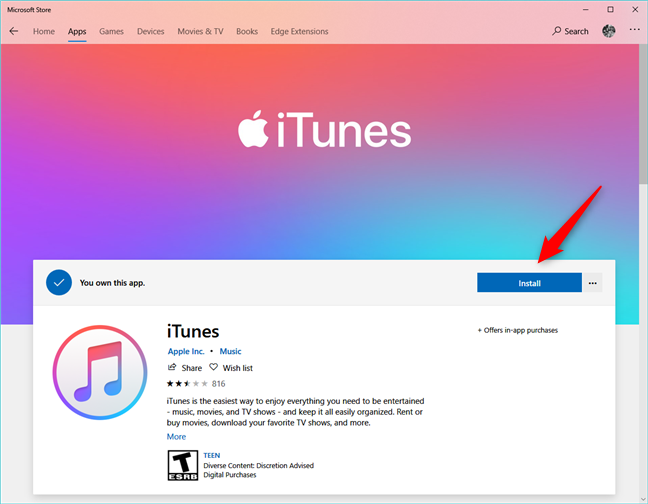
Start by opening the Microsoft Store on your Windows 10 PC, and search for iTunes. Alternatively, you can also click or tap on this link: iTunes in the Microsoft Store. Click or tap Install and wait for iTunes to be downloaded and installed on your Windows 10 PC.
The iTunes page from the Microsoft Store
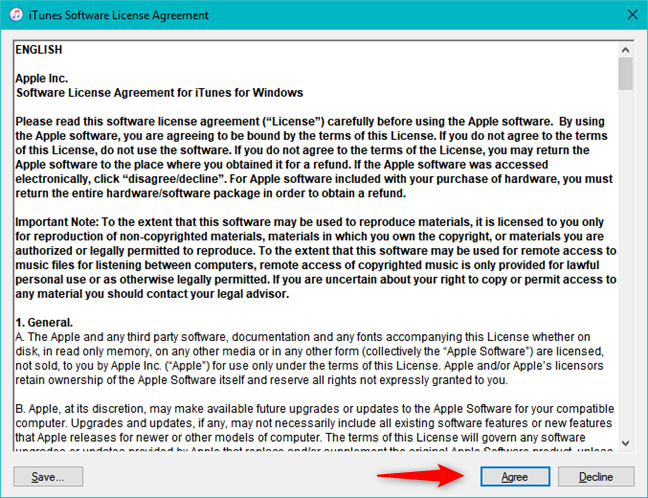
Once installed, open iTunes. As you are already looking at the Microsoft Store, you can just press the Launch button. Otherwise, you can close the Store and use another method to open iTunes, such as clicking or tapping on its shortcut from the Start Menu. The first time you open iTunes, you have to accept its license agreement, so click or tap Agree.
The license terms for iTunes
iTunes is opened on your PC. Now it is time to connect your iPhone to your Windows PC.
The iTunes app for Windows 10
Step 2. Connect your iPhone to your Windows 10 PC, using a Lightning cable
The first time you connect your iPhone to your Windows 10 PC, you must use a Lightning (or an older model) cable. However, afterward, you can also connect them using Wi-Fi, no cables involved.
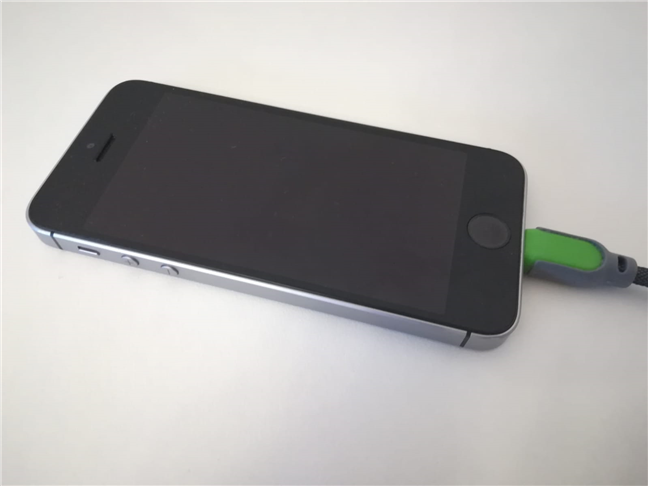
Plug the Lightning cable to your iPhone and your Windows 10 PC.
An iPhone SE connected to a PC with a Lightning cable
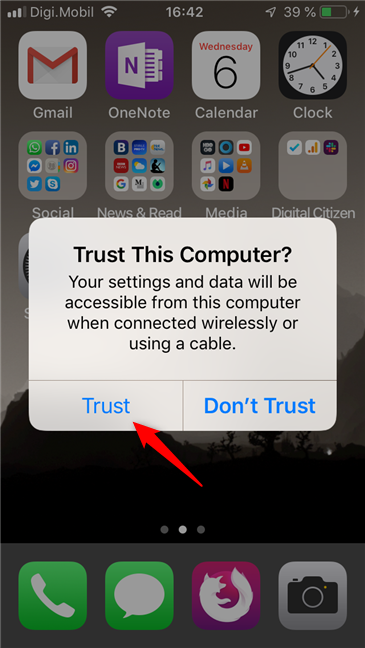
On your iPhone, you should see a message that asks "Trust this Computer?". Answer yes, by tapping the Trust answer.
Answering the Trust This Computer? Question on the iPhone
Then, you iPhone asks you to enter your PIN code. Enter it to continue.
The PIN code used on the iPhone
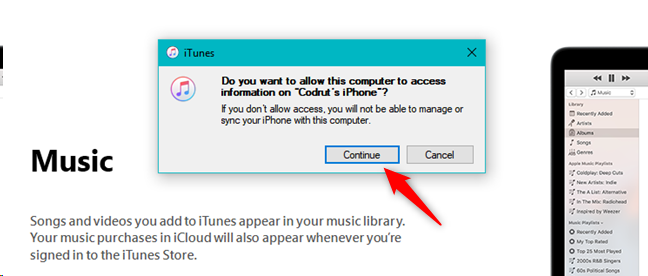
At the same time, the iTunes app on your Windows 10 PC asks you whether "[...] you want to allow this computer to access information on [your] iPhone". Approve this action by pressing the Continue button.
Allow the computer to access information on the iPhone
That's it: now your iPhone is connected to your Windows 10 PC.
Why would you want to connect your iPhone to your Windows 10 PC?
First of all, because you can see, open and sync the files found on your iPhone. In the iTunes app from your PC, select the folders you want to see, from the left side of the window.
The folders from the iPhone, shown in iTunes
You can also gain access to more complex features on your iPhone, including backup options and advanced settings. For that, in the iTunes app for Windows 10, click or tap the iPhone icon from the top-left area. Look carefully, because the icon is tiny.
The iPhone device button from the top-left area of the iTunes app
Among others, the iTunes app lets you both update your iPhone to the latest version of iOS, as well as restore it if something goes wrong. It also lets you choose whether to automatically back up your iPhone to your iCloud or to your Windows 10 computer, as well as let you create manual backups whenever you want.
Information and backup options for the iPhone
Also, you get a few Options for controlling things such as the videos and songs preferences, or accessibility options. However, one option that many people want to use is the one that allows your iPhone to sync with your Windows 10 PC over Wi-Fi. Let's see it:
How to connect your iPhone to your Windows 10 PC, using Wi-Fi
If you have already successfully connected your iPhone to your PC using a cable, you can also configure them so that they sync over Wi-Fi, no cables involved.
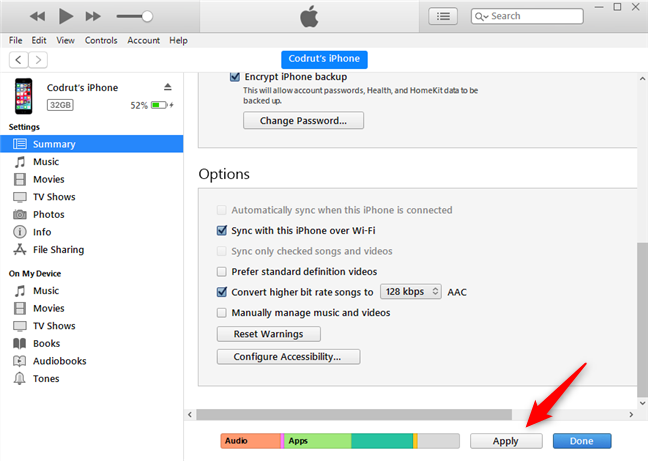
To do so, keep your iPhone connected to your PC and, in the iTunes Options enable the setting that says "Sync with this iPhone over Wi-Fi."
Enable the sync over Wi-Fi between the iPhone and Windows 10
Then click or tap Apply or Done, at the bottom-right corner of the window, to save your settings.
Saving the settings
Did you connect your iPhone to your Windows 10 PC?
As you have seen it is quite easy to connect your iPhone to your Windows 10 PC. All you need is the iTunes app and a cable. Afterward, you can even let go of the cable and connect the two devices over Wi-Fi. Before closing this tutorial, let us know if everything worked well for you. Also, if you encountered problems, do not hesitate to share them in a comment.


Discussion (0)
Be the first to comment.