

Google’s Nearby Share feature offers a convenient way to transfer photos, videos, documents, and other files wirelessly between Android devices without using the internet or a USB cable. But did you know that Nearby Share is available on PC also, not just on Android devices? In this guide, I’ll show you how to use Google’s Nearby Share app to share files between your Android devices and your Windows computers.
IMPORTANT: Android’s Nearby Share works with Windows computers, too, not just with Android devices. However, there are a few things you’ll need for that:
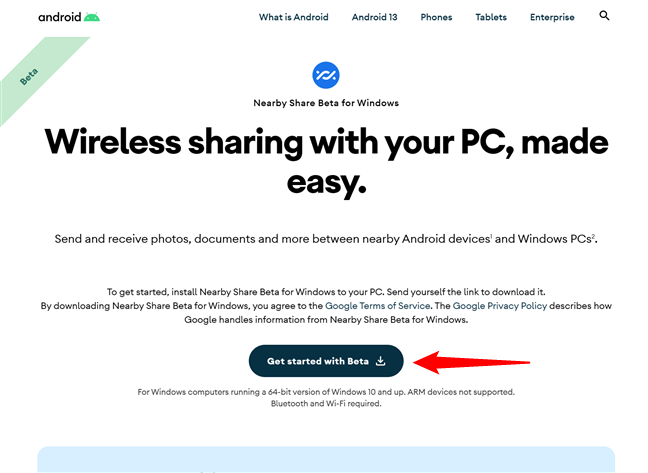
 Click the Get started with Beta button
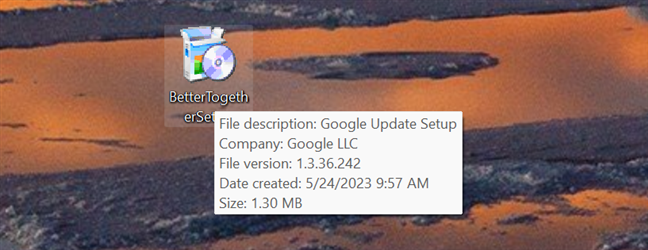
That triggers the download of the installer file for the Nearby Share app. Choose to launch it directly or save it somewhere on your computer and then double-click (or double-tap) on it to start the installation. Note that the executable file you’re downloading is called BetterTogetherSetup, and it has a small size of just 1.30 MB.
Click the Get started with Beta button
That triggers the download of the installer file for the Nearby Share app. Choose to launch it directly or save it somewhere on your computer and then double-click (or double-tap) on it to start the installation. Note that the executable file you’re downloading is called BetterTogetherSetup, and it has a small size of just 1.30 MB.
 Double-click on BetterTogetherSetup
Once you’ve launched the installer, the Google Nearby Share app immediately starts downloading and installing on your PC. There are no actions required of you during this time. Just wait for everything to be done.
Double-click on BetterTogetherSetup
Once you’ve launched the installer, the Google Nearby Share app immediately starts downloading and installing on your PC. There are no actions required of you during this time. Just wait for everything to be done.
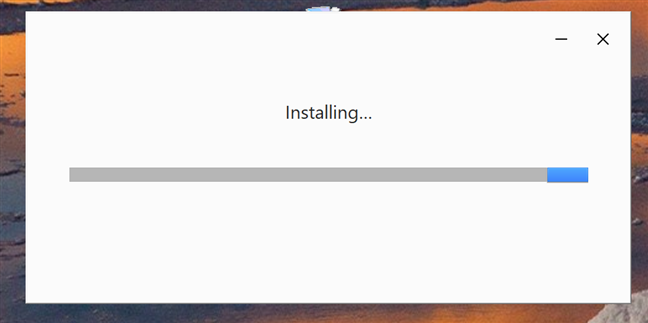
 Installing the Google Nearby Share app
When the installation is over, a window called “Nearby Share Beta from Google” opens, asking you to sign in. While you also have the option to “Use [Nearby Share] without an account,” I recommend you Sign in using your Google account.
That will offer you additional options for customizing your sharing preferences, including the possibility of allowing only your contacts to share files and other content with you.
Installing the Google Nearby Share app
When the installation is over, a window called “Nearby Share Beta from Google” opens, asking you to sign in. While you also have the option to “Use [Nearby Share] without an account,” I recommend you Sign in using your Google account.
That will offer you additional options for customizing your sharing preferences, including the possibility of allowing only your contacts to share files and other content with you.
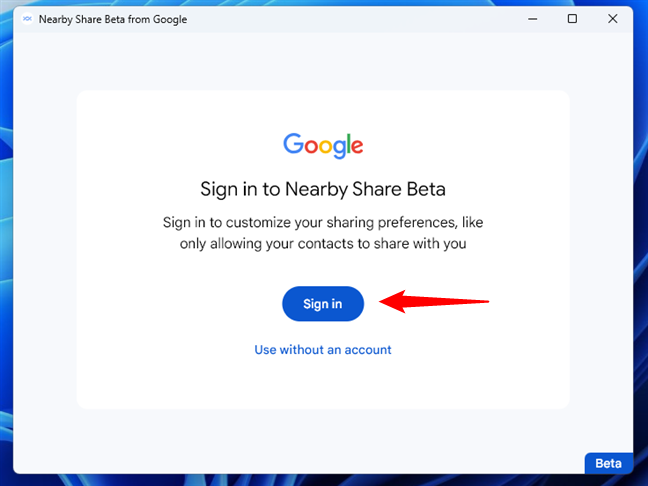
 Sign in to Google Nearby Share
If you’ve chosen to sign in, a browser window opens, allowing you to enter the details of your Google account. Do so, and then move on to the next step. If you’ve decided to use the app without an account, you’re automatically taken to the next step: configuring the app.
TIP: If you don’t have a Google account, here’s how to create one.
Sign in to Google Nearby Share
If you’ve chosen to sign in, a browser window opens, allowing you to enter the details of your Google account. Do so, and then move on to the next step. If you’ve decided to use the app without an account, you’re automatically taken to the next step: configuring the app.
TIP: If you don’t have a Google account, here’s how to create one.
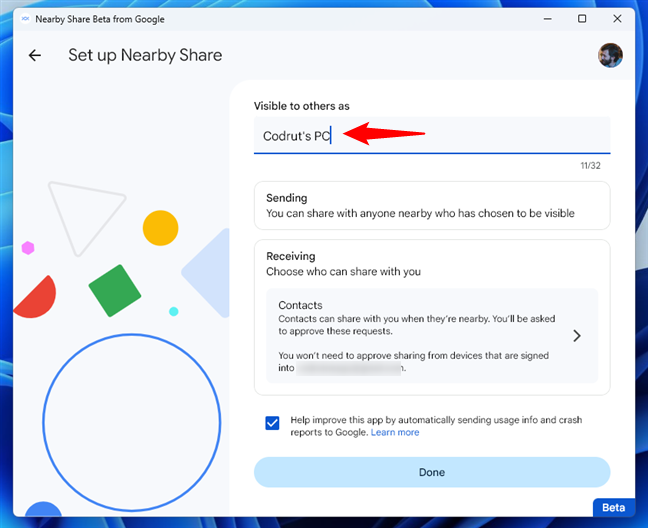
 Set a name for the Windows PC
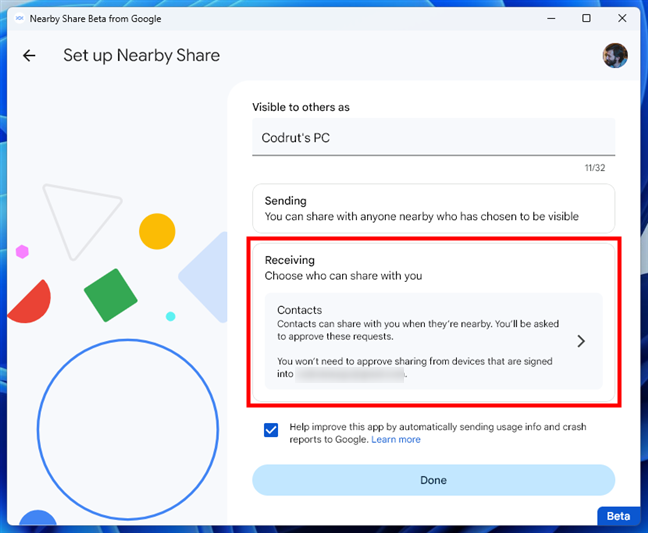
Then, you can choose who can send you files or other content. To do that, click or tap on the Receiving section.
Set a name for the Windows PC
Then, you can choose who can send you files or other content. To do that, click or tap on the Receiving section.
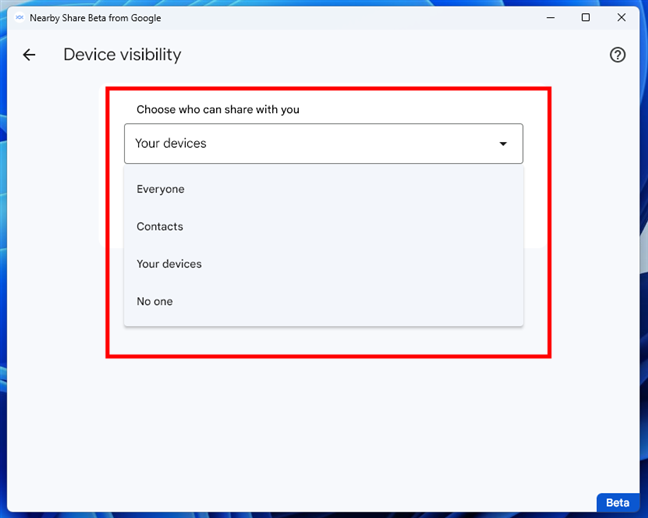
 Choose how to receive files via Nearby Share
Then, select whether you want your Windows computer to be able to receive files via Nearby Share from:
Choose how to receive files via Nearby Share
Then, select whether you want your Windows computer to be able to receive files via Nearby Share from:
 Set up Nearby Share Device visibility
When done, click or tap the back arrow in the top-left corner to return to the “Set up Nearby Share” page. There, you have only one more option to configure: choose whether you want to “Help improve this app by automatically sending usage info and crash reports to Google.” Put a checkmark in the box if you want to do that, or uncheck it if you don’t.
Set up Nearby Share Device visibility
When done, click or tap the back arrow in the top-left corner to return to the “Set up Nearby Share” page. There, you have only one more option to configure: choose whether you want to “Help improve this app by automatically sending usage info and crash reports to Google.” Put a checkmark in the box if you want to do that, or uncheck it if you don’t.
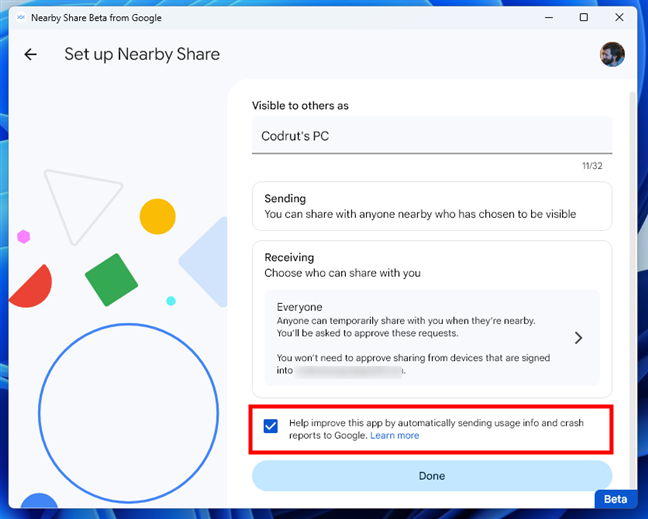
 Choose whether to send anonymous data to Google
Then, press the Done button at the bottom to start using Nearby Share on your Windows PC.
Choose whether to send anonymous data to Google
Then, press the Done button at the bottom to start using Nearby Share on your Windows PC.
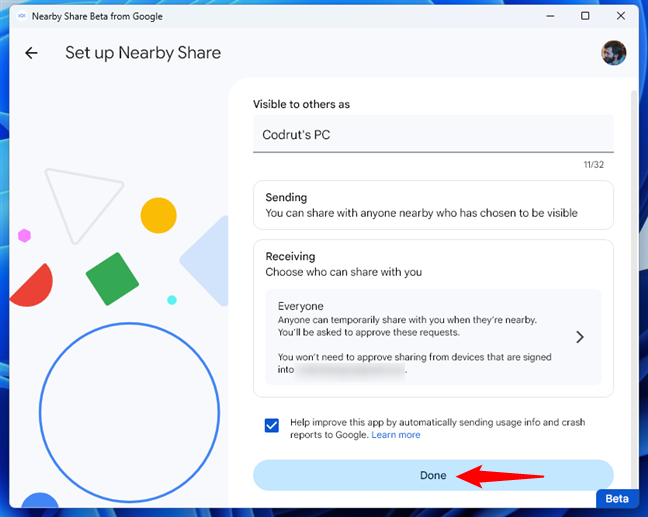
 Click the Done button
Now the Nearby Share app loads its main interface, which is the place where you can send files or folders, monitor the ones you’re receiving, and also change any of the settings you’ve configured earlier.
Click the Done button
Now the Nearby Share app loads its main interface, which is the place where you can send files or folders, monitor the ones you’re receiving, and also change any of the settings you’ve configured earlier.
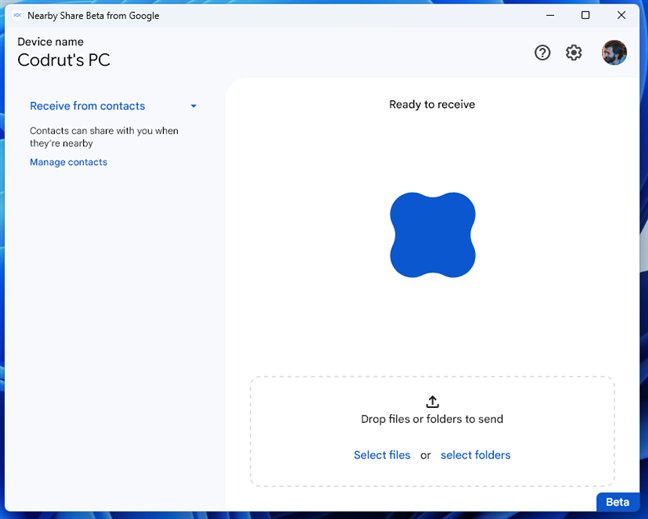 The Google Nearby Share app is ready
TIP: If you need to, you can also change all the previous options later on by accessing the Settings page of the Google Nearby Share app. To get to it, click or tap the cogwheel button in the top-right corner of the app.
The Google Nearby Share app is ready
TIP: If you need to, you can also change all the previous options later on by accessing the Settings page of the Google Nearby Share app. To get to it, click or tap the cogwheel button in the top-right corner of the app.
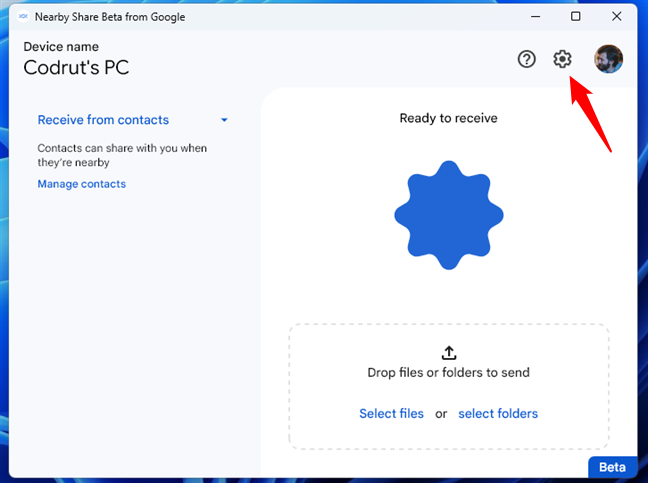
 The Settings button in the Google Nearby Share app
Before you can actually send or receive files with Nearby Share between your Windows PC and other Android devices, though, you’ll also need to configure Nearby Share on your Android smartphone or tablet.
The Settings button in the Google Nearby Share app
Before you can actually send or receive files with Nearby Share between your Windows PC and other Android devices, though, you’ll also need to configure Nearby Share on your Android smartphone or tablet.
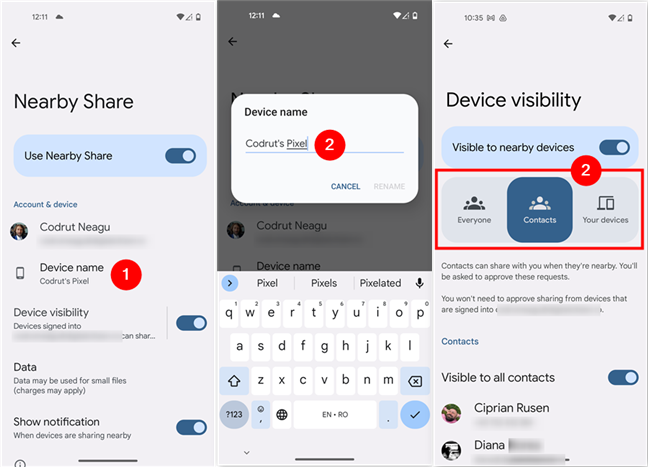
 Enable Nearby Share on Android
Once you’ve done that, you can also configure Nearby Share on your Android device. Just like on Windows, you can change the name of your device and set its visibility.
Enable Nearby Share on Android
Once you’ve done that, you can also configure Nearby Share on your Android device. Just like on Windows, you can change the name of your device and set its visibility.
 Set up Nearby Share on Android
Next, let’s see how to send and receive files with Nearby Share to and from an Android smartphone or tablet.
Set up Nearby Share on Android
Next, let’s see how to send and receive files with Nearby Share to and from an Android smartphone or tablet.
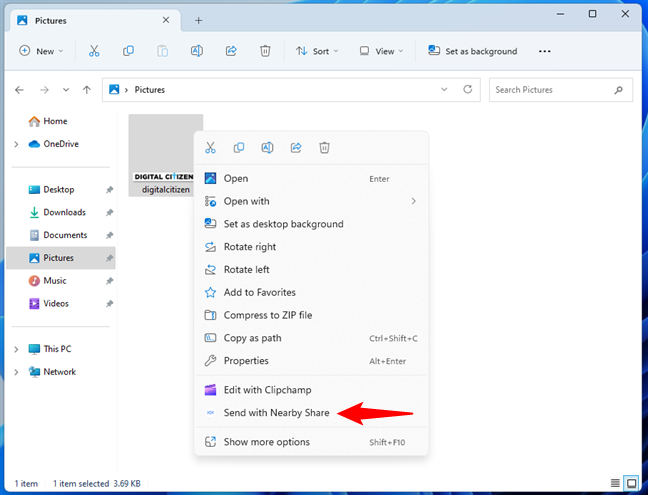
 Send with Nearby Share in Windows
The other method you can use is to open the Google Nearby Share app on your Windows PC, and then drag and drop the file or folder you want to share on top of the Nearby Share window.
Send with Nearby Share in Windows
The other method you can use is to open the Google Nearby Share app on your Windows PC, and then drag and drop the file or folder you want to share on top of the Nearby Share window.
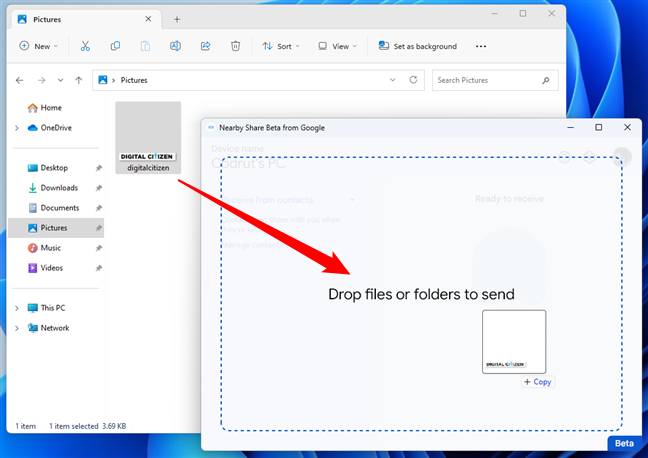
 Use the Nearby Share window to send files
Regardless of which way you go, once you’ve initiated a transfer, the Google Nearby Share app starts looking for available Android devices that are nearby. When the Android smartphone or tablet you want to send the content to appears on your Windows PC’s screen, click or tap on it.
Use the Nearby Share window to send files
Regardless of which way you go, once you’ve initiated a transfer, the Google Nearby Share app starts looking for available Android devices that are nearby. When the Android smartphone or tablet you want to send the content to appears on your Windows PC’s screen, click or tap on it.
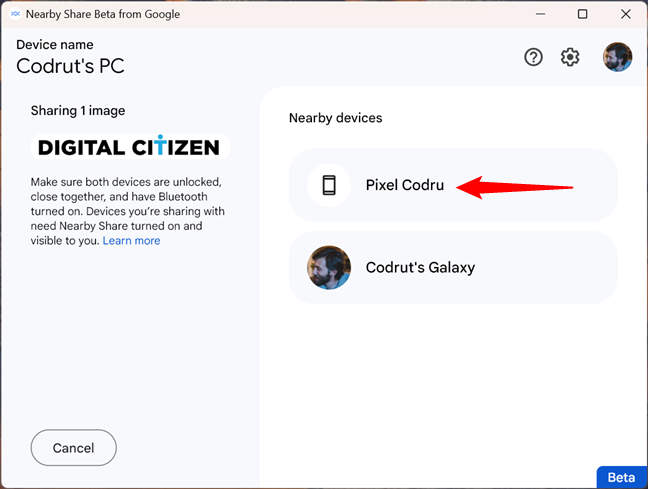
 Choose a nearby device
Then, on the Android smartphone or tablet you’ve selected, you should see a notification asking you to accept or decline the file transfer. Tap Accept to receive the file or folder.
Choose a nearby device
Then, on the Android smartphone or tablet you’ve selected, you should see a notification asking you to accept or decline the file transfer. Tap Accept to receive the file or folder.
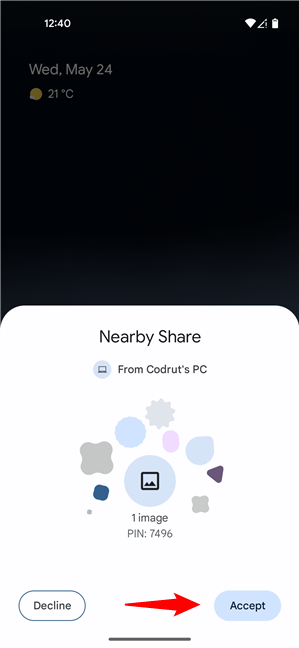
 Accept a file sent via Nearby Share
Once the transfer is over, you can open the file or the folder where it was saved. By default, all the files and folders received via Nearby Share are stored in the Downloads folder on your Android device.
Accept a file sent via Nearby Share
Once the transfer is over, you can open the file or the folder where it was saved. By default, all the files and folders received via Nearby Share are stored in the Downloads folder on your Android device.
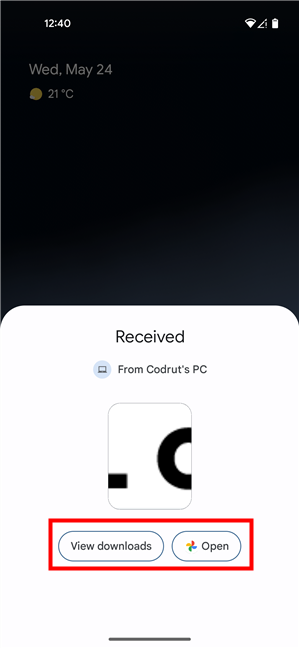 View or open the file on Android
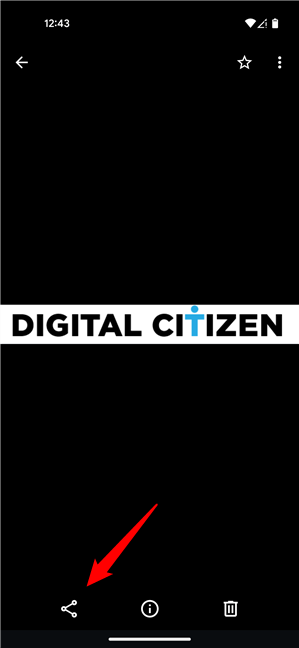 Tap the Share button
Next, select Nearby Share from the list of sharing options by tapping Nearby.
Tap the Share button
Next, select Nearby Share from the list of sharing options by tapping Nearby.
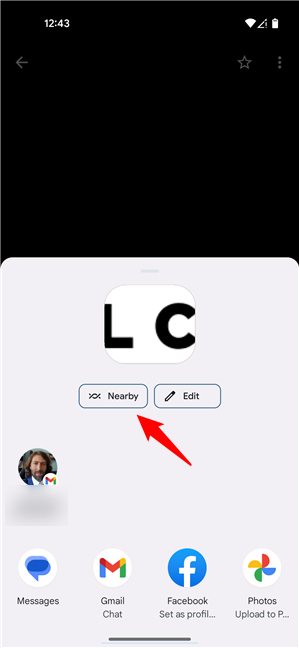 Choose to share Nearby
Wait for your Windows PC to show up as an option on your Android, and then tap on it.
Choose to share Nearby
Wait for your Windows PC to show up as an option on your Android, and then tap on it.
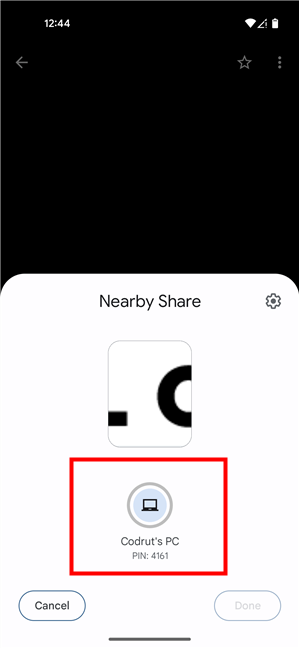 Select the Windows PC
TIP: In case your Windows computer doesn’t appear on your Android device, you may have to make your PC visible by opening the Google Nearby Share app first.
Back on your Windows computer, you should see a notification from the Nearby Share app asking you to either accept or decline the transfer. Click or tap on Accept to receive the file sent from the Android device.
Select the Windows PC
TIP: In case your Windows computer doesn’t appear on your Android device, you may have to make your PC visible by opening the Google Nearby Share app first.
Back on your Windows computer, you should see a notification from the Nearby Share app asking you to either accept or decline the transfer. Click or tap on Accept to receive the file sent from the Android device.
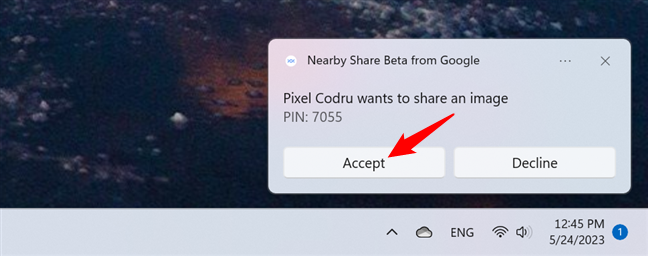
 Nearby Share notification on Windows
If, by any chance, you had the Google Nearby Share app open on your Windows PC, it too shows you a notification about the sharing request. So, you can also Accept or Decline the transfer from the app.
Nearby Share notification on Windows
If, by any chance, you had the Google Nearby Share app open on your Windows PC, it too shows you a notification about the sharing request. So, you can also Accept or Decline the transfer from the app.
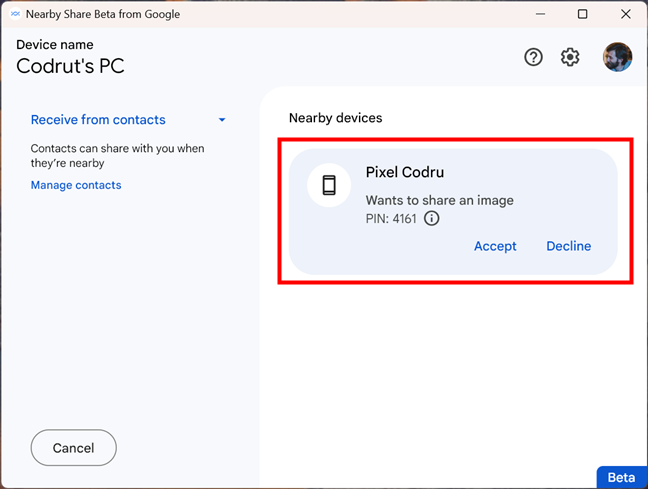 Accept a transfer in the Google Nearby Share app
Either way, once the transfer is over, you can find the file you’ve received via Nearby Share in the Downloads folder on your Windows computer.
Accept a transfer in the Google Nearby Share app
Either way, once the transfer is over, you can find the file you’ve received via Nearby Share in the Downloads folder on your Windows computer.
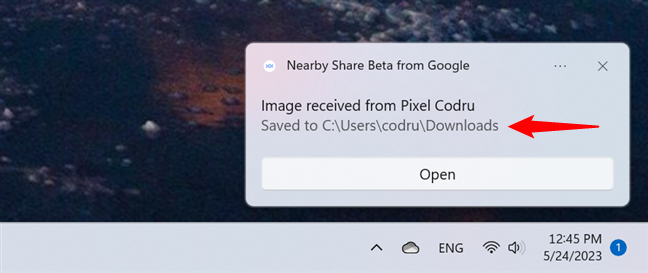
 The file has been transferred from Android to Windows
TIP: If you want to save the files transferred via Nearby Share in another folder on your Windows PC, you can. Open the Google Nearby Share app, click or tap the Settings button (its icon is a cogwheel, and you can find it in the top-right corner of the app), and select the folder you prefer by clicking or tapping the Change option next to “Save received files to.” This is the only setting that you didn’t get the option to configure during the initial wizard.
The file has been transferred from Android to Windows
TIP: If you want to save the files transferred via Nearby Share in another folder on your Windows PC, you can. Open the Google Nearby Share app, click or tap the Settings button (its icon is a cogwheel, and you can find it in the top-right corner of the app), and select the folder you prefer by clicking or tapping the Change option next to “Save received files to.” This is the only setting that you didn’t get the option to configure during the initial wizard.
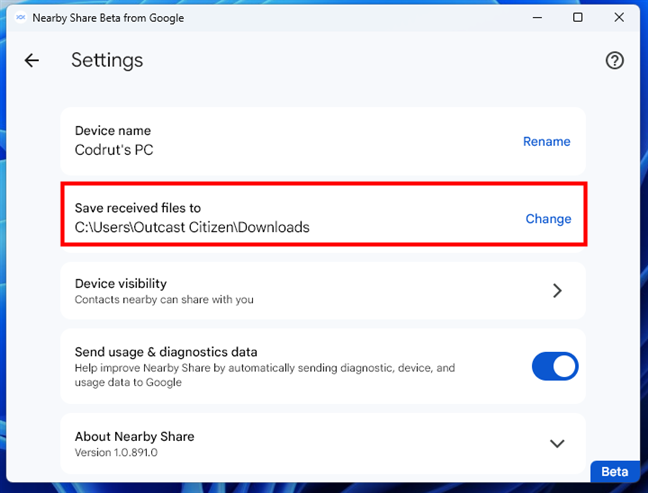
 Change the Nearby Share folder in Windows
And… that’s it!
Change the Nearby Share folder in Windows
And… that’s it!
- a Windows PC running Windows 10 or Windows 11 with Bluetooth enabled and the Google Nearby Share app installed;
- an Android device with Bluetooth and location services enabled.
Step 1. Get the Google Nearby Share app on your Windows PC
For Nearby Share to work with Windows, you’ll need to download and install the Google Nearby Share app on your computer. To do that, first, open a web browser on your PC, and go to this webpage. Once it’s loaded, click or tap the “Get started with Beta” button in order to download the app.Step 2. Set up Google Nearby Share on Windows
Now the Google Nearby Share app asks you a few questions about how you’d like it to work. First, choose a name for your Windows computer: this is how your PC will be “Visible to others [...].”- Everyone: Your Windows PC is visible to anyone close by using Nearby Share.
- Contacts: Your computer is visible only to nearby contacts. If you choose this option, you can opt to make your PC visible to all contacts or only to specific contacts that you select individually.
- Your devices: Your PC is visible only to your other devices (Windows computers, Android devices) on which you’re signed in with the same Google account.
- No one: Your Windows computer isn’t visible, and nobody can share files with you. In other words, Nearby Share is deactivated on your Windows PC.
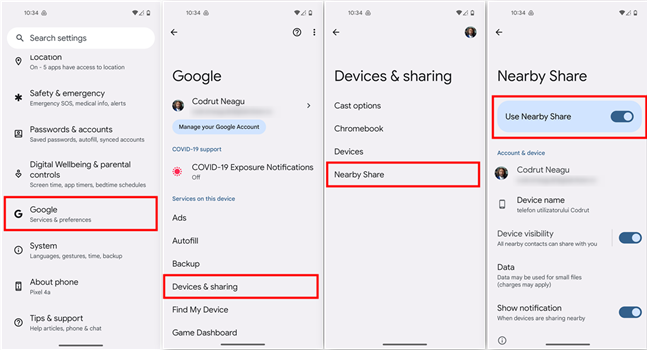
Step 3. Set up Nearby Share in Android
The steps to configure Nearby Share on Android devices are just as simple. I’ve already covered them, in detail, in this separate guide: How to use Nearby Share on Android. However, if you don’t have time to read that one, too, know that to turn on Nearby Share on your Android device, you have to go to Settings > Google > Devices & sharing > Nearby Share and enable the “Use Nearby Share” switch.Step 4. How to use Nearby Share on Windows & Android
4.1. Send files with Nearby Share from Windows to Android
There are two ways to start sending a file or folder from your Windows PC to your Android device: The fastest one is to open File Explorer, right-click or press and hold on the file or folder you want to transfer, and select “Send with Nearby Share” from the context menu.4.2. Send files with Nearby Share from Android to Windows
If you want to transfer a file from your Android smartphone or tablet to your Windows PC, here’s what you’ll have to do: First, open the file in an app that supports the Android Share menu. For example, an app such as Gallery, Files, or Google Photos. Then, tap the Share button (you can find it on the app’s toolbar or in its main menu).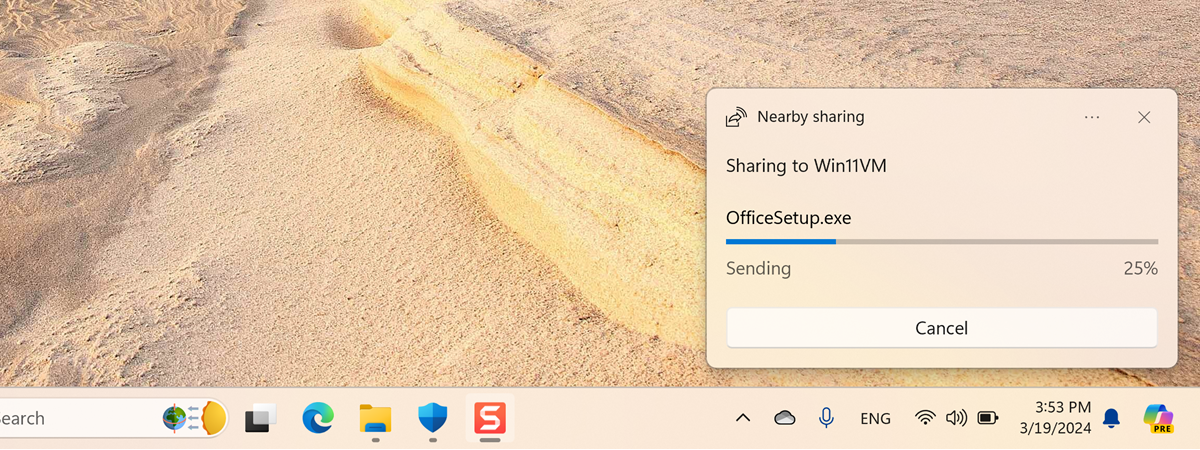
Discussion (0)
Be the first to comment.