

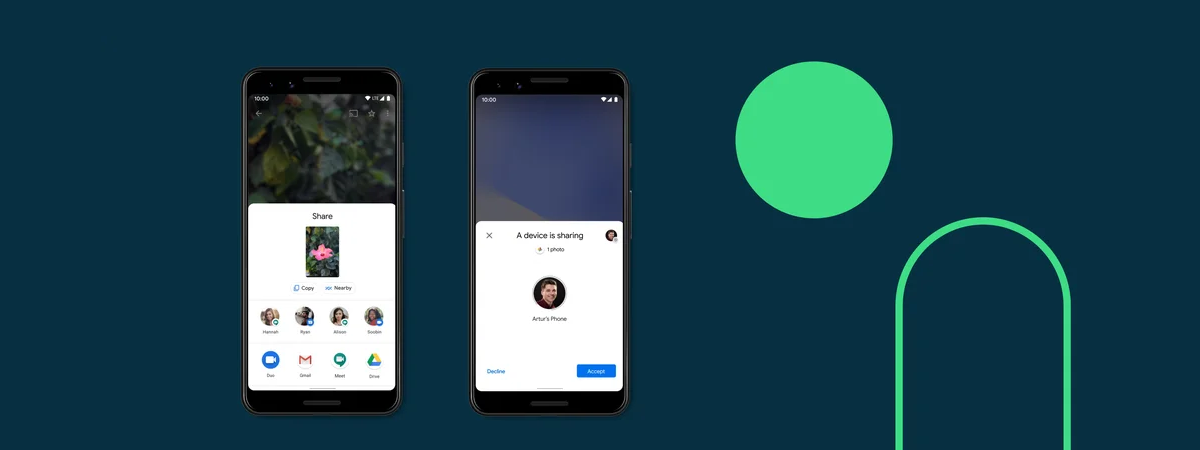
Nearby Share is a feature available on Android that allows you to share files, photos, links, and more with other nearby devices. It works with or without an internet connection, using Bluetooth, Wi-Fi, or mobile data to create a secure connection between the devices. Do you want to know how it all works? If you do, here’s how to use Nearby Share on Android smartphones and tablets:
NOTE: To write this guide, I used a Google Pixel 4a and a Samsung Galaxy S20 FE. However, because every step is identical on both smartphones, I’m using only one set of screenshots, taken on the official Android 13 version installed on the Pixel 4a. As this is a feature found in Android’s Google settings, you should have the exact same steps and screens regardless of who made your smartphone or tablet. Also, keep in mind that older Android versions, prior to Android 13, don’t support some of the Nearby Share features presented in this tutorial.
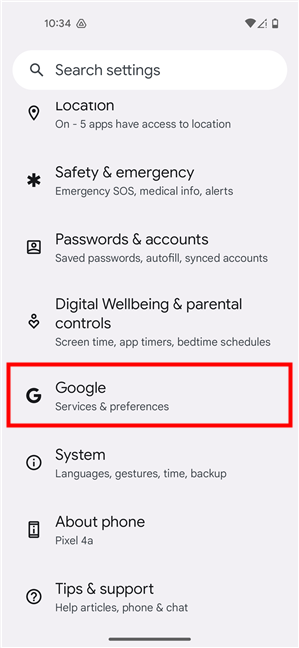
 Open the Android Settings and go to Google
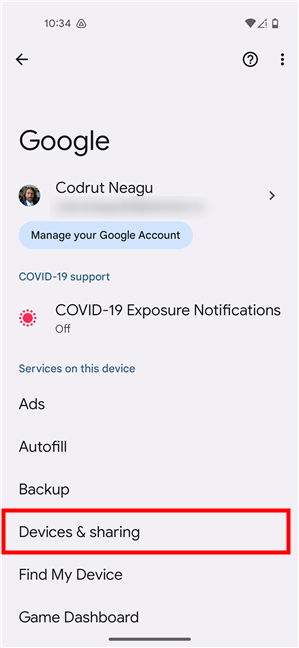
On the Google settings page, tap Devices & sharing.
Open the Android Settings and go to Google
On the Google settings page, tap Devices & sharing.
 Access Devices & sharing
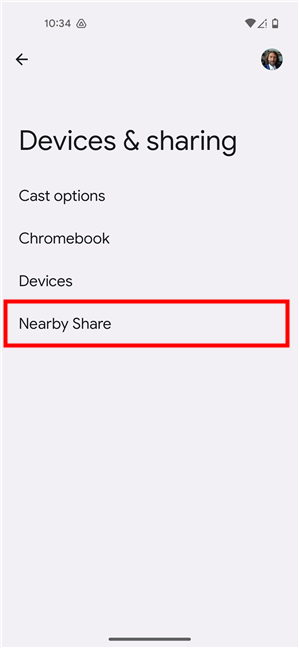
This opens the Devices & sharing page, where the last option in the list is Nearby Share. Tap on it.
Access Devices & sharing
This opens the Devices & sharing page, where the last option in the list is Nearby Share. Tap on it.
 Tap on Nearby Share
Now you should see the Nearby Share settings page, where you can enable and configure this feature to work exactly how you want. For starters, make sure you turn the “Use Nearby Share” switch on.
Tap on Nearby Share
Now you should see the Nearby Share settings page, where you can enable and configure this feature to work exactly how you want. For starters, make sure you turn the “Use Nearby Share” switch on.
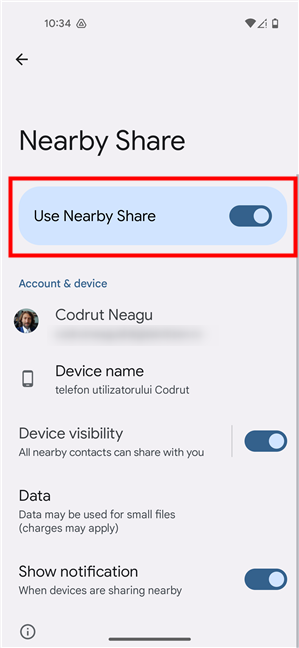 Enable the Use Nearby Share switch
TIP: Instead of going through all the previous steps to access the Nearby Share screen, you can open the Quick Settings panel by swiping down from the top of your Android screen. Then, tap the Nearby Share button.
Enable the Use Nearby Share switch
TIP: Instead of going through all the previous steps to access the Nearby Share screen, you can open the Quick Settings panel by swiping down from the top of your Android screen. Then, tap the Nearby Share button.
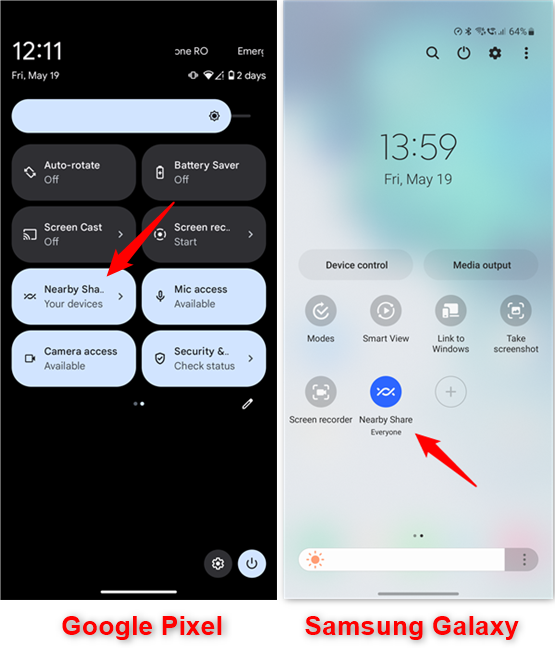
 Open Nearby Share from the Quick Settings
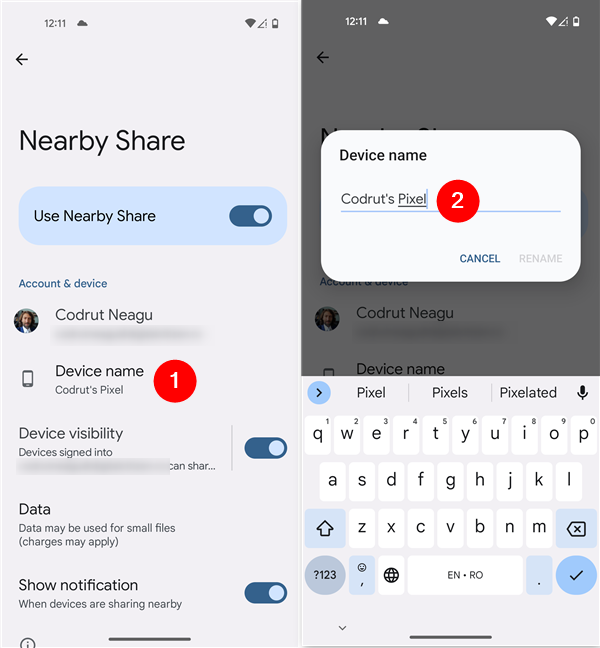
 Give a name to your Android device
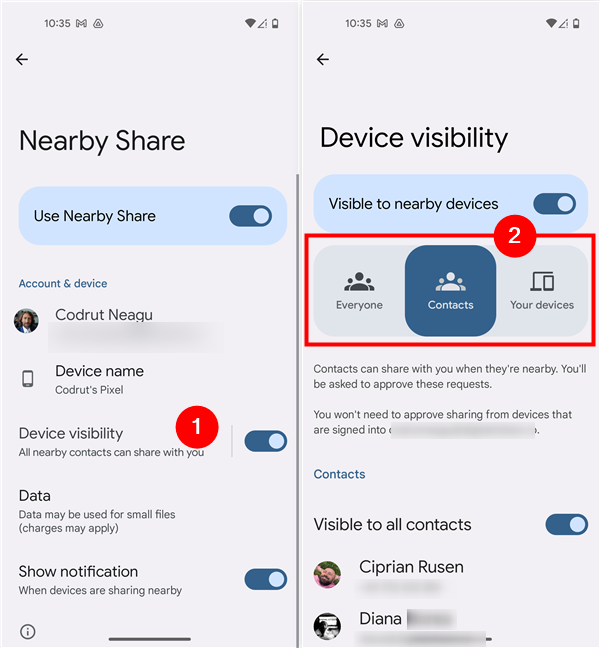 Configure Device visibility for Nearby Share
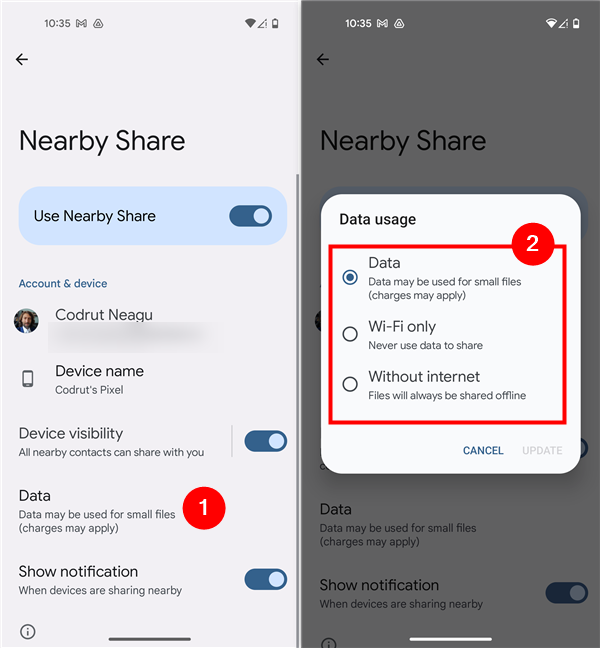 Choose how let Nearby Share use data
After selecting your preferred option, tap on Update at the bottom of the Data usage window.
Choose how let Nearby Share use data
After selecting your preferred option, tap on Update at the bottom of the Data usage window.
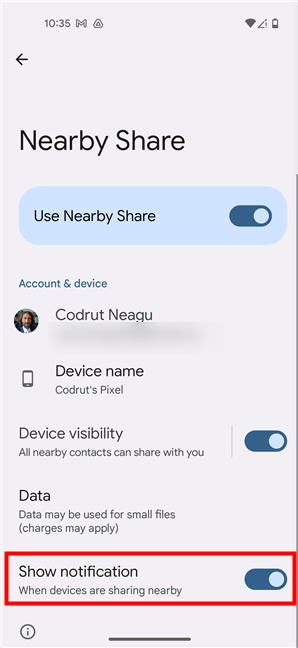
 Allow Nearby Share to show notifications
 How to use Nearby Share on Android
Similarly, you can use Nearby Share to send a link from a browser or a file from the Files app. All you have to do is find the Share option in the app’s menu, tap on it, and select Nearby Share.
How to use Nearby Share on Android
Similarly, you can use Nearby Share to send a link from a browser or a file from the Files app. All you have to do is find the Share option in the app’s menu, tap on it, and select Nearby Share.
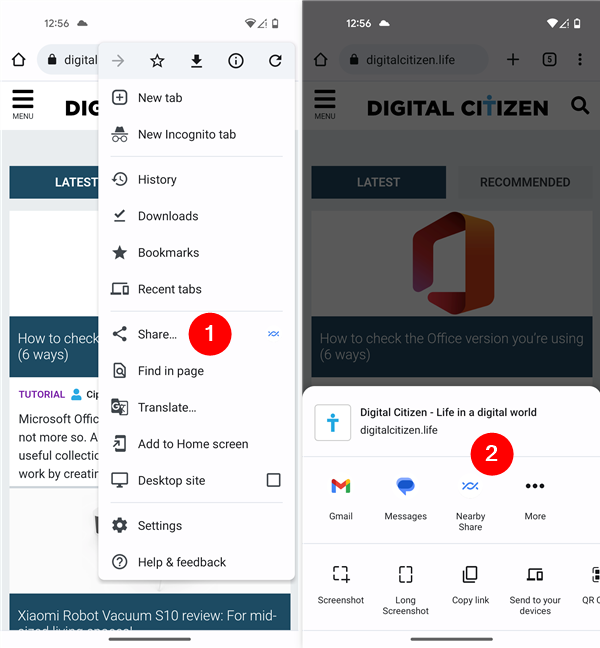 How to share a link with Nearby Share on Android
 Tap the device that will receive the file or content
 Accept the Narby Share request
 The file or content sent via Nearby Share has been transferred
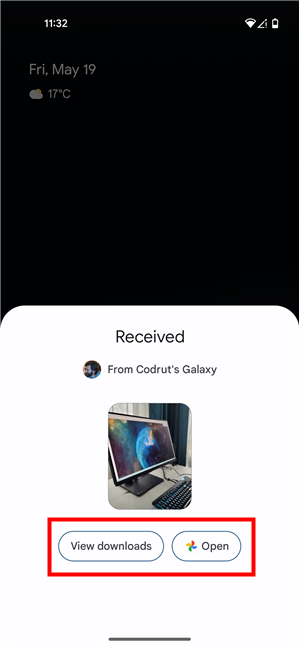
On the other device, the one that received the file or content via Nearby Share, a message should also pop up, informing them whether the transfer was successful. Depending on what type of file or content was sent, they will have different options to handle it. For example, if a photo was shared, they can view it in the Downloads folder or open it with their default photo app. Similarly, if a link was shared, they would have the option to open it in their default web browser, and so on.
The file or content sent via Nearby Share has been transferred
On the other device, the one that received the file or content via Nearby Share, a message should also pop up, informing them whether the transfer was successful. Depending on what type of file or content was sent, they will have different options to handle it. For example, if a photo was shared, they can view it in the Downloads folder or open it with their default photo app. Similarly, if a link was shared, they would have the option to open it in their default web browser, and so on.
 A photo received via Nearby Share
That’s pretty much all there is to know about how to use nearby sharing on Android smartphones and tablets. But wait, are you wondering whether Nearby Share is available on PC too? Well, the answer is yes, and I promise I’ll get back to you with another tutorial just for that.
A photo received via Nearby Share
That’s pretty much all there is to know about how to use nearby sharing on Android smartphones and tablets. But wait, are you wondering whether Nearby Share is available on PC too? Well, the answer is yes, and I promise I’ll get back to you with another tutorial just for that.
Step 1. Enable Nearby Share on Android
If you want to send or receive files or other types of content using Nearby Share on your Android device, you’ll first have to enable this feature. To do that, open the Settings app and scroll until you find the Google entry. Then, tap on it.Step 2. Configure Nearby Share on Android
Among other things, the Android operating system allows you to customize how your device appears to others when using Nearby Share, as well as choose who can see your device. Here’s how to configure Nearby Share on your Android smartphone:How to name your Android device
On the Nearby Share page, under the “Use Nearby Share” switch, you should see the account you’re using on your smartphone, followed by the Device’s name. The latter is the name that the other smartphones, tablets, or even computers using Nearby Share will see when they attempt to share content with you. If you don’t like the default name assigned to your Android device in Nearby Share, tap the Device name entry and enter another one in the pop-up. Then, tap Rename to save your new Device name.How to choose who can see your Android device
Under the Device name entry, there’s a switch called Device visibility. If it’s off, no other devices around you can share content with you. However, if you initiate a share, your device automatically becomes visible. If you intend to receive files, photos, or other types of content from nearby devices, you should enable this switch. Once you do, tap on the Device visibility entry (not on its switch), and you will also be able to choose one of three settings concerning how your Android device is going to be available for other devices close by:- Everyone: While your screen is on and unlocked, your Android smartphone or tablet is visible to anyone nearby.
- Contacts: As long as your smartphone or tablet is turned on and unlocked, it’s visible to your nearby contacts. By default, all your contacts can see your device. However, you can make your device visible only for some contacts by disabling the “Visible to all contacts” switch and selecting just the ones you want.
- Your devices: Your smartphone or tablet is visible to all the nearby devices on which you’re using the same Google Account.
How to configure the data usage of Nearby Share
Next, you choose how you’d like Nearby Share to use data on your Android device. To do so, tap the Data entry under Device visibility. Again, you’ll get three different options to choose from:- Data: Allows Nearby Share to use your Android mobile data plan for transferring files. This is the default option, but you should use it only when sending or receiving links or small files. Otherwise, your mobile operator might charge you for the data used.
- Wi-Fi only: Instructs Nearby Share to use only Wi-Fi for transferring content to and from your device. It works best when both devices involved in a Nearby Share transfer are connected to the same wireless network. If they’re not, Nearby Share should automatically establish a WiFi Direct connection between the devices.
- Without internet: Denies internet access for Nearby Share. Transfers are still possible using other offline means, such as Bluetooth or WiFi, but are usually slower.
How to make your Android show Nearby Share notifications
Last but not least, you can also choose whether you want your Android device to notify you when a nearby device wants to share something with you. The last setting on the Nearby Share page is the Show notification switch. If you want to receive notifications, make sure to leave this switch on. If you turn it off, you’ll have to open Nearby Share on your Android before you get notified that someone else wants to send you files.Step 3. Select the file or content to share
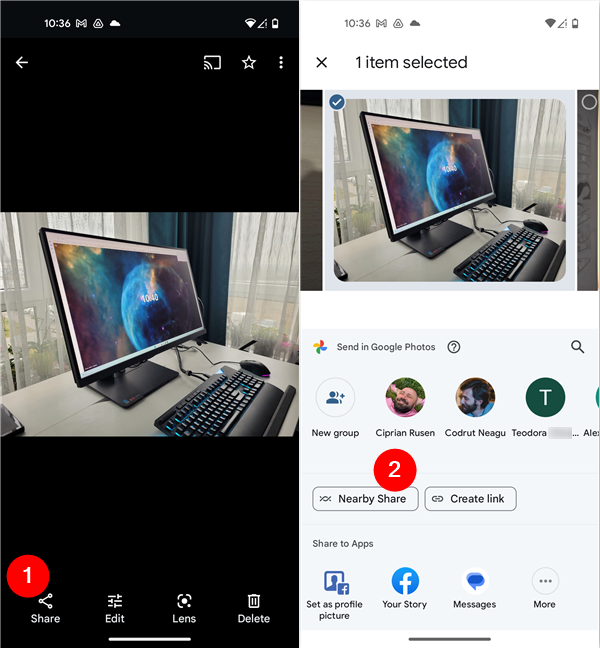
Once you’ve finished configuring Nearby Share on your Android smartphone or tablet, you can start using it to transfer content. It’s important to know that you can use Nearby Share from any app that offers the Android Share menu. For example, if you want to share a photo, you can do it from the Photos or Gallery app. Just tap the Share icon and choose Nearby Share from the list of options.Step 4. Select the nearby device to share with
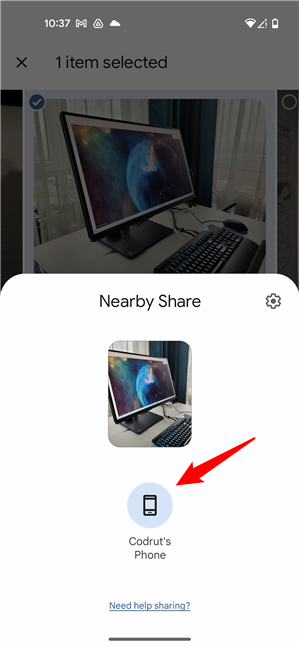
Nearby Share will then scan for other devices that have this feature enabled and are within range. It may take a few seconds for all the available devices to show up. Once they do, tap the device to which you want to transfer the file, link, or any other content selected earlier.Step 4. Wait for the other device to accept the Nearby Share transfer
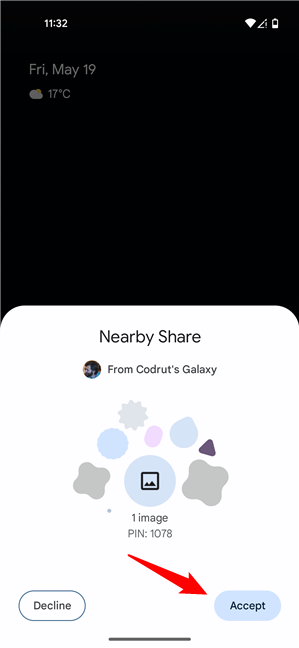
The device selected during the previous step should receive a notification asking them to accept or decline the transfer. If it’s accepted, Nearby Share will start transferring the file or content to that device. If declined, the transfer is canceled.Step 6. Nearby Share transfers the file or content
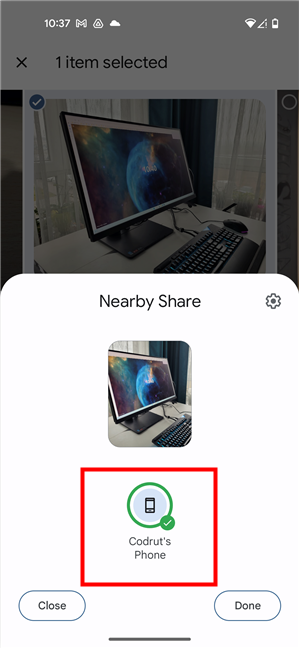
If the Nearby Share was accepted by the other party, the file or content you’ve selected is now transferred. When it’s over, your Android device will let you know about it.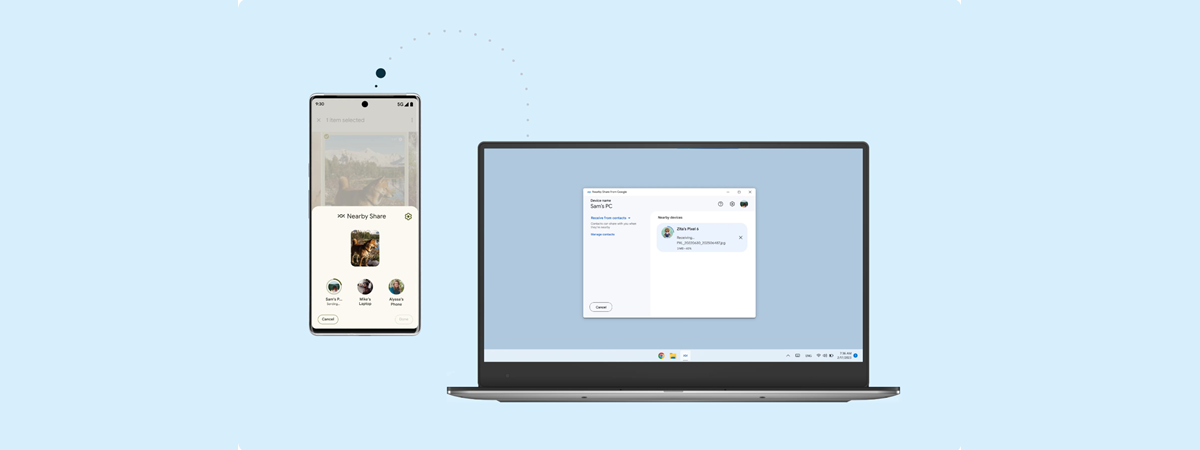

Discussion (0)
Be the first to comment.