Connecting to wireless networks in Windows 10 is an easy and straightforward process, involving a few simple steps. It is true that it depends on whether the wireless router broadcasts the name of the Wi-Fi network or not. However, if it does, connecting to that network is as simple as entering its password and choosing whether you want your Windows 10 PC or device to be visible to other devices in the same network. So without further ado, let's see how to connect to wireless networks on a laptop or tablet with Windows 10:
NOTE: The screenshots used in this article are from Windows 10 with May 2019 Update, which is available to all Windows 10 users, for free, starting May 2019.
How to connect your Windows 10 PC or device to WiFi
If a wireless network broadcasts its name (also known as SSID), it is automatically detected by any Windows 10 device that is close enough to the coverage area of that network. You can see that a WiFi network is in range by hovering the mouse cursor over the internet icon from your system tray: it says that "Connections are available."
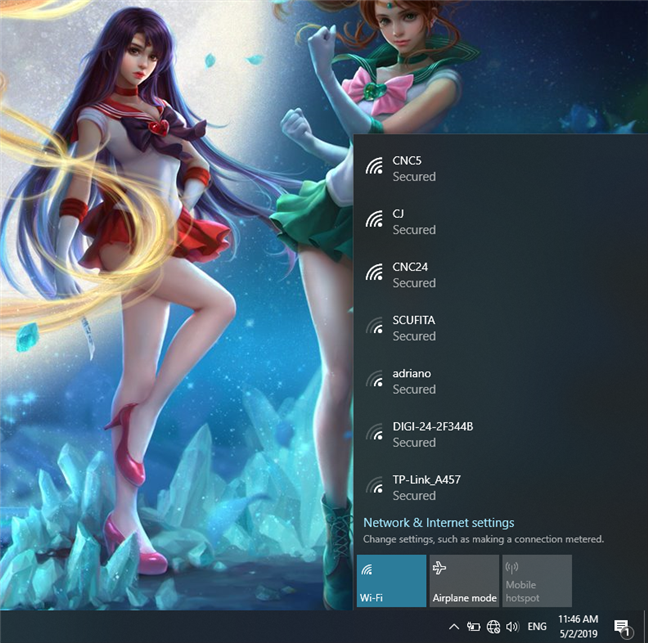
To access the list of available wireless networks, click or tap the network icon from the Windows 10 system tray, and you should see something like this:
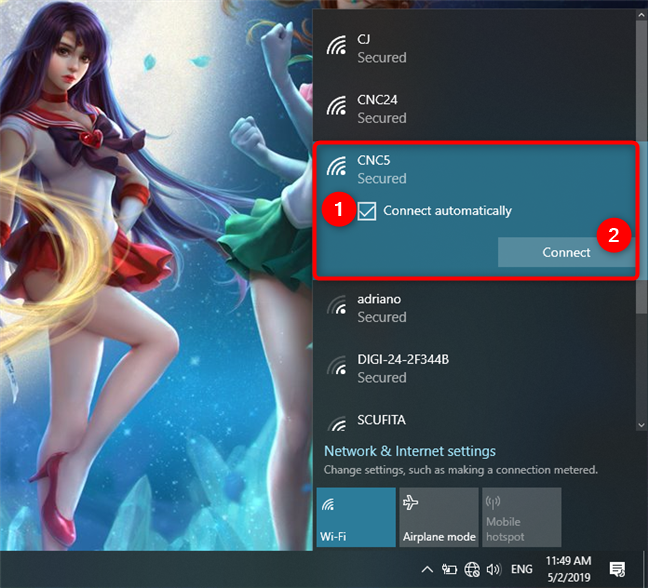
Locate the network to which you want to connect and click or tap on its name. If it is a network you know and you intend to connect to it regularly, you should also check the option that says: "Connect automatically." This way, whenever your Windows 10 PC or device is in that wireless network's range, it automatically connects to it. Then, click or tap Connect.
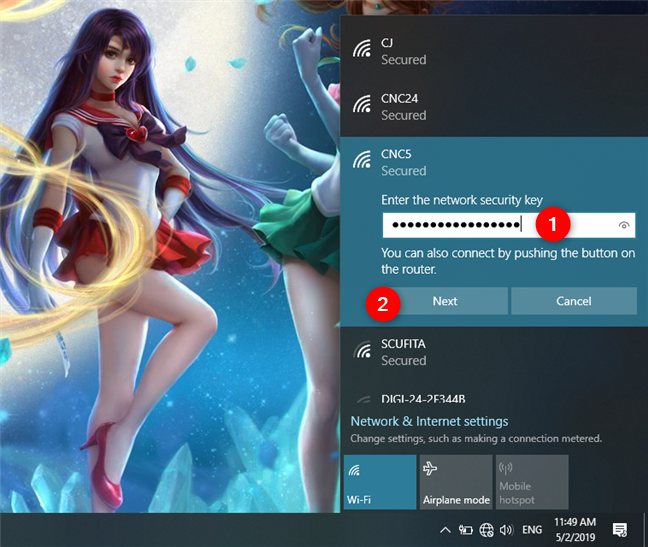
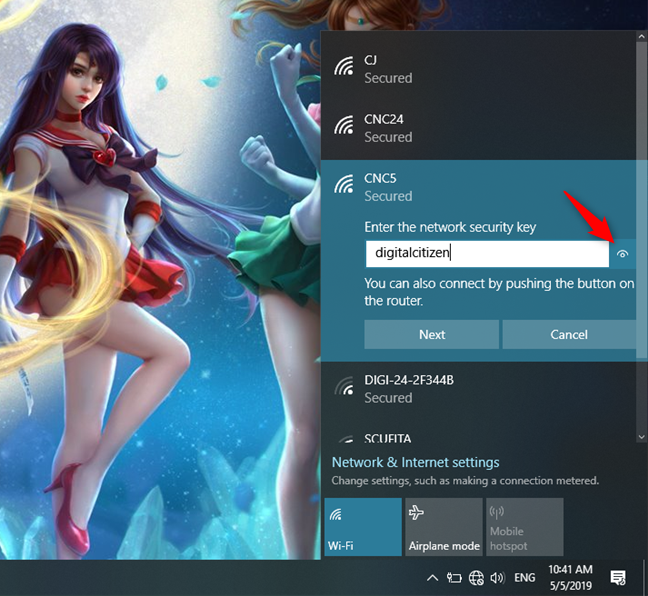
After you have clicked or tapped on Connect, Windows 10 runs a scan for the security settings of the wireless network. When done, it asks you for the security key. It is the password required by the network to connect to it. Enter it and press Next.
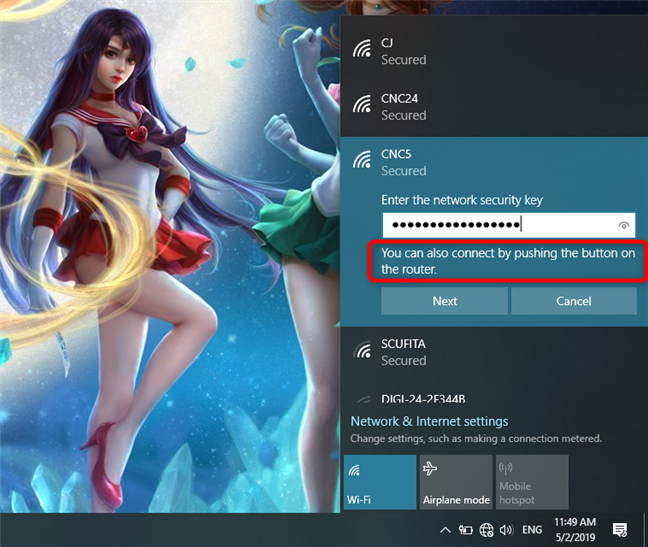
If the broadcasting router supports WPS and this feature is enabled, you can also connect by pushing the WPS button on your router.
NOTE: If you chose to enter the password for the wireless network, you could double check its accuracy by clicking or tapping the eye-like icon on its right side, before pressing Next.
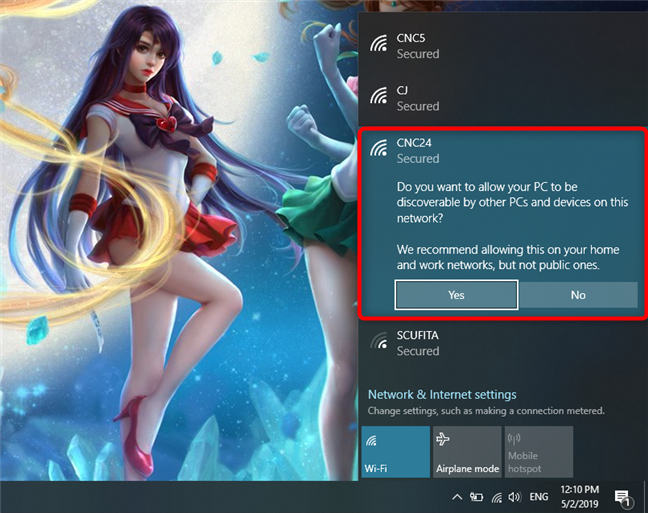
Once your Windows 10 PC or device establishes the connection to the wireless network, it asks whether you want to set its location as private or as public.
If you choose Yes, you choose to "allow your PC to be discoverable by other PCs and devices on this network." This is what you should do if you are connecting to your home or work wireless network.
If you are connecting to a public wireless network, choose No. If you do not choose anything and close this dialog, Windows 10 sets this new network as public, by default. To learn more about network locations in Windows, read this guide: What are network locations in Windows?.
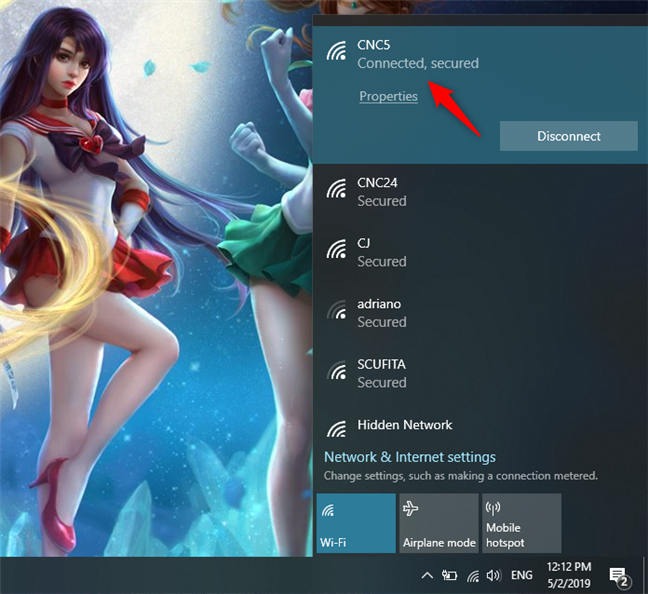
Once the sharing part is over, your Windows 10 PC or device is connected to the wireless network you chose.
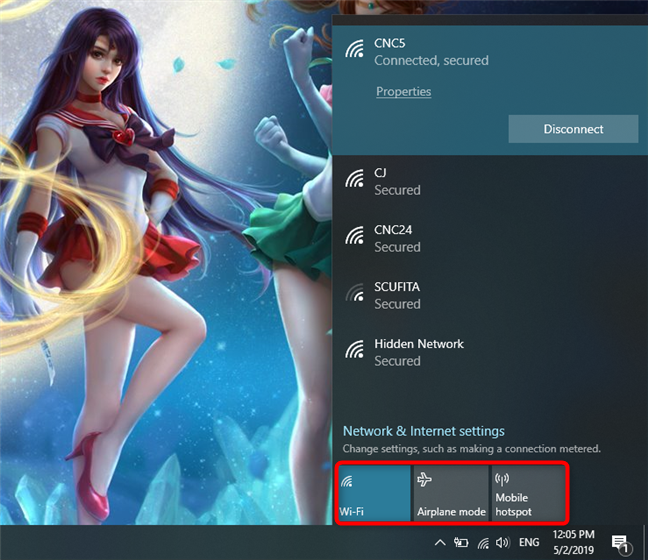
On the bottom of the network panel, there are also a few other large buttons:
- Wi-Fi: a click or a tap on the Wi-Fi button enables or disables the wireless card installed on your device
- Airplane mode: pressing the Airplane mode button disables both the wireless card and any other radio emitter installed, such as Bluetooth chips. Disabling the wireless card or entering the airplane mode means that your device no longer attempts to connect to any network. It also helps to preserve the battery life of your device when you do not work online.
- Mobile hotspot: once you are connected to the internet, pressing on this button lets you turn your Windows 10 device in a mobile hotspot.
How to disconnect from WiFi in Windows 10
If you no longer want to use a particular wireless network you are connected to, you can always disconnect from it.
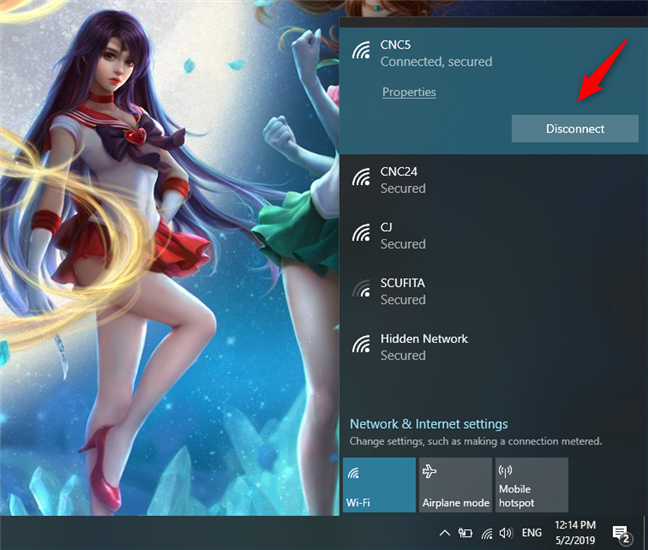
To do that, first open the list of wireless networks, by clicking or tapping on the network icon from the system tray.
In the list of available wireless networks, locate the one you are connected to. That should be easy because, near that WiFi network's name, you see a text like "Connected, secured." Click or tap the Disconnect button.
Your Windows 10 PC or device immediately disconnects, and you can now choose to connect to another Wi-Fi network if that's what you want.
How to fix problems with your WiFi in Windows 10
Even if you followed the instructions provided above carefully, issues could arise. If you find yourself unable to connect to your network of choice, and you are sure the security information you entered is precisely correct, check these articles for some useful troubleshooting information:
- Troubleshoot internet connection problems over a wireless network
- Reset your Windows 10 network settings and adapters, in just 5 clicks
- 4 ways to forget or delete a network in Windows 10 (WiFi)
Did you successfully connect to a wireless network?
As you can see, connecting to a network that broadcasts its name is easy. The steps we mentioned in this article allow you to search for and connect to any wireless network you have access to. However, take care when you are about to connect to an open network in a public place. Usually, such networks do not ask for a security password, and they are free but can put you at risk. Unless you are using a good firewall and antivirus solution, avoid this kind of network.


 06.05.2019