
Did you know that if you have a Windows 10 laptop, tablet, or 2-in-1 device, you can use the WPS button on your router to connect to its Wi-Fi network quickly? And you don’t have to type in your wireless network password? Here’s a complete guide for how to connect to Wi-Fi through WPS on any laptop with Windows 10, as well as on any desktop computer with a wireless network card:
NOTE: If you need a refresher on what WPS (Wi-Fi Protected Setup) is, I recommend reading: What is WPS? Where is the WPS button on a router?. For this procedure to work, you need WPS enabled on the wireless router or access point that broadcasts the Wi-Fi signal in your area. Both the device emitting the wireless signal and the one receiving it must support WPS. Oh, and before we begin, please don’t confuse the Wi-Fi WPS feature with WPS Office. The latter is a suite of applications for creating and editing things like documents, presentations, and spreadsheets, and it has nothing to do with WPS (Wi-Fi Protected Setup).
Step 1: Select the Wi-Fi network to connect via WPS in Windows 10
First of all, to connect via WPS on your Windows 10 laptop or computer, open the list of available wireless networks. One easy way is to click or tap the internet icon from the system tray.
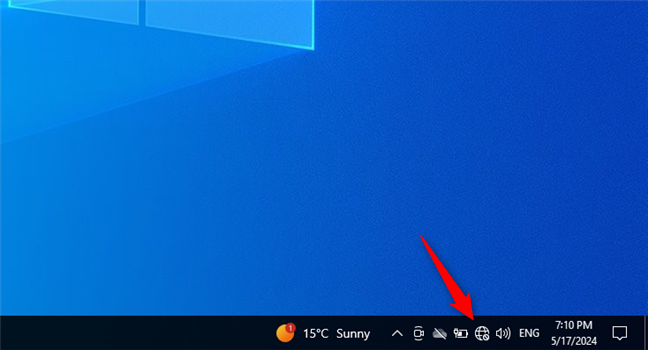
The Network icon from the notification area in Windows 10
The list that pops up shows all the Wi-Fi networks available near you. Find the wireless network you want to connect with through WPS and click or tap on its name.
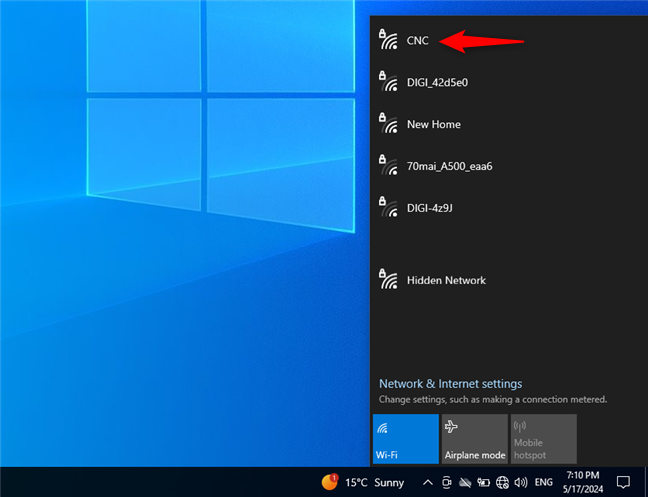
Click or tap the Wi-Fi network to connect to
Then, select whether you intend to Connect automatically to the selected network each time you are in its coverage area, and click or tap the Connect button.
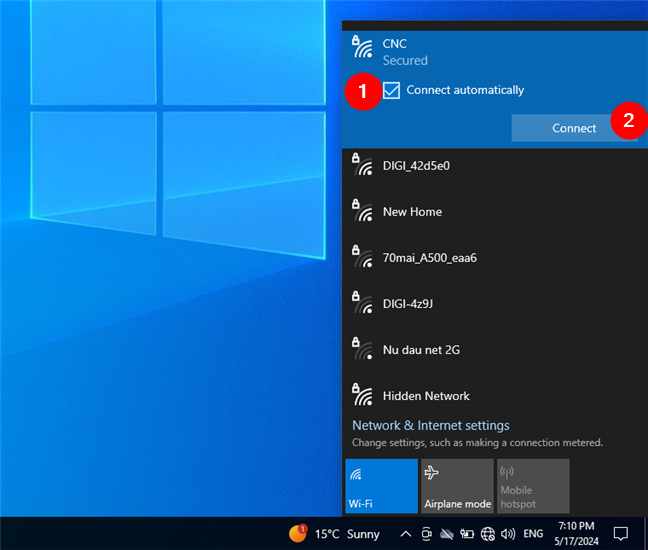
Choose whether to Connect automatically, then press Connect
Windows 10 asks you to enter the password for the Wi-Fi to which you want to connect. Don’t do it just yet! If WPS is enabled on the router that broadcasts the Wi-Fi network, right under the password field, Windows 10 tells you that:
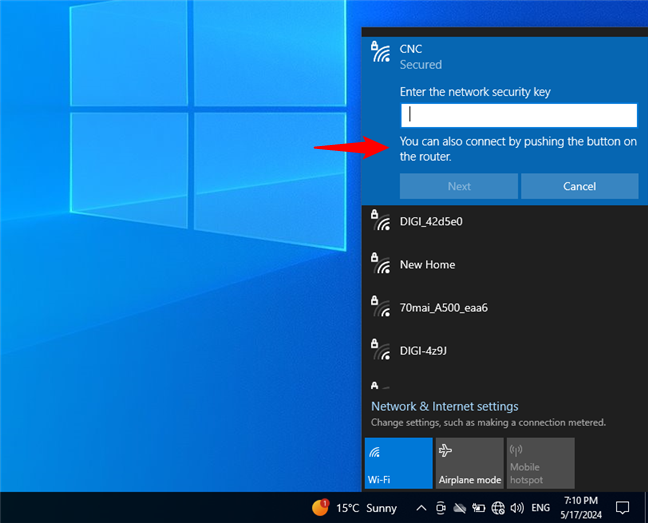
You can also connect by pushing the button on the router
TIP: You can also use WPS on laptops and PCs with Windows 11, not just in Windows 10.
Step 2: Push the WPS button on your router
In order to connect your Windows 10 PC or laptop via WPS, instead of typing the Wi-Fi password, walk to your wireless router or access point. Push the WPS button on it for a couple of seconds. This button is usually found on the back of the router or one of its sides.
For example, on an ASUS RT-AX1800S, the WPS button is located on its back, next to the power jack.
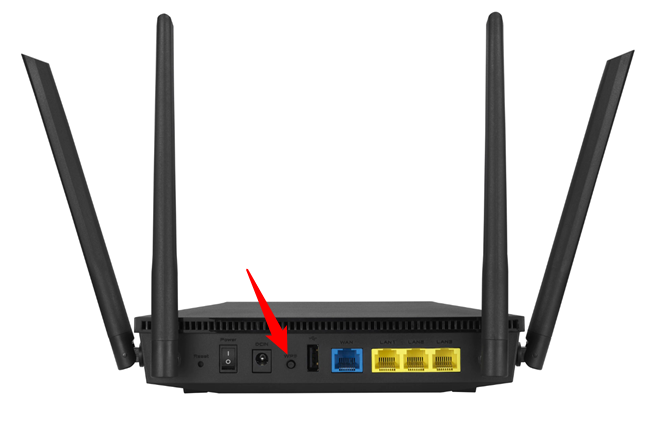
The location of the WPS button on an ASUS router
On Linksys wireless routers, the WPS button is usually labeled appropriately. For instance, on a Linksys EA7430 router, you’ll find a blue WPS button on its rear side.
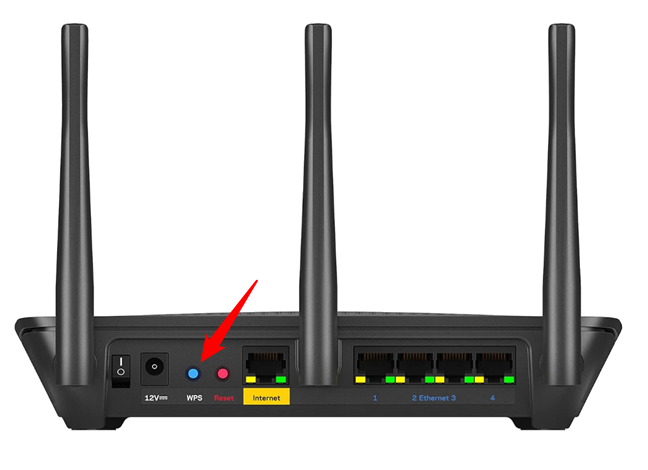
The WPS button on a Linksys router
TP-Link also has the habit of placing the WPS button on the back of its Wi-Fi routers. Here’s, for example, where you’ll find WPS on a TP-Link Archer AX21.
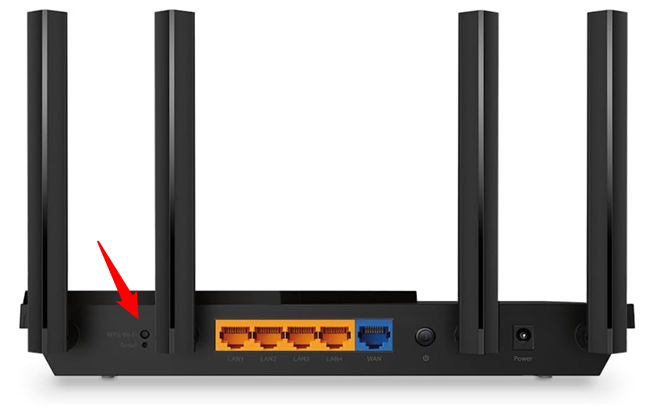
Where's the WPS button on a TP-Link router
On NETGEAR routers, the WPS button might not be labeled, but it will have an icon resembling Wi-Fi. And while some NETGEAR routers have it on their back, others, like the NETGEAR Nighthawk RAX54S, have the WPS button next to the LEDs on its top area.
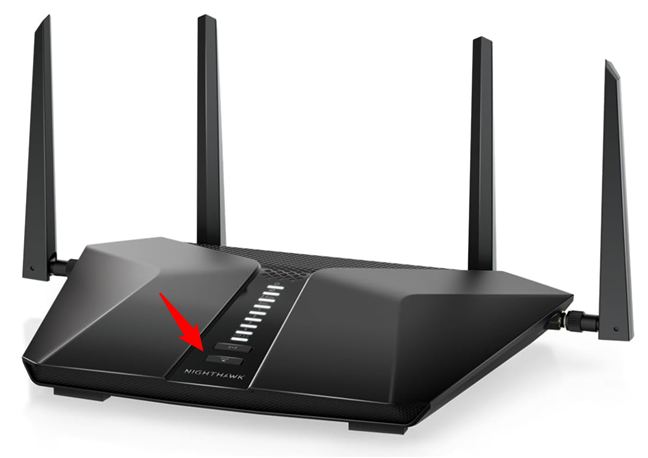
Where's the WPS button on a NETGEAR Wi-Fi router
Tenda follows the traditional design path and usually positions the WPS button on the back of its routers, like on this Tenda AC6.
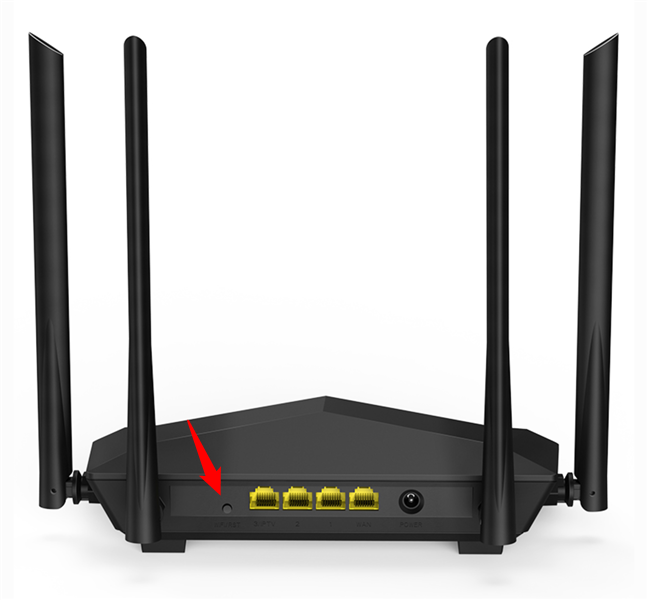
The WPS button on a Tenda router
Finally, D-Link also has the habit of placing the WPS button on the rear side of its routers, like on the D-Link DIR-1950 model in the next picture.
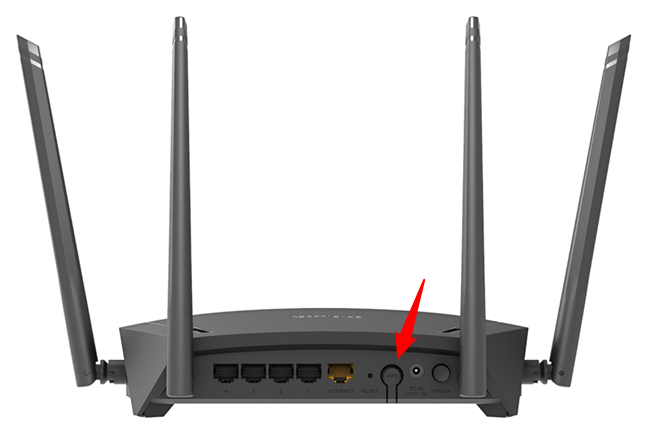
Where to find the WPS button a D-Link router
Step 3. Go back to your Windows 10 PC/laptop and wait for WPS to establish the Wi-Fi connection
You can now return to your Windows 10 device. After a couple of seconds, the operating system will automatically receive the wireless settings from the router (or access point) and connect to the Wi-Fi network by itself, without you entering the password.
NOTE: If you don’t know the password for your network, here are a couple of ways to learn your Wi-Fi password in Windows 10.
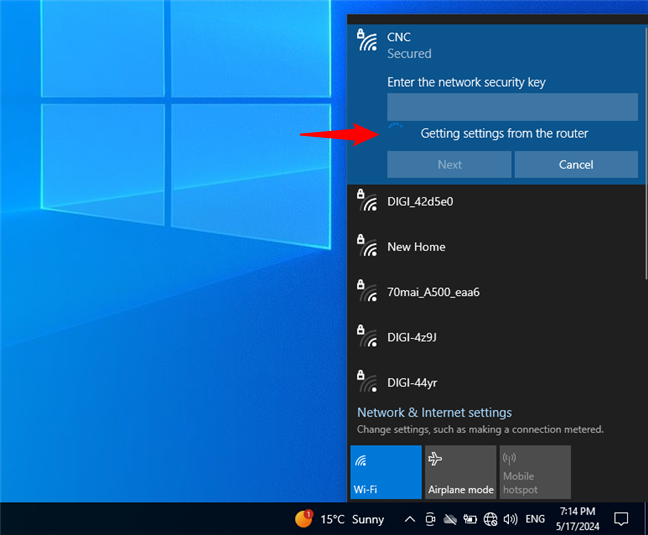
Windows 10 uses WPS for Getting settings from the router
You are now connected to the wireless network using WPS in Windows 10. The next time you connect to this network from the same Windows 10 computer or device, you won’t have to push the WPS button again.
That’s because the router has already transferred all the required settings to Windows 10, including the security password. Windows 10 stores these details and uses them automatically each time it has to make future connections to the same network.
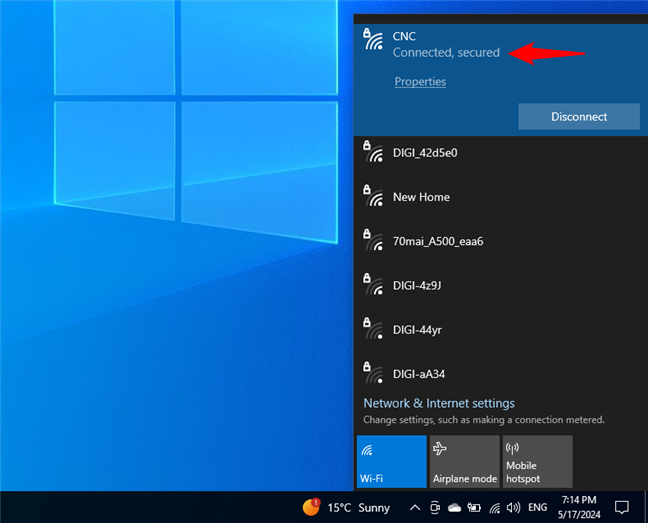
The Wi-Fi network connection is established and working
TIP: If you want to share files or folders with other users and devices connected to the same network, you might have to change the network profile location in Windows 10.
Can I connect through WPS in Windows 10 using a client PIN code?
The WPS standard also allows devices to connect using a PIN code. One eight-digit PIN code is generated by the wireless router (or access point) and another by the client that wants to connect to the Wi-Fi network using WPS. Unfortunately, Windows 10 doesn’t generate a client PIN code that you can use for WPS connections. You can get the client PIN only if your wireless network card has a specialized application that generates it for you. Sadly, on the computers and laptops I own, there aren’t such apps, so I can’t demonstrate how this method works.
Did you connect your Windows 10 PC or laptop to Wi-Fi via WPS?
As you’ve seen in this guide, you can also connect to Wi-Fi by pushing the WPS button on your router. Moreover, using WPS in Windows 10 to connect to wireless networks is often easier and faster than entering passwords. Anyone can do it, and you only need to read this guide the first time you do it. If you have any questions or problems, don’t hesitate to leave a comment in the section below.


 30.05.2024

