

If you’re using Windows 11 on your computers and you’re storing photos on your PCs, you might be interested in the new Gallery from Windows 11. This is a feature that Microsoft has introduced in File Explorer recently, which now offers a convenient way to access and manage your photo collection without having to open a separate app like Photos. In this article, I’ll show you where the Gallery is in Windows 11, how to use the Gallery in File Explorer, and how to remove Gallery from File Explorer if you don’t like it. Without further ado, let’s begin:
 The new Gallery in File Explorer
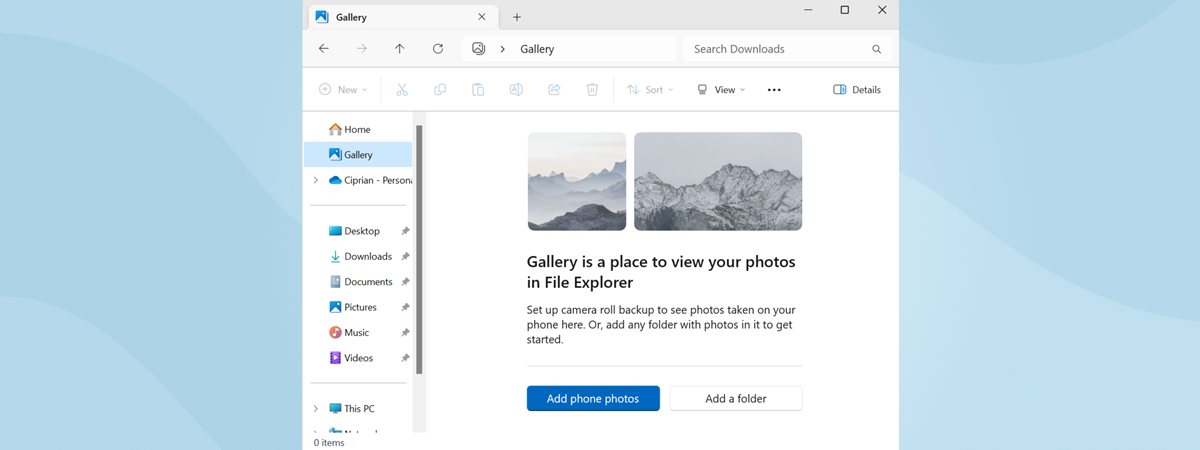
By default, the Gallery displays all the photos in your Pictures folder. As you’ll see later in this guide, you can configure the Gallery to include additional folders, too. However, it’s important to note that the pictures shown in the Gallery continue to be stored in their original locations. The Gallery acts only as a sort of dashboard or place where you can see all your photos from all the locations selected and included in your collection.
The new Gallery in File Explorer
By default, the Gallery displays all the photos in your Pictures folder. As you’ll see later in this guide, you can configure the Gallery to include additional folders, too. However, it’s important to note that the pictures shown in the Gallery continue to be stored in their original locations. The Gallery acts only as a sort of dashboard or place where you can see all your photos from all the locations selected and included in your collection.
 Open File Explorer
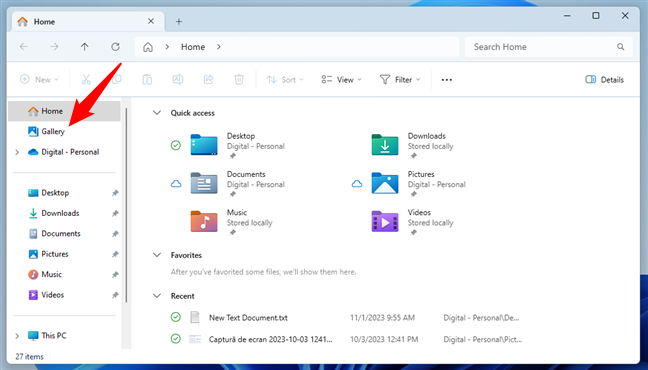
Once File Explorer opens, select Gallery in the navigation pane on the left.
Open File Explorer
Once File Explorer opens, select Gallery in the navigation pane on the left.

 Where is Gallery in Windows 11?
This is all: extremely simple, isn’t it? Next, let’s take a look at what the Gallery in File Explorer allows you to do:
Where is Gallery in Windows 11?
This is all: extremely simple, isn’t it? Next, let’s take a look at what the Gallery in File Explorer allows you to do:
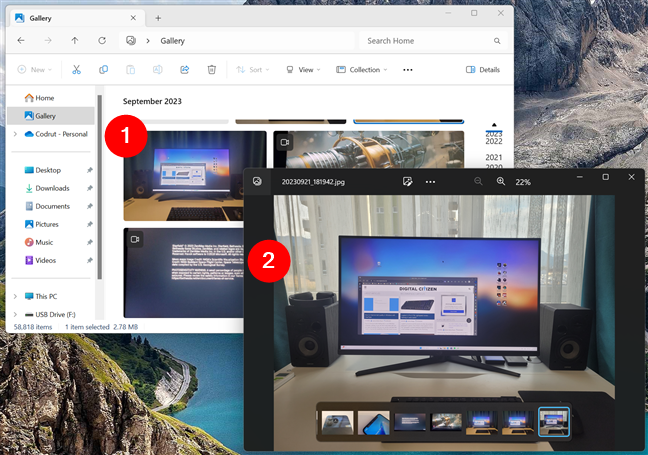
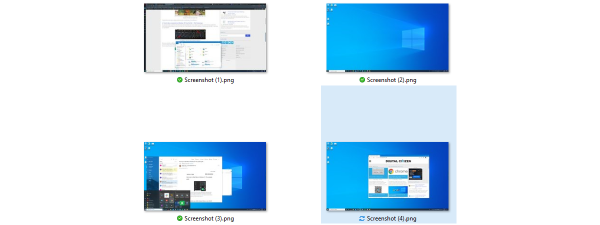
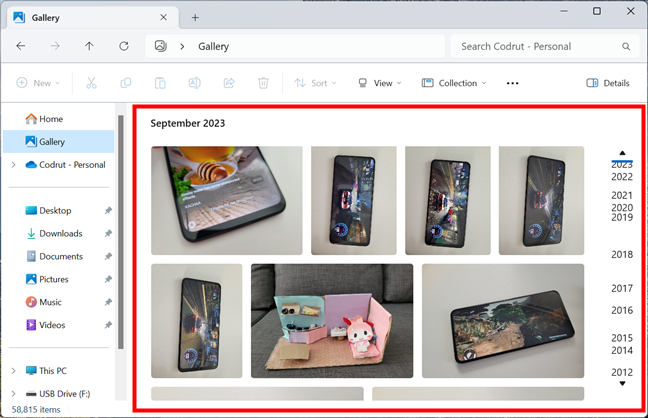 The Gallery shows all your photos
The Gallery allows you to do everything you’d expect from a normal file in a folder. For instance, you can double-click (or double-tap) on any photo to open it with the Photos app, where you can view, edit, share, or delete it.
The Gallery shows all your photos
The Gallery allows you to do everything you’d expect from a normal file in a folder. For instance, you can double-click (or double-tap) on any photo to open it with the Photos app, where you can view, edit, share, or delete it.
 You can open any photo from the Gallery
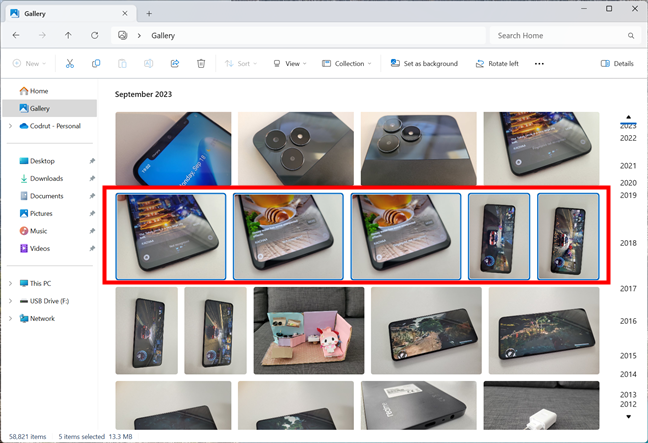
You can also select multiple photos by holding down Ctrl on your keyboard and clicking on the pictures you want to include in the selection. However, it seems that you can’t do the same by dragging a selection box around multiple photos: that didn’t work on any of my Windows 11 computers.
You can open any photo from the Gallery
You can also select multiple photos by holding down Ctrl on your keyboard and clicking on the pictures you want to include in the selection. However, it seems that you can’t do the same by dragging a selection box around multiple photos: that didn’t work on any of my Windows 11 computers.
 You can select multiple photos in Gallery
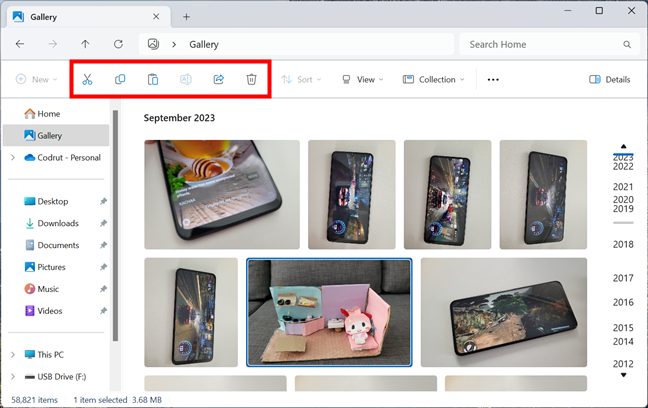
After you select one or more photos in the Gallery from File Explorer, you can use the menu at the top to perform actions on them. For instance, you can Cut, Copy, Paste, Share, or Delete pictures. However, although there is a Rename and a Sort button available in File Explorer’s command bar, they didn’t activate on my Windows 11 PC. It’s probably a bug, as I can’t see why Microsoft would not allow us to rename pictures directly from File Explorer’s Gallery or sort our photo collections using criteria other than date.
You can select multiple photos in Gallery
After you select one or more photos in the Gallery from File Explorer, you can use the menu at the top to perform actions on them. For instance, you can Cut, Copy, Paste, Share, or Delete pictures. However, although there is a Rename and a Sort button available in File Explorer’s command bar, they didn’t activate on my Windows 11 PC. It’s probably a bug, as I can’t see why Microsoft would not allow us to rename pictures directly from File Explorer’s Gallery or sort our photo collections using criteria other than date.
 Actions available for photos in Gallery
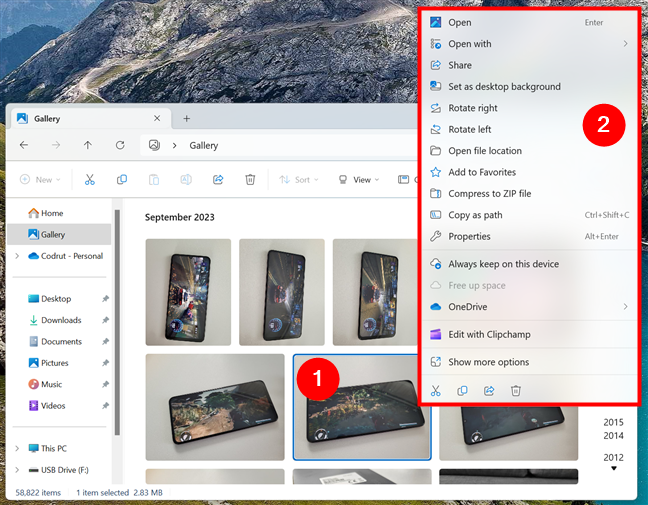
In the Gallery from File Explorer, you can also right-click or press-and-hold on a photo or selection of photos to access more options, such as Properties, Open with, or Set as desktop background.
Actions available for photos in Gallery
In the Gallery from File Explorer, you can also right-click or press-and-hold on a photo or selection of photos to access more options, such as Properties, Open with, or Set as desktop background.
 You can right-click on any photo(s) in File Explorer's Gallery
Now you know that using Gallery in File Explorer is basically the same as using File Explorer to navigate and manage your folders and files. It just offers a more streamlined way of handling photos. Having said that, let’s move on and see how to configure the Gallery to include more or fewer folders:
You can right-click on any photo(s) in File Explorer's Gallery
Now you know that using Gallery in File Explorer is basically the same as using File Explorer to navigate and manage your folders and files. It just offers a more streamlined way of handling photos. Having said that, let’s move on and see how to configure the Gallery to include more or fewer folders:
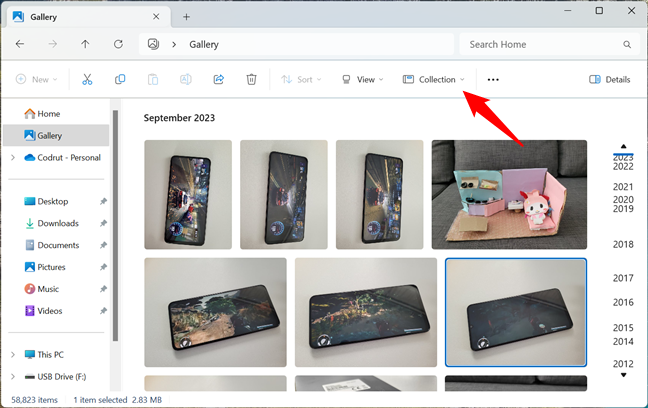 The Collection button in File Explorer's Gallery
This opens a menu where you can select what folders are shown by the Gallery. By default, it’s set to Show all the folders included in the Gallery. Also by default, there should be only one folder included: Pictures. However, if you add more folders to your collection, this is where you’ll be able to choose which ones are going to be shown by File Explorer’s Gallery.
The Collection button in File Explorer's Gallery
This opens a menu where you can select what folders are shown by the Gallery. By default, it’s set to Show all the folders included in the Gallery. Also by default, there should be only one folder included: Pictures. However, if you add more folders to your collection, this is where you’ll be able to choose which ones are going to be shown by File Explorer’s Gallery.
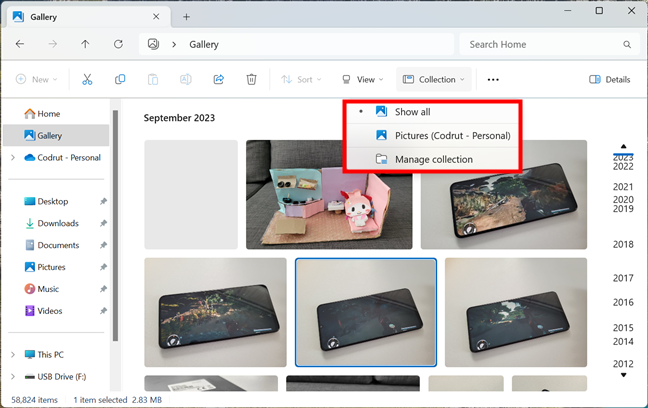 Choosing what to show in Gallery
The last option in the Collection menu is called Manage collection. To add or remove folders from the Gallery, click or tap on it.
Choosing what to show in Gallery
The last option in the Collection menu is called Manage collection. To add or remove folders from the Gallery, click or tap on it.
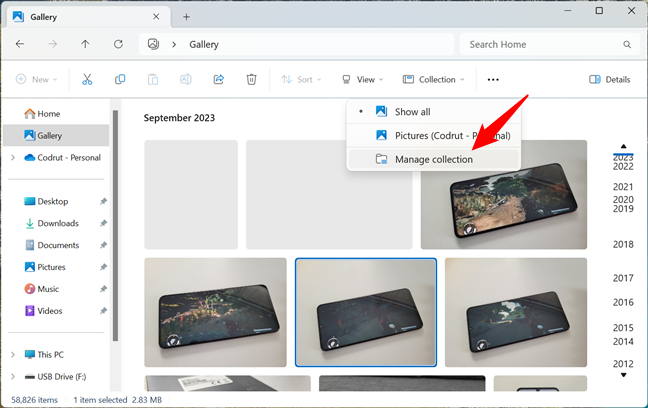 Manage collection
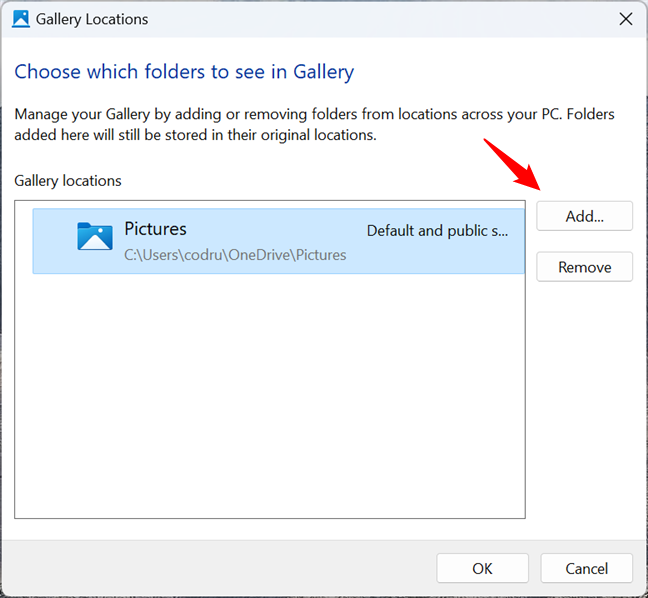
Then, a new window will open. It’s called “Choose which folders to see in Gallery”, and it shows you the list of folders that are currently included in Windows 11’s Gallery.
Manage collection
Then, a new window will open. It’s called “Choose which folders to see in Gallery”, and it shows you the list of folders that are currently included in Windows 11’s Gallery.
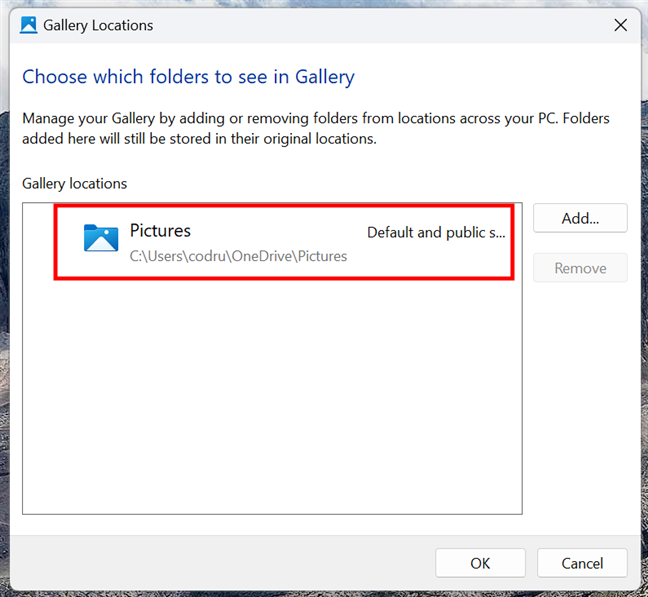
 List of folders included in the Gallery from File Explorer
If you want to include a new folder, click or tap the Add… button on the right side of the Gallery locations list.
List of folders included in the Gallery from File Explorer
If you want to include a new folder, click or tap the Add… button on the right side of the Gallery locations list.
 Click Add to include a new folder in the Gallery
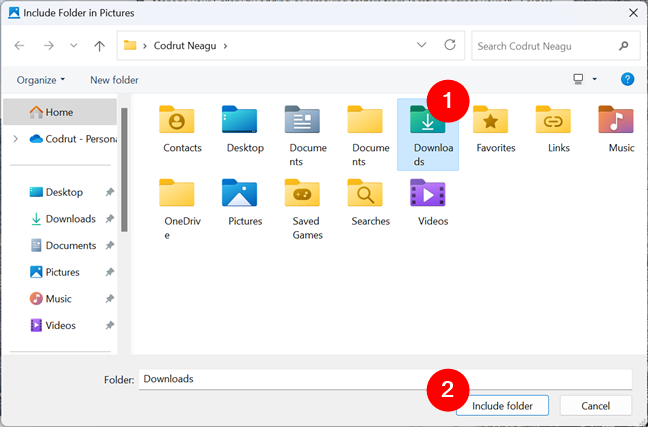
Then, navigate through your Windows 11 computer to find the folder you want to add. When you locate it, select it and click or tap the Include folder button.
Click Add to include a new folder in the Gallery
Then, navigate through your Windows 11 computer to find the folder you want to add. When you locate it, select it and click or tap the Include folder button.
 Add a folder to the File Explorer Gallery
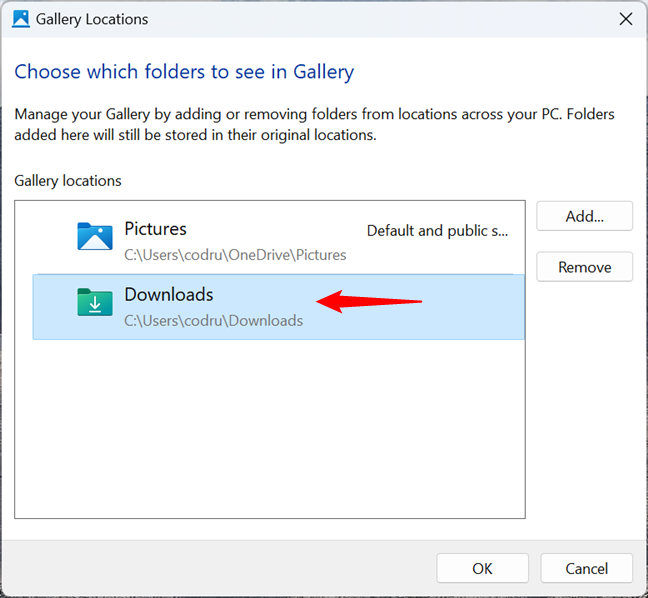
As soon as you do that, the folder is added to the list of Gallery locations, and every photo in it will be available to see in the Gallery from File Explorer.
Add a folder to the File Explorer Gallery
As soon as you do that, the folder is added to the list of Gallery locations, and every photo in it will be available to see in the Gallery from File Explorer.
 A new folder was added to the Gallery in Windows 11
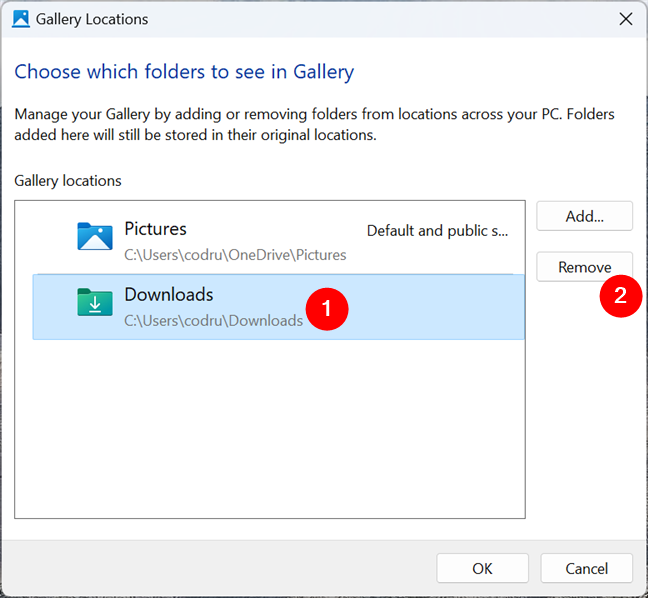
You can also choose to get a folder out of your Gallery collection. To do that, select it in the Gallery locations list and click or tap the Remove button on the right. This excludes an existing folder from the Gallery.
A new folder was added to the Gallery in Windows 11
You can also choose to get a folder out of your Gallery collection. To do that, select it in the Gallery locations list and click or tap the Remove button on the right. This excludes an existing folder from the Gallery.
 Remove a folder from the Gallery in Windows 11
When you are done configuring the Gallery, click or tap OK to save your settings.
Remove a folder from the Gallery in Windows 11
When you are done configuring the Gallery, click or tap OK to save your settings.
 Click OK to save the new settings
Easy, right? But what if you don’t want the Gallery to show up at all in File Explorer? Some people might not like this new feature, so here’s…
Click OK to save the new settings
Easy, right? But what if you don’t want the Gallery to show up at all in File Explorer? Some people might not like this new feature, so here’s…
 How to remove Gallery from File Explorer
This command adds a registry key that instructs Windows 11 to remove the Gallery from File Explorer. If this is the first time you’re using the command, it will execute silently and immediately tell you that “The operation completed successfully.” If you’ve run it previously, the key might already exist in the Windows Registry, and you’ll need to confirm that you want to overwrite it. In this case, when you’re asked about it, type y or yes to confirm the action.
How to remove Gallery from File Explorer
This command adds a registry key that instructs Windows 11 to remove the Gallery from File Explorer. If this is the first time you’re using the command, it will execute silently and immediately tell you that “The operation completed successfully.” If you’ve run it previously, the key might already exist in the Windows Registry, and you’ll need to confirm that you want to overwrite it. In this case, when you’re asked about it, type y or yes to confirm the action.
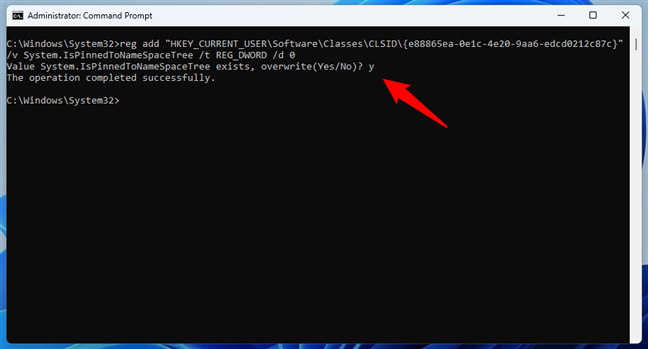
 Confirm the removal of Gallery
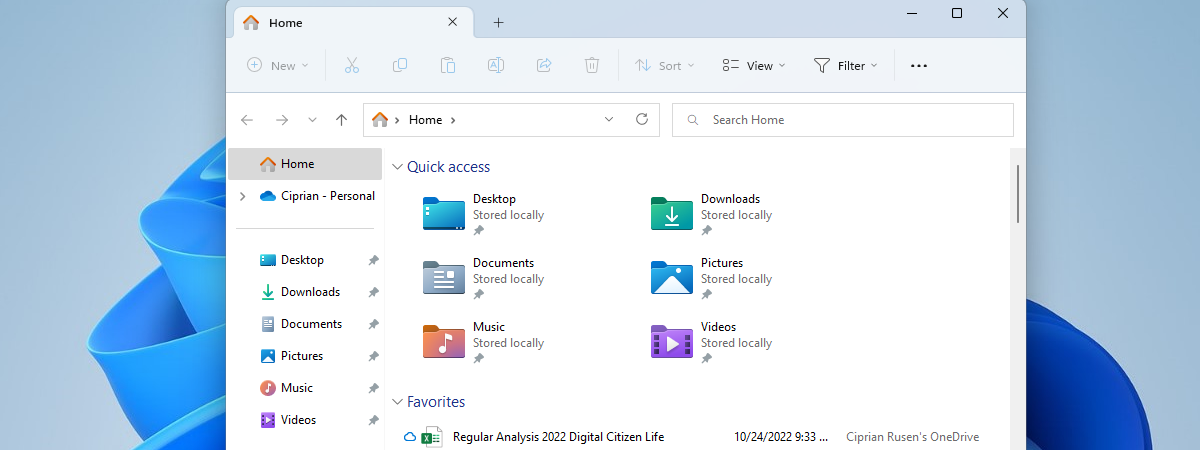
After you’ve run the command, open (or restart) File Explorer, and you should see that the Gallery is no longer shown in it.
Confirm the removal of Gallery
After you’ve run the command, open (or restart) File Explorer, and you should see that the Gallery is no longer shown in it.
 The Gallery was removed from File Explorer
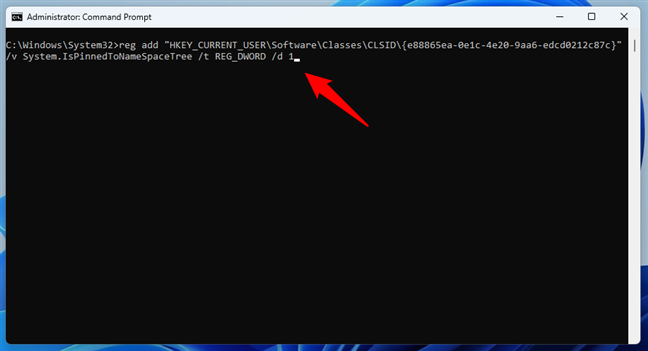
If you change your mind and want to add Gallery to File Explorer again, run the same command but replace the 0 (zero) value with 1 (one), like this:
The Gallery was removed from File Explorer
If you change your mind and want to add Gallery to File Explorer again, run the same command but replace the 0 (zero) value with 1 (one), like this:
 How to show Gallery in File Explorer
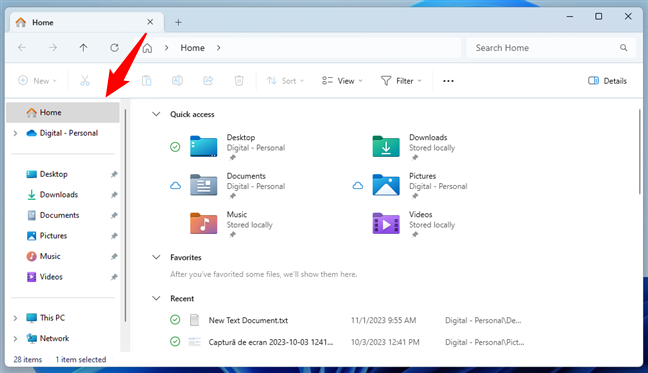
When you open (or restart) File Explorer the next time, the Gallery will appear in the navigation pane.
How to show Gallery in File Explorer
When you open (or restart) File Explorer the next time, the Gallery will appear in the navigation pane.
 The Gallery is visible in File Explorer
NOTE: In case the changes don’t take effect immediately, restart your Windows 11 computer.
The Gallery is visible in File Explorer
NOTE: In case the changes don’t take effect immediately, restart your Windows 11 computer.
What is the new Gallery in File Explorer?
The Gallery is a recent feature of File Explorer that was introduced in Windows 11 Moment 4 Update. Designed to make it easier to access all the pictures in your photo collection, what the Gallery in File Explorer shows is actually the same content you see in the All Photos view from the Photos app.How to use the Gallery in File Explorer
The Gallery in File Explorer is pretty easy to use. Here’s how:How to open the Gallery in Windows 11
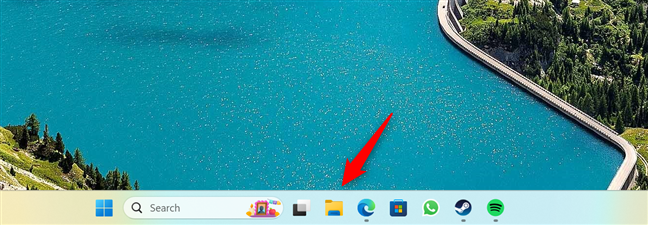
Before interacting with the Gallery and managing your pictures, you must first know how to access this new feature. Start by opening File Explorer on your Windows 11 computer. The quickest ways to do this are to press Win + E on your keyboard or to click/tap the File Explorer button on the taskbar.How to use the Gallery in Windows 11
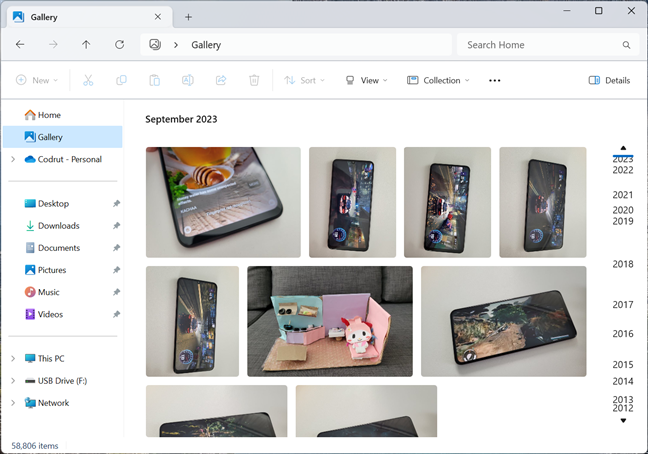
When you access the Gallery in File Explorer, you see a grid of thumbnails of your photos, sorted by the date when they were taken. You can scroll down using your mouse to see more photos, or you can use the scrollbar on the right side of the window.How to add or remove folders from the Gallery
To change which folders are shown in the Gallery from File Explorer, click or tap the Collection button in the top-right area.How to remove Gallery from File Explorer
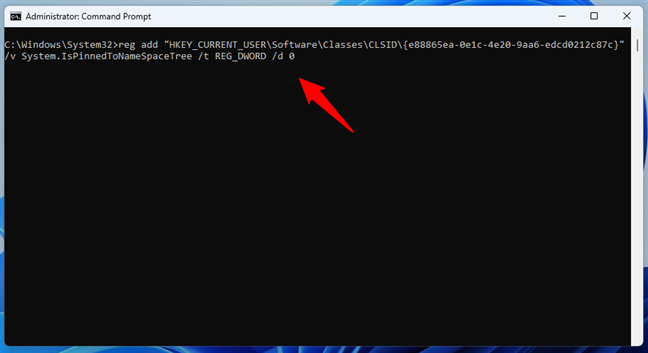
If you want to remove the Gallery from File Explorer, you can. Although there’s no option in Windows 11 to do it with a simple switch or a checkbox, you can hide the Gallery by running the following command in Command Prompt:reg add "HKEY_CURRENT_USER\Software\Classes\CLSID\{e88865ea-0e1c-4e20-9aa6-edcd0212c87c}" /v System.IsPinnedToNameSpaceTree /t REG_DWORD /d 0
reg add "HKEY_CURRENT_USER\Software\Classes\CLSID\{e88865ea-0e1c-4e20-9aa6-edcd0212c87c}" /v System.IsPinnedToNameSpaceTree /t REG_DWORD /d 1
Discussion (10)
Thanks for the article. I Seem to have lost the ability to create folders with Gallery. I will check further with Google. Thanks.
I understand this Gallery folder has been existing for a while, but I paid attention to it just now. I find it confusing and totally unnecessary! Who really needs it?? Why put stuff on our computers without asking if we are interested?
Annoying!!!
Gallery in Windows 11 file explorer is a waste of time and space. Just leave file explorer alone and allow users to move their files as they see fit. The gallery also encourages more screen time as people search and view pictures.
My problem is the photos in Gallery are in the HEIC format. I am not techie. I used to be able to attach photos from my phone and also Kodak camera to emails and also Craig’s List and other site to sell things. I am at a loss on how to change the format to jpeg. Wish they would just leave well enough alone.
I’m have a minimum internet speed and this Gallery showed up including one drive (I had already deleted some pictures that got placed in one drive by mistake, so the folders were empty but my internet provider told me there was something still going out to the network from my pc and using the bandwidth. I’ve now removed the one drive folder from Gallery and I’ll see if it improves my network performance.
I find Gallery confusing. It seems like a repetition of what I already have in Pictures and Photos which I’ve been dreadfully trying to consolidate. I think Pictures is a newer version of Photos (another confusion). I’m not a techie so don’t feel comfortable using the Command prompt. what’s the fastest and easiest way to get rid of pictures in Gallery?
I just noticed today that my gallery updated, and ALL my folders are gone. Every picture I had filed and catalogued is missing and they are all crammed together and listed by year. This does me no good. A lot of my info was clipart, and the year classification is worthless. I hate this.
I’m sorry for your frustrating experience.
I don’t know what the point of Gallery is when I can select my ‘Pictures’ folder with my categorised and catalogued images. I can’t see the point of have a flat folder with 54K images in it.
This is a horrendous new ‘shiny’ Those who dont want to share their every move may think ‘i will delete gallery’. If you delete it deletes all your pictures from your once trusted pictures folder. If recycle gets full it will delete them completely if you are not tech savvy. I lost all my images and even a recovery process just a couple of days later did not recover them all. Before creating these things the kids in charge should consider ‘are there users that dont do or understand back up? do they not use the cloud? is their life of experiences stored in a single picture folder that can be destroyed by one click? There was NO MESSAGE explaining that by deleting Gallery it would also delete from ‘Pictures’