

Windows 11 and Windows 10 are two operating systems that include a special feature called “Wireless Display.” It can enhance your experience in a good way by allowing you to transform your computer or laptop into a secondary screen. Once this feature is installed and configured, you can project the screen of another Windows computer or even an Android device to your Windows PC. So, if you want more screen estate and you’ve got a Windows 11 or Windows 10 computer that you don’t need at the moment, here’s how to use it as a wireless display:
NOTE: To write this tutorial, we used a desktop computer and a laptop running both Windows 11 and Windows 10. While testing everything, we found out that the steps and settings are the same in both operating systems, so we decided to use screenshots from Windows 11 only. Also, before going any further, keep in mind that you can use your Windows PC as a wireless display only if it has a Wi-Fi card installed that supports Miracast. Therefore this feature is available mostly on laptops and tablets, and less on desktop PCs. In case you’re wondering what Miracast is, read this guide first: What is Miracast, and how do you use it?.
 Access Projecting to this PC
On the “Projecting to this PC” page, Windows informs you that you can “Project your Windows phone or PC to this screen, and use its keyboard, mouse, and other devices too.” Don’t worry; this information is slightly outdated: the truth is that you can project on a Windows 11 or Windows 10 PC from Android too. Click or tap on the Optional features link under “Add the ‘Wireless Display’ optional feature to project to this PC.”
Access Projecting to this PC
On the “Projecting to this PC” page, Windows informs you that you can “Project your Windows phone or PC to this screen, and use its keyboard, mouse, and other devices too.” Don’t worry; this information is slightly outdated: the truth is that you can project on a Windows 11 or Windows 10 PC from Android too. Click or tap on the Optional features link under “Add the ‘Wireless Display’ optional feature to project to this PC.”
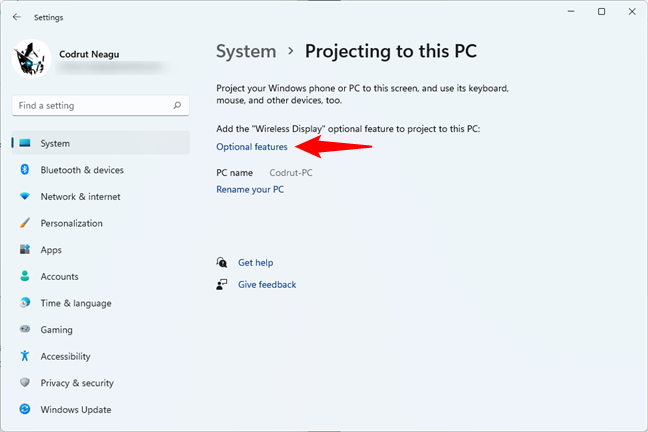 Click on Optional features
Windows then takes you to the Optional features page from the Apps settings. On it, click or tap the View features button next to “Add an optional feature.”
Click on Optional features
Windows then takes you to the Optional features page from the Apps settings. On it, click or tap the View features button next to “Add an optional feature.”
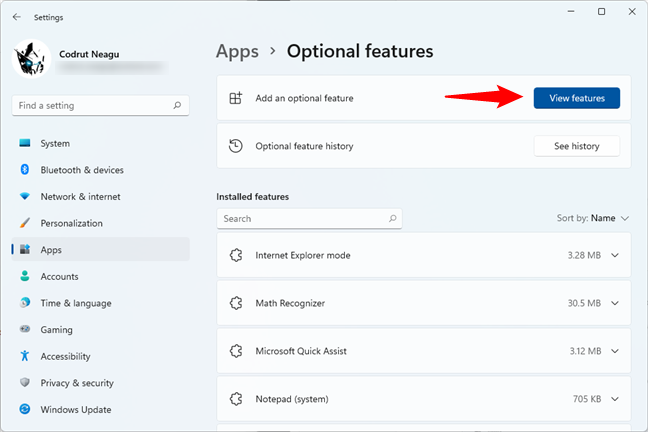 View features available in Windows
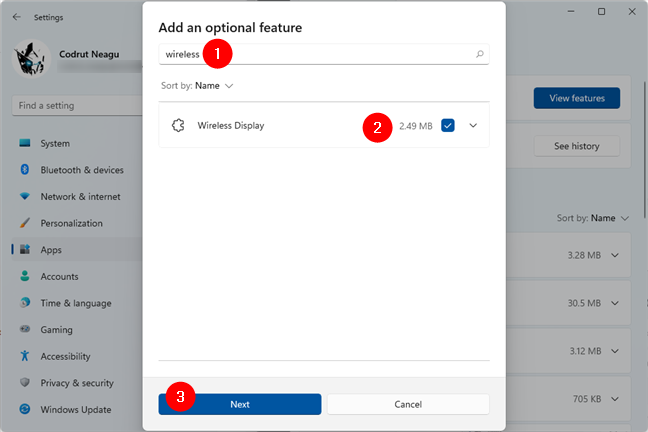
In the “Add an optional feature” dialog, type “wireless” and select “Wireless Display” in the search results. Then, click or tap on Next at the bottom of the window.
View features available in Windows
In the “Add an optional feature” dialog, type “wireless” and select “Wireless Display” in the search results. Then, click or tap on Next at the bottom of the window.
 Add the Wireless Display optional feature
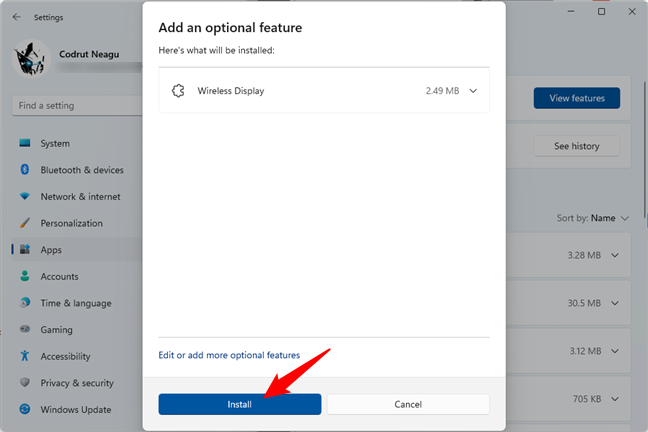
Windows summarizes the list of optional features that will be installed. The only one you chose is “Wireless Display,” so it’s the only one you should see: click or tap on Install to add it to your PC.
TIP: You may also want to read: What are those Windows features that you can add or remove?
Add the Wireless Display optional feature
Windows summarizes the list of optional features that will be installed. The only one you chose is “Wireless Display,” so it’s the only one you should see: click or tap on Install to add it to your PC.
TIP: You may also want to read: What are those Windows features that you can add or remove?
 Install Wireless Display in Windows
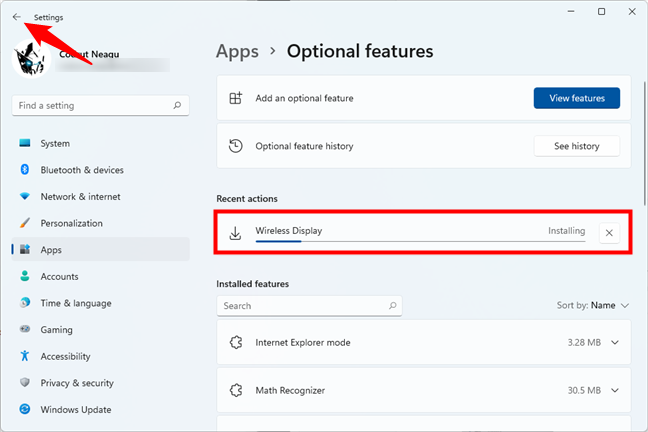
Wait for the “Wireless Display” feature to be installed. When done, click or tap on the Back arrow found in the top-left corner of the Settings window.
Install Wireless Display in Windows
Wait for the “Wireless Display” feature to be installed. When done, click or tap on the Back arrow found in the top-left corner of the Settings window.
 Wireless Display is installing
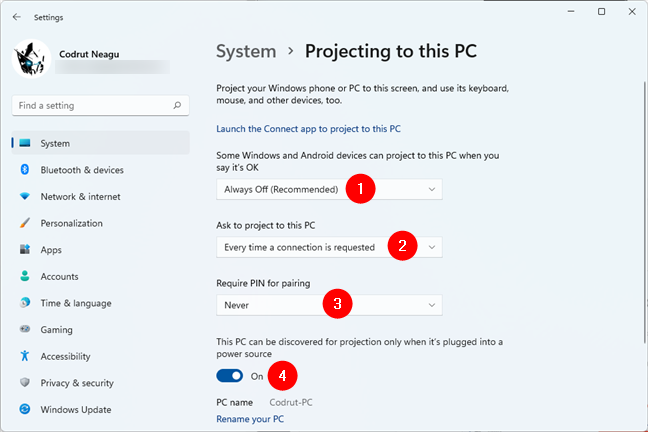
This will bring you back to the “Projecting to this PC” page from the Settings app. Notice that the available options here have changed now. There are a couple of things that you can configure regarding how the wireless projection works on your Windows 11 or Windows 10 computer.
Before actually projecting to your PC, let’s see what each one is about:
Wireless Display is installing
This will bring you back to the “Projecting to this PC” page from the Settings app. Notice that the available options here have changed now. There are a couple of things that you can configure regarding how the wireless projection works on your Windows 11 or Windows 10 computer.
Before actually projecting to your PC, let’s see what each one is about:
 Settings available for Projecting to this PC
Choose the settings you prefer, and then move on to the next section of this guide to see how to use your Windows PC as a wireless display.
Settings available for Projecting to this PC
Choose the settings you prefer, and then move on to the next section of this guide to see how to use your Windows PC as a wireless display.
 Opening the Connect app
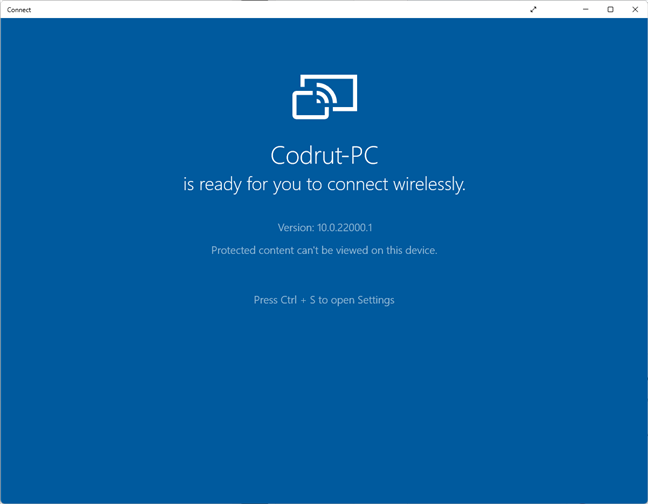
The Connect app looks very simple when you open it:
Opening the Connect app
The Connect app looks very simple when you open it:
 Connect allows you to project to your computer
But what’s important is that once you open it, your Windows PC is ready to accept projections from other computers or devices.
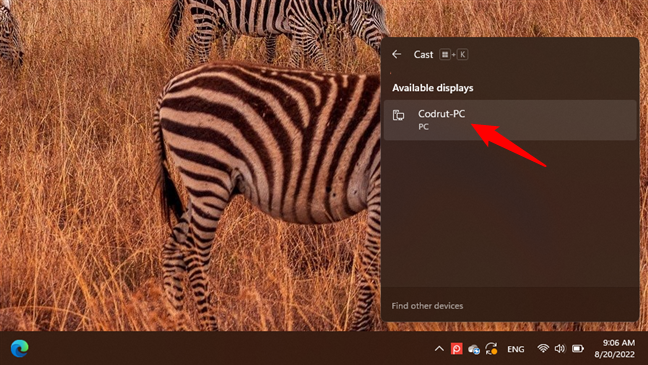
All you have to do next is open the Cast menu on the computer or device you connect from. You can do that by pressing Windows + K on your keyboard, using the Cast quick setting button, or the Connect button from the System > Display page in Settings.
Connect allows you to project to your computer
But what’s important is that once you open it, your Windows PC is ready to accept projections from other computers or devices.
All you have to do next is open the Cast menu on the computer or device you connect from. You can do that by pressing Windows + K on your keyboard, using the Cast quick setting button, or the Connect button from the System > Display page in Settings.
 Selecting the Windows PC to project to
If you need guidance on how to project from your computer or smartphone, check these tutorials for help:
Selecting the Windows PC to project to
If you need guidance on how to project from your computer or smartphone, check these tutorials for help:
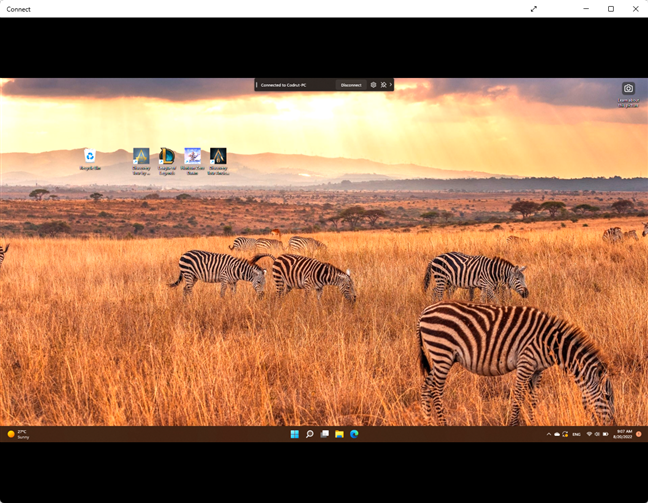
 Using a Windows PC as a wireless display
That’s it! You can now enjoy your extra screen real estate whenever you need it.
Using a Windows PC as a wireless display
That’s it! You can now enjoy your extra screen real estate whenever you need it.
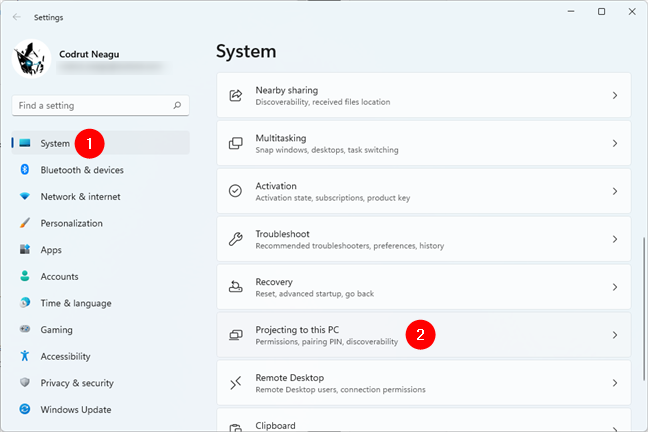
How to turn your Windows PC into a wireless display
In order to transform your Windows 11 or Windows 10 computer into a wireless display and be able to project on it, you should add the “Wireless Display” optional feature. For that, the first step is to open the Settings app (press Windows + I on your keyboard). In the Settings app, head to System > Projecting to this PC.- “Some Windows and Android devices can project to this PC when you say it’s OK:”
- “Available everywhere on secure networks” always lets other computers and devices project to your Windows computer as long as they’re all connected to a secure network that’s protected using a password and without having to manually open the Connect app first (we’ll talk a bit later about it).
- “Available everywhere” allows the projection to your Windows PC regardless of how secure the network you’re connected to is and without having to launch the Connect app first.
- “Always Off (Recommended)” doesn’t let other PCs or devices project to your PC unless you open the Connect app on your Windows PC first.
- “Ask to project to this PC:”
- “First time only” only asks for your confirmation the first time you start projecting on it from a different computer or device.
- “Every time a connection is requested” will ask you to agree to let another computer or device project to your Windows PC every time you do it. This is the default option.
- “Require PIN for pairing” issues a unique PIN code each time you or someone else attempts to project to your Windows computer.
- “This PC can be discovered for projection only when it’s plugged into a power source” is a switch that allows other computers and devices to find your Windows PC only if it’s connected to a power source. By default, it’s on, and you should leave it like that if you’re using a laptop.
How to project to your Windows PC
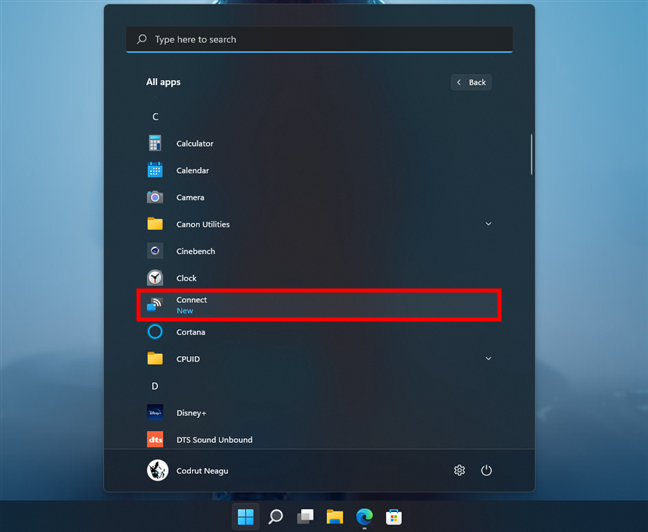
Once you’ve added the “Wireless Display” feature and configured it to your liking, you can start projecting to your Windows PC. To do that, both Windows 11 and Windows 10 rely on the Connect app. You can open it from its shortcut from the Start Menu, using search, or from the “Projecting to this PC” page in the Settings app.- How to wirelessly connect and project to a TV from Windows 11 (works for projecting to Windows computers too)
- How to wirelessly connect and project to a TV from Windows 10 (works for projecting to Windows computers too)
- How to wirelessly mirror the screen of your Android on a TV
Discussion (0)
Be the first to comment.