

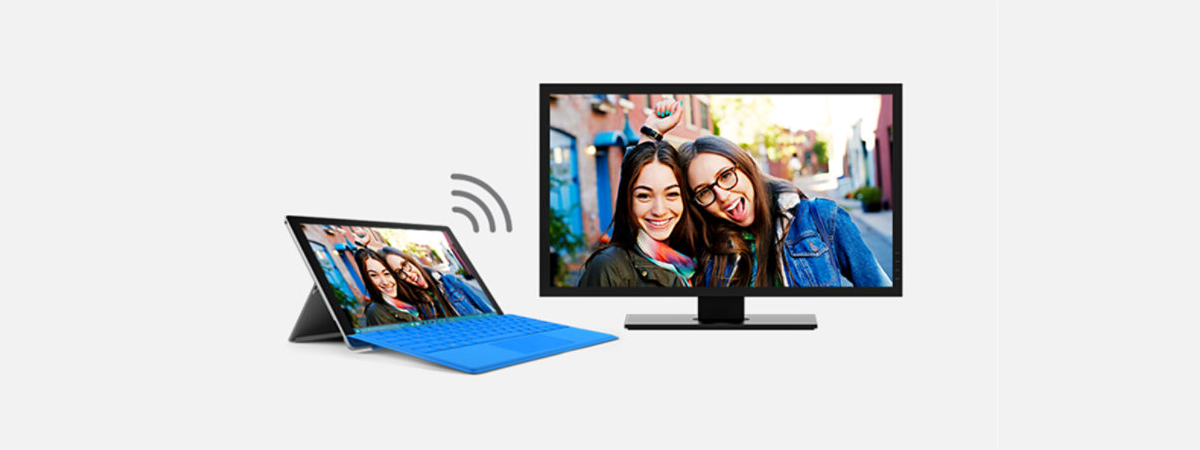
Do you have a TV with the Android TV operating system on it? Or maybe a Samsung Smart TV with Tizen TV, or an LG Smart TV running on WebOS? The brand doesn’t matter; all Smart TVs allow you to connect wirelessly to them and cast from a laptop, smartphone, or tablet through Miracast - a widely adopted industry standard for wireless projection. Luckily, Windows 11 laptops, tablets, and other mobile devices also support Miracast, and you can easily project to any TV by following the steps from this guide:
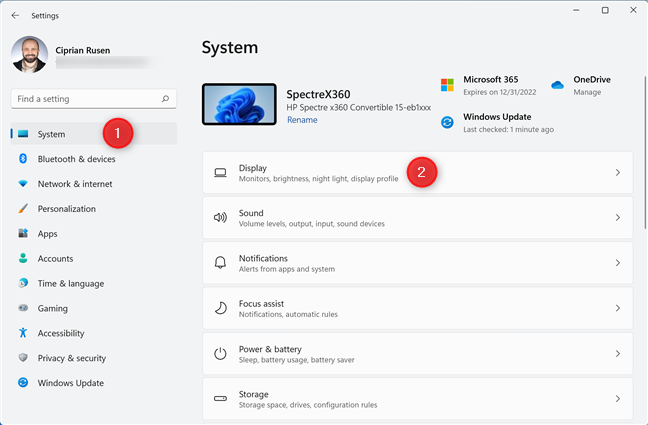
 In Windows 11 Settings, go to System > Display
Scroll down on the right until you see the Scale & layout section. Click or tap the arrow next to Multiple displays to expand this section and access more options. Then, press the Connect button next to “Connect to a wireless display.”
In Windows 11 Settings, go to System > Display
Scroll down on the right until you see the Scale & layout section. Click or tap the arrow next to Multiple displays to expand this section and access more options. Then, press the Connect button next to “Connect to a wireless display.”
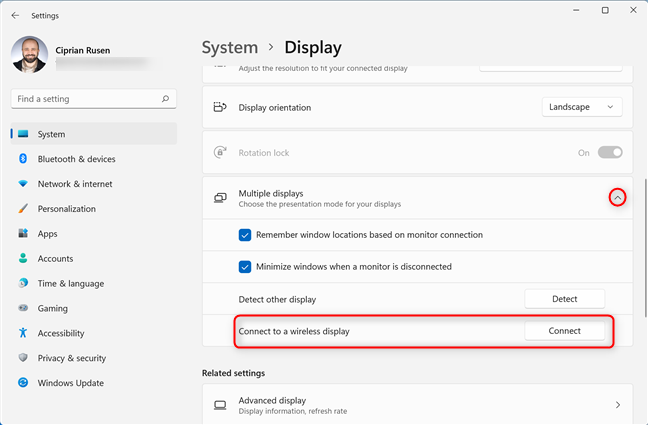 Expand Multiple displays and connect to a wireless display
This action opens the Cast menu. Another way to get to it is from Quick Settings: press Windows + A on your keyboard (or click/tap on the Wi-Fi, Volume, or Battery icons on the taskbar), and choose Cast.
Expand Multiple displays and connect to a wireless display
This action opens the Cast menu. Another way to get to it is from Quick Settings: press Windows + A on your keyboard (or click/tap on the Wi-Fi, Volume, or Battery icons on the taskbar), and choose Cast.
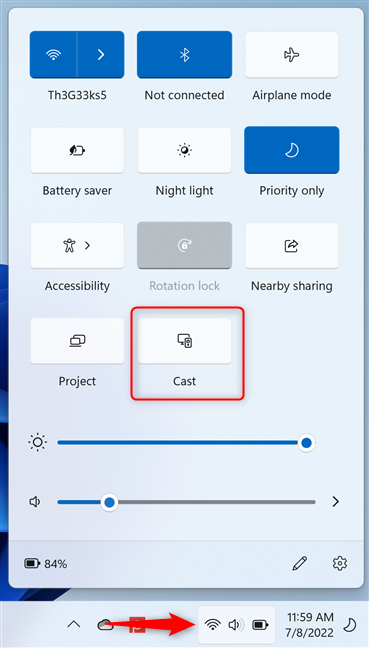
 Choose Cast in Windows 11's Quick Settings
You can also access the Cast menu directly by pressing the Windows + K keys on your keyboard. Windows 11 shows all the nearby wireless displays it detects, that support the Miracast standard. To connect to your TV, click or tap its name from the list.
Choose Cast in Windows 11's Quick Settings
You can also access the Cast menu directly by pressing the Windows + K keys on your keyboard. Windows 11 shows all the nearby wireless displays it detects, that support the Miracast standard. To connect to your TV, click or tap its name from the list.
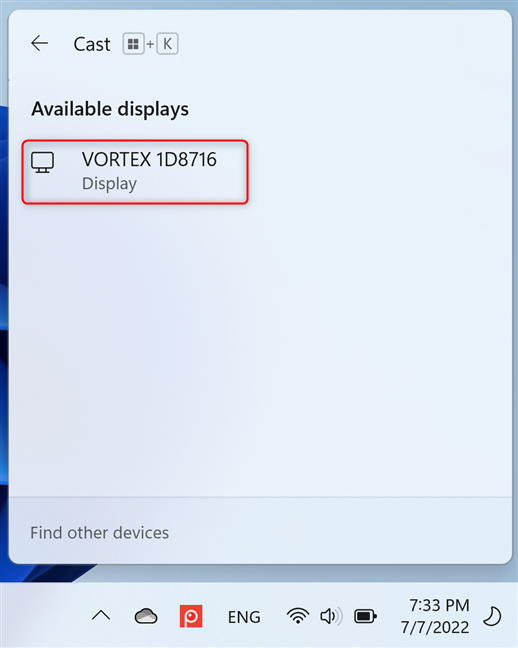
 Click or tap on the name of your TV
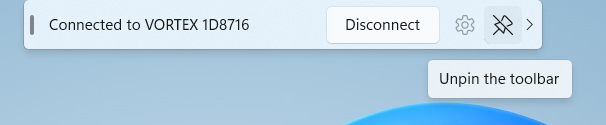
You might see a message on your TV asking you to approve the connection. First, approve it, and then you can see your Windows 11 desktop on the TV. On your Windows 11 laptop or tablet, you also see a connection toolbar at the top of your desktop. It includes the text “Connected to…” followed by the name of your TV, a Disconnect button that does what it says, and a Pin/Unpin icon. By default, the toolbar is pinned at the top of the desktop. If you want to hide it, click or tap the Unpin icon.
Click or tap on the name of your TV
You might see a message on your TV asking you to approve the connection. First, approve it, and then you can see your Windows 11 desktop on the TV. On your Windows 11 laptop or tablet, you also see a connection toolbar at the top of your desktop. It includes the text “Connected to…” followed by the name of your TV, a Disconnect button that does what it says, and a Pin/Unpin icon. By default, the toolbar is pinned at the top of the desktop. If you want to hide it, click or tap the Unpin icon.
 You are wirelessly connected to the TV
 Access Quick Settings > Project
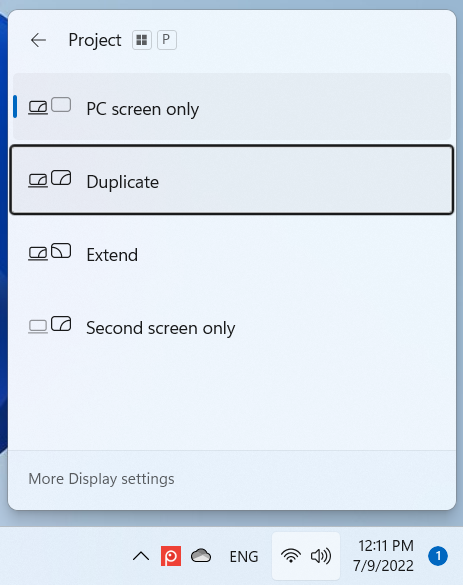
Another way to access the Project menu is by pressing Windows + P on your keyboard. Then, choose how you want to project your image on the TV:
Access Quick Settings > Project
Another way to access the Project menu is by pressing Windows + P on your keyboard. Then, choose how you want to project your image on the TV:
 Choose how you want to project

 Click or tap Disconnect in the connection toolbar
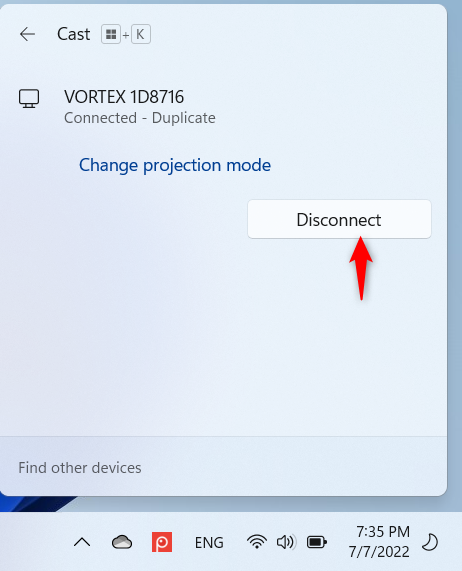
Another option is to use the Cast menu. Press Windows + K on your keyboard. This displays the name of your TV, that you’re connected to it, and the projection mode used (in my case, Duplicate). To stop projecting to it, click or tap Disconnect, and you’re done.
Click or tap Disconnect in the connection toolbar
Another option is to use the Cast menu. Press Windows + K on your keyboard. This displays the name of your TV, that you’re connected to it, and the projection mode used (in my case, Duplicate). To stop projecting to it, click or tap Disconnect, and you’re done.
 Click or tap Disconnect in the Cast menu
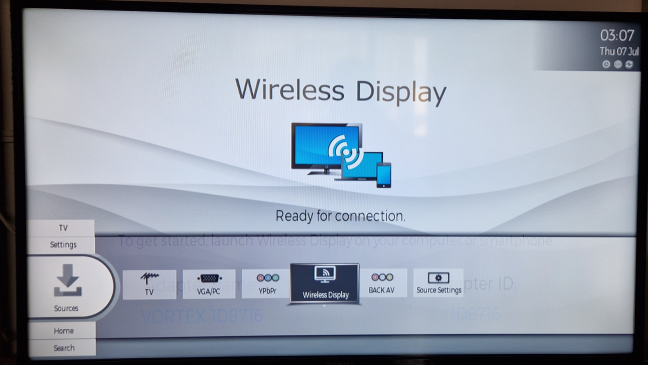
 Enable the Wireless Display input on your TV
Then, repeat the steps above and try again.
NOTE: This isn’t required on most modern Smart TVs because their wireless display functionality is enabled by default.
Enable the Wireless Display input on your TV
Then, repeat the steps above and try again.
NOTE: This isn’t required on most modern Smart TVs because their wireless display functionality is enabled by default.
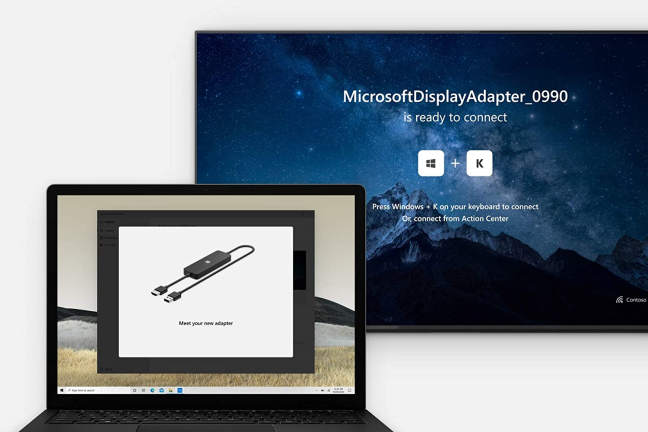
 The Microsoft Wireless Display Adapter can turn any TV into a wireless display
Plug the adapter into the back of your TV, and then cast to it using the steps shared in this guide.
The Microsoft Wireless Display Adapter can turn any TV into a wireless display
Plug the adapter into the back of your TV, and then cast to it using the steps shared in this guide.
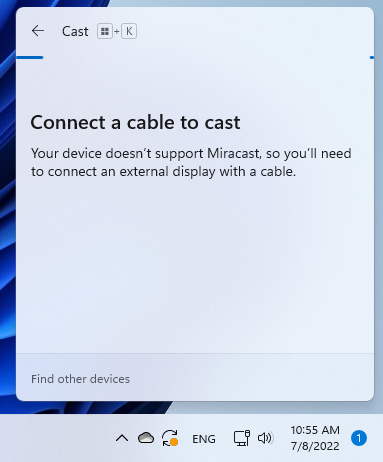
 Miracast isn't available on desktop PCs
However, you can find exceptions to this rule if your PC has a premium motherboard that includes Wi-Fi, Bluetooth, and support for the Miracast standard.
Miracast isn't available on desktop PCs
However, you can find exceptions to this rule if your PC has a premium motherboard that includes Wi-Fi, Bluetooth, and support for the Miracast standard.
Connect wirelessly to your TV, using the Cast menu from Windows 11
First, make sure that the TV you want to connect to wirelessly is turned on. Then, on your Windows 11 laptop, tablet, or hybrid device, access the Cast menu. There are two ways to do that. The longer path is to open Settings (Windows + I) and go to System > Display.How to change the way you project to your TV
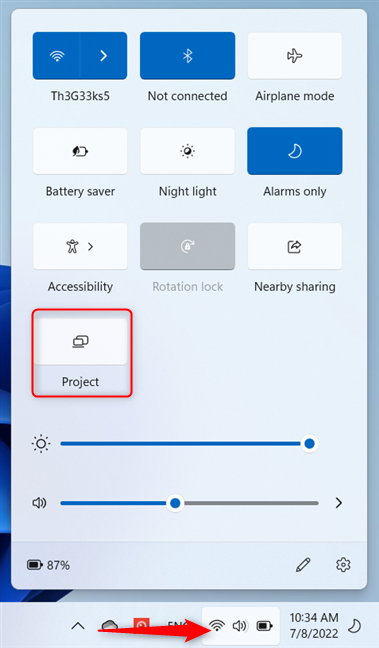
By default, Windows 11 duplicates your desktop to the TV, which means that everything you do on your device is also shown on the TV. If you want to change this behavior, you can from the Project menu. One way to access it is to open the Quick Settings by pressing Windows + A on your keyboard or by clicking or tapping the Wi-Fi, Volume, or Battery icons on the taskbar, in the bottom-right corner of your screen. In the Windows 11 Quick Settings, click or tap Project.- PC screen only - stops the connection to your TV, and the image is shown only on your Windows 11 laptop or tablet.
- Duplicate - it mirrors the screen from your Windows 11 device to the TV. This is the default behavior for casting wirelessly from Windows 11.
- Extend - extends the image to the TV, turning it into a secondary display. You can then move windows from your Windows 11 laptop to your TV and the other way around.
- Second screen only - disables the display on your Windows 11 laptop or tablet and uses only your TV as a screen.
How to disconnect from your TV and stop projecting wirelessly
When you are done using your TV, you can disconnect from it. The easiest way is to use the toolbar on the top side of your desktop. Move the mouse to the top side of the desktop to see it (if minimized), and then press Disconnect.Troubleshooting: Windows 11 doesn’t see my TV for wireless projection
It can happen that your Windows 11 laptop or tablet can’t “see” your TV and wirelessly project to it. If you have an older TV, as I do, this happens because you need to enable the Wireless Display feature manually. Therefore, use the TV’s remote to browse its menus and select Wireless Display or something similar as its input source.Bonus: How to turn your old TV into a wireless display
Also, if you don’t have a smart TV, but your TV does have an HDMI port and a USB port, you can turn it into a wireless display by buying a Microsoft Wireless Display Adapter.IMPORTANT: Miracast is not available on most desktop PCs
Wireless projection is not available on most Windows 11 desktop PCs because they tend not to have a Wi-Fi adapter (hence they don’t support the Miracast wireless standard) that you can use for casting your image. However, it’s usually available for laptops, tablets, and convertible devices. Therefore, on a PC, it is likely that upon accessing the Cast menu, you see the message: “Connect a cable to cast. Your device doesn’t support Miracast, so you’ll need to connect an external display with a cable.”
Discussion (2)
I have 2 laptops and a tablet. I have zero issues connecting my win10 laptop and tablet to my TV wirelessly. My Win11 laptop shows my tv, tries to connect, it shows connecting on my tv, then says it was not successful. Any suggestions?
None of these options worked. I have a Lenovo with Windows 11 and am trying to connect it to a Sony Bravia