

One of the oldest and most popular graphic editors, Paint has been available in Windows from the beginning. Although for a long time, it remained pretty much the same, over the years, Paint has undergone several changes. Probably the most significant ones in the last decade or so are found in the latest version of Paint that comes with Windows 11. In this article, I’ll show you how to use Paint in Windows 11, including all the new features and improvements it offers:
NOTE: This article is written using Windows 11 version 22H2 and the latest Paint app available (version 11.2304.30.0). If you have an older Windows 11 build or Paint version, you might not see all the features and options presented in this guide. In that case, make sure you update your operating system and get the latest Paint app.
 How to open Paint in Windows 11
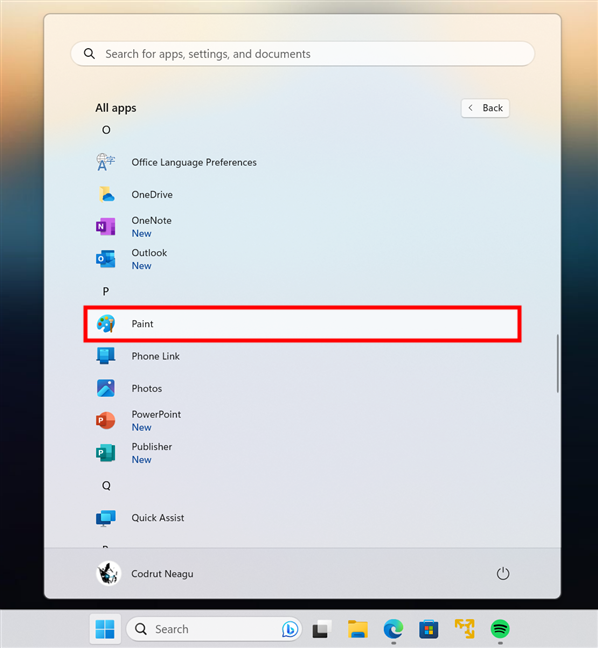
Alternatively, if you don’t find Microsoft Paint in the Pinned section, you can use its shortcut from the All apps list.
How to open Paint in Windows 11
Alternatively, if you don’t find Microsoft Paint in the Pinned section, you can use its shortcut from the All apps list.
 Paint shortcut in the Start Menu
Now that you know how to open it, let’s see how to work with Windows 11’s Paint:
Paint shortcut in the Start Menu
Now that you know how to open it, let’s see how to work with Windows 11’s Paint:
 Paint for Windows 11
Let’s see what you can do with Microsoft Paint, starting with the most common tools for drawing and editing images and ending with the settings and options for saving your work or configuring the app itself:
Paint for Windows 11
Let’s see what you can do with Microsoft Paint, starting with the most common tools for drawing and editing images and ending with the settings and options for saving your work or configuring the app itself:
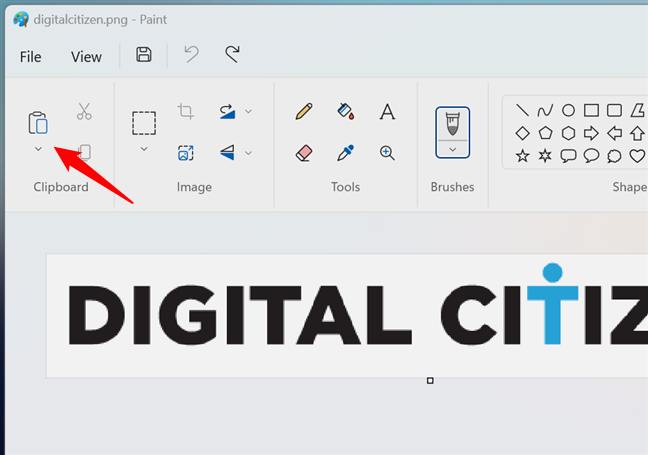
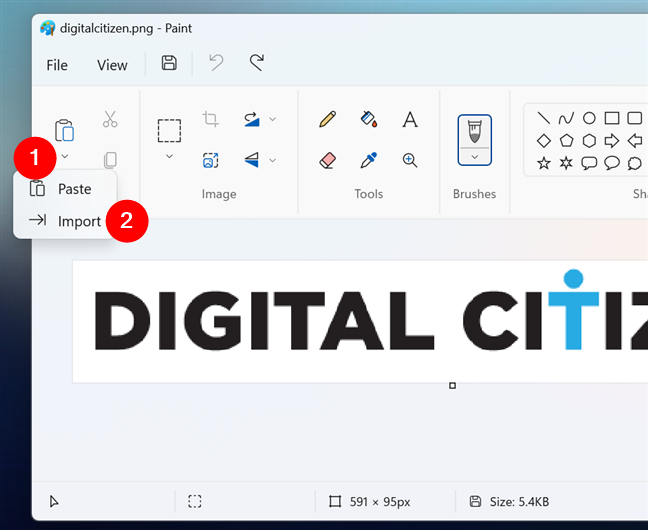
 How to open images in Windows 11's Paint
If not, you can click or tap the small arrow under the Paste button and select Import from the menu to open the image file you want to work on.
How to open images in Windows 11's Paint
If not, you can click or tap the small arrow under the Paste button and select Import from the menu to open the image file you want to work on.
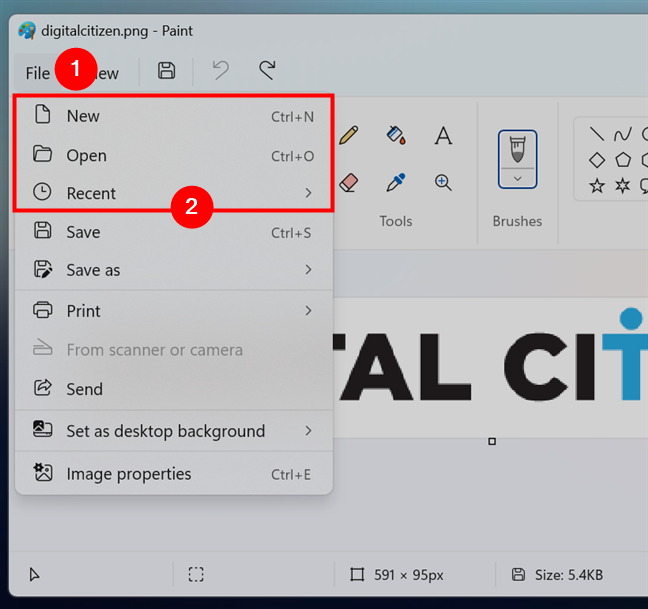
 How to import an image in Paint for Windows 11
Alternatively, Windows 11’s Paint also lets you create or open an image from its main menu. For that, click or tap File in the top-left corner of the app’s window and select the option you prefer:
How to import an image in Paint for Windows 11
Alternatively, Windows 11’s Paint also lets you create or open an image from its main menu. For that, click or tap File in the top-left corner of the app’s window and select the option you prefer:
 How to open an image with Paint in Windows 11
TIP: Microsoft’s Paint app for Windows 11 supports many image file types, including all the following: Bitmap Files (.bmp, .dib), JPEG (.jpg, .jpeg, .jpe, .jfif), GIF (.gif), TIFF (.tif, .tiff), PNG (.png), ICO (.ico), HEIC (.heic, .hif), and WEBP (.webp).
How to open an image with Paint in Windows 11
TIP: Microsoft’s Paint app for Windows 11 supports many image file types, including all the following: Bitmap Files (.bmp, .dib), JPEG (.jpg, .jpeg, .jpe, .jfif), GIF (.gif), TIFF (.tif, .tiff), PNG (.png), ICO (.ico), HEIC (.heic, .hif), and WEBP (.webp).
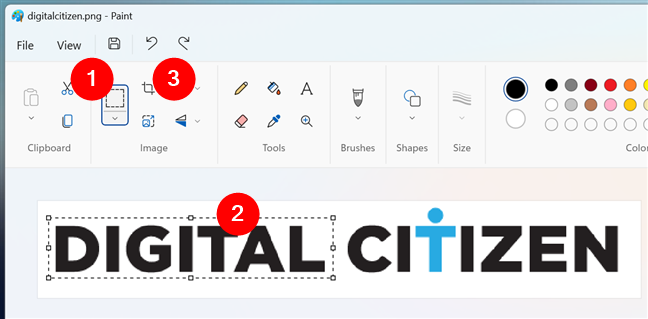
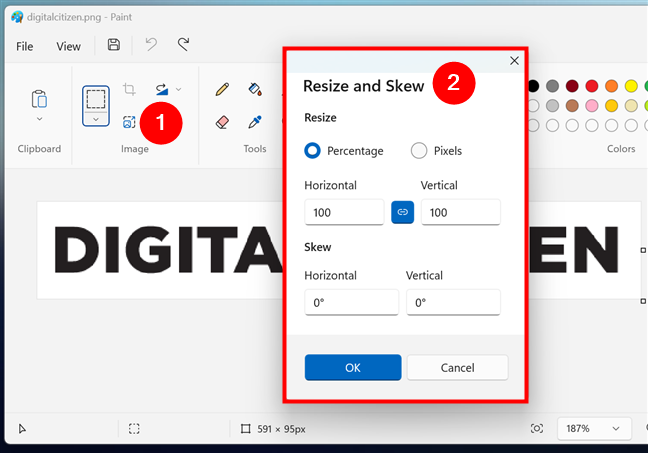
 How to select and crop an image in Windows 11's Paint
The Rotate and Flip buttons do exactly what you expect them to: spin and turn the image over. Resize and skew is more interesting, allowing you to change the size of the image by Percentage or by Pixels. Percentage allows you to increase or decrease the size of your image relative to its original size. Entering 50, for instance, makes the image half as large as before, while entering 200 makes the image twice as large. Pixels lets you choose the exact width and height for the resized image.
How to select and crop an image in Windows 11's Paint
The Rotate and Flip buttons do exactly what you expect them to: spin and turn the image over. Resize and skew is more interesting, allowing you to change the size of the image by Percentage or by Pixels. Percentage allows you to increase or decrease the size of your image relative to its original size. Entering 50, for instance, makes the image half as large as before, while entering 200 makes the image twice as large. Pixels lets you choose the exact width and height for the resized image.
 How to resize an image in Paint for Windows 11
But what about actual painting? After all, we’re talking about a program called Paint! 🙂 Here’s how to…
How to resize an image in Paint for Windows 11
But what about actual painting? After all, we’re talking about a program called Paint! 🙂 Here’s how to…
 How to draw in Paint for Windows 11
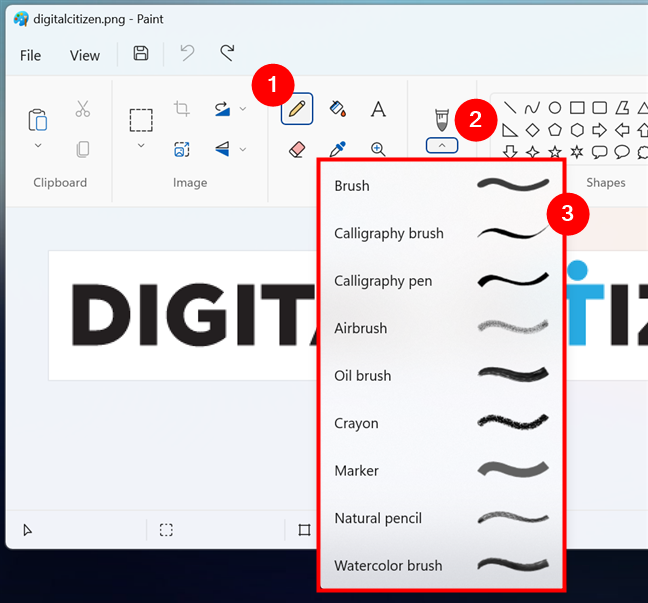
For example, when selecting the Pencil, you can customize it by choosing a different type of brush. In this case, the Brushes toolset activates and allows you to switch from a regular Brush for the Pencil to a Caligraphy brush, Caligraphy pen, Airbrush, Oil brush, Crayon, Marker, Natural pencil, or Watercolor brush.
How to draw in Paint for Windows 11
For example, when selecting the Pencil, you can customize it by choosing a different type of brush. In this case, the Brushes toolset activates and allows you to switch from a regular Brush for the Pencil to a Caligraphy brush, Caligraphy pen, Airbrush, Oil brush, Crayon, Marker, Natural pencil, or Watercolor brush.
 How to change the pencil in Paint
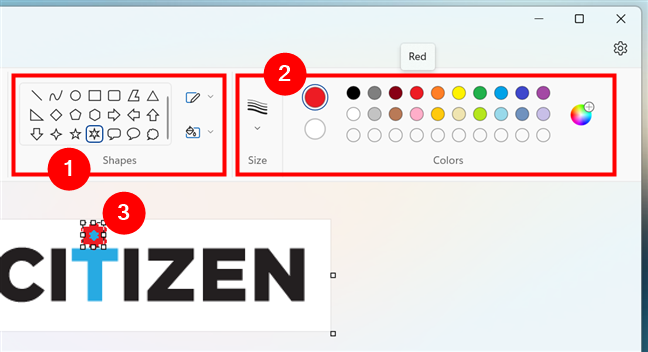
Depending on what tool you choose, you can also select a different Size for it or change its Colors. Furthermore, if you’re not much of an artist and freehand drawing isn’t your strong point, you can also use Shapes in Windows 11’s Paint. These let you quickly draw various shapes, such as rectangles, circles, stars, and arrows. Just like for the Pencil tool, you can also adjust the outline color, fill color, and size of your shapes.
How to change the pencil in Paint
Depending on what tool you choose, you can also select a different Size for it or change its Colors. Furthermore, if you’re not much of an artist and freehand drawing isn’t your strong point, you can also use Shapes in Windows 11’s Paint. These let you quickly draw various shapes, such as rectangles, circles, stars, and arrows. Just like for the Pencil tool, you can also adjust the outline color, fill color, and size of your shapes.
 How to insert shapes in Paint
Play around with the drawing options in Paint, and you’ll surely master it in no time. Well, at least the tools; the artistic part is another thing. 🙂
How to insert shapes in Paint
Play around with the drawing options in Paint, and you’ll surely master it in no time. Well, at least the tools; the artistic part is another thing. 🙂
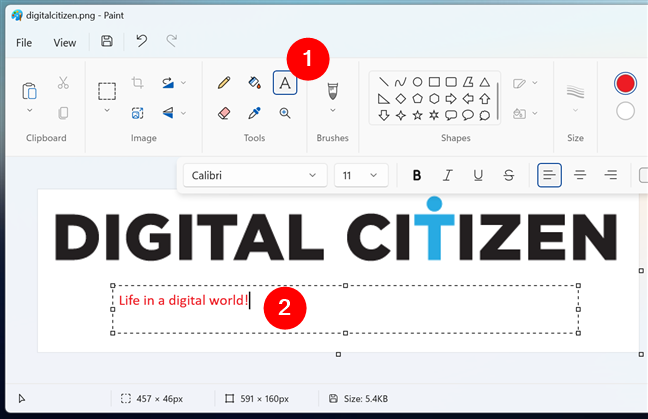
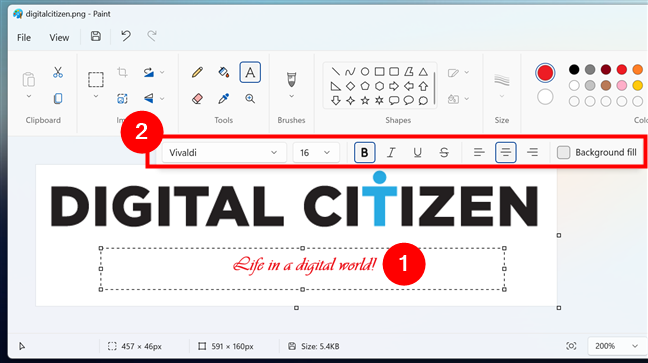
 How to insert text in Paint for Windows 11
If you want to customize the way your text looks, you can change the Font family, Font size, effects (Bold, Italic, Underline, Strikethrough), alignment (Left align, Center align, Right align), and even set a Background fill for it. All that is done from the text toolbar below Paint’s ribbon.
How to insert text in Paint for Windows 11
If you want to customize the way your text looks, you can change the Font family, Font size, effects (Bold, Italic, Underline, Strikethrough), alignment (Left align, Center align, Right align), and even set a Background fill for it. All that is done from the text toolbar below Paint’s ribbon.
 How to format text in Windows 11's Paint
When you finish entering and editing the text, click or tap anywhere outside the text box to apply it to your image.
TIP: Be careful not to leave the editing mode until you’re happy with the text’s appearance. If you do, the changes become permanent in the image, and you won’t be able to modify the text again. The only way to revert the changes is by using the Undo button in Windows 11’s Paint menu or the keyboard shortcut Ctrl + Z.
How to format text in Windows 11's Paint
When you finish entering and editing the text, click or tap anywhere outside the text box to apply it to your image.
TIP: Be careful not to leave the editing mode until you’re happy with the text’s appearance. If you do, the changes become permanent in the image, and you won’t be able to modify the text again. The only way to revert the changes is by using the Undo button in Windows 11’s Paint menu or the keyboard shortcut Ctrl + Z.
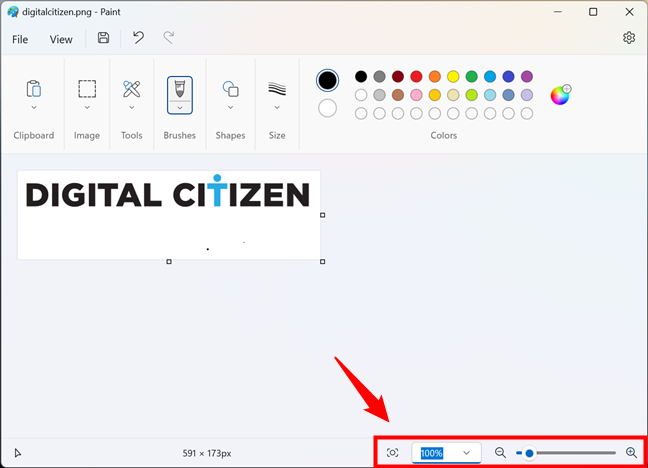
 Zooming controls in Windows 11's Paint
Zooming in Paint helps you draw and edit images more precisely, as you can view more details, as well as the “big picture.” Try the controls and see what I mean. 🙂
Zooming controls in Windows 11's Paint
Zooming in Paint helps you draw and edit images more precisely, as you can view more details, as well as the “big picture.” Try the controls and see what I mean. 🙂
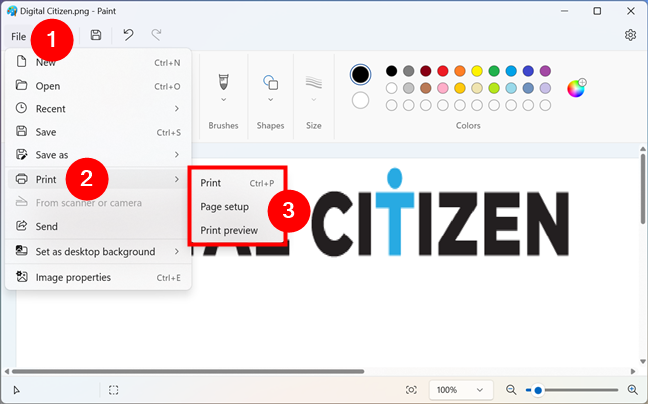
 Print options in Paint for Windows 11
Use the Page setup and Print options seen above to select your printer, paper size, orientation, and other settings. If you want, click or tap on Print preview to see how your image or poster is going to look on paper and further adjust the margins, scaling, and alignment, if needed.
Print options in Paint for Windows 11
Use the Page setup and Print options seen above to select your printer, paper size, orientation, and other settings. If you want, click or tap on Print preview to see how your image or poster is going to look on paper and further adjust the margins, scaling, and alignment, if needed.
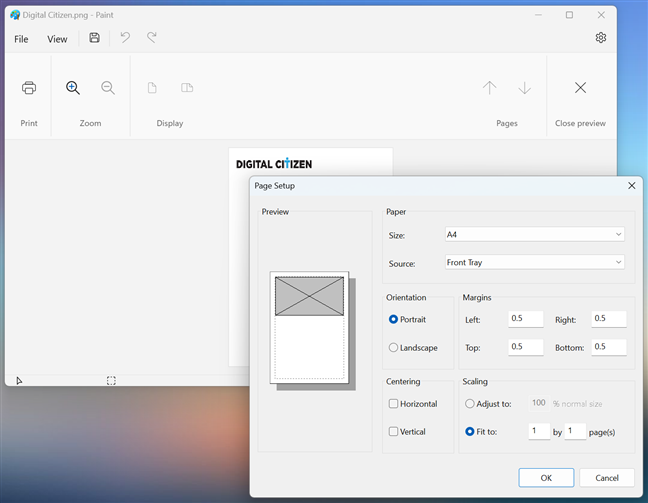
 Page Setup and Print preview in Paint
When done, use the Print dialog to send your image to the printer.
Page Setup and Print preview in Paint
When done, use the Print dialog to send your image to the printer.
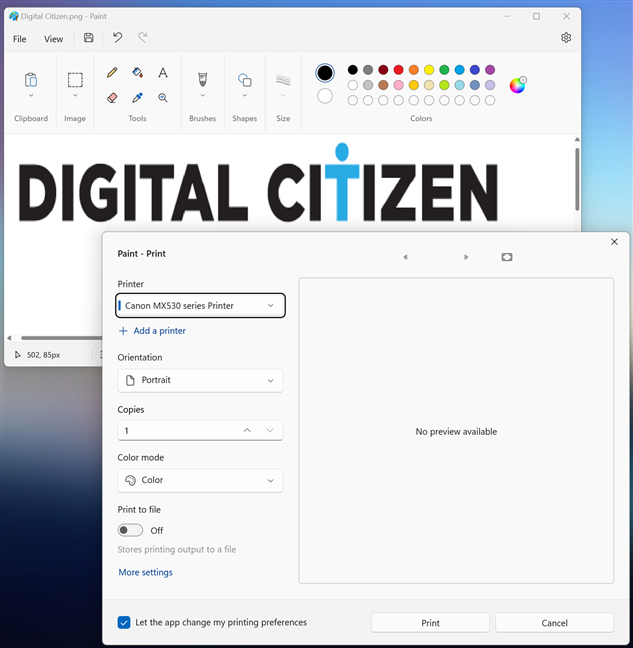
 How to print with Paint in Windows 11
TIP: Did you know that you can use Windows 11’s Paint to print large images on more than just one page? Here’s how to print an image or poster on multiple pages.
How to print with Paint in Windows 11
TIP: Did you know that you can use Windows 11’s Paint to print large images on more than just one page? Here’s how to print an image or poster on multiple pages.
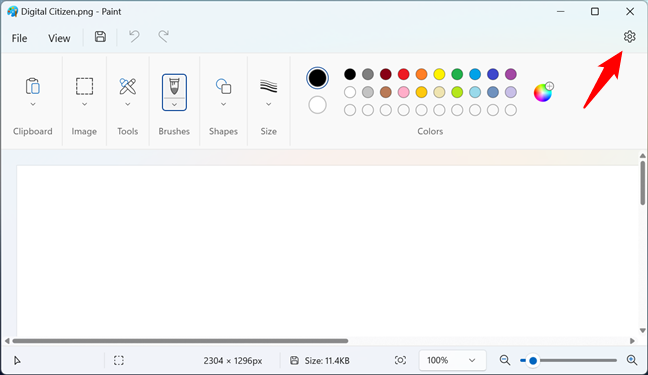
 The Settings button in Windows 11's Paint
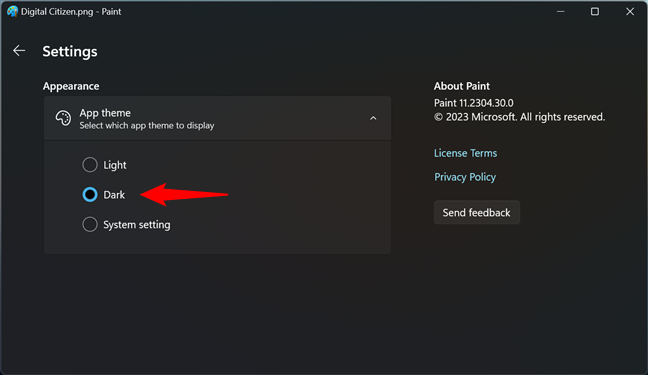
Then, the Settings page opens: on it, select the Dark option under App theme. If you’d rather have Paint automatically switch to dark mode whenever Windows 11 does, select System setting instead.
The Settings button in Windows 11's Paint
Then, the Settings page opens: on it, select the Dark option under App theme. If you’d rather have Paint automatically switch to dark mode whenever Windows 11 does, select System setting instead.
 Dark mode for Paint in Windows 11
The changes in appearance are applied instantly. When you get back to the main interface of Windows 11’s Paint, this is what you should see if you’ve turned dark mode on:
Dark mode for Paint in Windows 11
The changes in appearance are applied instantly. When you get back to the main interface of Windows 11’s Paint, this is what you should see if you’ve turned dark mode on:
 Windows 11's Paint in Dark mode
While it’s not a huge change in how Paint for Windows 11 works, the option to use dark mode is something many users requested. So, enjoy! 🙂
Windows 11's Paint in Dark mode
While it’s not a huge change in how Paint for Windows 11 works, the option to use dark mode is something many users requested. So, enjoy! 🙂
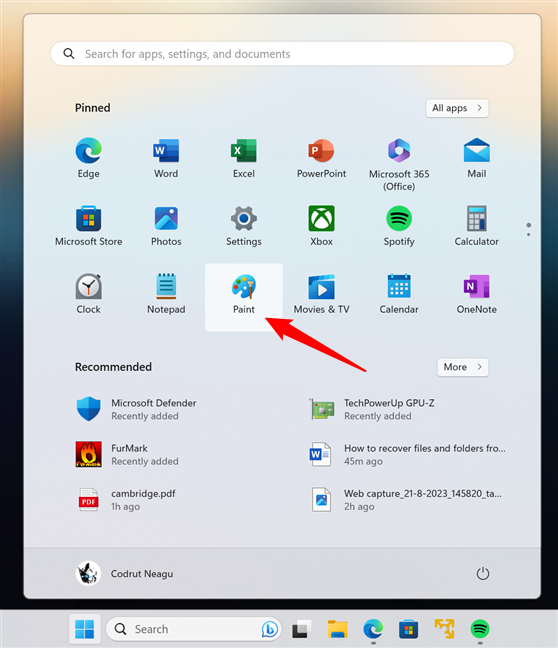
How to open Paint in Windows 11
There are several ways to open Windows 11’s Paint, but the most common method is probably the one that involves the use of the Start Menu. Press the Windows button on the taskbar, and click or tap the Paint shortcut in the list of Pinned items.How to use Paint for Windows 11
Although Windows 11’s Paint resembles the older versions of Microsoft Paint in previous Windows operating systems, its looks, tools, and features have been improved. The new Paint matches the visual design of Windows 11, with rounded corners, modern icons, support for dark mode, and a more elegant user interface overall.1. Open images in Paint for Windows 11
The ribbon at the top of the Paint window is where you find all the tools you need for drawing and editing pictures. They’re organized by categories, each holding various buttons. As the first step in editing any image is to import or copy/paste the image, the first toolset in the ribbon is Clipboard. If you already have an image copied in the clipboard (Ctrl + C), you can paste it (Ctrl + V) it into Windows 11’s Paint.- New creates a new image file with a blank canvas that you can draw or write on;
- Open lets you browse through your Windows 11 computer to choose the image file to edit;
- Recent shows you the list of images you’ve worked with not long ago, and you can choose the one you want to carry on editing.
2. Use Windows 11’s Paint to edit images (crop, resize, flip, rotate)
The next toolset in Paint for Windows 11 is called Image, and it has buttons that you can use to Select, Crop, Rotate, Resize and skew, and Flip. They work the same way as the ones in Paint for Windows 10. For example, to crop the loaded image to a specific area, use the Select tool. It defaults to a rectangular selection area, but you can choose a free-form shape if you want (in the menu that shows upon clicking/tapping the arrow under the button). Then, you click or tap on the image and drag it to create a selection box. Adjust the size and position of the box as needed. When satisfied with your selection, click or tap Crop to apply the changes to the image.3. Draw in Paint for Windows 11
The next sets of tools in Windows 11’s Paint are all about drawing and writing. You have Tools, Brushes, Shapes, Size, and Colors. Tools includes buttons for Pencil, Fill, Text, Eraser, Color picker, and Magnifier. They cover all the basics you need to draw, erase, fill, pick, write, and zoom on your image. Furthermore, depending on which tool you choose, you can get additional options for it.4. Insert text in Microsoft Paint for Windows 11
Typing text in an image got a few changes and is improved in Windows 11’s Paint compared to older versions of the app (in previous Microsoft operating systems). As you’ve seen earlier, the Text button is found in the Tools category from Paint’s ribbon interface. To insert text, click or tap the Text button marked with an A icon. Then, click or tap on the image where you want to write the text. A box with a dotted border appears: you can resize or move it as you wish. Once done, type the text you want inside the box.5. Zoom in or out with Paint’s new controls
Old Paint apps in previous Windows operating systems allowed you to zoom in and zoom out. However, in Windows 11’s Paint, the zoom controls have been improved, and they’re now more useful and easy to use. In the lower-right corner of the window, you can use a Fit to window button (Ctrl + 0), a Zoom percentage list, and a Zoom out / Zoom in slider.6. Print an image or a poster with Paint for Windows 11
Once you’ve finished creating or editing an image or drawing in Paint, you’ll probably want to save it or, even better, print your creation on paper. Fortunately, you can do this easily: click or tap on File in the main menu, select Print, and you get all the options you need: set up the page, preview the output, and print the image.7. Match Paint’s colors with Windows 11 using Dark mode
While Windows 11 and many of the apps bundled with it have had dark mode interfaces, Paint was not one of them. However, the most recent versions of the app now include support for the Dark theme. If you want to change the appearance of Paint for Windows 11 to a darker color scheme, you need to access its Settings. To do that, click or tap the cogwheel button in the top-right corner of the app.

Discussion (2)
Just got a new computer with win 11. I have had computers from all versions, so I am not a newbie. I swear that the people in charge of “new and improved ” versions of things, have never actually used these things on a daily basis.
Have been wandering through message boards, to find that the incredibly annoying change in all my folders to group things cannot be gotten rid of permanently. Now I have to jump through hoops every time I access files in a folder as it reverts to stupid.
And the amount of time to find out how to resize something in Paint!
And why do I have to go to a second page to find the basic -delete, change,copy, paste, where 7zip lives… It’s been made more time consuming and annoying.
Sorry to hear about the annoyances you’ve encountered. Thanks for posting this comment.