Microsoft Paint is a simple and versatile graphics editor that comes pre-installed with Windows 11. You can use it to create and edit images, drawings, logos, icons, and more. But did you know that you can also use it to generate images using AI? That’s right, with the new Cocreator feature in Microsoft Paint, you can type to describe what you’d like your image to be, and the powerful artificial intelligence model called DALL-E will make your creativity come to life! In this article, I will show you just how easy it is to use Cocreator in Microsoft Paint for Windows 11.
What is Cocreator in Paint?
The Cocreator from Windows 11’s Paint is a brand-new feature that allows you to generate images by simply entering text that describes what you want. The AI behind this feature is based on DALL-E, an artificial intelligence model developed by OpenAI that uses deep learning to generate digital images from natural language descriptions. During the last months or so, Microsoft worked towards getting this powerful tool into Paint. This is somewhat unexpected as “Does Microsoft Paint still exist?” is a question many people are asking nowadays. 🙂
Where is Cocreator in Paint?
If you want to use AI in MS Paint and have fun creating “works of art” by simply typing a description of the image you’d like to generate, you’ll need to first know how to get Microsoft Paint’s Cocreator. Fortunately, this is simple as there’s nothing special you need to do:
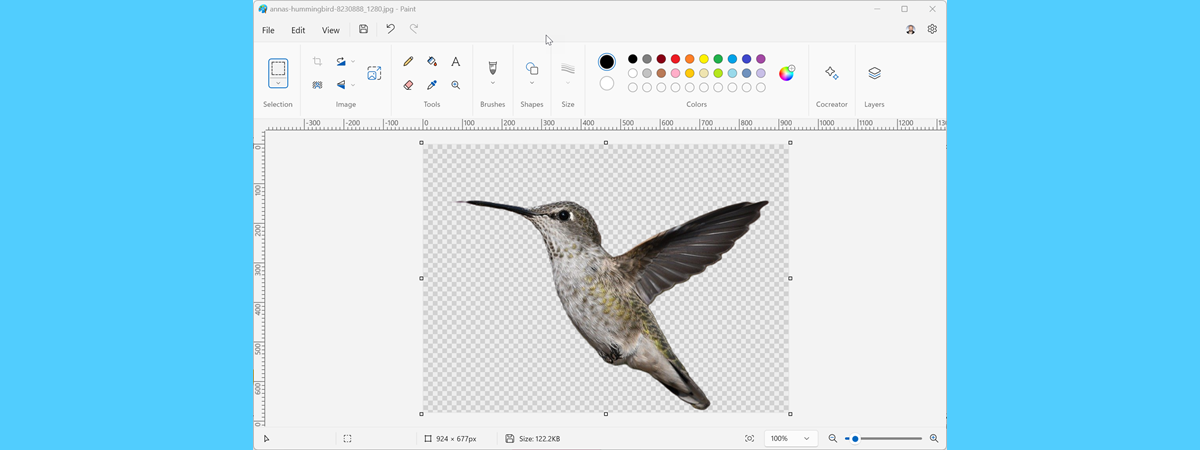
Start by opening Microsoft Paint on your Windows 11 computer and either create a new file or open an existing one. Then, look at the right side of the app’s toolbar, and you’ll find Cocreator.
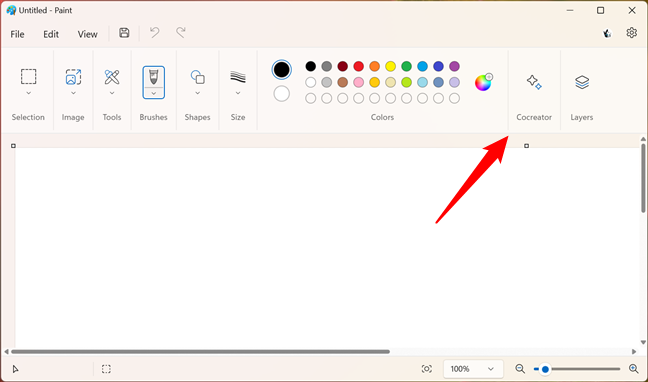
Where is Cocreator in Paint?
NOTE: If you don’t see the Cocreator in Paint, it’s probably because you live in a region that’s not currently supported. When writing this article, the Cocreator is available only in the United States, France, the UK, Australia, Canada, Italy, and Germany.
To use Cocreator in Paint, click or tap its toolbar button, and the Cocreator side panel will show up, like in the next screenshot.
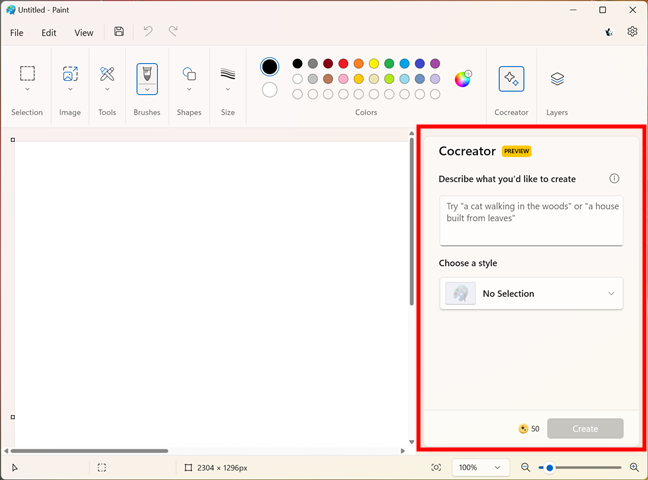
The Cocreator side panel in Paint
Let’s see now how to use AI in MS Paint:
How to use Cocreator to generate AI images in Paint
The side panel is extremely simple, but it contains everything there is about the Cocreator in Paint. Split into two sections, the Cocreator has a field where you tell it what image you want to create and a dropdown menu where you choose a style that you’d like the AI to use for the generated image.
Start by typing a description of the image you’d like to generate with AI in the “Describe what you’d like to create” text field. In the following example, you can see that I want MS Paint’s Cocreator to create an image of “a giant cat having fun with a tiny earth.” 😸
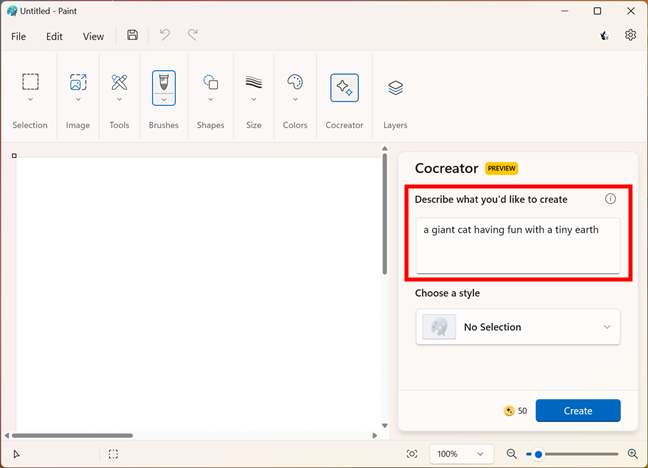
Describe what you’d like to create
Once you’ve typed a description for the image you want to be generated by the AI, click or tap on “Choose a style” and select one of the options available: No selection, Charcoal, Ink Sketch, Watercolor, Oil Painting, Digital Art, Photorealistic, Anime, or Pixel Art.
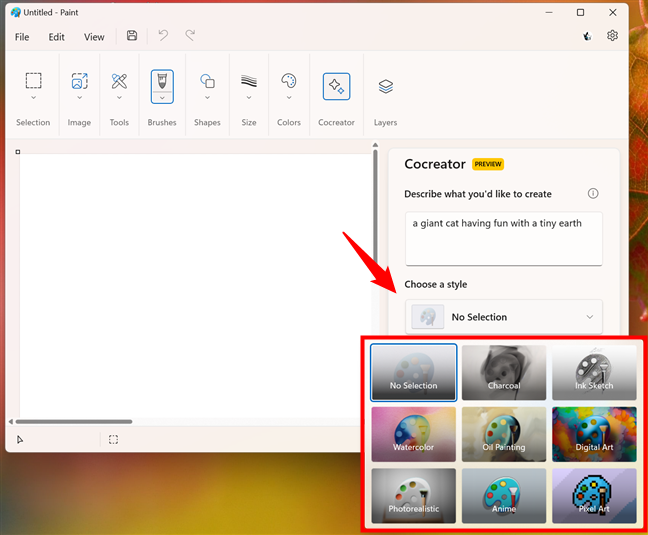
Choose a style
Once you choose a style, it will be shown as selected in Cocreator’s side panel, and MS Paint’s AI will try to match your expectations to generate an image in that style.
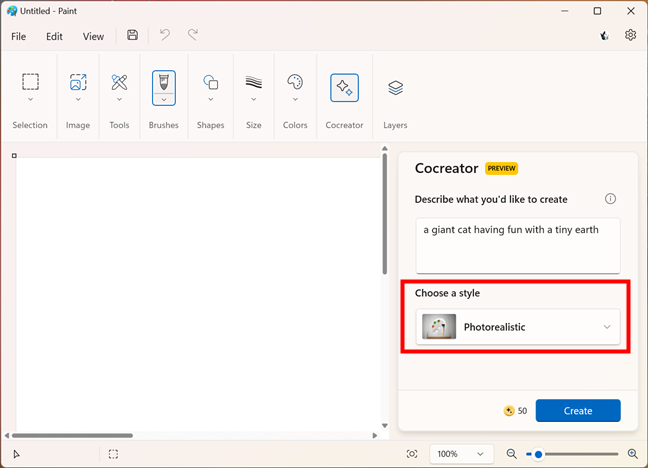
Setting a photorealistic style
You’re now ready to let Paint generate the AI image. To do so, click or tap the Create button in the bottom-right corner of Cocreator’s side panel.
Note that, when writing this article, Microsoft allows you to generate up to 50 images per day with Cocreator. When the day starts, you get 50 credits that are shown left of the Create button in Paint’s Cocreator side panel. Every time you generate a new image, a credit goes away.
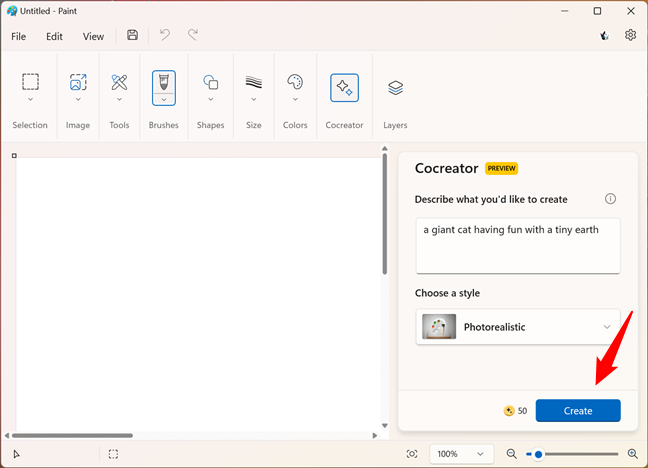
Create an AI image with Paint's Cocreator
Once you’ve pressed Create, it only takes a couple of moments for Paint’s AI to create the image. However, you don’t get only one image but up to three different creations. They’re shown in the Explore variants section of the Cocreator side panel.
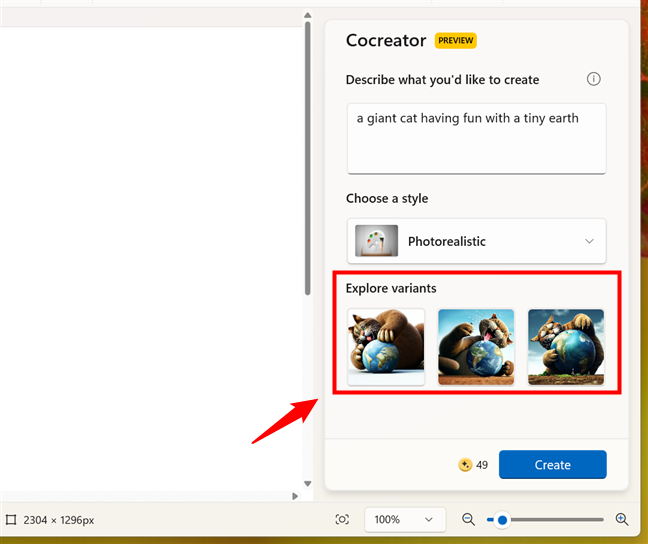
Explore variants of the AI-generated image
Click or tap the AI-generated variant you prefer, and it will be loaded onto your canvas in Paint.
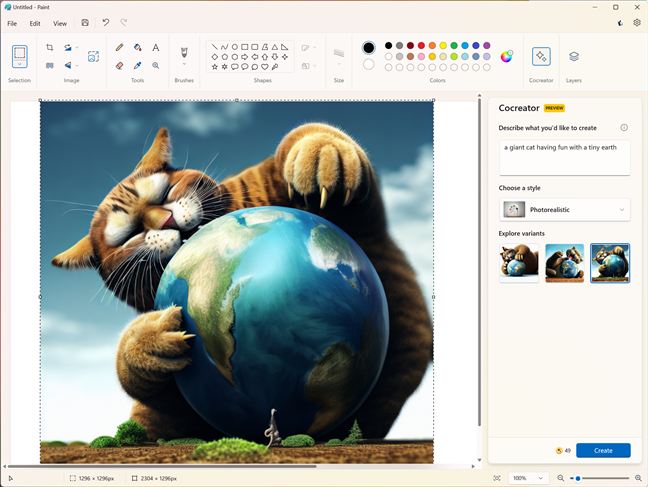
Loading the AI-generated image in Paint
You can then use all the tools and features available in Microsoft Paint to work on the image you’ve generated with the help of artificial intelligence. For instance, you can use brushes, shapes, colors, text, or stickers to add new details to the canvas. If you’re new to all that, you can learn more about working with Paint in this guide: How to use Paint in Windows 11.
Once you’re done creating your image, you can save it to your computer as an image file in various formats, such as PNG, JPEG, BMP, or GIF.
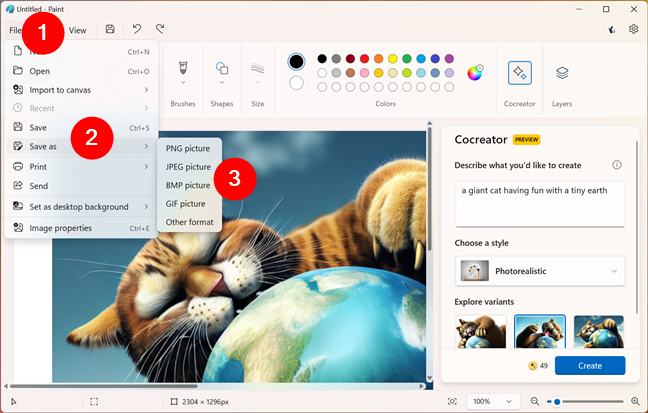
You can save your AI-generated project
TIP: If you like some of the image variants generated by MS Paint’s AI and don’t want to lose them, you can save them. You don’t even have to load them in Paint: just click or tap the More (...) button in the top-right corner of the image you want to keep and select Save image.
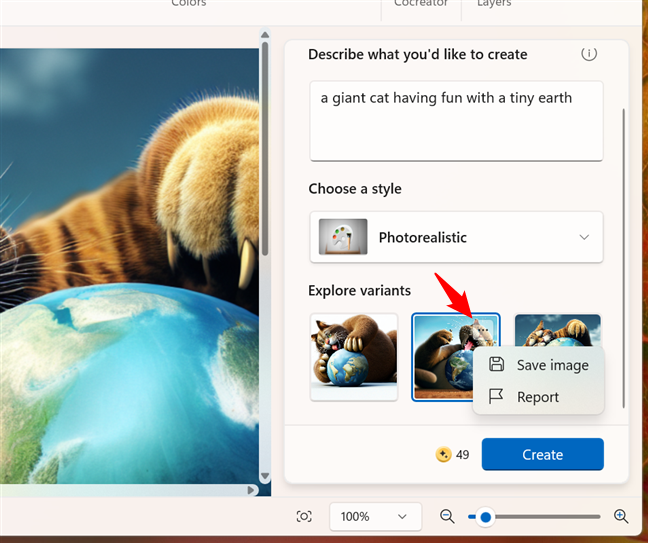
You can save any of your AI-generated images
That’s it!
Are you having fun creating images with AI in Paint?
You know now what Cocreator is and where to find it in Paint. Moreover, you also know just how easy it is to use Cocreator in Microsoft Paint for Windows 11. All it takes is a well-thought description of what you want, and the image in your mind is immediately created. Try it out! And then let me know what you think about Paint’s AI in the comments section below.


 12.12.2023