Changing the name of your user account in Windows 10 can be tricky. The process differs depending on your permissions and the type of your user account, but we try to make it crystal-clear for you. If you ever asked yourself "How do I rename an account in Windows 10?", look no further. In this tutorial we share how to rename both local accounts and Microsoft accounts. Let's get started:
First things first: Account types and permissions to consider when you change your account name
In Windows 10, you see the name of your user account displayed on the login screen. To change your account name, there are different steps to follow depending on your account's permissions and on whether you're using a local or a Microsoft account.
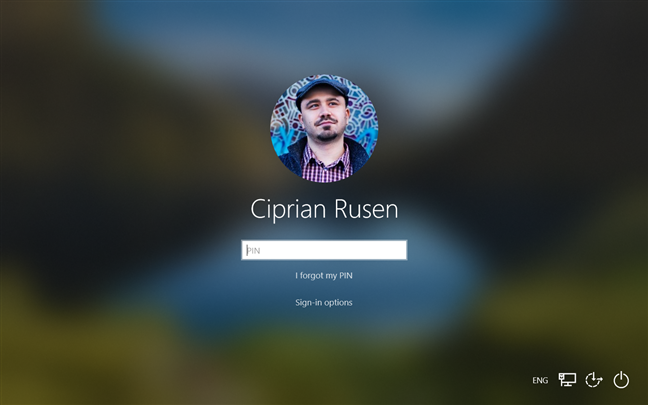
The Windows 10 login screen
Windows 10 encourages home users to sign in with a Microsoft account in order to sync their settings and files. It is also easier to change your account name if you sign in using a Microsoft account because you don't need "special" permissions: the process is the same for both standard and Administrator accounts.
However, when it comes to local user accounts, you need administrative permissions to change your account name. Simply put: only an Administrator account has the privileges to change the name of a local account, whether it's their account or someone else's. So if you are using a local account and you don't have administrative rights, you need an Admin to follow the steps shown in this tutorial.
How to change the name of your Microsoft account in Windows 10
If you sign into Windows 10 using a Microsoft account, the name displayed on the login screen is automatically synced with the one in your Microsoft profile. To change it, you need to update those settings online. Luckily, the process is straightforward:
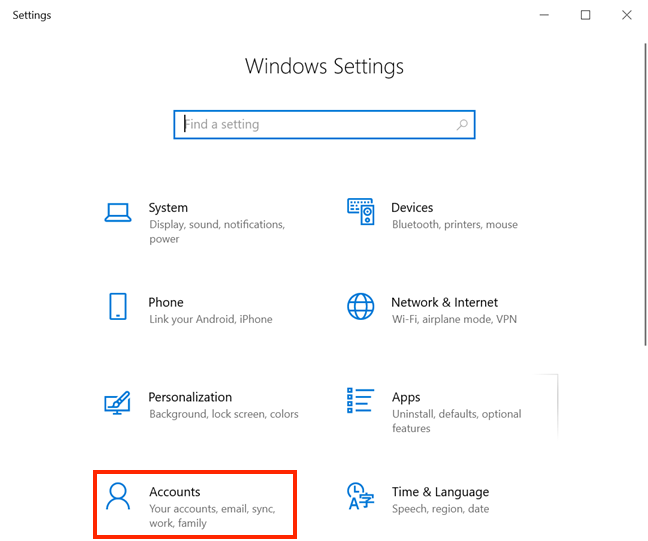
First, open the Settings app - we find it easiest to do that using the keyboard shortcut Win + I. Then, go to Accounts.
Access Accounts Settings
This opens the Your info tab from Accounts settings. On the right-hand side, under your account details, click or tap on "Manage my Microsoft account."
Press Manage my Microsoft account
Your default browser opens, and you might have to sign in to your Microsoft account (unless you're already logged in).
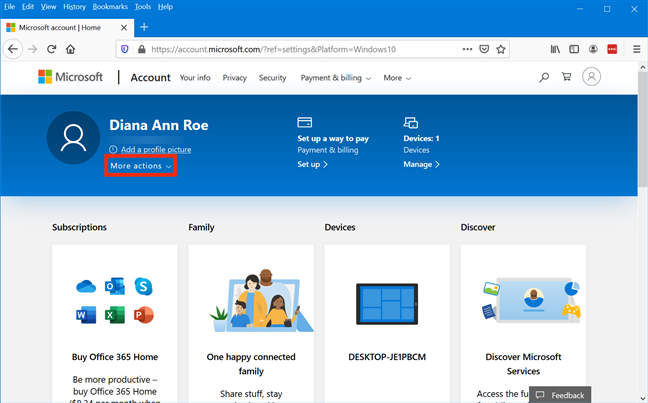
On the Homepage of your Microsoft Account, press on More actions, under your account details.
Click or tap More actions
This opens a drop-down menu. Click or tap on the first option, Edit profile.
Press Edit profile
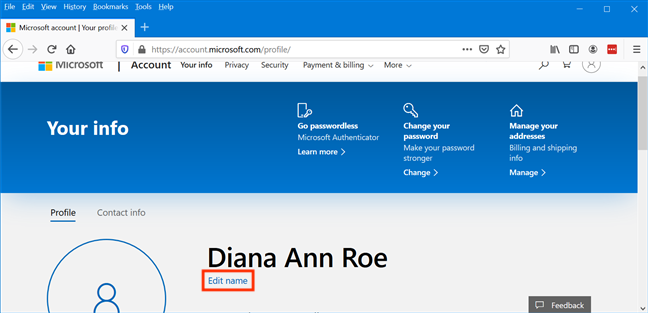
On the next page, you can find the option you need under your name. Click or tap on Edit name.
Press Edit name
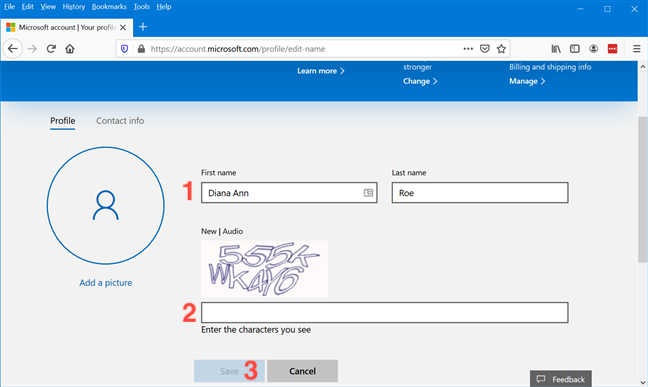
Use the First name and Last name fields to enter your desired name. Don't forget to "Enter the characters you see" in the image, before pressing Save.
Enter a new name, insert the captcha, and click or tap Save
You are returned to your Microsoft account's Profile page, where you can see your new name displayed on top. To see your changes applied in Windows 10, switch to another user account or restart your PC. When you sign back into your account, your settings are synced, and your name is updated throughout Windows 10.
How to change the name of your local Administrator account from the Control Panel in Windows 10
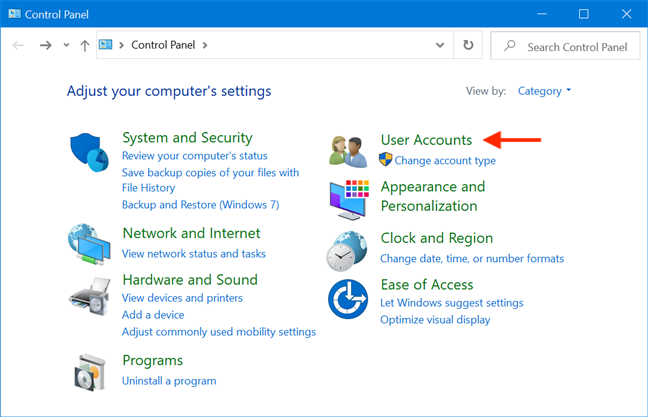
To change the name of your local Administrator account, begin by opening the Control Panel and accessing User Accounts.
Press User Accounts
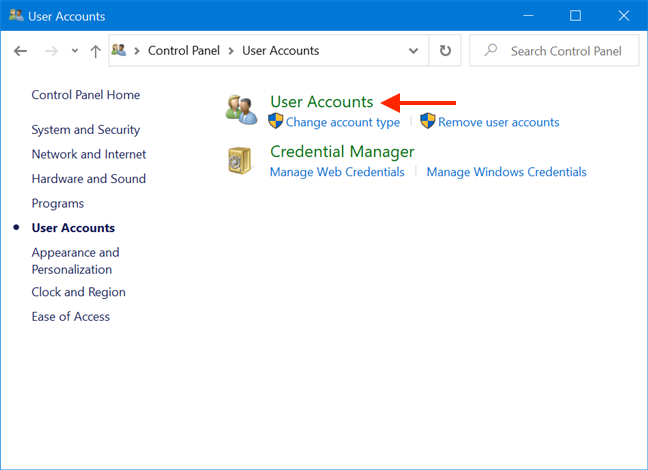
On the next page, click or tap on User Accounts.
Press User Accounts again
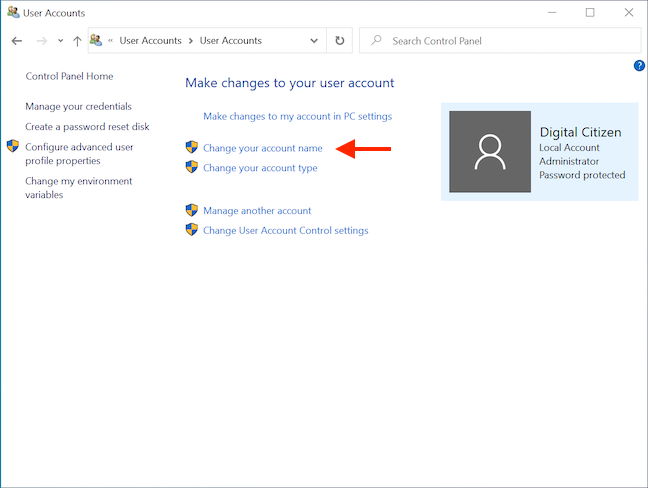
Access the "Change your account name" link.
NOTE: This link is not available if you are logged in through a Microsoft account, so scroll up to the previous section to change it. If you are using a standard account, this is where the UAC pops up, asking for admin credentials.
Click or tap Change your account name
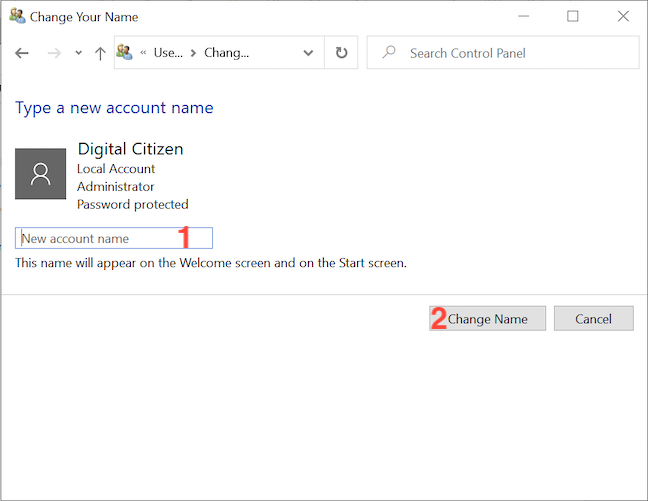
Insert a "New account name," and then click or tap on Change Name.
Type in the new name and press Change Name
Logout, and your user account name is updated the next time you sign in.
How to change the name of a local account from the Control Panel in Windows 10
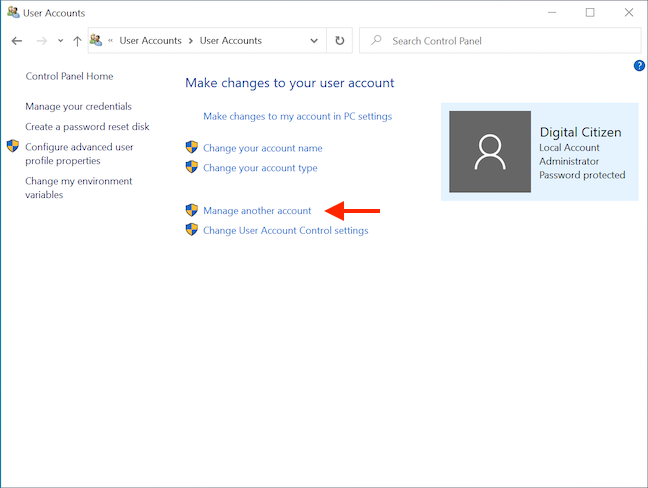
As explained earlier, you need Administrator privileges to change the username of a local (non-Microsoft) standard account. Open the Control Panel and access "User Accounts ->User Accounts," as illustrated in the previous section. On the next screen, click or tap on "Manage another account." If your account does not have administrative privileges, this is where the UAC pops up, asking an Admin to insert their credentials.
Press Manage another account
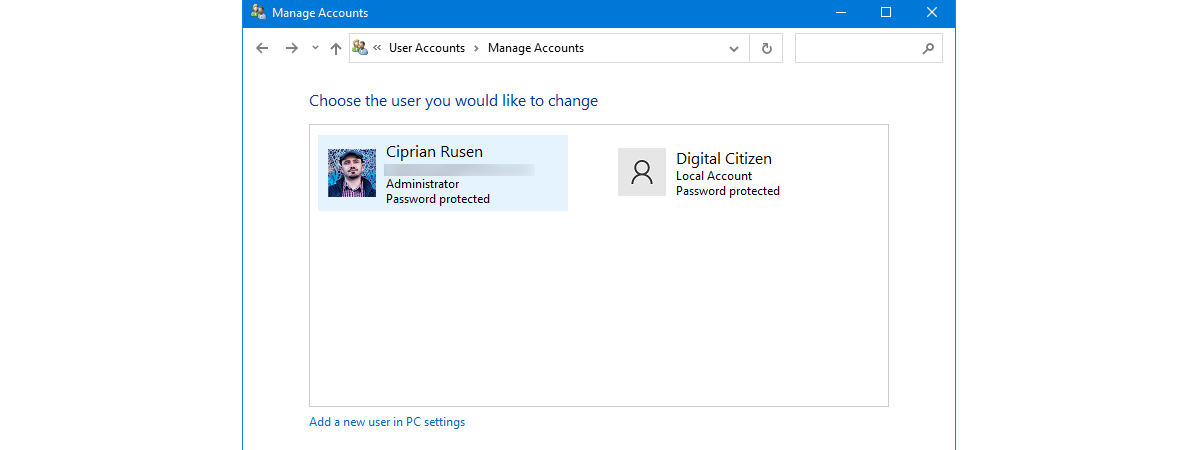
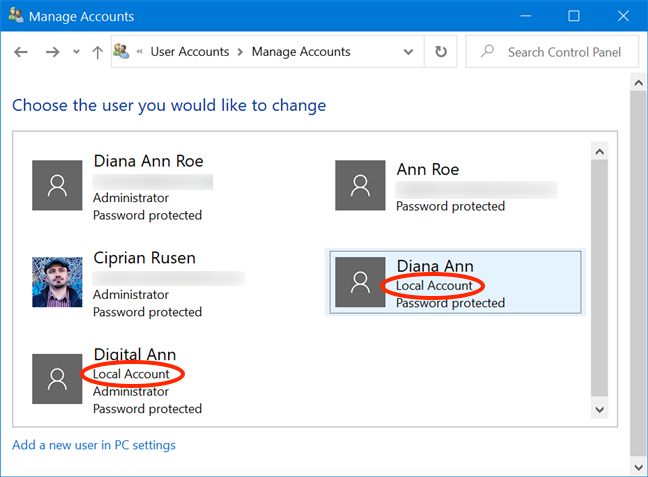
In the Manage Accounts screen, you can see all the user accounts on your Windows 10 computer or device, their account type and permissions. Click or tap on the Local Account you want to rename.
Select the Local Account you want renamed
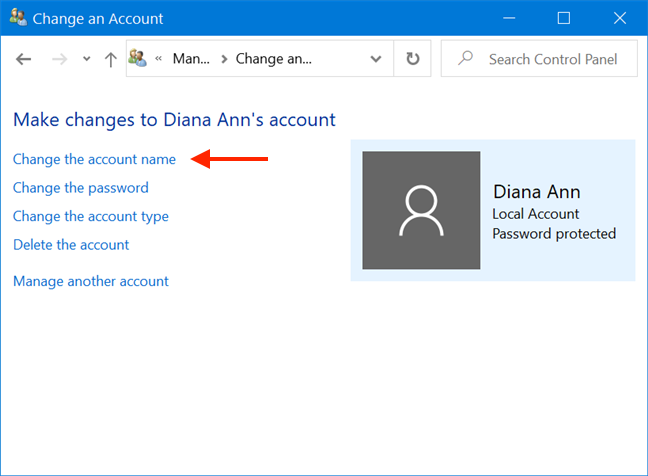
On the next screen, access the "Change the account name" link.
Click or tap Change the account name
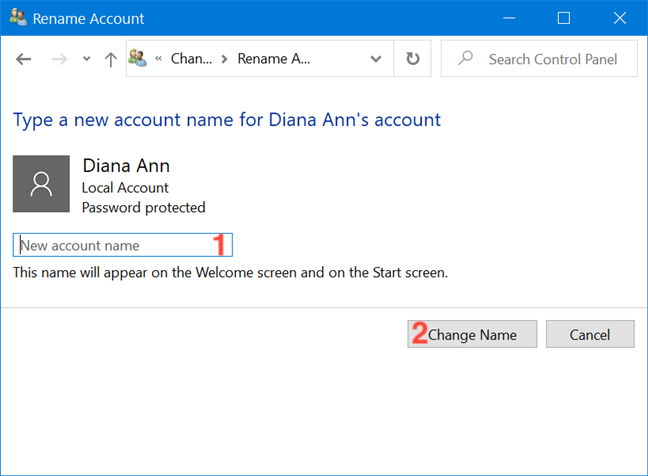
Type a New account name in the field. Then, click or tap on Change Name.
Choose a New account name and press Change Name
The new name is already updated and is displayed on the login screen.
How to change the name of a local account using netplwiz in Windows 10
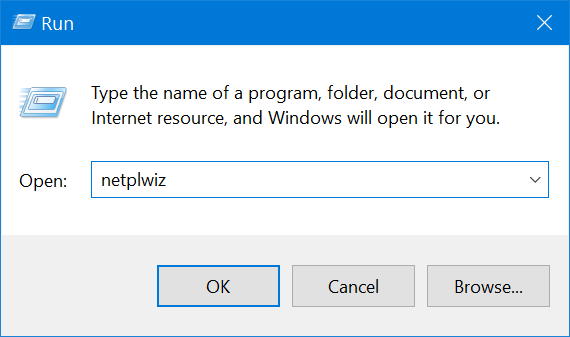
An Administrator can also use the netplwiz app to rename a local user account. To start, open the Run window by pressing the keyboard shortcut Win + R and insert "netplwiz." Press OK or Enter on your keyboard.
Enter netplwiz into the Run window
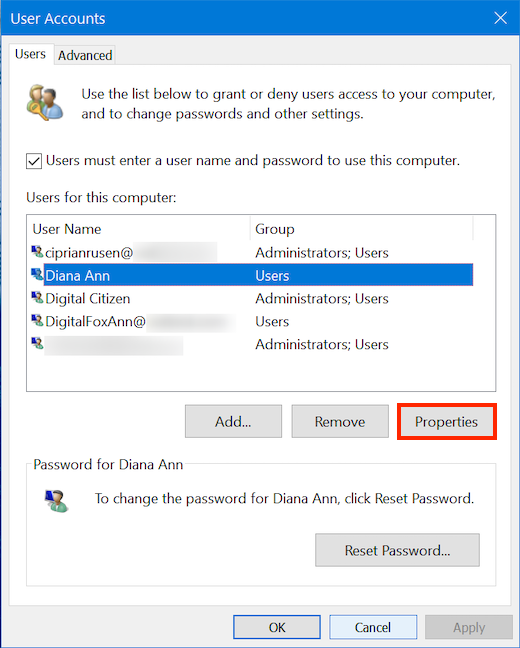
In the Users tab of the User Accounts window, select one of the local, non-Microsoft accounts - the entries displaying a name, and not an email address in the User Name column. Click or tap on Properties.
IMPORTANT: If you login with a Microsoft account and try to rename your user account with netplwiz, your changes are displayed for the moment, but Windows 10 does not remember them. The next time you sign in, your username syncs, displaying the name of your Microsoft account.
Choose a local account and press Properties
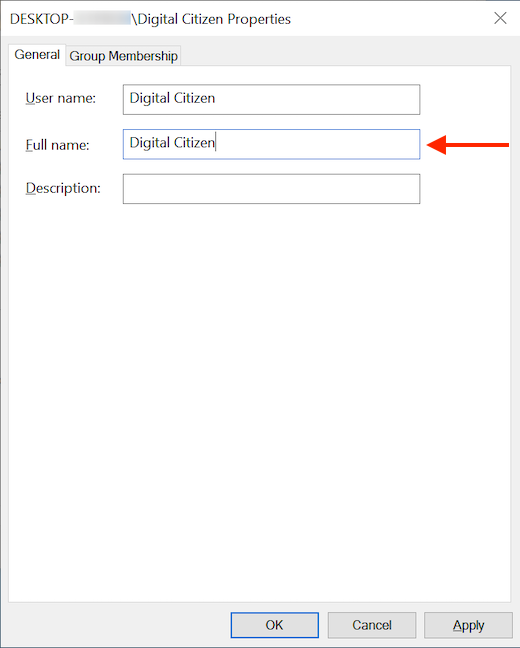
In the next window showing the Properties of the local account, insert your desired name in the Full name field, and press OK.
Type a new Full name and hit OK
You are returned to the User Accounts window. Click or tap OK again to save your changes. If you were renaming another local account, you can see the new name updated immediately.
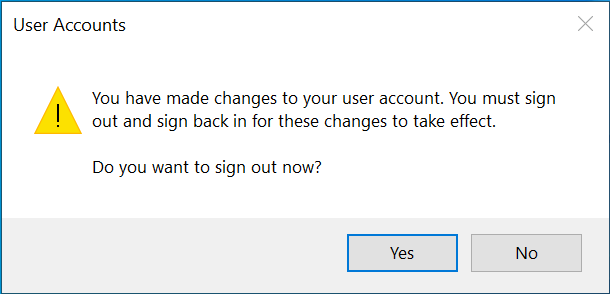
However, if you are logged in with the local account you were renaming, a pop-up offers info about your changes, asking if you want to sign out. Click or tap on Yes.
How to change the name of a local account using Computer Management in Windows 10
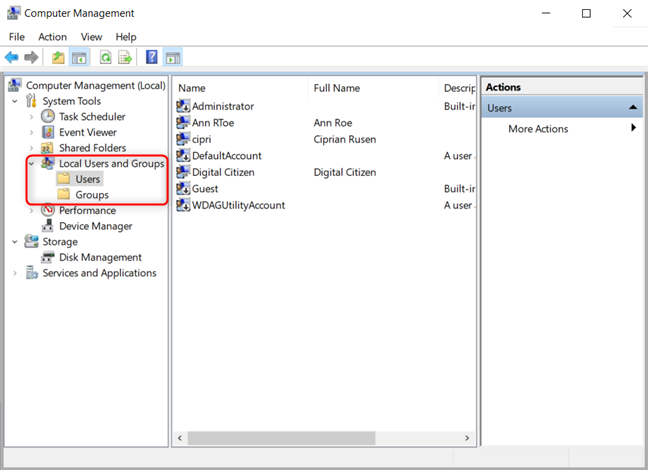
You can also start Computer Management and use it to rename a local user account. To open it, press Start, open the "Windows Administrative Tools" folder, and access Computer Management. In the Computer Management window, open Local Users and Groups and then Users. On the right, you see a list of all the user accounts on your Windows 10 computer.
In Computer Management, open Local Users and Groups and then Users
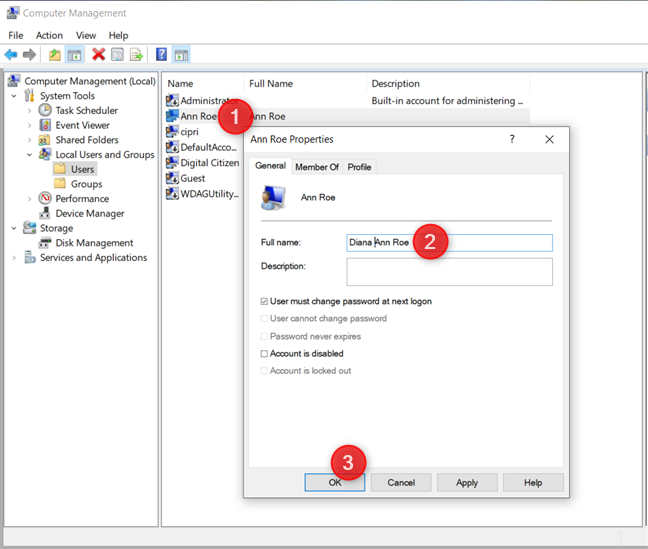
Double-click or double-tap on the user account that you want to rename to open its Properties. Type the desired name for the local user account in the Full name field, and then press OK.
Insert the desired name for the local user account and hit OK
Sign out to see the new user account name on the sign in screen.
IMPORTANT: If you login with a Microsoft account and try to rename your user account with Computer Management, your changes are displayed for the moment, but Windows 10 does not remember them. The next time you sign in, your user account syncs, displaying the name of your Microsoft account.
Why did you want to change your account name?
We often use our devices in public places. It can be flattering to see people show an interest in us, but when they call us by name after reading it off our screen (while we were logging in), it is a bit too stalkerish. What about you? What's your reason for wanting to rename your account? Let us know in a comment.
How to change the user name, not the account user name.
C:Users
Anonymous ·
what now?….
Anonymous ·
for some reason when i click the browse for more picture link in the change your account icon window it doesn’t bring up a sub window for me to use any other pics for my account icon , help?…..


Discussion (3)
How to change the user name, not the account user name.
C:Users
what now?….
for some reason when i click the browse for more picture link in the change your account icon window it doesn’t bring up a sub window for me to use any other pics for my account icon , help?…..