22.03.2021
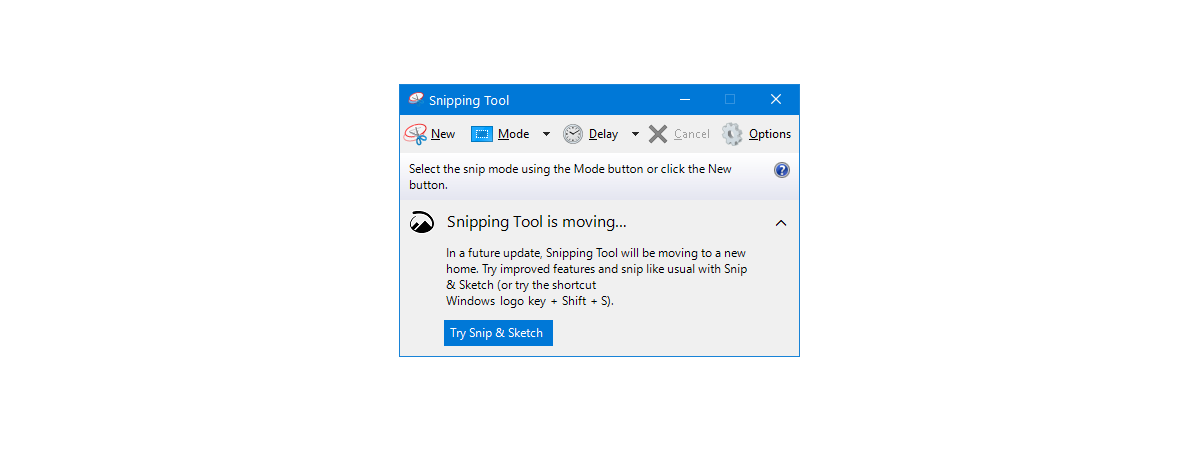
The Windows Snipping Tool is a utility app included in modern versions of the operating system, like Windows 10 and Windows 7. Due to its familiarity, many users find Microsoft’s Snipping Tool an easy and efficient instrument for taking screenshots in Windows. This guide shows how to use the Snipping Tool for Windows 10 and Windows 7 from the moment you click the Snipping Tool shortcut to when you’re saving your image. Let’s get started:
NOTE: The Snipping Tool is also mentioned in our tutorial showing 9 ways to screenshot on Windows.
Where is the Snipping Tool in Windows 10?
There are many different ways to open the Windows 10 Snipping Tool app, but the fastest way to launch it is to use search. Click or tap on the taskbar’s search field, type in snipping tool, and then press on the appropriate result. Alternatively, you can also click or tap on Open from the right side of the flyout.

How to open the Snipping Tool on Windows 10 using Search
If you prefer a more classic approach, open the Start Menu and access the Windows Accessories folder. Click or tap on the Windows 10 Snipping Tool shortcut inside to launch the app.
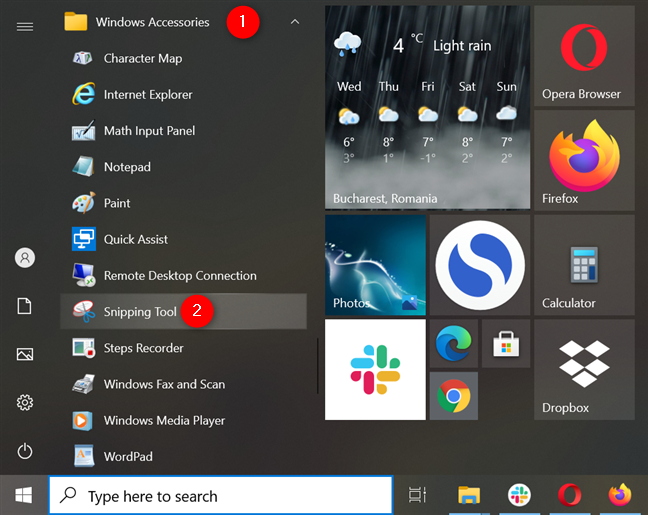
Press the Snipping Tool shortcut in Windows 10 to open the app
An alternative way to launch the Snipping Tool in Windows 10 is to use the Run command window. Use the Windows + R keyboard shortcut to quickly open Run, write snippingtool in the Open field, and then click/tap the OK button or press the Enter key.
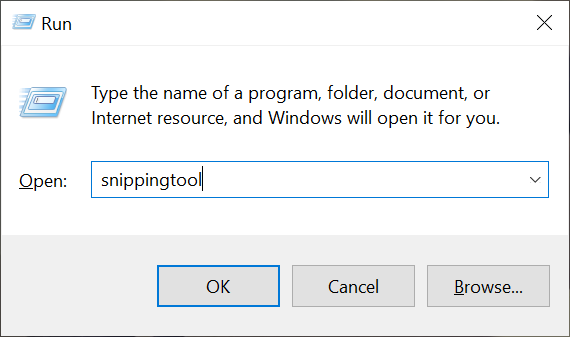
Launch the Windows 10 Snipping Tool using Run
Alternatively, a shortcut for Snipping Tool can also be pinned to Start or the Windows 10 taskbar, and you can use it for quickly accessing the tool.
TIP: Here are all the ways to open Snipping Tool in Windows 10.
How to open the Snipping Tool for Windows 7
The methods to access the Windows 7 Snipping Tool are similar to the ones in Windows 10. Type “snip” in the Start Menu search box and then click on the Snipping Tool result.
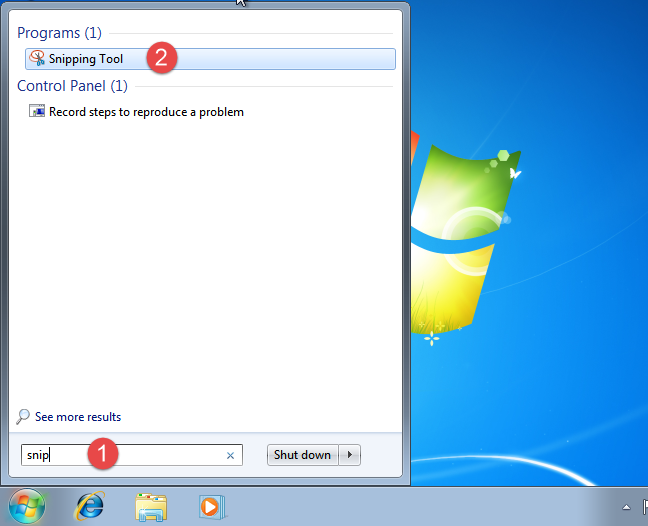
Open the Snipping Tool for Windows 7 from the Start Menu
Another way is to open the Accessories folder from the Windows 7 Start Menu and then click on the shortcut for Snipping Tool.
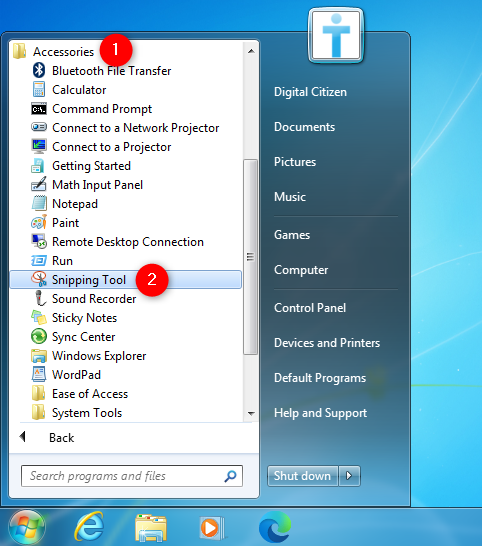
Use the Windows Snipping Tool shortcut from the Start Menu
Alternatively, you can also use the Run window to launch the app using the same steps shown in the previous chapter.
TIP: You can also create a Snipping Tool keyboard shortcut in both Windows 10 and Windows 7 by following the instructions in this guide. You can then launch the app by pressing the Snipping Tool hotkey.
Understanding the Windows Snipping Tool interface
When it comes to the user interface, the Windows 7 Snipping Tool is pretty basic, with only three available buttons.
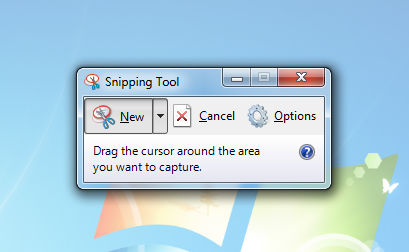
The Windows 7 Snipping Tool
The Snipping Tool for Windows 10 has a slightly different user interface than the one found in Windows 7. The Windows 10 Snipping Tool includes the Mode and Delay buttons, that aren’t found in the Snipping Tool for Windows 7.
NOTE: Another difference is the notification shown at the bottom, urging you to try the Windows 10 app that might replace the Snipping Tool in the near future: Snip & Sketch.
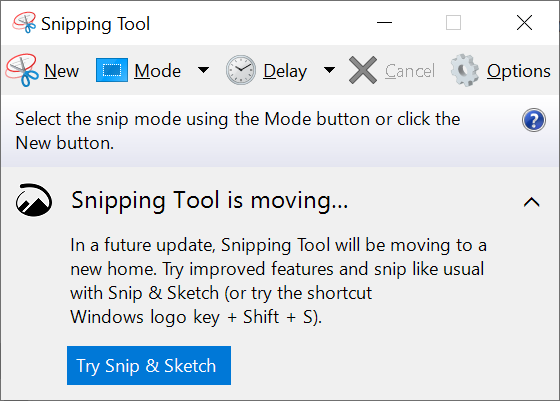
The Windows 10 Snipping Tool
Here’s what each of the main buttons does:
- New - available on both operating systems, it initiates taking a screenshot using the selected mode.
- Mode - is available only in the Snipping Tool for Windows 10 and lets you choose what type of screenshot you take, as shown in the next chapter. If you’re using Windows 7, click the downward arrow next to New instead to reveal the same options.
- Delay - present only in Windows 10, you can use this button to delay the screen capture for up to 5 seconds. Select one of the available options from its dropdown menu to set a delay for your screenshot.
- Cancel - lets you cancel taking a screenshot. Press Esc on your keyboard for the same result.
- Options - allows you to customize different aspects of the application.
How to use the Snipping Tool on Windows to take screenshots
There are four types of screen captures you can take with the Microsoft Snipping Tool app. In Windows 10, you can select which one you want to use by clicking or tapping on the Mode button or the downward arrow next to it.
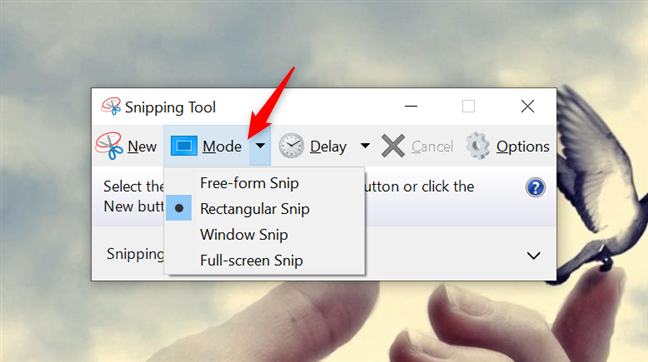
The Mode button from the Snipping Tool in Windows 10
In Windows 7, click on the arrow next to New to display a dropdown menu with the same options.
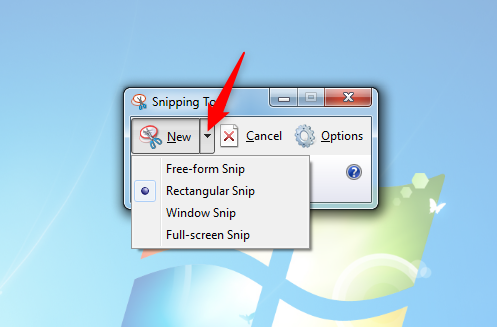
Select the type of screenshot in the Snipping Tool for Windows 7
Each option lets you take another type of screenshot:
- Free-form Snip - use it if you want to draw an irregular shape with your mouse anywhere on the screen, capturing the selected area.
- Rectangular Snip - selected by default, it lets you take a screenshot of a rectangular section.
- Window Snip - takes a screenshot of an open window or menu on your screen. Moving the cursor around highlights different elements you can capture by clicking or tapping on them.
- Full-screen Snip - immediately captures the entire screen, like the old-fashioned Print Screen key.
After choosing the screenshot Mode, press on New and decide what to capture. If you decided to use one of the first two types, select the area that interests you by clicking and dragging your cursor or your finger if you have a touchscreen. If you are using the default settings, the selected area is surrounded by a red border as you drag.
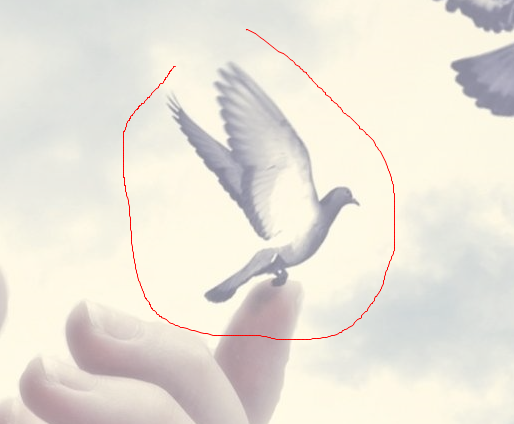
How to use the Snipping Tool on Windows to get a Free-form snip
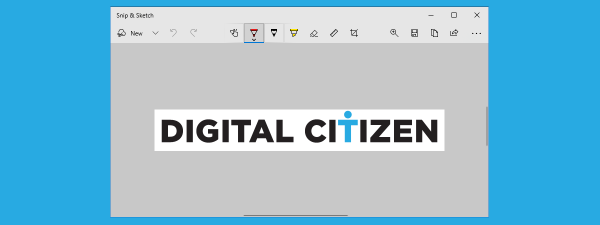
When you are finished with your selection, release the mouse button or lift your finger, and the captured area is automatically opened in an editing window, where you can annotate, save or share the screenshot.
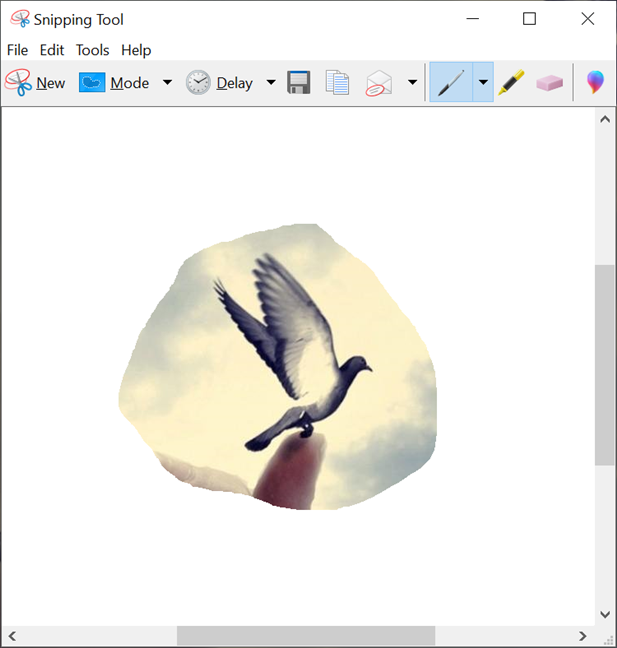
Captured screenshots are opened in the Snipping Tool editing mode
How to edit and save your screenshots with the Snipping Tool app
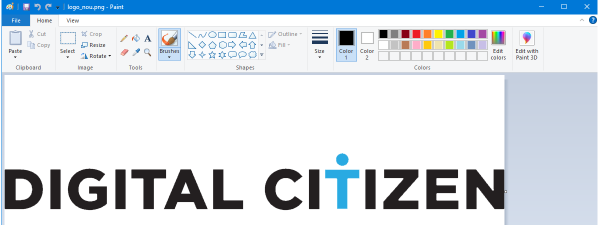
The Snipping Tool editing window offers useful tools for modifying your screenshots as soon as you take them. If you are not satisfied with your image, you can always make another one using the New button. Before saving your screenshot, you can use the Pen and Highlighter tools to draw and write on the capture, while the Eraser tool removes the changes you make. The image below provides an overview of the available options.
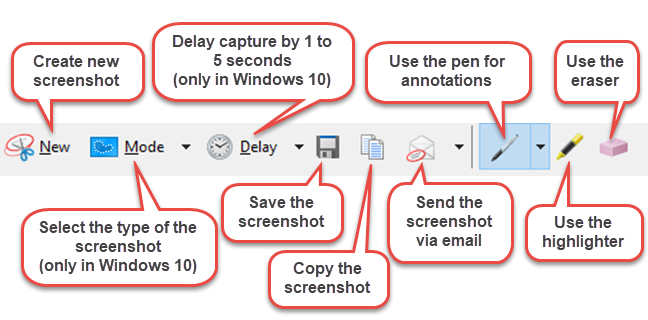
How to use the Snipping Tool editing mode
To save the screenshot, press the Save button. In the pop-up, select the image location, type in a File name, and choose the file type: PNG, GIF, JPEG, or HTML. Then, press Save.
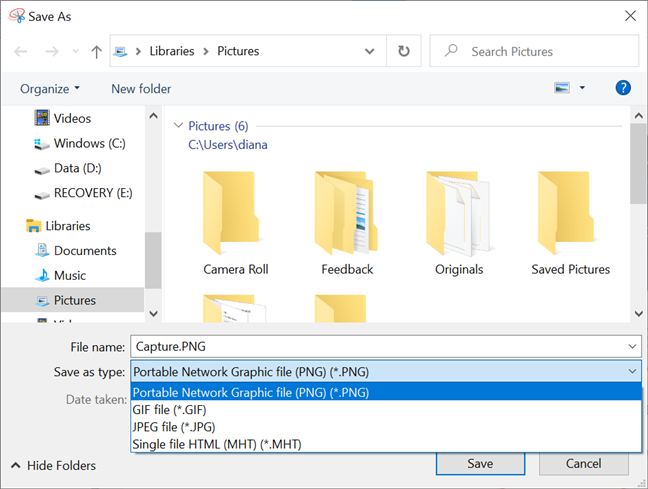
Save your screenshots
TIP: By default, the Snipping Tool app saves screenshots in the Pictures folder. For more details, we created a guide to help you find out where Windows 10 screenshots are saved and change their default location.
Bonus: How to customize the Snipping Tool on Windows 10 and Windows 7
Regardless of your Windows version, when you start the Snipping Tool, click or tap on the Options button to set your preferences on how the program should work.

Press on Options to set up the Snipping Tool app
You can also access Options from the Tools menu in the app’s editing mode.
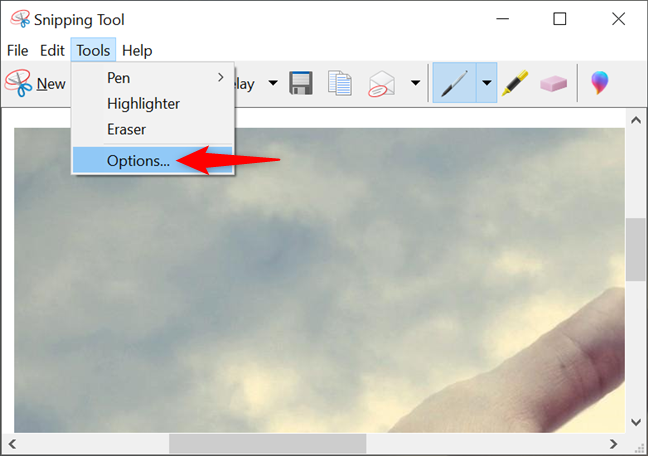
Access Options from the app's editing mode
The available options are displayed in two sections: Application and Selection. The Application section has a set of checkboxes that you can use to make the following changes:
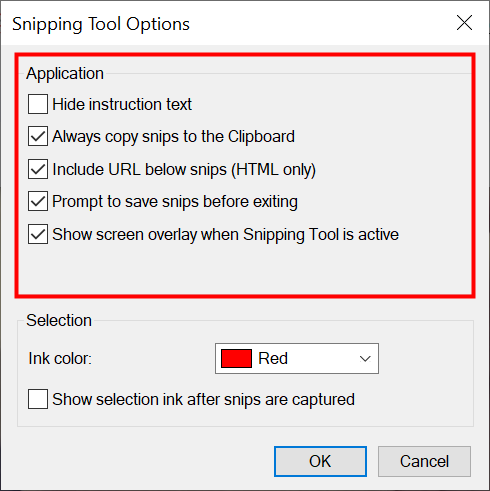
The Application Options in the Microsoft Snipping Tool
- Hide Instruction Text – hide the instructions shown in the main Snipping Tool window.
- Always copy snips to the Clipboard – copy all captures to the Windows clipboard to easily paste them into other applications (e.g., word processors or image editors).
- Include URL below snips (HTML only) – save your snips as a Single File HTML or MHT documents, and a URL of the webpage is included in the screenshot.
- Prompt to save snips before exiting – gives you a heads up if you have any unsaved captures and you try to close the program.
- Show screen overlay when Snipping Tool – if disabled, when you are taking a screenshot, the Snipping Tool transparent overlay is no longer shown on the screen.
The Selection pane at the bottom lets you modify settings regarding the color palette:
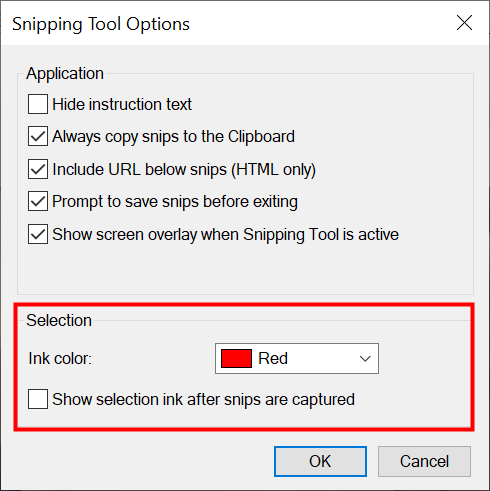
Change the Selection Options in the Windows Snipping Tool
- Ink Color – changes the color of the selection border when you create a snip.
- Show selection ink after snips are captured – when enabled, the selection border is displayed around the screenshot, using the color shown above.
Are you using the Windows 10 or Windows 7 Snipping Tool?
Now that you know how to use the Snipping Tool on Windows, you can take great screenshots regardless of your operating system. Before you close this guide, let us know which version of the app you’re taking snips with. If you’re using the Windows 10 Snipping Tool, we’re curious about your reasons. Did you try the other options available in Windows 10? Let us know in the comments.