Snip & Sketch is a Windows 10 screenshot tool that Microsoft has introduced with the October 2018 Update. In the future, it is going to replace the Snipping Tool, but so far both apps continue to exist in Windows 10 until Snip & Sketch reaches feature-parity with the Snipping Tools or it outperforms it. Here is how to open Snip & Sketch, the keyboard shortcut for Snip & Sketch, and how to use the app to take screenshots:
What is Snip & Sketch?
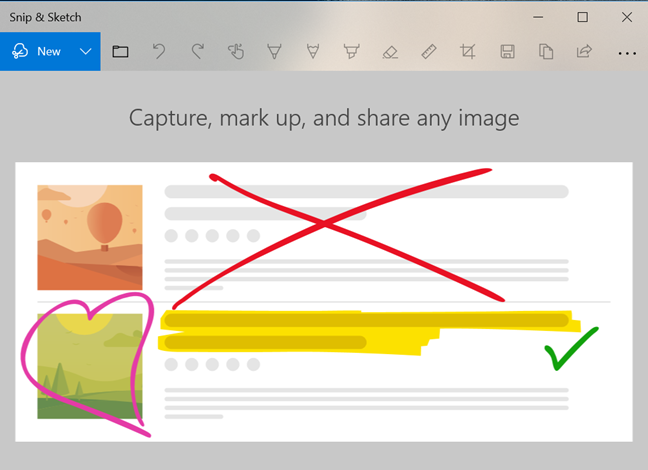
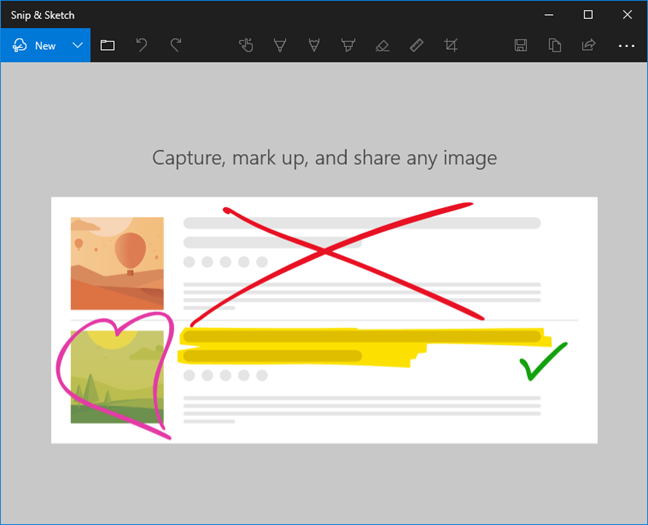
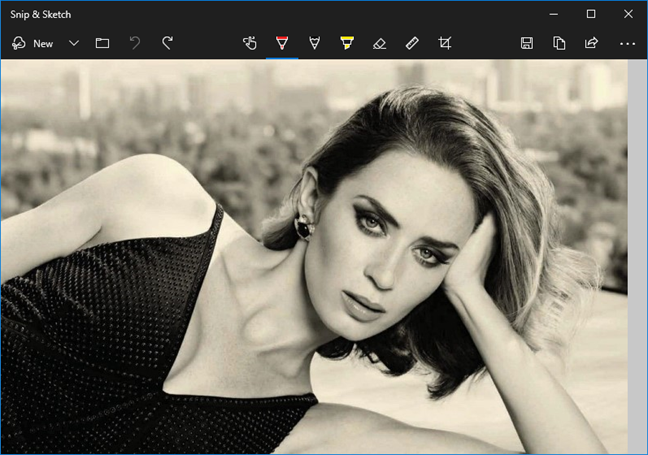
Snip & Sketch is a Windows 10 app that was introduced with the October 2018 Update. The app can be used to take screenshots (snip) and make changes to the resulting images (sketch). The Snip & Sketch app refers to screenshots as snips. With it, you can capture the entire screen, an app window, or a region of the screen. You can also use Snip & Sketch to edit screenshots and add annotations and other elements. The sketch capabilities are designed for light editing that people do on a screenshot. You can see how the Snip & Sketch app looks, in the screenshot below.
Snip & Sketch
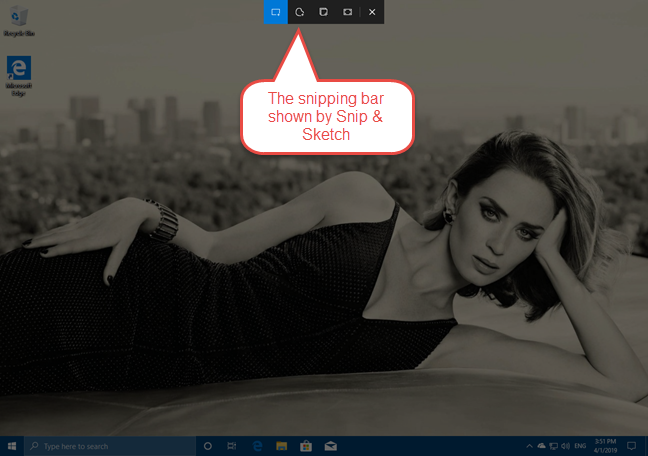
When you take screenshots, the window of the Snip & Sketch app is hidden and you get a snipping bar on the screen that helps with the screen capturing process. When the screen capture is over, you are back to the Snip & Sketch app with the screenshot loaded and ready for further processing.
The snipping bar shown by Snip & Sketch
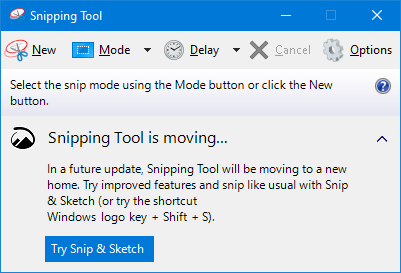
Snip & Sketch is an evolution of the old Snipping Tool app that has been around since Windows 7. Microsoft plans to phase out the Snipping Tool in a future Windows 10 update. When you open the Snipping Tool in Windows 10, you get a message saying: "In a future update, Snipping Tool will be moving to a new home. Try improved features and snip like usual with Snip & Sketch (or try the shortcut Windows logo key + Shift + S)."
Snipping Tool is moving
Let's learn how to open the Snip & Sketch app, how to use the snipping bar, and how to take different types of screenshots.
How to open the Snip & Sketch app in Windows 10
One of the easiest ways to open the Snip & Sketch app is to click or tap on its shortcut from the Start Menu. You can find it in the list of apps that start with the letter S.
The shortcut for Snip & Sketch in Windows 10
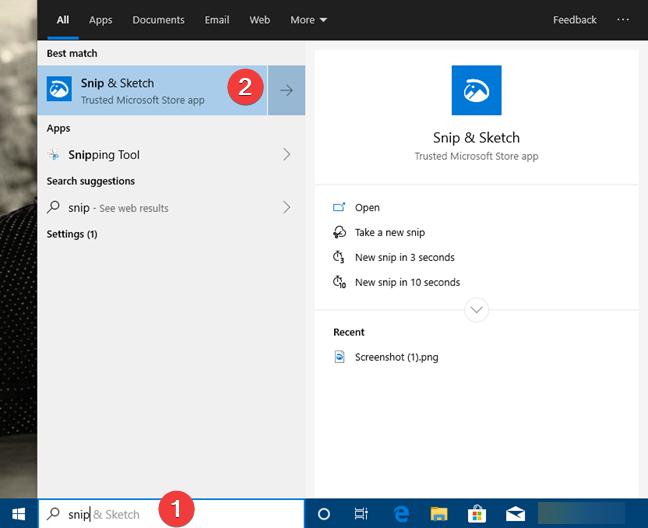
An alternative method to open Snip & Sketch is to use search. In the search field on your taskbar, enter the word snip and then click or tap the Snip & Search result.
Using Windows 10 search to find Snip & Sketch
If you have opened the Snip & Sketch app, you should see a window similar to this one:
The Snip & Sketch app
You are now ready to take a screenshot or to edit an image using Snip & Sketch.
How to open the snipping bar of the Snip & Sketch app
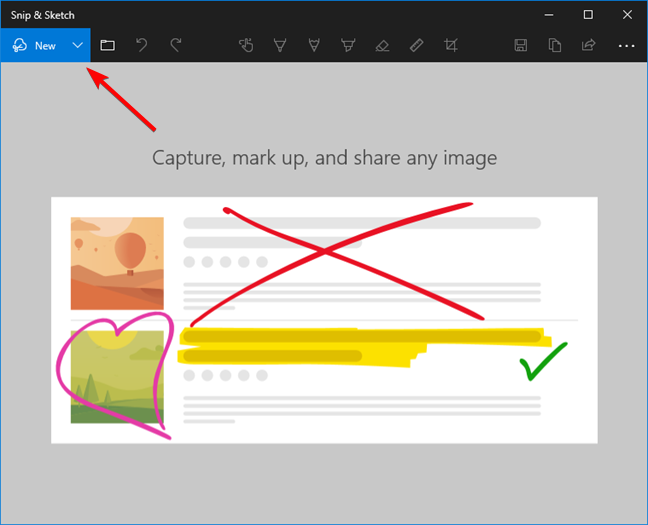
To take screenshots using Snip & Sketch, you have to use its snipping bar. In the Snip & Sketch window, on the top-left corner, there is a button called New. Click or it. Alternatively, you can also use the Ctrl + N keyboard shortcut.
The New button for taking screenshots with Snip & Sketch
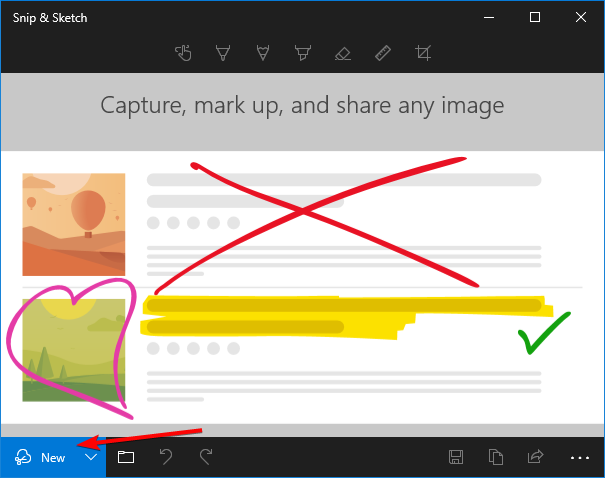
Note that, if the Snip & Sketch window has been resized to be small, the New button and the rest of the menu might be displayed in the lower part of the app window.
The New button on the bottom of a small Snip & Sketch window
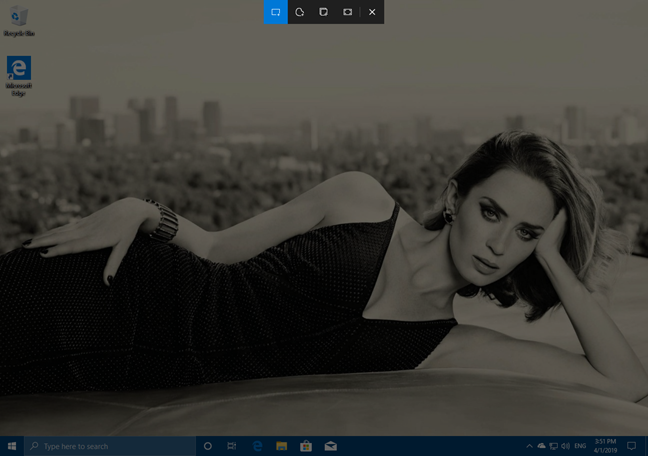
After you have pressed the New button, the entire screen dims and, on the top-center area, the snipping bar appears.
The snipping bar shown by Snip & Sketch in Windows 10
Snip & Sketch keyboard shortcut: How to open the snipping bar using the keyboard
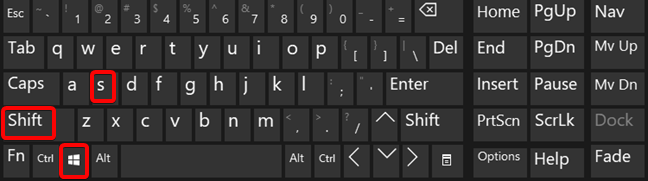
Windows 10 has a built-in keyboard shortcut that you can use to open Snip & Sketch directly in its screenshot-taking mode: Windows + Shift + S. Press the keys simultaneously on the keyboard.
Windows + Shift + S keyboard shortcut for Snip & Sketch
Once you have pressed Windows + Shift + S, the entire screen dims and, on the top-center area, the snipping bar appears.
The snipping bar in Windows 10
The Windows + Shift + S shortcut is handy, but it may affect your screen before you have a chance to take your screenshot. For example, if you want to capture an open menu, the Windows + Shift + S shortcut may close it before the screen is captured.
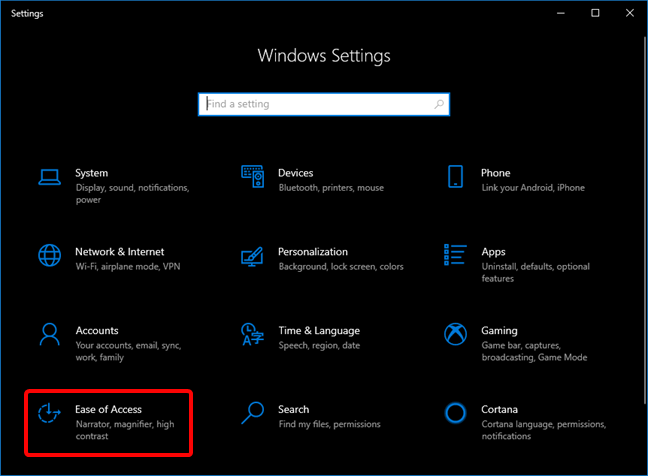
Windows 10 offers the alternative of using the PrtScn key on your keyboard to take screenshots using the Snip & Sketch app. This is not however, enabled by default. You have to change a Windows 10 setting for that to happen. Start by launching the Settings app. The fast way to do it is to press the Windows + I keys on your keyboard simultaneously. Then, head to Ease of Access.
Open Ease of Access in Windows 10 Settings
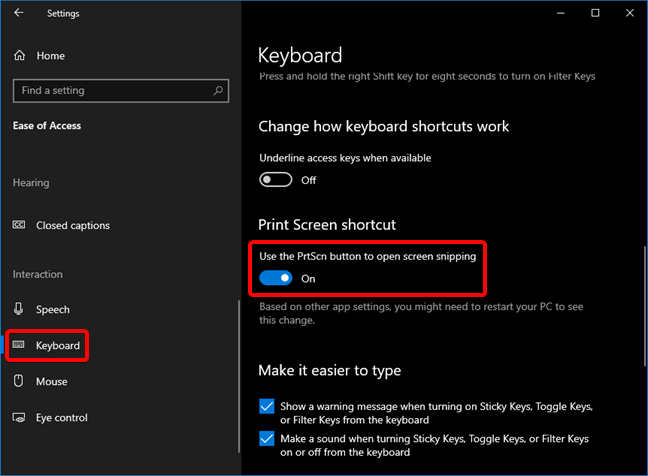
On the left side of Settings, choose Keyboard. On the right side of the window, scroll down until you find a setting called "Print Screen shortcut" and enable the switch that says "Use the PrtScn button to open screen snipping."
Use the PrtScn button to take screenshots with Snip & Sketch
Right under that setting, Windows 10 also tells you that "Based on other app settings, you might need to restart your PC to see this change." Although it is not mandatory, it is best to reboot so that Windows 10 has no issues in assigning the Print Screen to the Snip & Sketch app. After that, press the PrtScn key on your keyboard to take screenshots with this app.
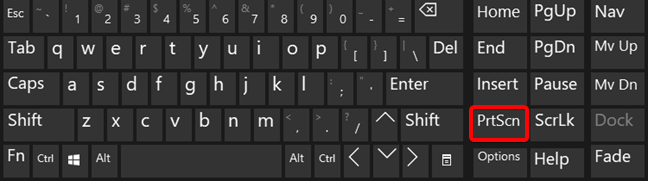
Press PrtScn on your keyboard to take a screenshot in Windows 10
Then, the snipping bar is displayed on the top side of the screen and you can take a screenshot.
How to open the snipping bar in Windows 10 using its Quick Action button
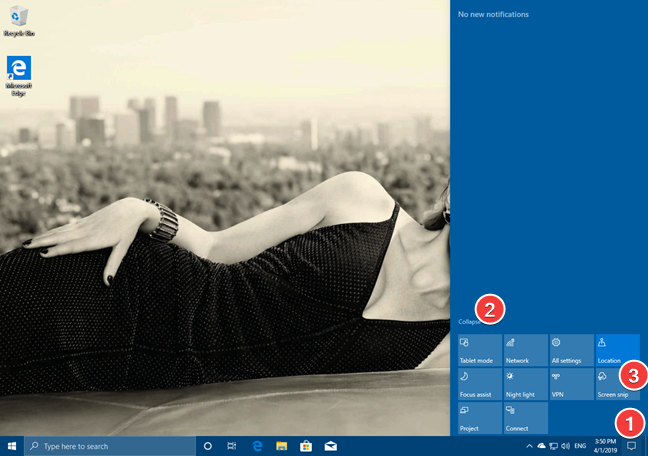
The Snip & Sketch app also offers a button in the Quick actions panel, which you can use to open the snipping bar. To get to it, open the Notifications & actions panel by clicking/tapping on its button from the bottom-right corner of the screen, or by sliding your finger from the right side of the screen (if you have a touchscreen). You can also press the Windows + A keys on the keyboard. Then click/tap on Expand, and you should see the Screen snip button.
The Screen snip button from the Quick Actions panel
Once you click/tap the Screen snip button, Snip & Sketch loads the snipping bar on the top-center edge of your screen, and you can use it to take a screenshot.
How to take screenshots with Snip & Sketch in Windows 10
Once the snipping bar is shown on the screen, the Snip & Sketch app offers four different ways of choosing which part of the screen is captured:
Rectangular Snip - take a screenshot of a region of the screen by drawing a rectangular shape with the mouse or using touch.
Freeform Snip - take a freeform screenshot of the screen by drawing an unrestricted shape.
Window Snip - take a screenshot of one of the app windows that are found on your screen. This option is available only in Windows 10 with May 2019 Update or newer. It was not available when Snip & Sketch was first released in Windows 10 October 2018 Update.
Fullscreen Snip - take a screenshot of your entire screen.
The buttons on the snipping bar
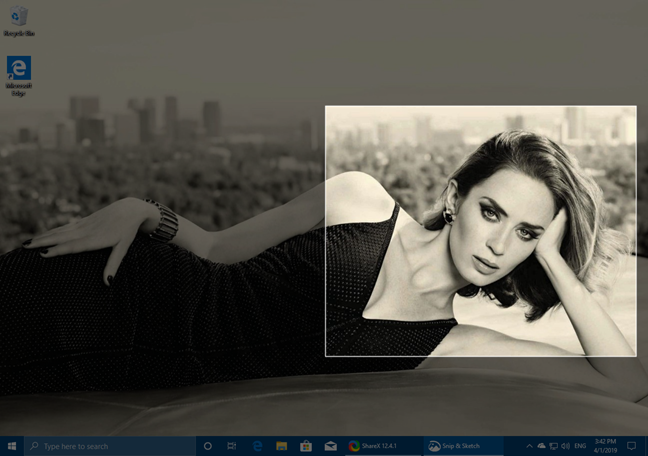
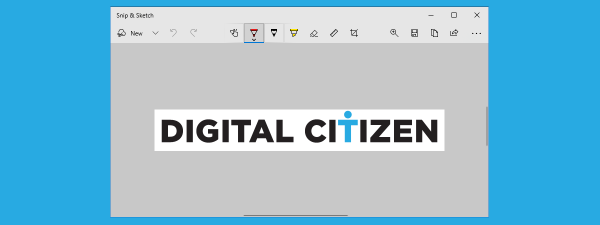
By default, the first option - Rectangular Snip - is the one enabled. When you use it, dragging the mouse cursor on the screen takes a screenshot with a rectangular shape, such as in the image below.
Taking a rectangular screenshot with Snip & Sketch
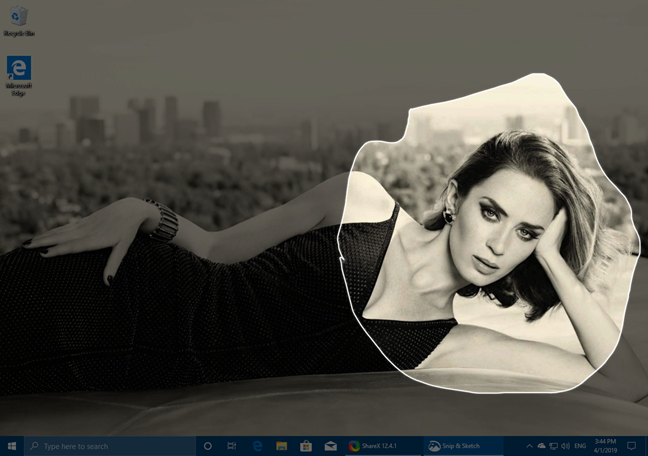
If you choose the Freeform Snip, you can drag the mouse cursor on the screen any way you want, to take a screenshot with any shape and size. Here is an example:
Taking a freeform screenshot with Snip & Sketch
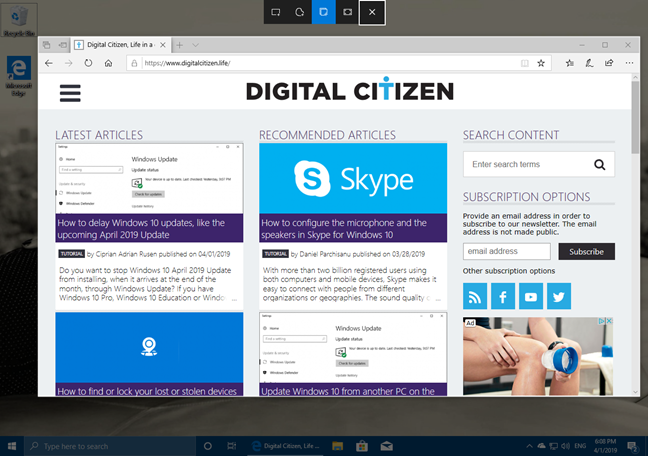
If you choose Window Snip, the app is going to dim the whole screen except the window you hover with your mouse cursor (or finger). Click or tap on the window you want to take the screenshot.
Taking a screenshot of a window with Snip & Sketch
If you choose the Fullscreen Snip, the app immediately takes a screenshot of your entire screen. Once you have taken a screenshot, the Snip & Sketch app opens and shows your newly created screenshot. Now you can use the app to edit the screenshot if you wish so.
Do you like the way Snip & Sketch takes screenshots in Windows 10?
The new Snip & Sketch app is better integrated with Windows 10 than the former Snipping Tool and it is easier to use. You can rely on Snip & Sketch on all devices with Windows 10 October 2018 Update or later, and you can start using it right away without the need to purchase or install additional software. Do you like what it has to offer and the way it works? Do you believe it could be further improved? Tell us your opinion in the comments section below.
This is awful. I can no longer copy and paste to an email. I have to save to my hard drive that I can’t access within my work secure platform. This is complicated and time consuming. I give it an ‘F’
Snipster ·
Microsoft is king of restricting access to executables. Just try to find the executable for this program. It’s in Program Files/windowsapps. You need to get access in there. Then when you click on the executable it won’t launch without a slew of vsc dills. This kind of thing, and forcing edge always down your throat on start-up should tell you everything you need to know about using windows. Your data isn’t any safer with Bill than with those cowboys at facebook
Paul ·
IMHO, Useless feature. Where does the snip go to? I can’t edit/save after.
Ross Smith ·
Overall love the new tool, more modification options when I have the app open that are great.
Wish there was a quick key to do a app snip. Often I like to indicate on a snip using the highlighter or pen and in order to do this I have to open app then snip. Wish I could do a windows key shift S to snip then be in the app to be able to modify.
fox ·
Hi,
where will teh screenshot saved when taking them with
shift windows s ?
It just lest me craete screenshots but after taking i dont find them ?
Maggie ·
I also want to know?????? I open action centre far bottom right but if i click on it it just removes it!
Todd ·
It really needs the ability to allow typed notations on screen captures.
Mike Silver ·
This tool sucks. Lipstick on a pig. They should have used Snagit as a guide to how to make a good snipping/editing tool. For example I can’t draw simple boxes around an area to highlight, a key in documentation. Free form lines look terrible. Big failure on MS.
Sam ·
Can I use the keyboard to type into this application? Thank you for replies/advice, Sam
Anonymous ·
When you edit screenshots, yes, you can type. 🙂
Jon ·
I did like this but they seem to have changed the behaviour now and whereas I could stack screenshots before, now if I take a second screenshot it overwrites the first. They probably did this to counter the annoying behaviour where you couldn’t group close all the snip windows without having to give focus to each one. To summarise, I prefer a few aspects but on the whole it is annoying.
Jeff ·
Nice summary, thanks. Lame, lame, lame update though. M$ even removed Help! Trusty old F1 does nothing. Outrageous IMHO.
It’s a very limited attempt at an update. We pay tons of $ to M$, and they release this with barely any more functionality than the old Snipping Tool. And with important features removed, e.g. it’s missing the ‘Capture Window’ functionality.
Where is text annotation? Simple shape annotation (rectangle, circle)? Printing? Straightforward things like that would make all the difference, and are not difficult to do.
Underwhelmed is putting it mildly.
Me ·
This update is awful; MS made it more complicated. Where is the “Copy” function in the new Snip & Search, so I can insert the snipped item into an email, for example??
Larry ·
This is still too much work. Why can’t there be an option to print the snip to the printer immediately without any intervening steps? I don’t need to save the snip, I don’t need to edit the snip. I just want to print the snip and move on!
Anonymous ·
Good feedback. I will report it to Microsoft. Maybe they will take it into consideration, for future updates to the app.
Andrew Patterson ·
Doesn’t seem to be any better integrated or easy to use to me, and they seemed to have removed the Window clip, which is what I use the most frequently. I’ve never figured out a use for the freeform snip, but for some reason that remains.
Tate ·
Snip & Sketch is okay, but where is the ability to just print the snip like you could with the sniping tool?
Norman McAllister ·
The new Snip and Sketch should have a Print facility for easily printing out the finished snip
Bar Camp ·
Regression cf Snipping Tool – no direct printing option!
No textbox feature.


Discussion (19)
This is awful. I can no longer copy and paste to an email. I have to save to my hard drive that I can’t access within my work secure platform. This is complicated and time consuming. I give it an ‘F’
Microsoft is king of restricting access to executables. Just try to find the executable for this program. It’s in Program Files/windowsapps. You need to get access in there. Then when you click on the executable it won’t launch without a slew of vsc dills. This kind of thing, and forcing edge always down your throat on start-up should tell you everything you need to know about using windows. Your data isn’t any safer with Bill than with those cowboys at facebook
IMHO, Useless feature. Where does the snip go to? I can’t edit/save after.
Overall love the new tool, more modification options when I have the app open that are great.
Wish there was a quick key to do a app snip. Often I like to indicate on a snip using the highlighter or pen and in order to do this I have to open app then snip. Wish I could do a windows key shift S to snip then be in the app to be able to modify.
Hi,
where will teh screenshot saved when taking them with
shift windows s ?
It just lest me craete screenshots but after taking i dont find them ?
I also want to know?????? I open action centre far bottom right but if i click on it it just removes it!
It really needs the ability to allow typed notations on screen captures.
This tool sucks. Lipstick on a pig. They should have used Snagit as a guide to how to make a good snipping/editing tool. For example I can’t draw simple boxes around an area to highlight, a key in documentation. Free form lines look terrible. Big failure on MS.
Can I use the keyboard to type into this application? Thank you for replies/advice, Sam
When you edit screenshots, yes, you can type. 🙂
I did like this but they seem to have changed the behaviour now and whereas I could stack screenshots before, now if I take a second screenshot it overwrites the first. They probably did this to counter the annoying behaviour where you couldn’t group close all the snip windows without having to give focus to each one. To summarise, I prefer a few aspects but on the whole it is annoying.
Nice summary, thanks. Lame, lame, lame update though. M$ even removed Help! Trusty old F1 does nothing. Outrageous IMHO.
It’s a very limited attempt at an update. We pay tons of $ to M$, and they release this with barely any more functionality than the old Snipping Tool. And with important features removed, e.g. it’s missing the ‘Capture Window’ functionality.
Where is text annotation? Simple shape annotation (rectangle, circle)? Printing? Straightforward things like that would make all the difference, and are not difficult to do.
Underwhelmed is putting it mildly.
This update is awful; MS made it more complicated. Where is the “Copy” function in the new Snip & Search, so I can insert the snipped item into an email, for example??
This is still too much work. Why can’t there be an option to print the snip to the printer immediately without any intervening steps? I don’t need to save the snip, I don’t need to edit the snip. I just want to print the snip and move on!
Good feedback. I will report it to Microsoft. Maybe they will take it into consideration, for future updates to the app.
Doesn’t seem to be any better integrated or easy to use to me, and they seemed to have removed the Window clip, which is what I use the most frequently. I’ve never figured out a use for the freeform snip, but for some reason that remains.
Snip & Sketch is okay, but where is the ability to just print the snip like you could with the sniping tool?
The new Snip and Sketch should have a Print facility for easily printing out the finished snip
Regression cf Snipping Tool – no direct printing option!
No textbox feature.