11.04.2024
Figuring out how to take a screenshot on an iPhone 13, iPhone 14, or iPhone 15 is not an easy task if you’re switching from Android or even if you used an older iPhone before. Luckily, there are several options available for taking a screenshot on your iPhone when it comes to the latest models. This tutorial illustrates how to screenshot on an iPhone, so continue reading to find the option you’re most comfortable with:
How to screenshot on an iPhone using the Side Button and Volume Up
While older models, with Touch ID, required you to press the Home and Power (top/side) buttons to take a screenshot on your iPhone, things are different on newer Apple devices. So, if you just upgraded from an older model and you’re wondering how to screenshot on an iPhone without a Home button, this chapter illustrates the standard method using its physical buttons. You don’t have to enable or set up anything, and you can quickly capture the content of your screen at any time. To begin, open whatever it is that you want to save. Then, screenshot it by pressing, at the same time, the Volume Up button on the left and the Side Button on the device’s right edge.
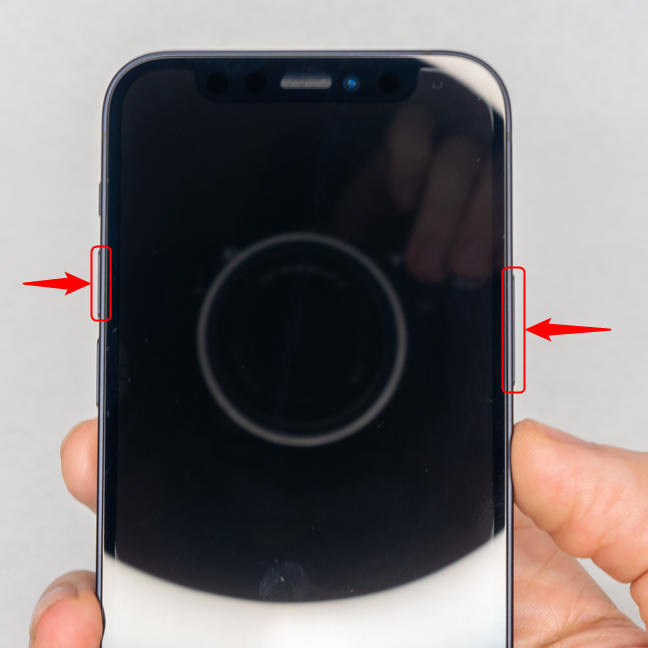
How to do a screenshot on an iPhone
You don’t have to do it for long; just briefly press the two buttons (if you press them for more than two seconds, you activate the emergency screen, which allows you to turn off your iPhone). When you release the buttons, your screen should flash white, and you should hear a camera shutter sound. The animation of your screen shrinking into a thumbnail, which is shortly displayed on the bottom left, also indicates that the iPhone screenshot was successfully captured.
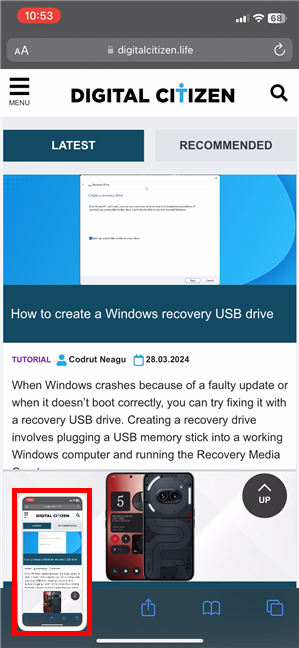
When you take a screenshot on iPhone, its preview is shown in the bottom-left corner
Wait until the preview disappears, or swipe it to the left, and your iPhone automatically saves the screenshot. Tapping on the preview opens the image on a new screen, where you can crop it, edit it, or share it.
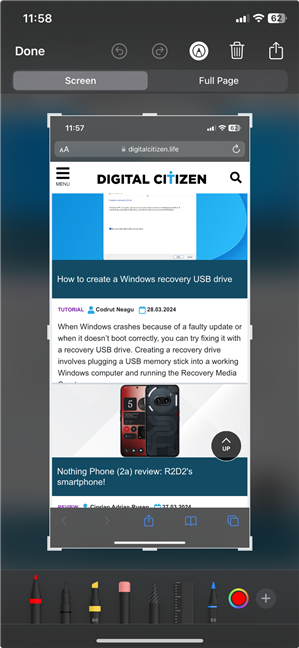
iPhone screenshot images can be opened and edited by tapping on their preview
Tap Done in the top-left corner and decide whether to save or delete the screenshot to avoid cluttering your iPhone (but mostly, your limited iCloud space).
NOTE: The default location for your iPhone screenshots is the Albums tab of the Photos app, as explained in our article on screenshot locations.
How to take a screenshot on an iPhone with AssistiveTouch
If you’d rather take screenshots on your iPhone with one hand or don’t want to use its physical buttons, AssistiveTouch is a great alternative to saving what’s on your screen. However, the feature isn’t on by default, so you must first enable it. While it has a default option for taking a screenshot on an iPhone, you can also personalize it to speed up the process. Let’s see how it all works.
Enable AssistiveTouch and use it to take an iPhone screenshot
First, open Settings by tapping on the cogwheel icon shown on your Home Screen.
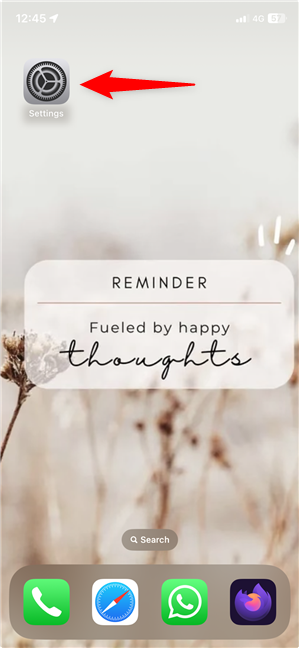
Open the iPhone Settings app
Scroll down and tap Accessibility.

Go to Accessibility settings
On the next screen, access Touch in the Physical and Motor section.
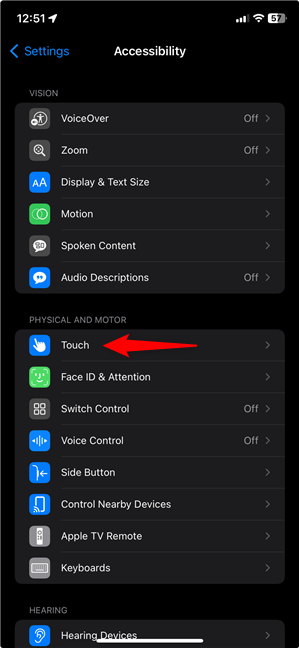
Tap on Touch
Tap the first option on the screen: AssistiveTouch.
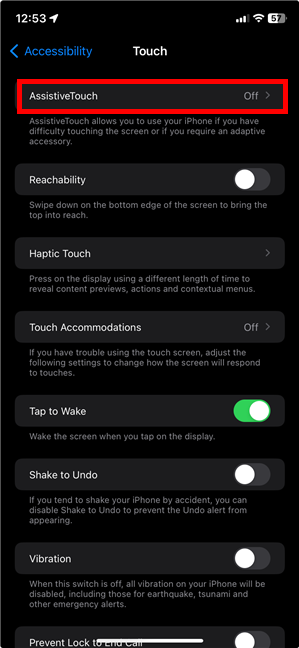
Access AssistiveTouch
Next, tap the switch next to AssistiveTouch to turn the feature on.
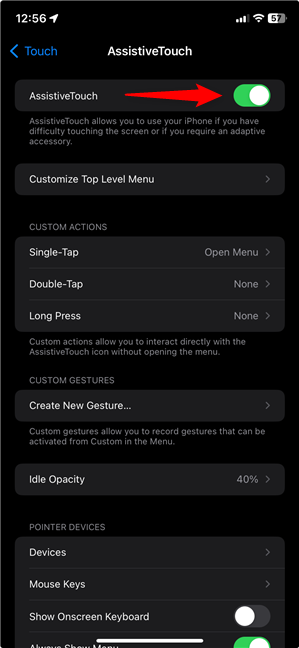
Activate AssistiveTouch on your iPhone
As soon as you flip the switch, a floating button appears on your screen’s right side. You can drag and drop it to another position you find convenient, but only at the edge of your screen.
Open what you want to capture and tap the AssistiveTouch button to access the feature.

Tap the floating AssistiveTouch button to start taking your iPhone screenshot
The AssistiveTouch overlay opens at the bottom of your screen. Tap Device.
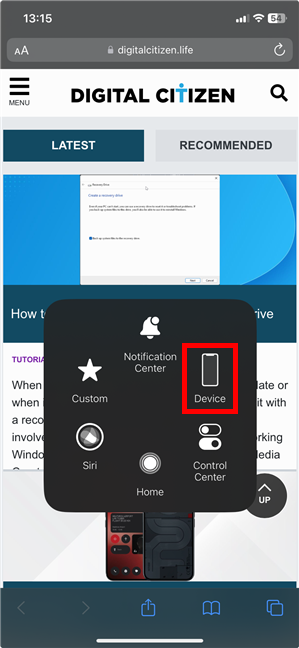
Access Device in the AssistiveTouch menu
On the next screen, tap More to reveal additional options.
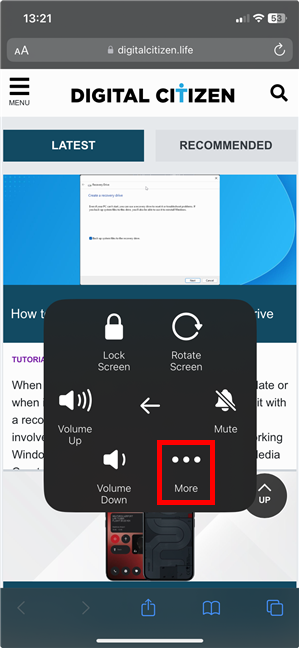
Access More to reveal the Screenshot option
Finally, you come across the default Screenshot option included in the AssistiveTouch menu. Tap it to take a screenshot on your iPhone.
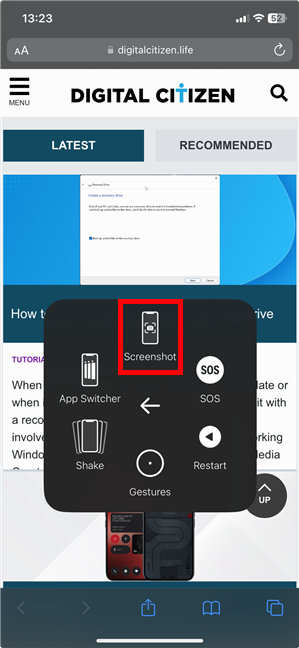
How to take screenshots on iPhone using the default AssistiveTouch option
Wow, that’s a lot of tapping, too much for my taste. So how do you take a screenshot on an iPhone faster using this feature? Well, there are more ways to customize it, so read on.
Customize AssistiveTouch and use it to take screenshots on iPhone
If you screenshot with your iPhone very often, tapping that many options is complicated and time-consuming. Luckily, you can easily customize the AssistiveTouch to simplify the process. On the AssistiveTouch screen used to enable the feature, check out the Custom Actions. They allow you to interact directly with the AssistiveTouch icon without opening its menu, which is much faster. You can choose Single-Tap, Double-Tap, or Long Press to take a screenshot on your iPhone. If you don’t use AssistiveTouch for anything else, it’s a good idea to configure Single-Tap for iPhone screenshots, but all Custom Actions are just as easy to set up. First, tap on the action you want to use from the three available ones.

Choose the action you want to use for taking a screenshot on iPhone
On the next screen, scroll down and tap Screenshot to select this option.
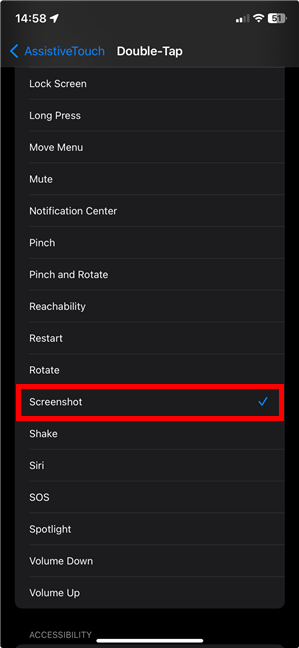
Select the Screenshot option by tapping on it
If you’re setting up the Double-Tap or Long Press actions, you can also configure the Double-Tap Timeout or the Long Press Duration at the top of their respective pages. This should make using this feature as comfortable as possible. Once everything is set up, just tap, double-tap, or long-press the AssistiveTouch button to take iPhone screenshots.
Alternatively, you can customize the AssistiveTouch overlay to show the Screenshot option on its main menu. On the AssistiveTouch screen, access “Customize Top Level Menu.”
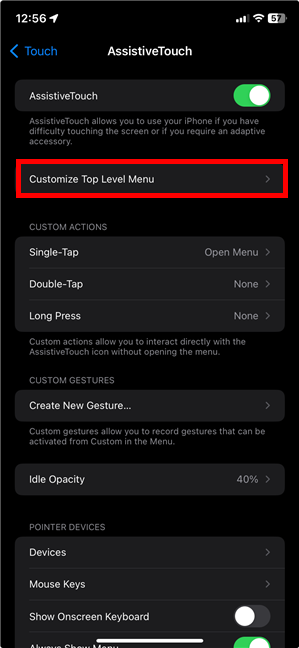
Customize Top Level Menu
Tap the plus sign (+) to add a new blank icon to the Top Level Menu. Then, tap on the latest addition to change it.
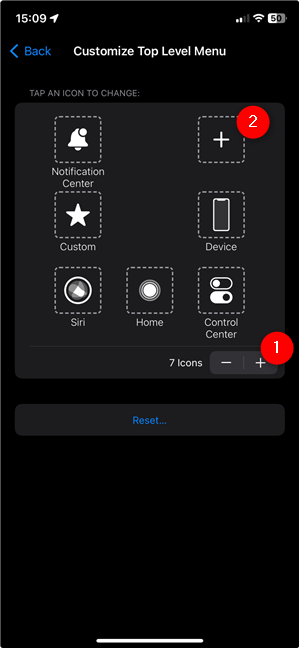
Add a new icon to the AssistiveTouch menu
The next screen displays a list of all the options you can add to the AssistiveTouch main menu. Scroll to the Screenshot entry, select it with a tap, and press Done.

Add the Screenshot button to the AssistiveTouch menu
The next time you press the AssistiveTouch button, you can see the Screenshot option at the top level of the overlay. Tap it to take a screenshot on your iPhone.
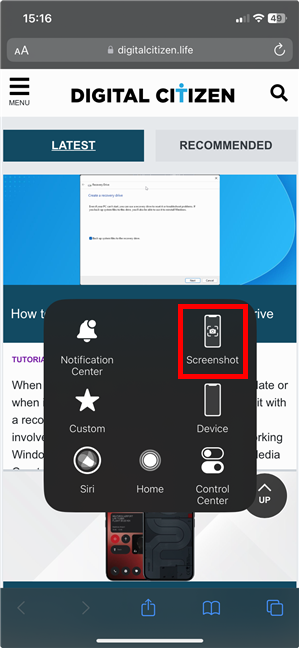
How to screenshot on iPhone using the AssistiveTouch Top Level Menu
Oh, and don’t worry: the AssistiveTouch overlay is not captured in your screenshots.
How to screenshot on the iPhone using back taps
One of the coolest accessibility features of the latest iPhones (from iPhone X onwards) is the ability to command the smartphone by tapping its back. You can use this feature to take screenshots as well, but first you need to activate it. Access the iPhone Settings, head to Accessibility, and then to Touch, as shown in the previous method. Next, scroll down to the end of the Touch options screen and access Back Tap.
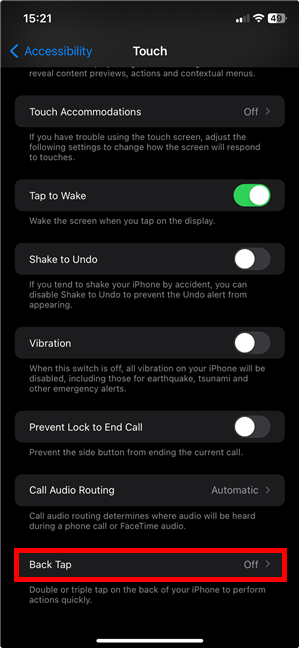
On the Touch screen, go to Back Tap
Decide if you want to configure Double Tap or Triple Tap. There are no differences when setting up the two, so tap on the one you want to use.
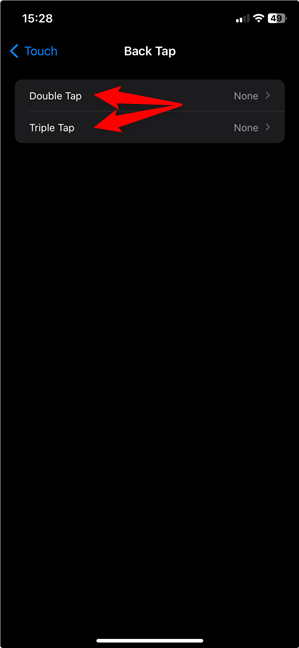
Configure Double Tap or Triple Tap for iPhone screenshots
Finally, select Screenshot from the list of available options.
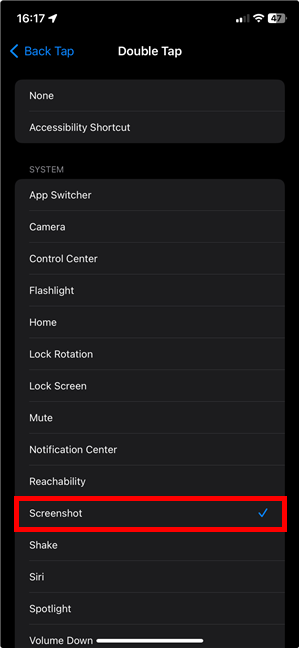
Tap Screenshot to select the option
All set! To take a screenshot, simply double-tap or triple-tap the back of the iPhone. This also works if your smartphone has a protective case.
How to take screenshots on iPhone using Siri
Last but not least, you can also ask Siri, Apple’s virtual assistant, to take a screenshot on an iPhone. Make sure she is listening (say “Hey Siri”) and say “screenshot” or “take a screenshot.”
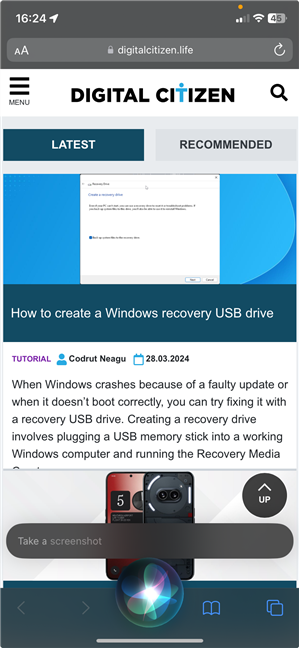
How to take a screenshot on your iPhone using Siri
Siri immediately takes a screenshot for you, capturing what you see on your screen.
How do you screenshot on an iPhone?
If you need proof of your high score to brag to your friends or if you want to make sure you don’t forget a specific conversation, screenshots are a quick way to do all that. Before you close this tutorial, let me know if you like the screenshot options available on the iPhone. Which one is your favorite? How do you screenshot on an iPhone? Let me know in the comments below.