

Knowing how to record your screen on an iPhone can come in handy in a variety of situations. Whether you want to capture gameplay, create a tutorial, or document a software bug, an iPhone screen recording is a quick and convenient way to save what’s happening on your display. Best of all, screen recording on an iPhone is so easy that anyone can do it in seconds, and it only takes a few taps. Read this guide to learn how to screen record on an iPhone in three simple steps:

 Open the Control Center in iOS 18
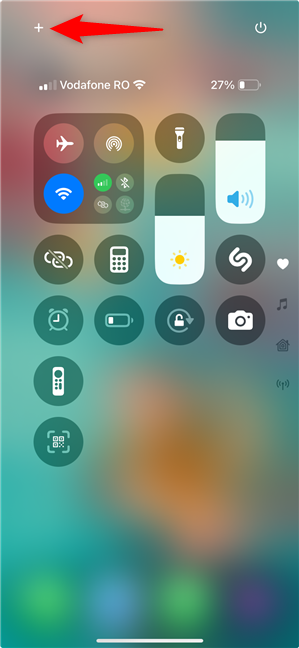
Next, tap the plus sign (+) in the top-left corner.
Open the Control Center in iOS 18
Next, tap the plus sign (+) in the top-left corner.
 Press + to start editing the Control Center
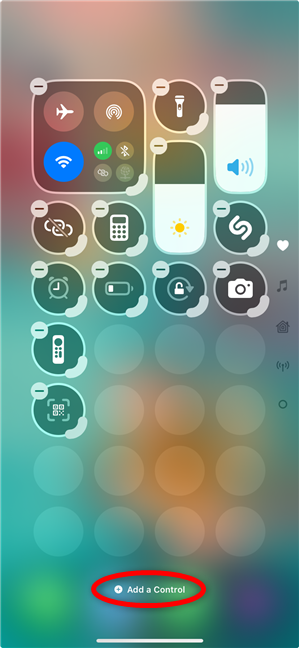
When the icons in the Control Center start pulsating, tap Add a Control at the bottom of the screen.
Press + to start editing the Control Center
When the icons in the Control Center start pulsating, tap Add a Control at the bottom of the screen.
 Tap Add a Control to add the screen record icon to an iPhone
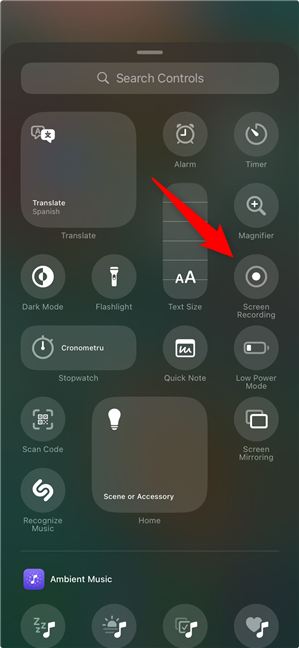
You get to a screen showing all the available controls. It’s not hard to figure out what to do next: tap Screen Recording on your iPhone.
Tap Add a Control to add the screen record icon to an iPhone
You get to a screen showing all the available controls. It’s not hard to figure out what to do next: tap Screen Recording on your iPhone.
 How to add screen record on an iPhone
Finally, you are returned to the Control Center editing screen. The iPhone Screen Recording icon is added in the first available spot. You can drag and drop the new control anywhere in this panel to move it.
How to add screen record on an iPhone
Finally, you are returned to the Control Center editing screen. The iPhone Screen Recording icon is added in the first available spot. You can drag and drop the new control anywhere in this panel to move it.
 The iPhone Screen Recording control is added in iOS 18
When you are done, tap any free area to exit the editing screen and return to the Control Center, where you can screen record on your iPhone. Scroll down to Step 2 to continue.
The iPhone Screen Recording control is added in iOS 18
When you are done, tap any free area to exit the editing screen and return to the Control Center, where you can screen record on your iPhone. Scroll down to Step 2 to continue.
 Access the Control Center
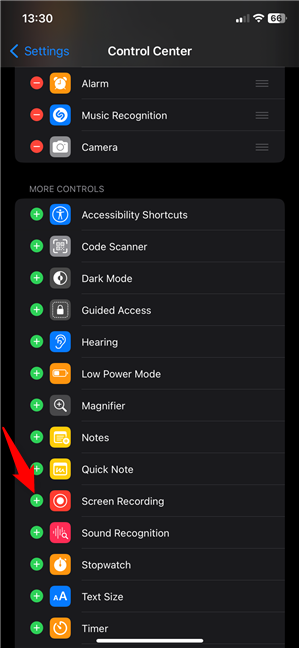
There are two lists in the Control Center settings: Included controls and More controls. To use the Screen Recording feature, it needs to be in the Included controls list. If it’s not there, scroll down to More controls, find the Screen Recording entry, and tap the plus sign (+) button next to it.
Access the Control Center
There are two lists in the Control Center settings: Included controls and More controls. To use the Screen Recording feature, it needs to be in the Included controls list. If it’s not there, scroll down to More controls, find the Screen Recording entry, and tap the plus sign (+) button next to it.
 How to add Screen Recording to an iPhone using iOS 17 or older
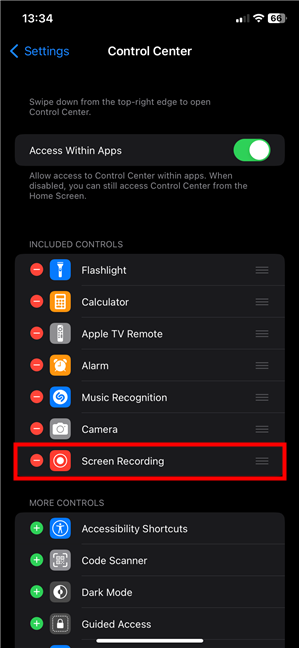
This adds Screen Recording to the Included controls, as shown below.
How to add Screen Recording to an iPhone using iOS 17 or older
This adds Screen Recording to the Included controls, as shown below.
 The iPhone screen record feature is add to the Included Controls
You can use the hamburger button next to it to move the entry further up. Otherwise, the Screen Recording control is added at the bottom of the Control Center, after all the other icons in the list.
The iPhone screen record feature is add to the Included Controls
You can use the hamburger button next to it to move the entry further up. Otherwise, the Screen Recording control is added at the bottom of the Control Center, after all the other icons in the list.
 Access the Control Center
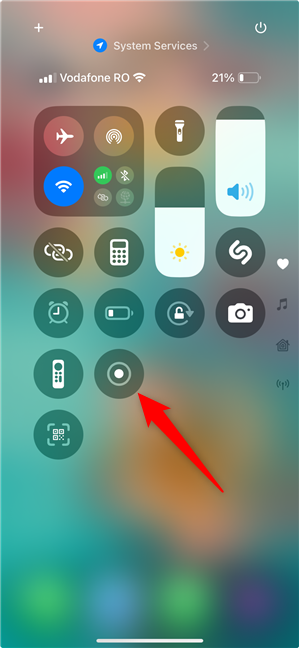
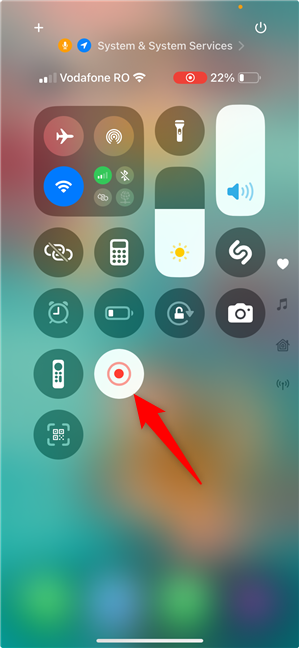
In the Control Center, find the Screen Recording button. While the button’s shape may differ, the icon looks the same: a big dot inside a circle.
Access the Control Center
In the Control Center, find the Screen Recording button. While the button’s shape may differ, the icon looks the same: a big dot inside a circle.
 Screen Recording on an iPhone
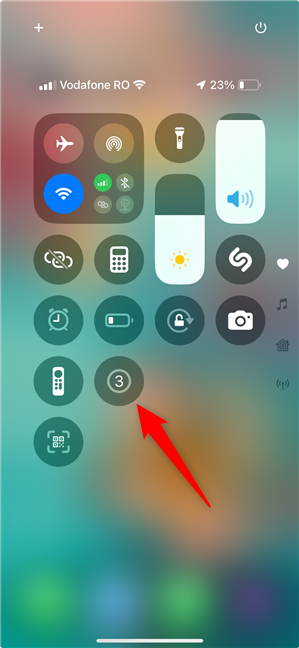
When you tap it, the Screen Recording button shows a three-second countdown, giving you time to exit the Control Center and return to the screen you want to record.
Screen Recording on an iPhone
When you tap it, the Screen Recording button shows a three-second countdown, giving you time to exit the Control Center and return to the screen you want to record.
 You have 3 seconds before your iPhone screen recording starts
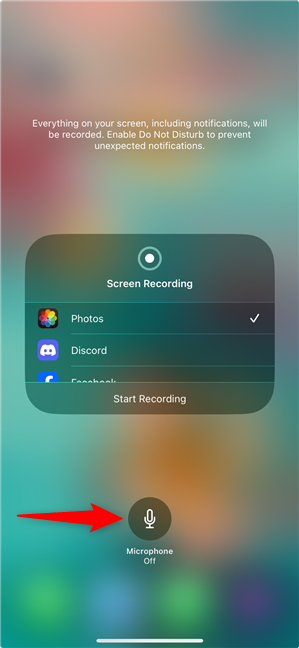
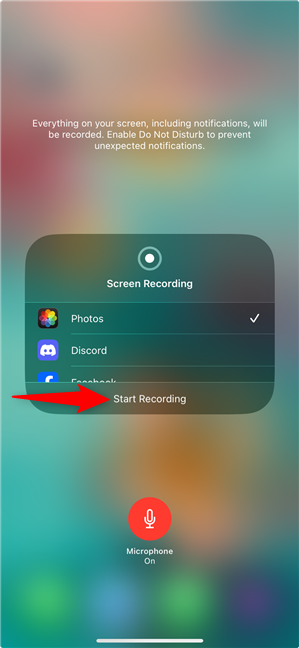
You can also touch and hold the Screen Recording control (highlighted in the previous 2 screenshots) to access more settings before you begin. These settings are saved and automatically used the next time you start to record (unless you enter this screen again to change them). Use the Microphone On/Off round button at the bottom of the screen to also record your voice in the video, not just the sounds played by your iPhone.
You have 3 seconds before your iPhone screen recording starts
You can also touch and hold the Screen Recording control (highlighted in the previous 2 screenshots) to access more settings before you begin. These settings are saved and automatically used the next time you start to record (unless you enter this screen again to change them). Use the Microphone On/Off round button at the bottom of the screen to also record your voice in the video, not just the sounds played by your iPhone.
 Turn on the Microphone for an iPhone screen recording with the sound of your voice
Use the panel in the middle to decide what happens to your video. The default option is saving it in the Photos app, but you can also broadcast it on Facebook, Instagram, Discord, Telegram, or another app by checking the desired option from this list.
When everything is how you want it, tap Start Recording (or Start Broadcast). A 3-second countdown is displayed at the top of the panel, so use this time to navigate to the screen you want to record.
Turn on the Microphone for an iPhone screen recording with the sound of your voice
Use the panel in the middle to decide what happens to your video. The default option is saving it in the Photos app, but you can also broadcast it on Facebook, Instagram, Discord, Telegram, or another app by checking the desired option from this list.
When everything is how you want it, tap Start Recording (or Start Broadcast). A 3-second countdown is displayed at the top of the panel, so use this time to navigate to the screen you want to record.
 How to record your iPhone screen
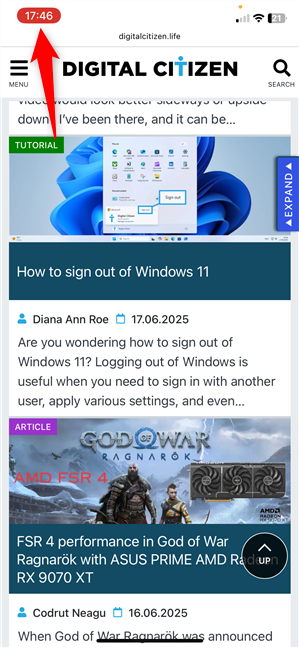
As long as you’re recording, a red bar is displayed at the top of your screen. On newer iPhone models, it’s discreetly shown in the top-left corner, around your clock.
How to record your iPhone screen
As long as you’re recording, a red bar is displayed at the top of your screen. On newer iPhone models, it’s discreetly shown in the top-left corner, around your clock.
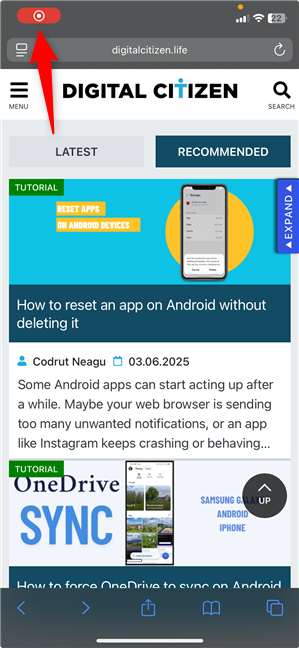 A red bar appears at the top when you turn on Screen Recording on iPhone
 Tap the iPhone Screen Recording button in the Control Center to stop
The second option is tapping the red clock or bar at the top of the screen.
Tap the iPhone Screen Recording button in the Control Center to stop
The second option is tapping the red clock or bar at the top of the screen.
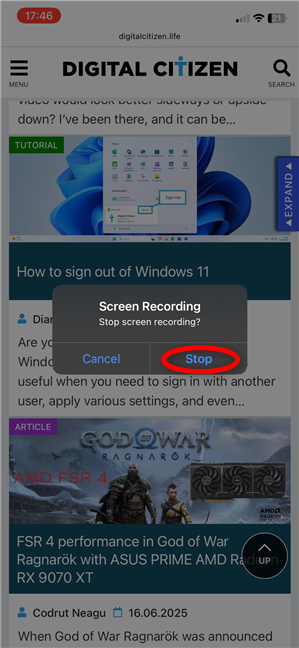
 Tap the red bar to stop Screen Recording on iPhone
Next, tap Stop in the pop-up asking you to confirm your choice.
Tap the red bar to stop Screen Recording on iPhone
Next, tap Stop in the pop-up asking you to confirm your choice.
 Confirm stopping screen record on iPhone
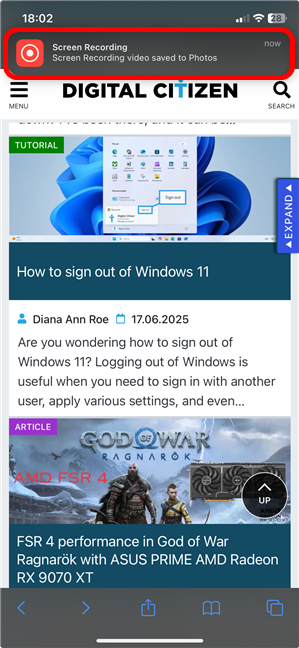
Regardless of the method used, you get a message at the top of the screen letting you know what happened to your video. In my case, it was saved to Photos.
Confirm stopping screen record on iPhone
Regardless of the method used, you get a message at the top of the screen letting you know what happened to your video. In my case, it was saved to Photos.
 You can find your screen recording in the Photos app
Tapping the message highlighted in the previous screenshot takes you to the Photos app and plays your recording. You can also open the Photos app anytime to find your video saved in its Library.
You can find your screen recording in the Photos app
Tapping the message highlighted in the previous screenshot takes you to the Photos app and plays your recording. You can also open the Photos app anytime to find your video saved in its Library.
Step 1. How to add screen record on the iPhone Control Center
The built-in iPhone Screen Recording feature has been around since iOS 11. To use it, the first step is to add it to the Control Center. Luckily, you only need to do this once. If you’re wondering how to add Screen Recording to your iPhone, this process is different depending on the iOS version you’re using. Follow the steps for your operating system.How to add screen record to an iPhone with iOS 18 (or newer)
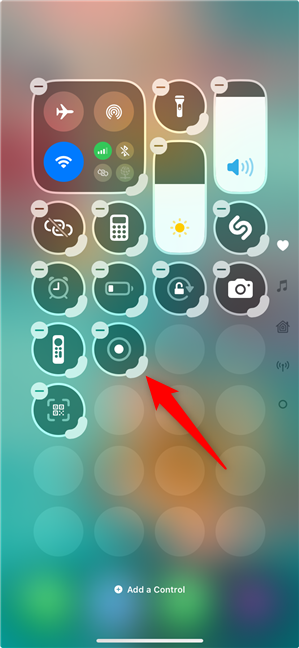
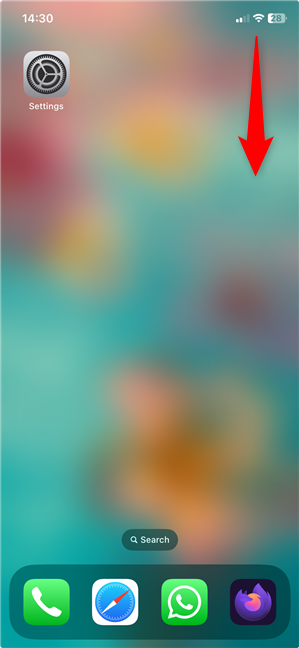
The Control Center in iOS 18 brought several changes, and one of those is that you no longer have to go through the Settings app to add more icons. You can now customize everything directly from the Control Center panel. To begin, open the Control Center by swiping downwards from your screen’s top-right corner (or upwards from the bottom of the screen on an iPhone SE).How to get screen record on an iPhone running an older iOS version
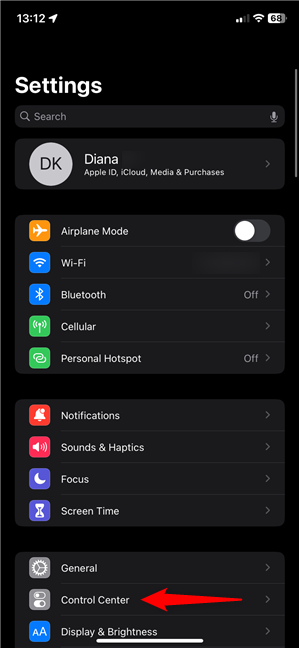
If you’re wondering how to add screen record to an iPhone that doesn’t support iOS 18, the process is just as simple. First, open the Settings app and tap Control Center.Step 2. How to record your screen on an iPhone
You can start using the iPhone Screen Recording from the Control Center. Accessing it differs depending on your iPhone: on iPhone X and newer models, swipe down from the top-right corner, as seen below. On older iPhones, swipe up from the bottom of the screen.Step 3. How to stop screen recording on an iPhone
There are two ways to stop screen recording on an iPhone. The first is to open the Control Center again and tap the (now red) Screen Recording icon to stop recording immediately.


Discussion (0)
Be the first to comment.