26.04.2024
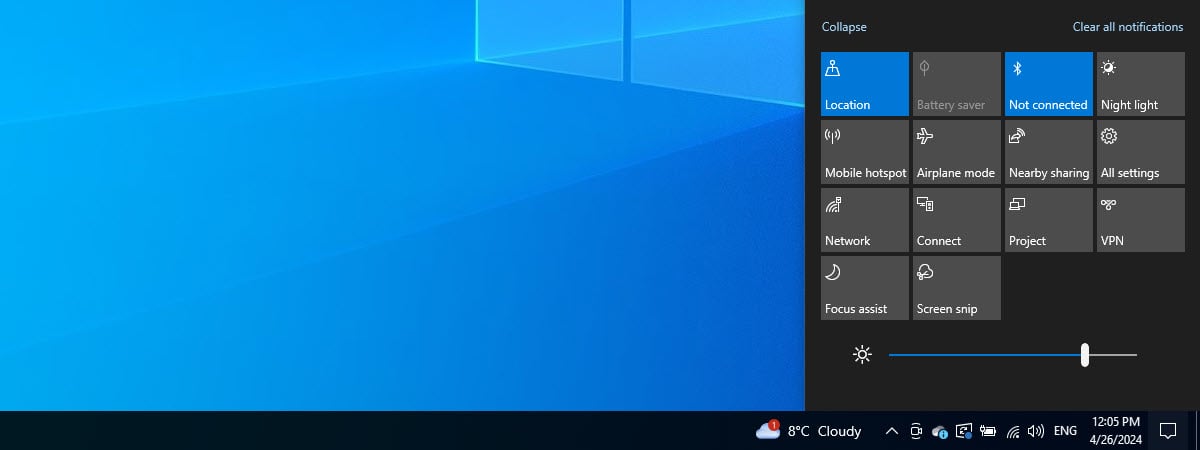
Knowing how to turn up the brightness and lower it can be useful if you spend a lot of time on your Windows 10 computer or device. This setting is especially important when you use a laptop or a tablet because, whether you are indoors or outdoors, you might need to increase or decrease the display’s brightness according to your surroundings. Fortunately, most laptops have built-in brightness shortcut keys, and Windows 10 also offers several options for changing this setting. Read this tutorial and learn how to lower or increase brightness in Windows 10:
1. What’s the brightness shortcut key?
Did you know that most laptops have special shortcut keys to increase brightness in Windows 10? Moreover, if your keyboard has such shortcuts, you can also use them to lower brightness on Windows. Unfortunately, there’s no standardized layout for these keys, and each manufacturer can choose where to place them on their laptop keyboards.
For instance, on my ASUS ROG Strix G17 G713, I have to press Fn + F7 to lower brightness in Windows 10 and I can use the Fn + F8 brightness shortcut keys to increase the brightness of the laptop’s screen.
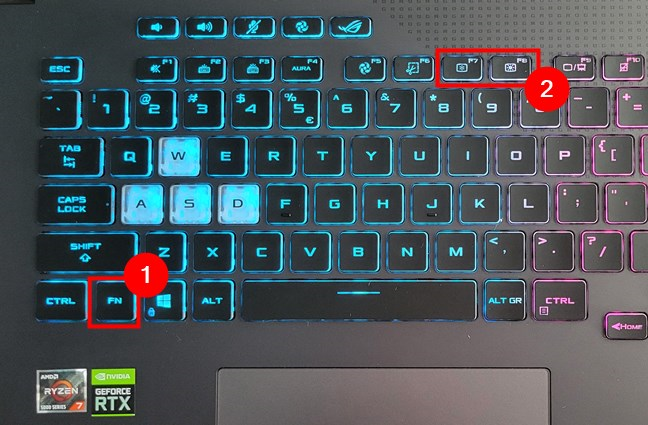
The brightness shortcut keys on an ASUS ROG gaming laptop
On an older Lenovo Legion Y520 laptop, I had to press the Fn + F12 shortcut key to increase brightness and Fn + F11 to lower it.
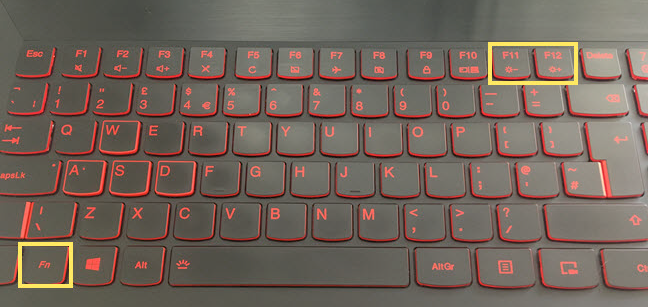
The brightness shortcut keys on a Lenovo gaming notebook
Other brands, like HP, sometimes assign a single key for changing the brightness of their laptops’ screens. For example, on an HP Spectre 13t laptop, you can use the F2 key to dim the screen and the F3 key to increase the screen brightness.
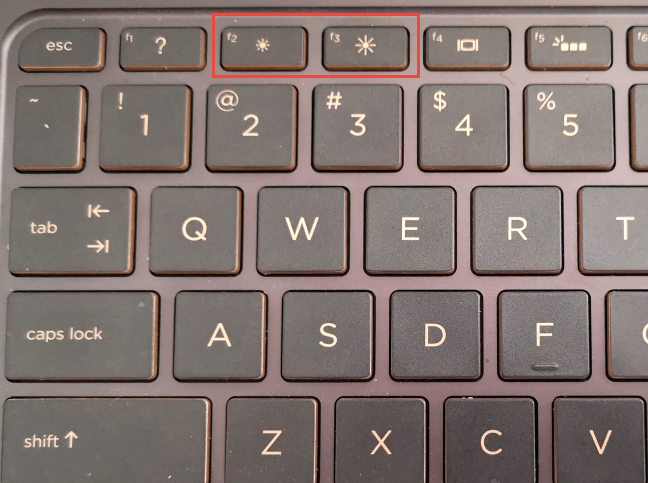
How to adjust brightness on an HP laptop with Windows 10
On Microsoft’s Surface Pro devices with type covers, you can use the keyboard shortcut Fn + DEL to increase the brightness and Fn + Backspace to decrease it.
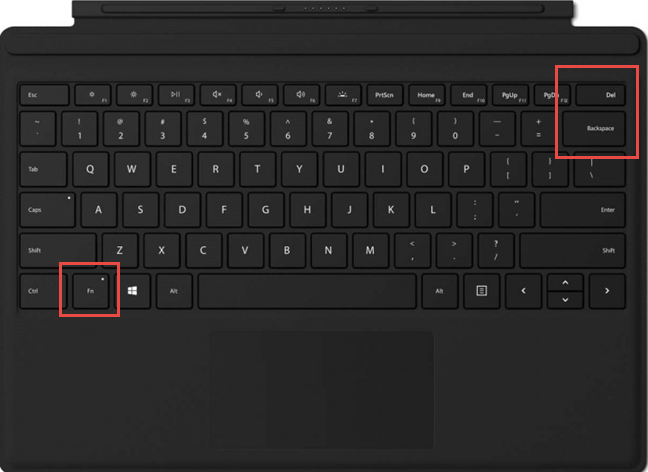
The brightness shortcut keys used on a Surface Type Cover
These brightness keyboard shortcuts are available on most Windows 10 laptops and tablets, but they can vary greatly. Still, regardless of your device's make and model, you should look for similar keys with the brightness-specific sun icon on them.
Sadly, you don’t get such brightness shortcut keys on keyboards for desktop computers since each monitor has its own settings for adjusting brightness, as you can see in the next chapter.
2. How to adjust the brightness in Windows 10 using the physical buttons of your monitor
While some monitors have dedicated buttons for changing brightness (either in front or on one of their edges), on others, you have to look through their specific menus to find the brightness controls. Consult your display's manual to navigate its menus and find the appropriate setting.
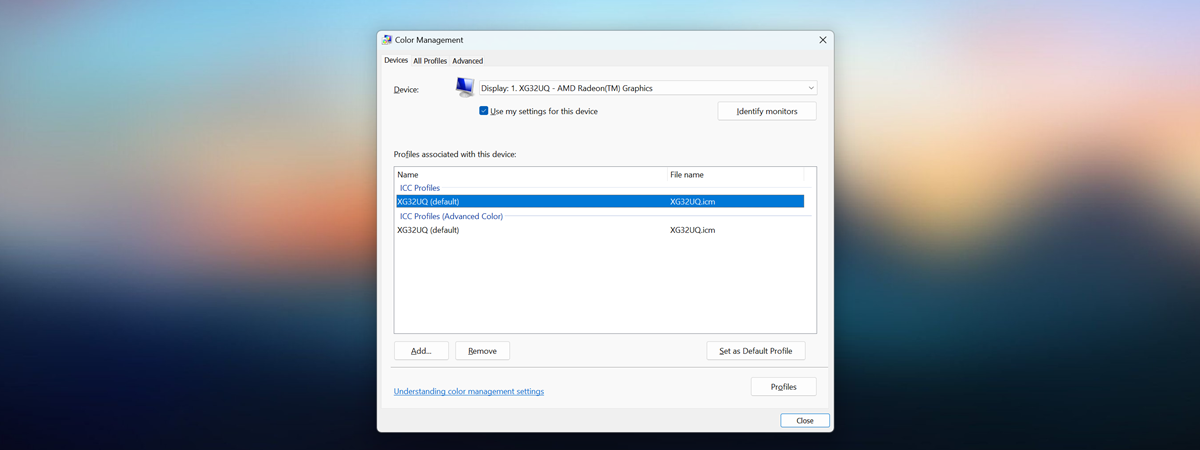
For example, to change the brightness of an ASUS ROG Strix XG32UQ monitor, you must use the joystick to navigate to the Image > Brightness menu, as shown in the picture below.
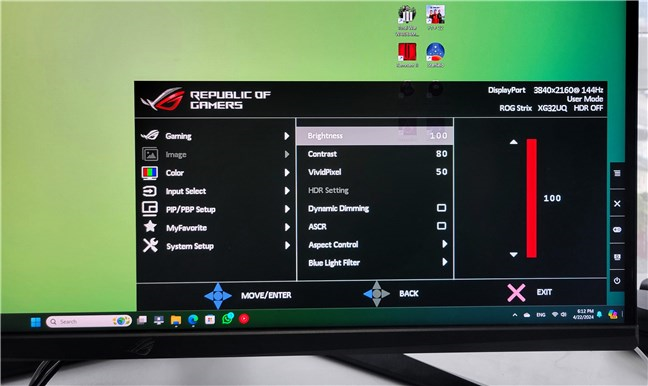
Change brightness for a computer monitor using its menus
3. How to change brightness in Windows 10 using the Quick actions
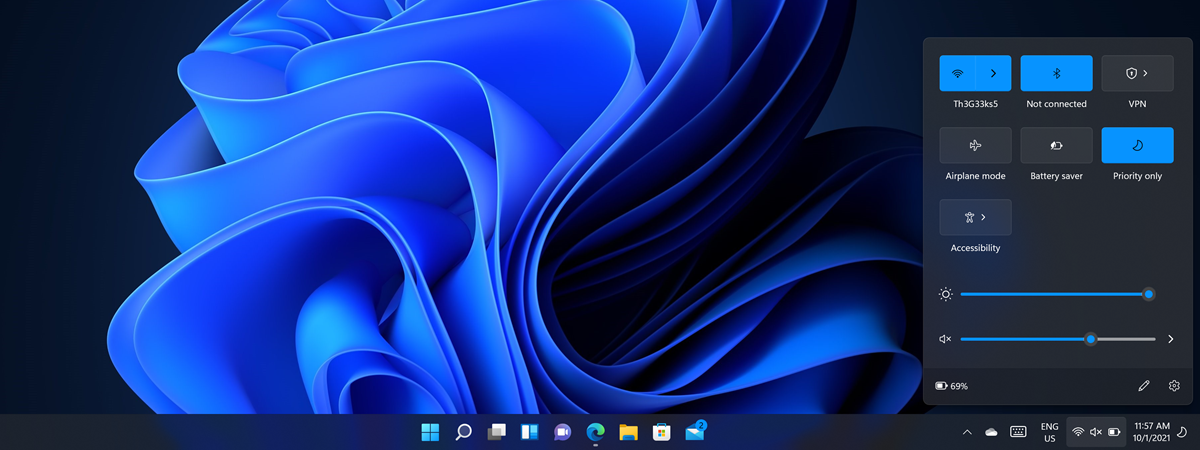
The quick actions in the Action Center can also be used to change the brightness in Windows 10. Use the keyboard shortcut Windows + A to open the Action Center, revealing a brightness slider at the bottom of the window.
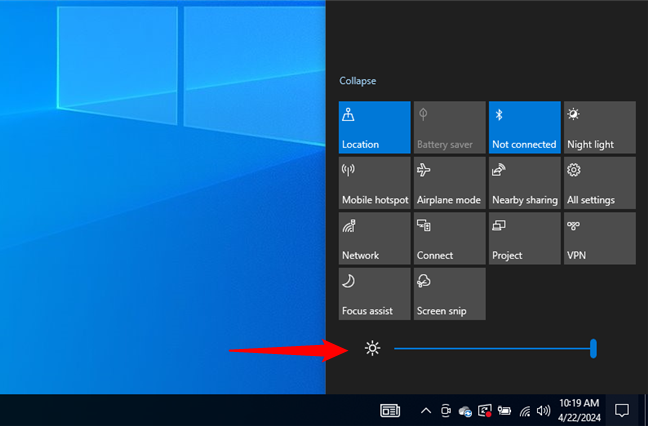
Change the brightness using Quick actions
Moving the slider at the bottom of the Action Center left or right changes the brightness of your display.
4. How to adjust the brightness using the Settings app
You can also use the Settings app to change the brightness level. Open Settings using the Windows + I keyboard shortcut, and click or tap System.
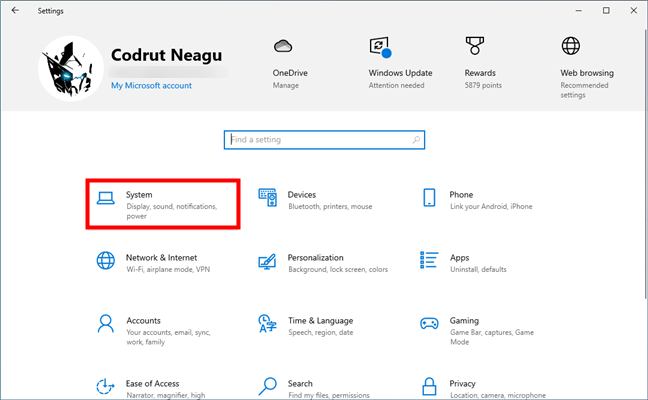
Go to the System category in the Settings app
The System category opens in the Display tab. Use the slider under “Brightness and color” to “Change brightness for the built-in display.”
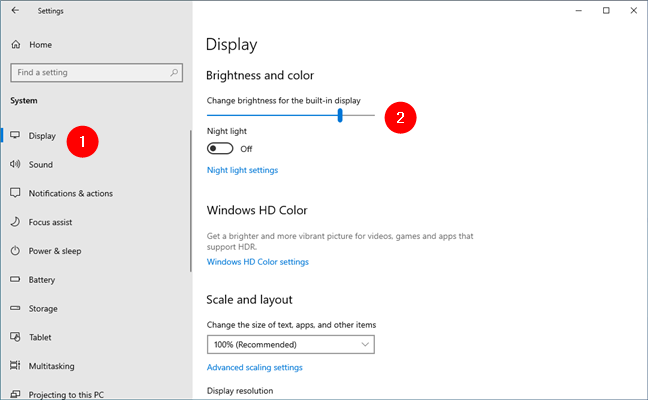
Adjust the brightness from Windows 10’s Settings
TIP: Some laptops and tablets also have built-in light sensors. If yours does, you can also enable the “Change brightness automatically when lighting changes” option to have your device automatically change brightness in Windows 10 based on how much light its sensors measure in your environment.
5. How to change brightness with the Windows Mobility Center
The Windows Mobility Center can also be used to modify the brightness of your display. Type mobility in the search field on the taskbar, and then click or tap the Windows Mobility Center result.
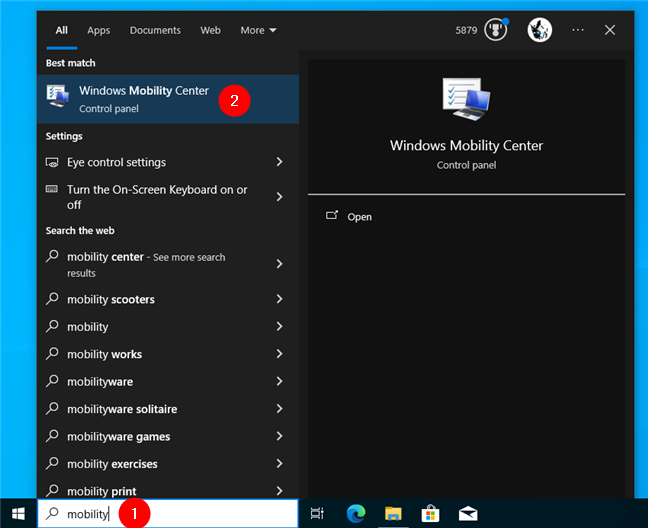
Open the Windows Mobility Center
You can then adjust your screen’s brightness by moving the slider under Display brightness.
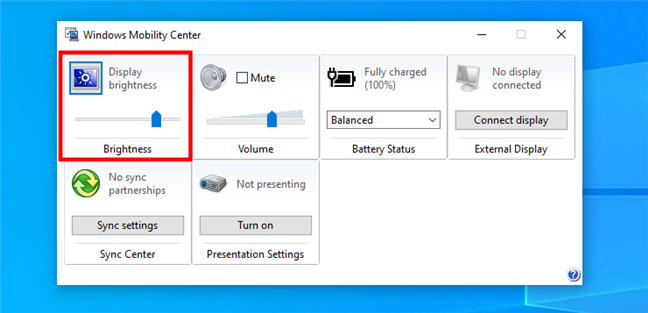
Windows Mobility Center lets you adjust the brightness
6. How to set the brightness in Windows 10 using PowerShell
You can also use the almighty PowerShell to change the brightness of your display. Open PowerShell and enter the following command, replacing brightnesslevel with the percentage value you want for your display’s brightness, from 0 to 100:
For example, if you want to set the brightness at 70%, enter the command:
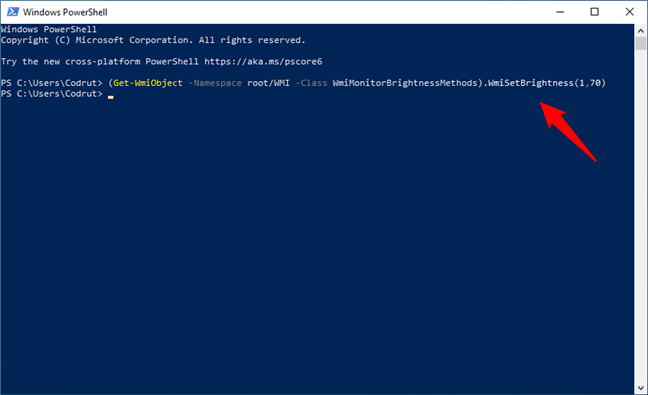
Use a PowerShell command to change the brightness level
When you press Enter, Windows 10 instantly decreases or increases the brightness according to your instructions.
7. How to change brightness in Windows 10 by setting a different Power mode
Lowering the screen's brightness decreases energy consumption and increases your device's autonomy. For laptops and tablets, Windows 10 has a setting that decreases or increases the brightness of your display according to the Power mode you use. To enable this option, click or tap on the battery icon in the system tray on the right side of the taskbar, and then access Battery settings.
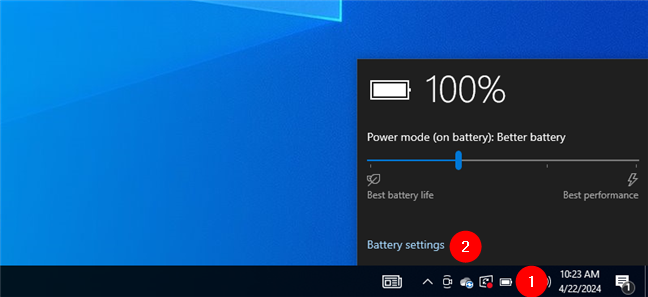
Go to Battery settings
TIP: If you can’t see the Power icon, you can learn how to find and add it to the taskbar by reading this tutorial: The Windows 10 system tray - How to show or hide icons.
In the Battery settings window, scroll down to the Battery saver section. Check the box at the bottom, to the left of the “Lower screen brightness while in battery saver” option.
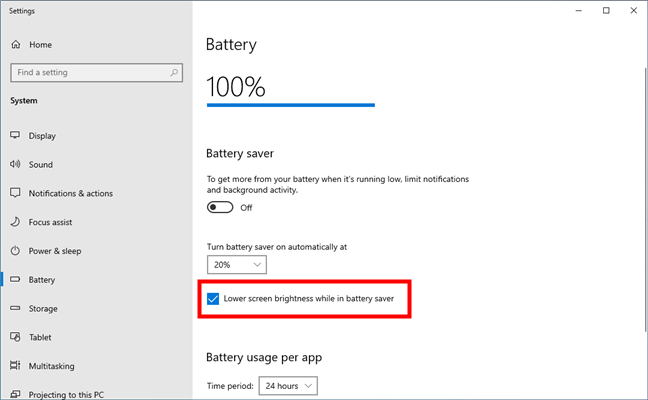
Lower screen brightness while in battery saver
This setting automatically dims the screen when your device tries to save battery. Click or tap the Power icon in the system tray again, and move the Power mode slider all the way to the left for “Best battery life.” If your device isn’t plugged in, the display brightness will be lowered, thus saving precious energy.
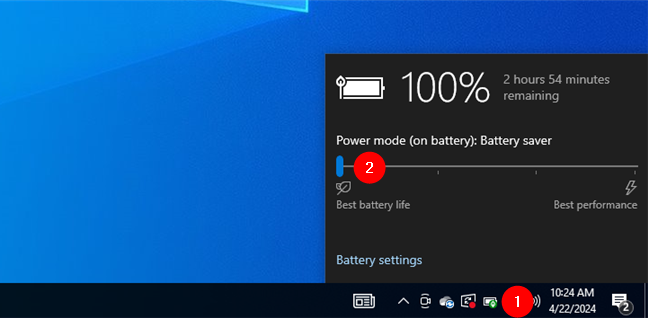
Saving battery dims the display of your device
Addendum: Why can't I change my brightness on Windows 10?
Sometimes, you may stumble upon an unpleasant situation where you can’t change the brightness of your Windows 10 device. If the brightness of your laptop, tablet, or computer monitor isn't functioning properly, it could be due to various factors, the most common ones being:
- Screen problems: Physical damage or inside components that are malfunctioning because of aging can cause problems with brightness adjustment. Unfortunately, this means you’ll either need to repair your display or replace it with a new one.
- Keyboard malfunction: If you’re trying to use a keyboard brightness shortcut that you know worked previously, it may indicate a keyboard problem rather than a display issue. For keyboard shortcuts that involve pressing the Fn key, ensure you’re pressing Fn, too, not just the appropriate F key. If you do, and the brightness still doesn’t change, you should try using a different keyboard to see if the brightness controls work.
- Outdated or bugged software: Broken graphics drivers and buggy Windows 10 updates can also lead to issues with brightness adjustment settings. If you suspect that, and to rule this factor out, you should make sure that you’ve installed all the latest updates for Windows 10, as well as all the latest drivers for your device.

Make sure you have the latest graphics drivers
What method do you prefer to change brightness in Windows 10?
Knowing how to increase and lower the brightness helps you be more productive and focused. A screen that is too bright or too dim can be uncomfortable for your eyes, leading to focus problems and health issues in the long run. Now that you know all these methods, I’m curious which you like best for changing the brightness of your display. Also, do you know of any others? Comment below, and let’s discuss.