Color is one of the critical elements when working with images and videos. Every computer monitor has a different color profile, rendering it slightly different from other displays. It’s important to make sure that the colors your monitor displays are as close to reality as possible. That’s why you should always install a color profile suited for your display. In this tutorial, I’ll explain what ICM files are, why they matter, and how to install an ICM color profile in Windows 11 or Windows 10. If you’re curious to learn more, read on:
What is a color profile?
Color profiles are not easy to define, especially for people who don’t work a lot with images and video editing or photography software. Therefore, I’ll try to summarize the best I can:
A color profile is a set of data that defines a device working with colors and how this device displays colors. The color profiles communicate the color characteristics of the device you use to the operating system. If the devices you use have correct color profiles associated with them, then you can be sure that the colors you see are as natural as possible.
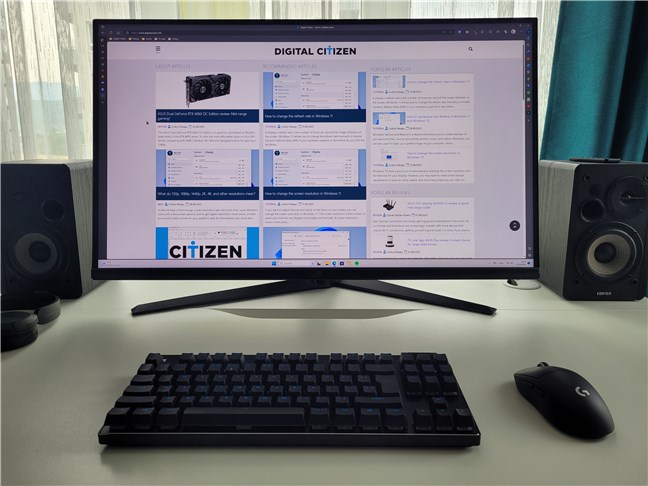
Viewing our website on an ASUS ROG monitor
Cameras, monitors, printers, and scanners are all image devices that we use every day. And because each device has its own way of managing colors, without the correct color profiles, the image you view on your monitor might look different from what you see when you print it. To decrease the occurrence of such differences and see the real colors used in an image, you need to install the color profiles for the devices that are working with colors. Printers and scanners install their color profiles together with their official drivers. That’s why the only component you need to worry about is your monitor. People rarely install drivers for them, which translates into your monitor not using the correct color profile. Therefore, you get the differences in color we mentioned earlier.
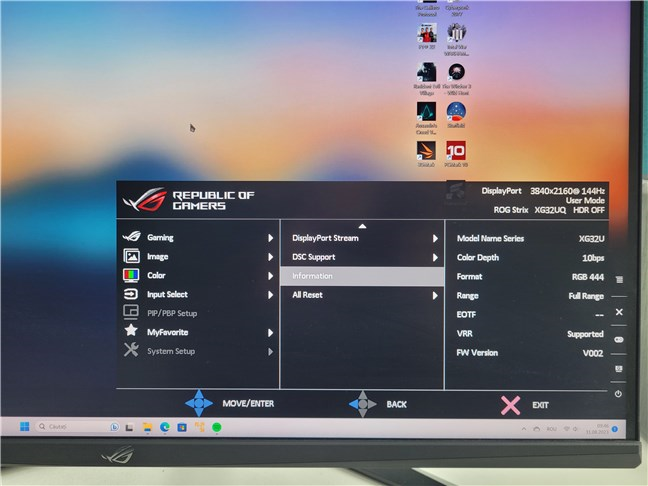
Checking a monitor for details about its model name
For example, imagine having a portrait photo of that special someone in your life. And you want to look at it on your monitor. But because you don’t have the correct color profile installed, the photo looks different from reality. For example, your girlfriend has pale skin instead of red cheeks, and her eyes are gray instead of blue. It can be even worse if the photo is black and white. A wrong color profile used by your monitor can turn the grays to blacks or vice versa. The result will likely be a picture that looks like it was scanned from a newspaper, with no fine details or smooth gradients.
Installing the correct color profile can also be useful for gamers to see the colors intended by game developers. A wrong color profile may hide your enemies in plain sight simply because they are as gray as the walls behind them.
What is an ICM file (or ICM profile)?
In Windows, color profiles are stored in files that end with the .ICM extension. When you’re installing a new color profile, or driver if you wish, for your monitor, that’s what you should have: an ICM file. Why this seemingly odd name? ICM stands for Image Color Management, which is a shorter way of saying that it is a Windows component that handles color management.

An ICM (color profile) file in Windows
Sometimes, color profiles can also be stored as ICC files (ICC stands for International Color Consortium). They’re the same as ICM files, and you can change their extension to either one. Windows 11 and Windows 10 treat ICM and ICC files the same, making no distinction between them.
Now, you have a basic idea of what color profiles and ICM files are and why they are useful. But, I’ve only scratched the surface on this subject, so if you want more detailed information on color profiles and their importance, I recommend reading Wikipedia’s Color Management article.
How to find the correct color profile for your monitor
Generally, the best location to get a color profile (assuming you don’t have a color calibrator at hand) is from the manufacturer of your monitor. Usually, these files are on a CD that came with your display or available for download on the monitor’s manufacturer support site. The monitor I use on my computer is an ASUS ROG Strix XG32UQ, so in my case, I needed to go to the ASUS support page. Here are the support pages for other brands: Acer Support, BenQ Support, Dell Support, Gigabyte Support, LG Support, MSI Support, and Samsung Support.
Another thing to remember is that if you search for “color profile” and specify your monitor model, chances are you won’t find anything useful. Color profiles are generally named as drivers by manufacturers. It’s best to search for downloads available for your monitor model and then download the driver available. I’ll use my monitor as an example. To get its driver (ICM profile), I went to the ASUS support website and typed XG32UQ (the monitor model) in the search field. The search returned only one result, so all I had to do was click on it. In other cases, your search may yield several versions of your monitor, so make sure you pick the right one (the one you have).

The support website of a monitor manufacturer
The previous action usually takes you to a new web page with several options, including one, if not more, download choices. For my ROG Strix XG32UQ monitor, ASUS provides drivers for Windows 11, as well as for Windows 10 64-bit and 32-bit. As I’m using Windows 11, I downloaded the driver package for this operating system.

Downloading the driver package for a monitor
The drivers came as a ZIP archive, and most monitors get them like that. Still, depending on the manufacturer, you may receive a self-extracting archive (with an .EXE file extension). If you get a ZIP file, extract the files inside the archive.

Monitor drivers are usually packaged inside ZIP archives
Look inside the extracted folder, and you should find a file with the .ICM or .ICC extension. That’s the ICC profile you’re looking for.

The ICM file holds the ICC profile
Once you have downloaded and extracted the driver files for your monitor, it’s time to install them. Let’s see how to do that and use the ICM profile on your computer:
How to install a color profile in Windows
In Windows, installing a color profile is easy, and the steps are identical regardless of whether you’re using Windows 11 or Windows 10. Furthermore, there are two ways to do it: one that’s really fast and another one that’s, let’s say, more traditional. Here’s how it all works, starting with the fast method:
How to install an ICM profile using the right-click menu
Use File Explorer to open the folder where you unpacked the monitor’s driver files. Then, right-click (or press and hold) the ICM file inside, and choose Install Profile in the context menu.

The Install Profile option from the right-click menu of an ICM file
That’s it! However, if you can’t install the color profile for your monitor this way, you can try the alternative method in the next chapter.
TIP: For the best image quality possible, you should also consider calibrating your monitor. For more details, read: How to calibrate your monitor in Windows.
How to install an ICM profile using Color Management
In either Windows 11 or Windows 10, use the search on your taskbar to enter the words “color management.” Then, in the results list, click or tap the Color Management shortcut.
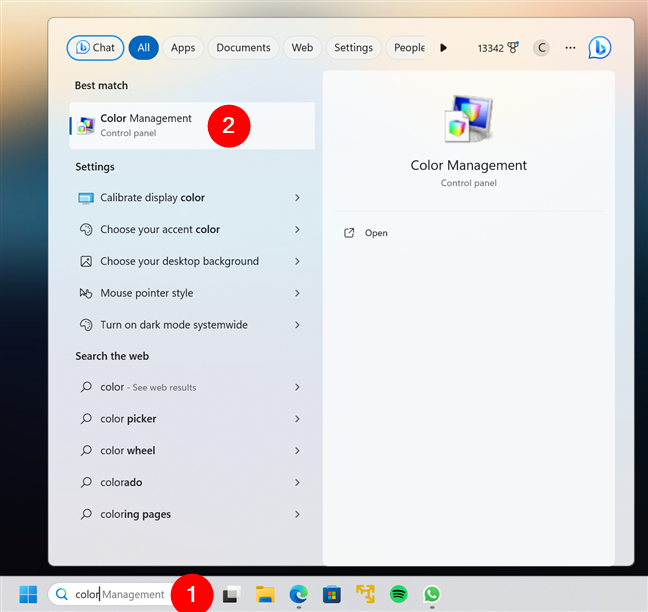
Searching for Color Management in Windows
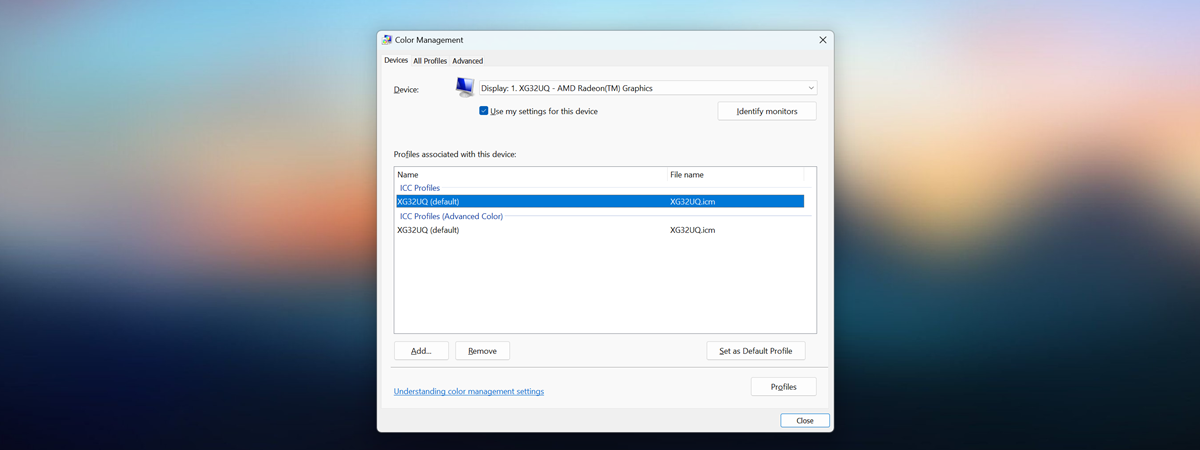
This launches the Color Management window, which looks like this:
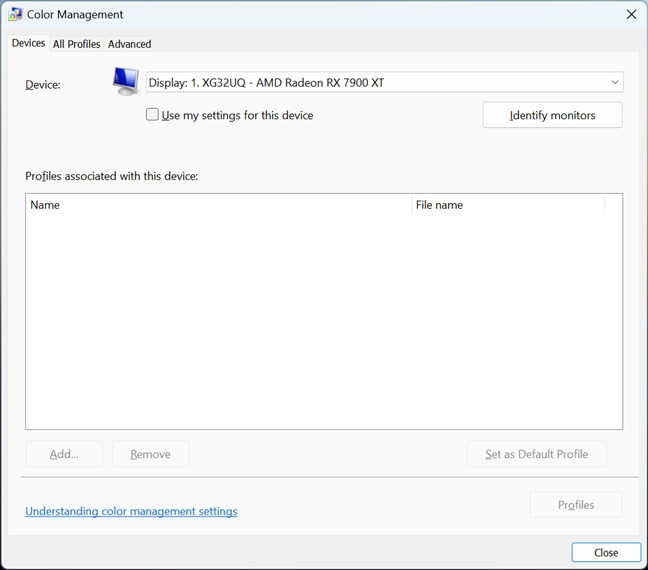
The Color Management window from Windows
In the top area of the Color Management window, make sure that the Devices tab is selected. Then, in the Device dropdown box, you have a list of devices installed on your computer, starting with your monitor(s). If you have multiple monitors, select the one where you downloaded the drivers and ICM file(s). Note that you can use the Identify monitors button under the Device section to identify your different displays and their number: display 1, display 2, etc.
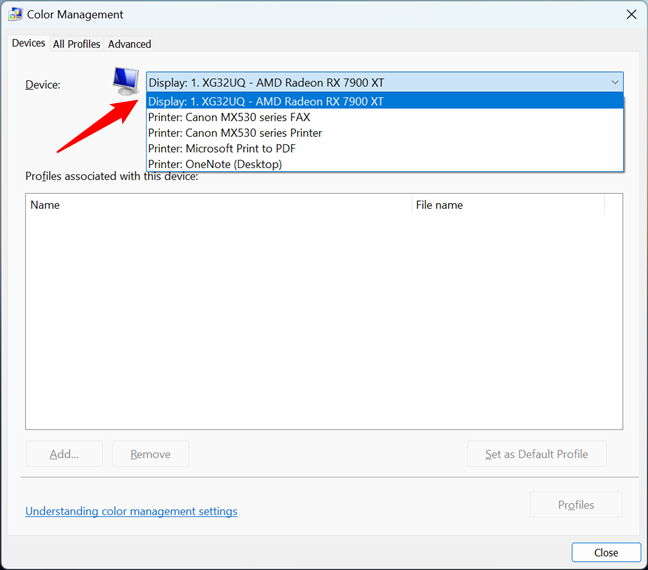
The list of devices that have color profiles in Windows
After selecting the correct display, click or tap the Add button from the bottom left corner of the window. If an ICM profile is already installed for the selected monitor, the Add button might be grayed out and disabled. If that’s the case, but you still want to replace the existing color profile with the one you’ve just downloaded, check the “Use my settings for this device” option. Then, you should be able to use the Add button.
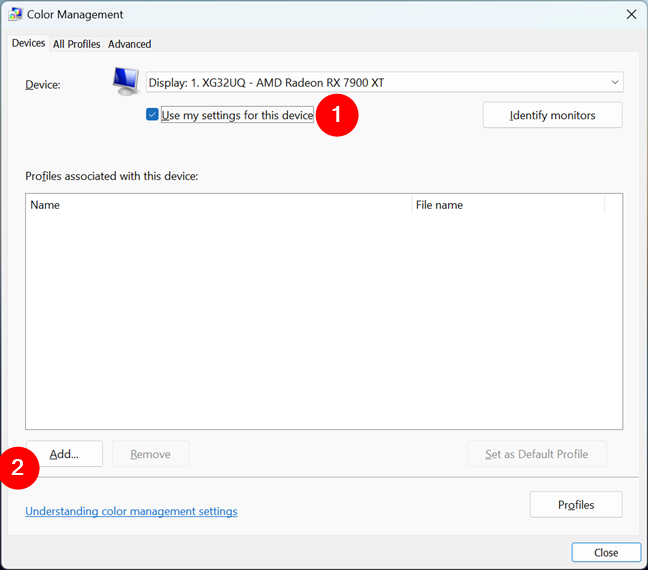
Adding a new color profile
This opens the Associate Color Profile window, where you see the list of installed color profiles. These profiles can be installed and used by other devices, such as your printer or scanner, or by image editing software, such as Adobe Photoshop. Click or tap Browse and find the location of the ICM file you want to use.
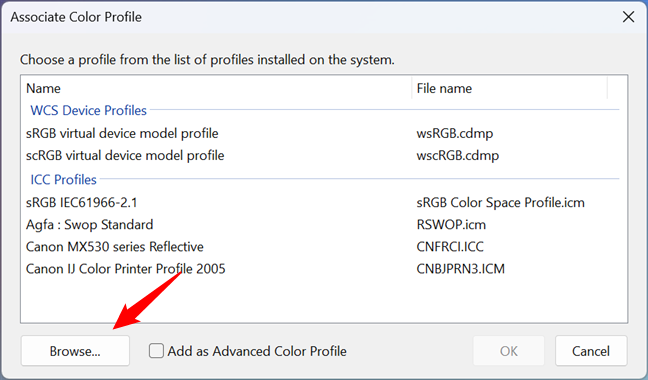
Browsing to find the ICM file that stores the color profile
Select the ICM file and click or tap Add.
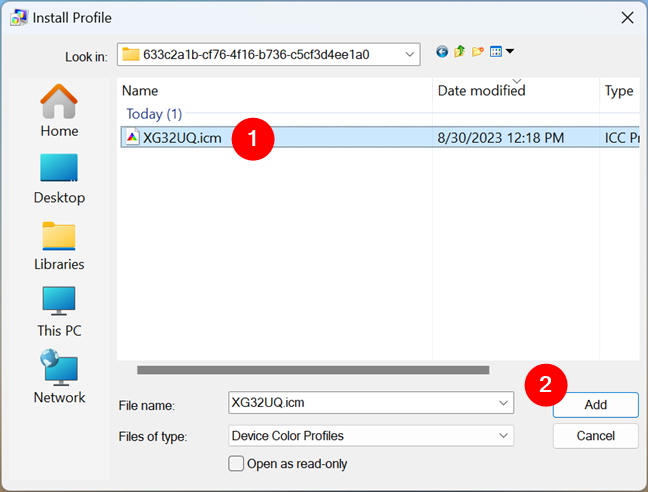
Selecting and adding a new color profile for a monitor
You may notice that the colors on your screen change as the new profile takes effect. Click or tap Close, and you are done.
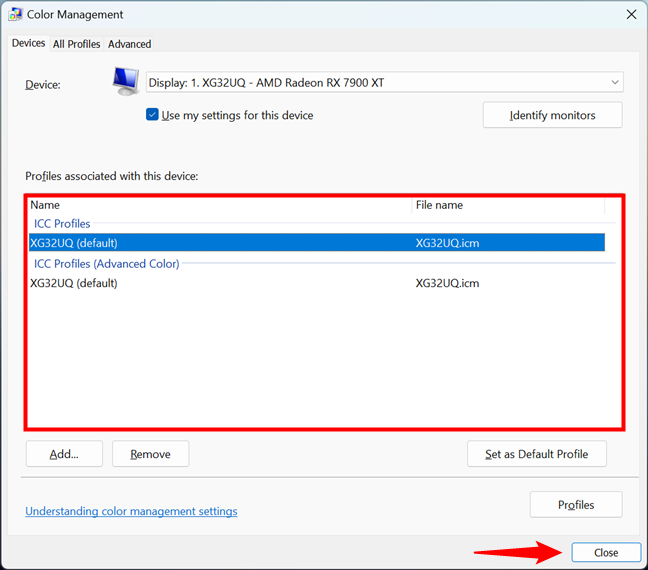
New color profiles for the monitor
If you have multiple monitors, you should repeat the procedure for each monitor and make sure you download and install the color profiles specific to each.
Did you install the correct color profile ICM file for your monitor?
Some people might not have been aware of the importance of color profiles and drivers for their desktop monitors. Hopefully, this tutorial has convinced you to install the appropriate color profiles for your display(s). As you can see, the procedure is reasonably easy to follow, and it should help when working with image and video editing applications and also when gaming.


 01.09.2023
