


One of the most important tasks that every computer user should do regularly is to back up their data. Backing up your data means creating a copy of your files and settings in a separate location, such as an external hard drive, a cloud service, or a network drive. This way, if something happens to your computer, such as a malware infection, a hardware failure, or a ransomware attack, you can restore your data from the backup and avoid losing your documents, photos, videos, and other files. In this article, I'll show you how to use Windows Backup to create and manage backups of your data in Windows. I will also explain some of the benefits and limitations of Windows Backup.
NOTE: The latest versions of Microsoft’s modern operating systems, Windows 11 and Windows 10, come with a new app called Windows Backup. It’s an application designed to make it easier and faster to back up and restore your data, but it’s not a replacement for the old Backup and Restore (Windows 7) feature that is still available in Windows. Windows Backup lets you choose what to back up and helps you restore your data later on when reinstalling your operating system or when you install Windows on a different computer.
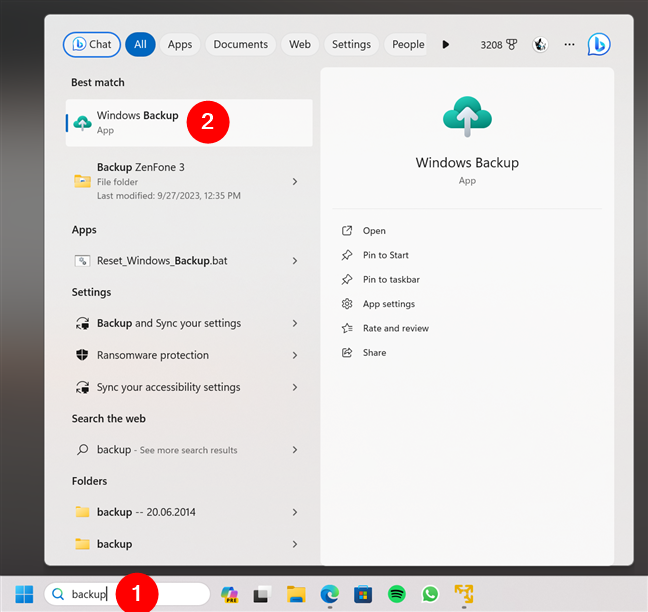
 Open Windows Backup in Windows 11 using search
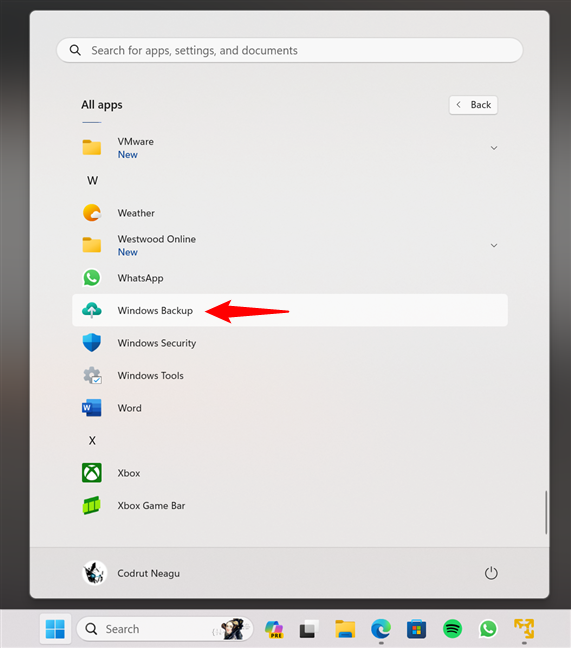
Alternatively, you can open the Start Menu, go to the All apps list, scroll, and click or tap on the Windows Backup shortcut.
Open Windows Backup in Windows 11 using search
Alternatively, you can open the Start Menu, go to the All apps list, scroll, and click or tap on the Windows Backup shortcut.
 Open Windows Backup in Windows 11 from the Start Menu
Regardless of how you chose to open it, this is what the Windows Backup app looks like in Windows 11:
Open Windows Backup in Windows 11 from the Start Menu
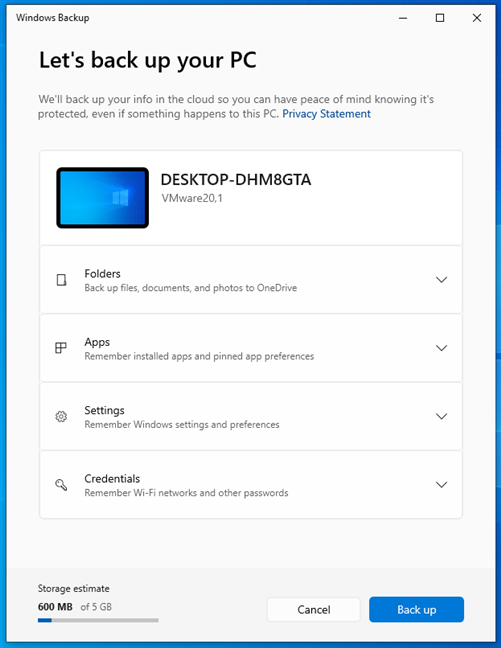
Regardless of how you chose to open it, this is what the Windows Backup app looks like in Windows 11:
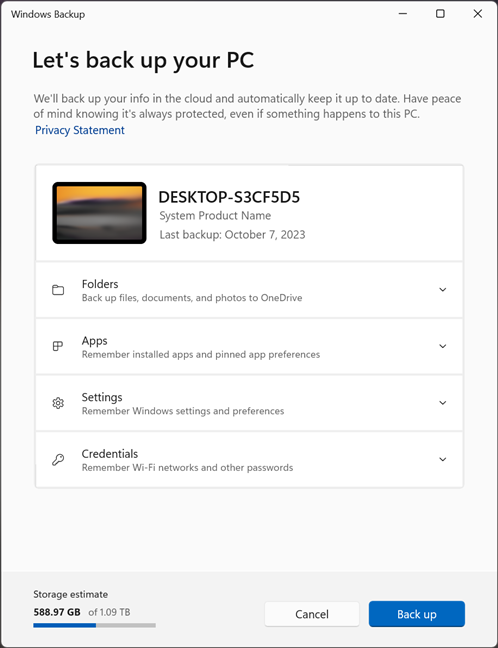
 What the Windows Backup app looks like in Windows 11
Now, you can skip to the next chapter of this tutorial to see how to use Windows Backup.
What the Windows Backup app looks like in Windows 11
Now, you can skip to the next chapter of this tutorial to see how to use Windows Backup.
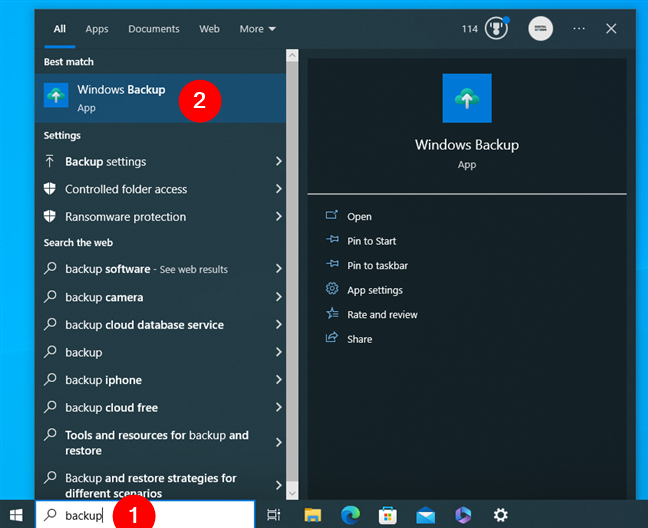
 Open Windows Backup in Windows 10 using search
If you don’t like using search, you can also launch Windows Backup by opening the Start Menu and clicking or tapping on the Windows Backup shortcut in the list of apps.
Open Windows Backup in Windows 10 using search
If you don’t like using search, you can also launch Windows Backup by opening the Start Menu and clicking or tapping on the Windows Backup shortcut in the list of apps.
 Open Windows Backup in Windows 11 from the Start Menu
Once you open it, you should see the new Windows Backup app from Windows 10, which looks like this:
Open Windows Backup in Windows 11 from the Start Menu
Once you open it, you should see the new Windows Backup app from Windows 10, which looks like this:
 What Windows Backup looks like in Windows 10
As you can notice, the Windows Backup app is identical in Windows 10 and Windows 11. Let’s see how to use it:
What Windows Backup looks like in Windows 10
As you can notice, the Windows Backup app is identical in Windows 10 and Windows 11. Let’s see how to use it:
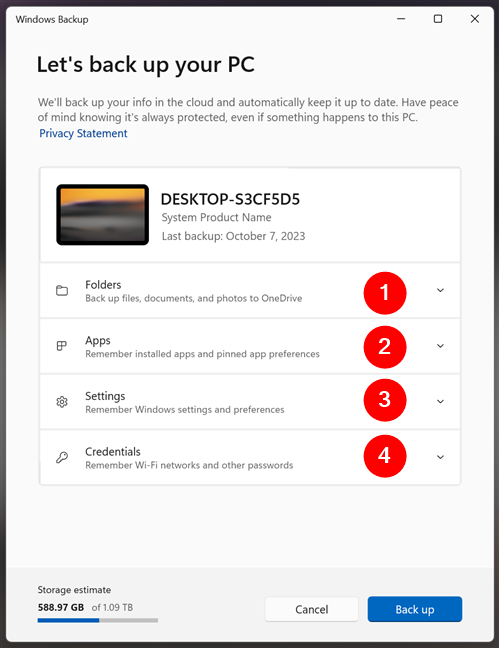
 The things you can back up with Windows Backup
Let’s take everything one by one. First, if you want to change what folders are included in your backup, click or tap on Folders. You’ll then see the list of folders available for backing up. To add a folder to the backup, turn its switch On, like the Desktop folder in the following screenshot. If one or more of the folders are already Backed up, you’ll see this message instead of the switch. That’s the case with my Documents and Pictures folders.
The things you can back up with Windows Backup
Let’s take everything one by one. First, if you want to change what folders are included in your backup, click or tap on Folders. You’ll then see the list of folders available for backing up. To add a folder to the backup, turn its switch On, like the Desktop folder in the following screenshot. If one or more of the folders are already Backed up, you’ll see this message instead of the switch. That’s the case with my Documents and Pictures folders.
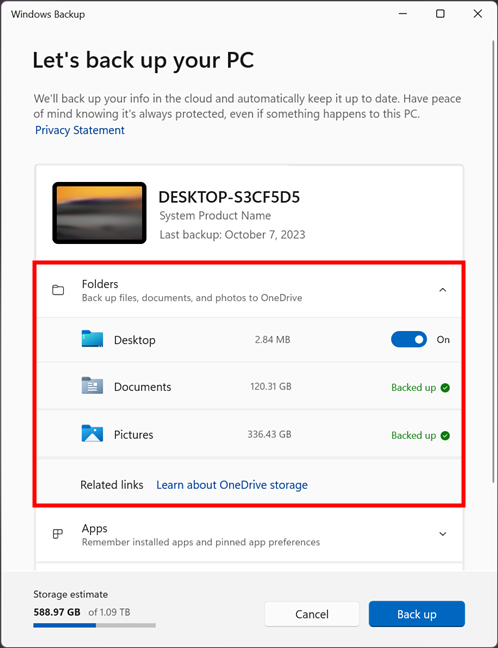 Choosing the folders to back up with Windows Backup
TIP: While the Folders in Windows Backup doesn’t give you too many options, know that you can add other user folders or exclude some, for that matter, from the OneDrive app. Also, according to Microsoft’s documentation, the Videos and Music folders should also be listed in Windows Backup. However, it may be that the app that we have today in Windows 11 and Windows 10 is not the final one. It will probably get an update that will allow us to add those two folders too.
Moving on, the next section in Windows Backup is Apps. This setting has only one switch: Quickly access apps on any Windows device. Turn it On to save your list of installed apps and get the option to recover them when you restore your backup.
Choosing the folders to back up with Windows Backup
TIP: While the Folders in Windows Backup doesn’t give you too many options, know that you can add other user folders or exclude some, for that matter, from the OneDrive app. Also, according to Microsoft’s documentation, the Videos and Music folders should also be listed in Windows Backup. However, it may be that the app that we have today in Windows 11 and Windows 10 is not the final one. It will probably get an update that will allow us to add those two folders too.
Moving on, the next section in Windows Backup is Apps. This setting has only one switch: Quickly access apps on any Windows device. Turn it On to save your list of installed apps and get the option to recover them when you restore your backup.
 Choosing to back up apps with Windows Backup
Next comes the Settings option. As mentioned earlier, this one has multiple switches for different settings you can back up: Accessibility, Language preferences and dictionary, Other Windows settings, and Personalization. Turn On the switch next to each type of settings you want to back up.
Choosing to back up apps with Windows Backup
Next comes the Settings option. As mentioned earlier, this one has multiple switches for different settings you can back up: Accessibility, Language preferences and dictionary, Other Windows settings, and Personalization. Turn On the switch next to each type of settings you want to back up.
 Choosing the settings to back up with Windows Backup
And last but not least, the final setting in Windows Backup is Credentials. There’s only one switch in it that allows you to save your Wi-Fi networks & passwords. If you want them included in your backup, turn this setting On.
Choosing the settings to back up with Windows Backup
And last but not least, the final setting in Windows Backup is Credentials. There’s only one switch in it that allows you to save your Wi-Fi networks & passwords. If you want them included in your backup, turn this setting On.
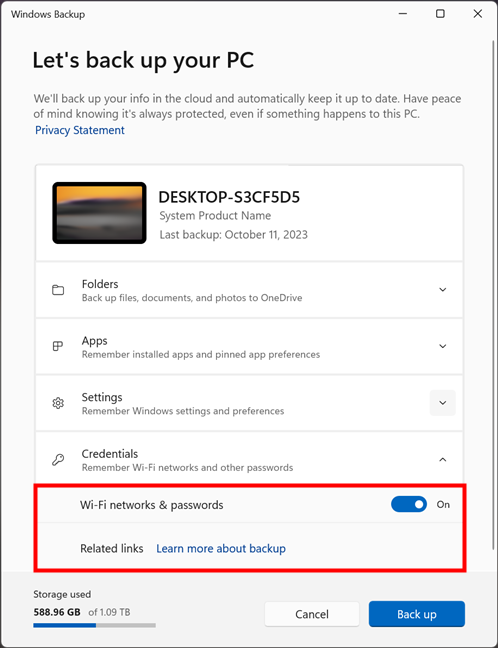 Choosing to back up Wi-Fi networks and passwords with Windows Backup
And with that, we’ve arrived at the end of the things you can back up with the new Windows Backup app. To create the backup right away, click or tap the Back up button in the bottom right corner of the window. If you’ve changed your mind, you can also Cancel everything you’ve set for backing up until now.
Choosing to back up Wi-Fi networks and passwords with Windows Backup
And with that, we’ve arrived at the end of the things you can back up with the new Windows Backup app. To create the backup right away, click or tap the Back up button in the bottom right corner of the window. If you’ve changed your mind, you can also Cancel everything you’ve set for backing up until now.
 Start a manual backup in Windows Backup
Once you’ve started the backup process, there’s nothing more to do. Just wait for it to finish, and then you can close the Windows Backup app. When you reinstall Windows or when you install a new Windows 11 or Windows 10 computer, you’ll be able to choose to restore the backup you’ve just created. For details on how all that works, check this guide: How to restore a backup made with Windows Backup.
Start a manual backup in Windows Backup
Once you’ve started the backup process, there’s nothing more to do. Just wait for it to finish, and then you can close the Windows Backup app. When you reinstall Windows or when you install a new Windows 11 or Windows 10 computer, you’ll be able to choose to restore the backup you’ve just created. For details on how all that works, check this guide: How to restore a backup made with Windows Backup.
How to open Windows Backup
Windows Backup is an app slash feature that allows you to create backups of your files and system settings. But, before we get to how to use it to make backups, you need to first know how to open Windows Backup:How to open the Windows Backup app in Windows 11
The fastest way of opening the Windows Backup app is to use the search in Windows 11. Click or tap in the Search box on your taskbar and enter the word backup. Then, in the list of results, select Windows Backup.How to open the Windows Backup app in Windows 10
If you’re using Windows 10, the search offers the most straightforward way of opening the new Windows Backup app. Click or tap the search box on your taskbar, type backup, and choose the Windows Backup result from the list.How to create a backup with Windows Backup
Before actually creating a backup with Windows Backup, it’s important to know what you can back up with this new app. By default, Windows Backup will back up:- Folders: These are the folders found in your user profile: Desktop, Documents, and Pictures. Windows Backup saves them in your OneDrive cloud storage. However, the app won’t back up any system files, and it doesn’t allow you to add custom locations (other folders) to the backup.
- Apps: The Windows Backup app will create a list of the apps installed on your computer. The list includes both apps you’ve installed from the Microsoft Store and apps that you installed from elsewhere. When restoring the backup, you’ll find all their shortcuts as you’ve had them in the Start Menu. However, while the apps that are available via the Microsoft Store will be reinstalled automatically, the ones outside of it will only get shortcuts with links to their websites. You will need to manually reinstall the latter.
- Settings: With Windows Backup, you can also back up some of your settings. These include Accessibility settings, Language preferences and dictionary, Personalization, and Other Windows settings.
- Credentials: These are the Wi-Fi networks & passwords you’ve connected to and saved on your Windows computer.
Benefits and limitations of Windows Backup
While Windows Backup is definitely a simple and convenient way to backup and restore your data in both Windows 11 and Windows 10, it has both benefits and limitations. Let’s first take a look at the good parts:- Windows Backup is a free built-in app available both in Windows 11 and Windows 10. You don’t have to install third-party software, and you don’t need to pay any subscription fees to use Windows Backup.
- Windows Backup is extremely easy to use. As you’ve seen in this guide, Windows Backup doesn’t require you to configure any complex settings or options. You just select the things you want backed up, and the app takes care of all the rest.
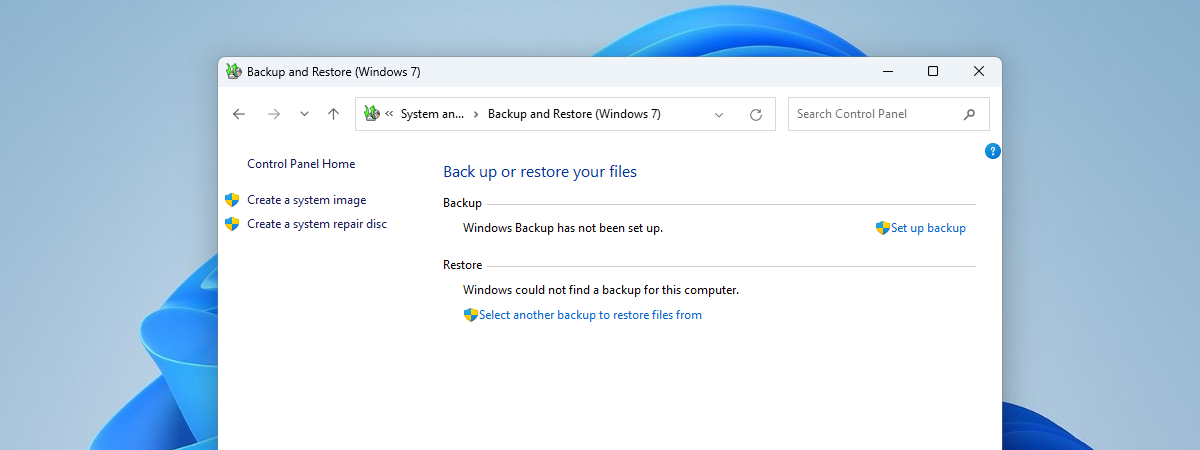
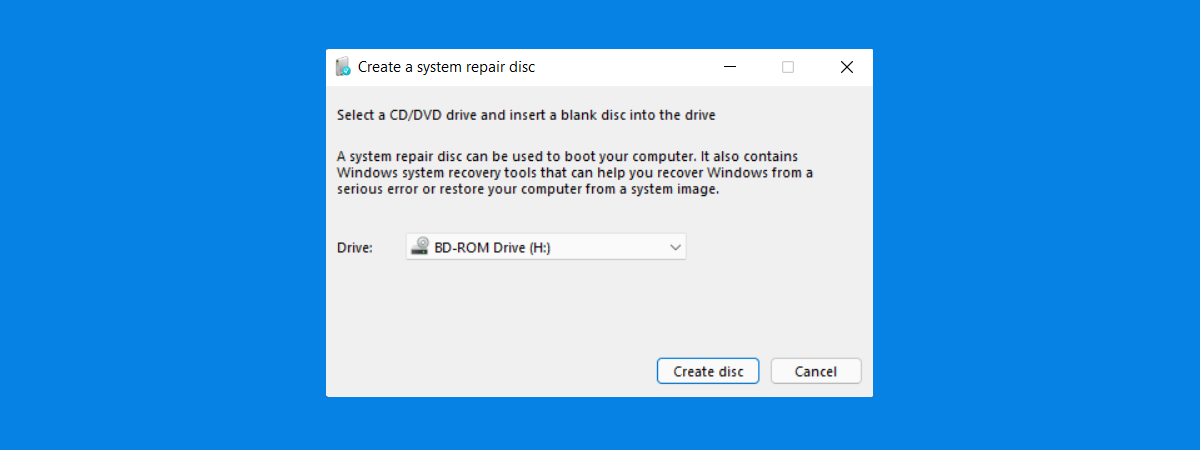
- The Windows Backup app can’t create full system backups. It can only back up some personal files, some settings, and some apps. Unfortunately, it cannot create copies of your system files or clone your apps. In other words, if your computer crashes or files on it get corrupted, you will need to reinstall Windows, and you can restore your data from Windows Backup only during the installation process. If you want to create a full system backup, you will need to use the old feature reminiscent of Windows 7 called Backup and Restore, which is still available in Windows 11 and Windows 10. Here’s how to use it to restore files and folders from a Windows backup.
- You can’t use Windows Backup to save backups on a portable drive like an external SSD or USB memory stick. Windows Backup relies on the cloud, which means you can’t use it for creating local backups.
- Windows Backup works only with Microsoft’s OneDrive. If you don’t have a Microsoft 365 subscription, and enough OneDrive storage space, you can’t use it to back up your data.

Discussion (0)
Be the first to comment.