If you want to boot Windows 7 into Safe Mode, it means that there is probably something wrong with your computer. Safe Mode can help you diagnose and sometimes even repair issues. However, before doing so, you must first know how to boot your Windows 7 computer into Safe Mode. In this article, we discuss what Safe Mode is and how it works, and we walk you through the methods of getting in and out of it, in Windows 7:
1. Hold down the F8 key during the Windows 7 boot
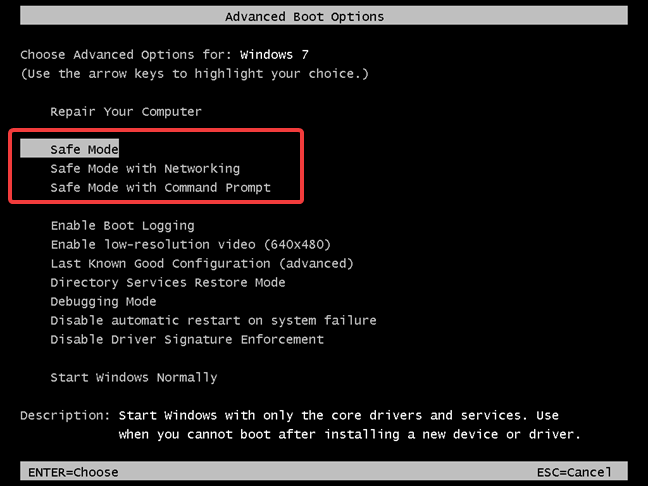
The fastest method for entering Windows 7's Safe Mode when you cannot boot normally, is to hold down the F8 key on your keyboard while your PC is starting, immediately after turning it on. Some older systems may stop loading the operating system and display an error message about a stuck key for doing this. For those cases tap the F8 key rapidly instead of holding it down. It brings up the Advanced Boot Options window, in which you can choose to boot into Safe Mode, Safe Mode with Networking, and Safe Mode with Command Prompt, among several other options. Use the arrow keys to select the Safe Mode you prefer and press Enter after that.
Advanced boot options in Windows 7
NOTE: If you are unable to start your Windows 7 computer normally after installing new drivers or changing settings, you may want to go down and try the "Last Known Good Configuration" option before trying Safe Mode. Ideally, this reboots Windows 7 as it was before the problem program or option was put in place.
2. Use the System Configuration tool (msconfig.exe) to boot Windows 7 into Safe Mode
Another option is to use the System Configuration tool. The fastest way to do that is to type the command msconfig in the search field from the Start Menu and then click the msconfig result.
Open System Configuration tool in Windows 7
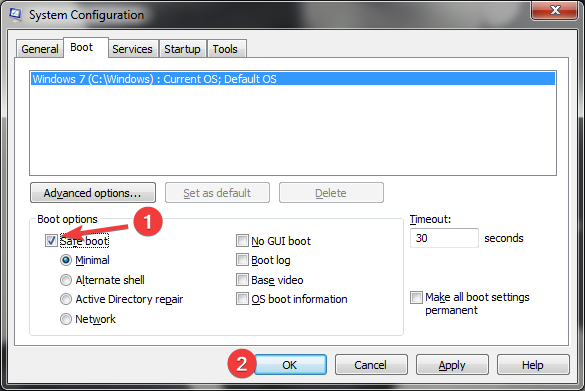
Once System Configuration opens, go to the Boot tab. There you find a settings section called Boot options and an option called "Safe boot." Enable it.
Enable Safe boot in the System Configuration tool
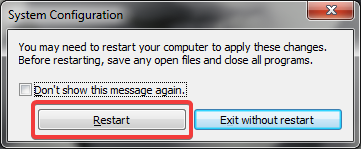
After you check the "Safe boot" entry, click OK and confirm whether you would like to restart now or later.
The next time you start Windows 7, it is going to load the Safe Mode.
Restart Windows 7 after changing the boot options
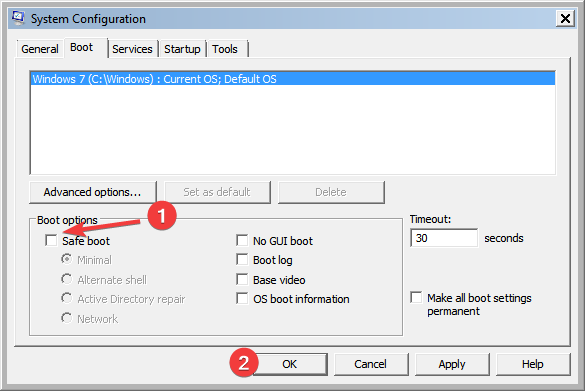
Note that this setting is somewhat permanent until you change it back. You must return to the System Configuration tool, uncheck the "Safe boot" option, hit OK and then restart your Windows 7 PC again to get back out of Safe Mode.
Set the normal boot in the System Configuration tool
3. Use the Command Prompt to start Windows 7's Safe Mode
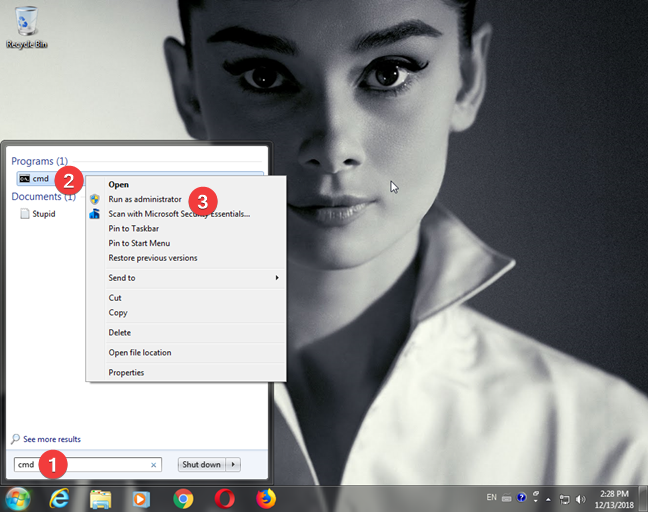
Start a Command Prompt window with administrator permissions. Search for "cmd" in the search field of the Start Menu, right-click on the result and choose "Run as administrator" from the context menu that opens.
Run Command Prompt as administrator, in Windows 7
Answer Yes if you get a UAC prompt to approve the run with administrator permissions. Run one of the following commands depending on which safe boot mode you want:
Safe Mode with Networking: "bcdedit /set {default} safeboot network"
Safe Mode with Command Prompt: "bcdedit /set {default} safebootalternateshell yes"
Enable the Safe Boot in the Command Prompt
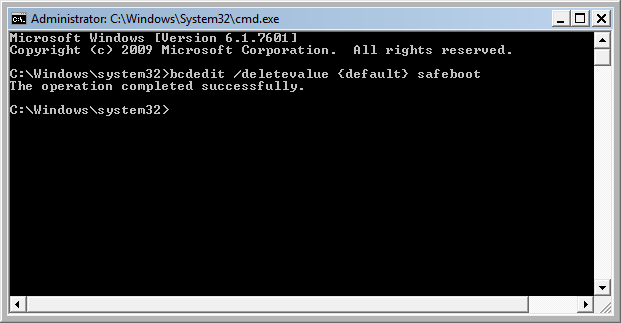
Restart your Windows 7 system, and it is going to start into Safe Mode. At this stage, every time you boot, you get the Safe Mode of Windows 7. After you finish your session, run this command to be able to boot Windows 7 normally again: "bcdedit /deletevalue {default} safeboot"
Enable the standard Windows 7 boot in the Command Prompt
At the next restart of Windows 7, you get the full operating system.
4. Use a Windows 7 installation drive and the Command Prompt
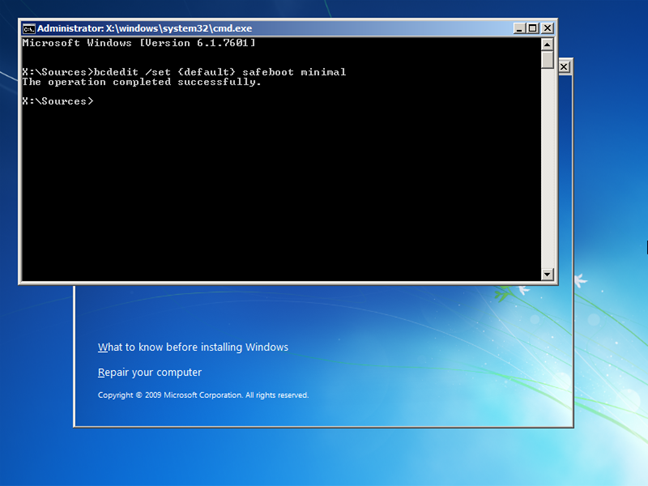
Use a Windows 7 installation DVD to boot your computer. Once you see the first screen of the setup wizard (the one shown in the screenshot below), press simultaneously on the Shift + F10 keys from your keyboard. It triggers the launch of a Command Prompt window.
The Windows 7 installation
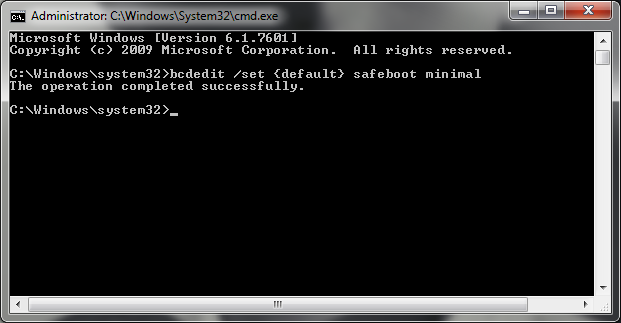
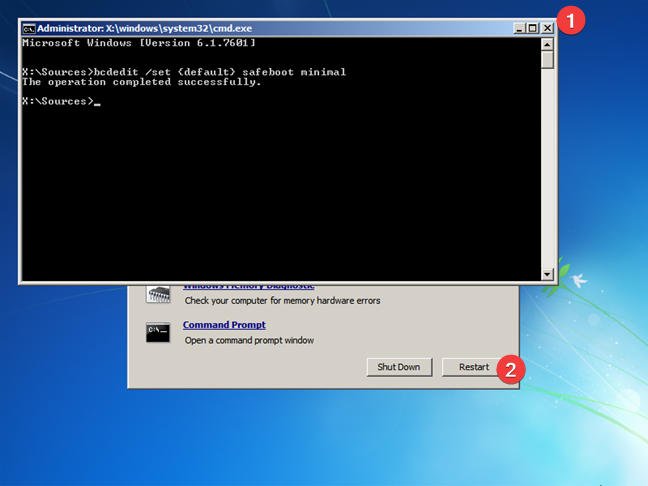
In the Command Prompt window, run this command: _"_bcdedit /set {default} safeboot minimal". Then press Enter on your keyboard. You get the message "The operation completed successfully."
Activate Safe Mode from the Command Prompt
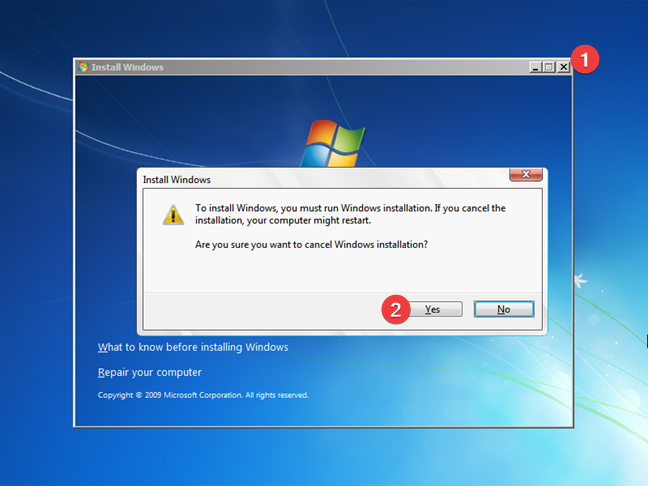
Now close Command Prompt and also close the Windows 7 installation wizard. The wizard asks if you are sure about canceling the installation. Say Yes and wait for the computer to reboot.
Close Install Windows 7 and restart
Once your computer restarts, it should automatically boot into Safe Mode. At this stage, every time you boot, you get the Safe Mode in Windows 7. After you finish your Safe Mode session, run this command to be able to boot normally again: "bcdedit /deletevalue {default} safeboot"
Set Windows 7 to boot normally, from the Command Prompt
At the next restart of Windows 7, you get the full operating system.
5. Use a Windows 7 repair disk and the Command Prompt
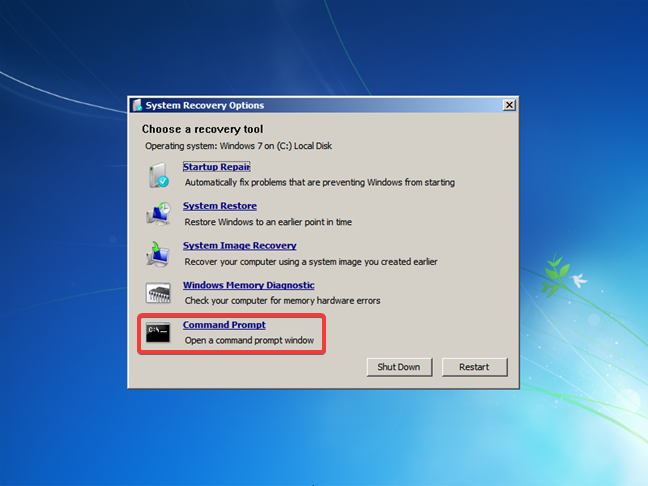
Another option to boot into Safe Mode is to use a repair disk. Boot into the repair disc first. On the main window, choose "Command Prompt."
System Recovery Options offered by a repair disk for Windows 7
It starts a Command Prompt window where you run several commands. Enter one of the following commands, depending on which Safe Mode you want:
Safe Mode with Networking: "bcdedit /set {default} safeboot network"
Safe Mode with Command Prompt: "bcdedit /set {default} safebootalternateshell yes"
Activate Windows 7 Safe Mode from the Command Prompt
Close the Command Prompt window and then press Restart on the main System Recovery Options window. It restarts Windows 7 into Safe Mode.
Close the Command Prompt and restart Windows 7
At this stage, every time you boot, you start the Windows 7 Safe Mode. After you finish your Safe Mode session, run this command to be able to boot normally again: "bcdedit /deletevalue {default} safeboot"
Enable the standard Windows 7 boot in the Command Prompt
At the next restart of Windows 7, you get the full operating system.
Safe Mode in Windows 7
When told to enter Safe Mode, Windows only loads the barest essentials needed to function (a minimal set of drivers and services). You do not have access to anything but the core programs and functions of Windows, which do not include the drivers for your networking devices - meaning you usually cannot access the internet while in the standard Safe Mode. While in Safe Mode, you might feel that your screen looks wonky and different than it usually does. It is because it has been set to run at the lowest possible graphics settings and the minimum resolution supported by Windows. In the case of Windows 7, that is 800 x 600 pixels.
Also, you might notice that all four corners of the desktop have "Safe Mode" written in text. Additionally, when you boot into Safe Mode in Windows 7, you are always greeted by the Windows Help and Support tool, explaining what Safe Mode is and how to use it.
Windows 7 in Safe Mode
Once again, remember that Safe Mode does not load any third-party services or programs that were supposed to run at startup. It loads only the core services and features needed by Windows 7 to run.
What do the different kinds of Safe Mode do?
You might have noticed that you have a couple of options beyond the plain old Safe Mode.
Safe Mode options in Windows 7
If you need the internet to update drivers or other programs, make sure to choose the "Safe Mode with Networking" option when initiating Safe Mode. It loads the drivers necessary to use your network card or modem so that you can access the internet or other networked computers while in Safe Mode.
Alternatively, if you prefer to use the Command Prompt, you might want to use the "Safe Mode with Command Prompt" option so that it loads the tools necessary to do this. The advanced users who use the Command Prompt probably already know why this is helpful. However, even beginners can benefit from using Command Prompt in Safe Mode. With just a few simple commands, they can navigate the computer more quickly.
Did you enter Windows 7's Safe Mode?
Congratulations! Now you know how to boot any Windows 7 computer into Safe Mode. It can be a lifesaver for all sorts of embarrassing situations, and we would love to hear any stories you have about using Safe Mode for troubleshooting.


Discussion (4)
you just saved me $350. Thankyou !
thank you very much
Now my compter is just looping, trying to entre safemode
Safe mode boot loop… stuck… thanks!