Did you know that Windows 10 includes a default app called Steps Recorder? It’s an app designed to record your steps and screen for troubleshooting purposes. In this tutorial, we show you what this excellent little tool can do. Here’s how to use Steps Recorder and why it can become one of your best friends, especially if you are the one who helps his family and friends troubleshoot their Windows 10 computers or devices:
What is Steps Recorder?
Steps Recorder is an app developed with the sole purpose of helping you troubleshoot problems on a Windows 10 computer. It does that by recording the steps you took when something bad happened on your PC. Then, it saves your steps in a friendly format, as a single file with details and screenshots for every step, which you can send to a friend or an IT professional who can help you diagnose the issue. Note that the Steps Recorder app is available in Windows 8.1 and Windows 7 too, although it had a slightly different name in the latter: Problems Steps Recorder.
How to open Steps Recorder in Windows 10
To open Steps Recorder in Windows 10, you can enter the word steps in the search field from the taskbar and click/tap on the Steps Recorder result.
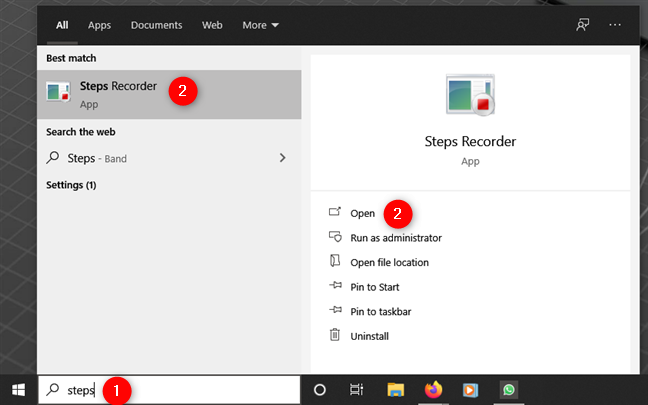
Open Steps Recorder in Windows 10 using search
You can also launch the app from the Start Menu. Open the Start Menu, navigate to Windows Accessories and click or tap on the Steps Recorder shortcut.
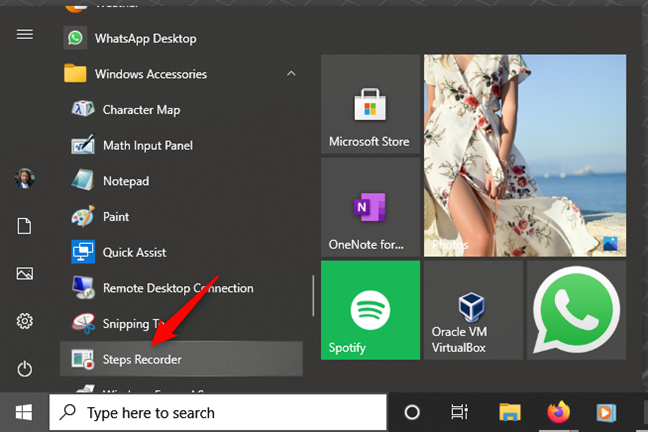
Open Steps Recorder in Windows 10 from the Start Menu
If you prefer text commands, you can also launch Steps Recorder by running the psr command in the Run window (Win + R), Command Prompt, PowerShell, or even in File Explorer.
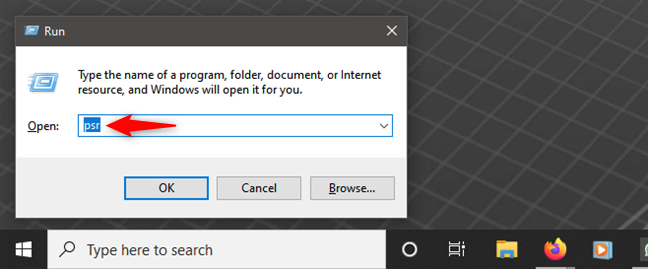
Open Steps Recorder in Windows 10 by running the psr command
How to use Steps Recorder in Windows 10
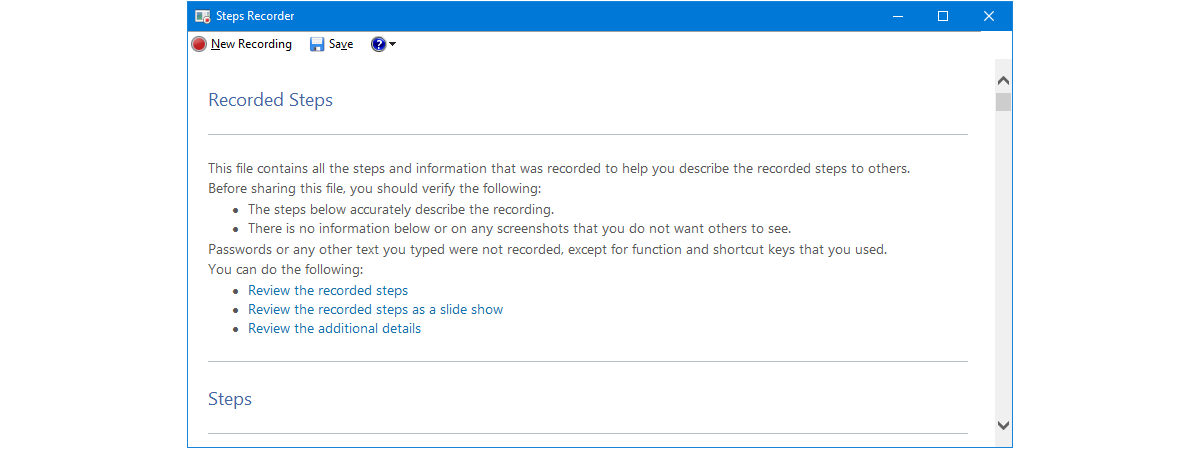
Once you open Steps Recorder, you should see a small and simple window pop up on your screen. It looks like this:

Steps Recorder in Windows 10 (aka Problem Steps Recorder in Windows 7)
The Start Recording button starts recording your actions, while Stop Recording stops it and doesn’t allow you to resume recording. Let’s see how that works:
Press the Start Recording. Now the tool records all your mouse movements. Start the applications you want to use, make the clicks/taps you want to make, type what you need, etc.

Start Record with Steps Recorder
Steps Recorder continually records what apps you launched, what things you clicked/tapped on, and whether you typed something or not.
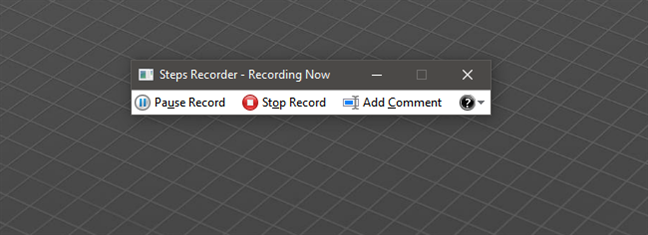
Recording steps in Windows 10 with Steps Recorder
One thing to keep in mind is that the Steps Recorder doesn’t record what you type. To add data to the recording about what you’ve typed, press the Add Comment button at the appropriate step and add a comment in the Highlight Problem and Comment box. Once you are done typing, press OK to continue recording.
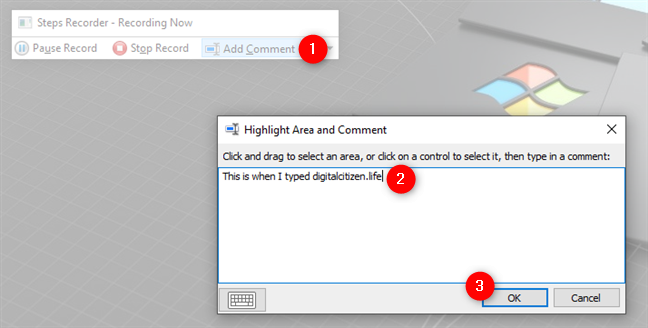
Adding a comment in Steps Recorder
To pause the recording, press Pause Record. You can resume it at any time.

Pause record in Steps Recorder
However, if you pressed Stop Recording, things stop there, and you can’t resume. As soon as you stop the recording, Steps Recorder lets you review the recording before saving it.
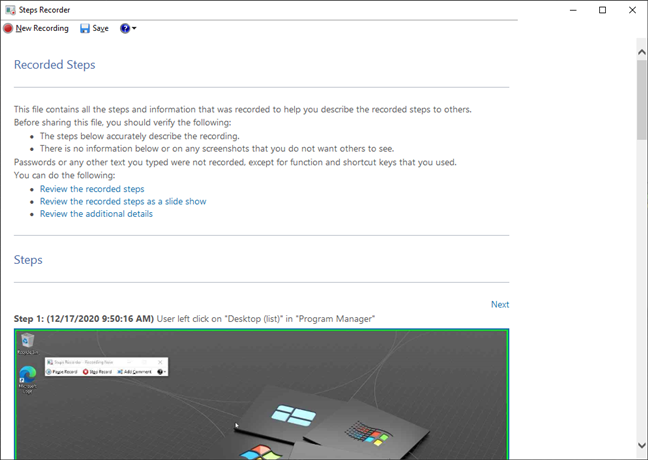
Recording details from Steps Recorder
Check the recording details to make sure that you didn’t record any passwords or other types of information that you don’t want others to see.
If everything looks OK, save the recording you made with Steps Recorder by pressing the Save button from the top of the window.
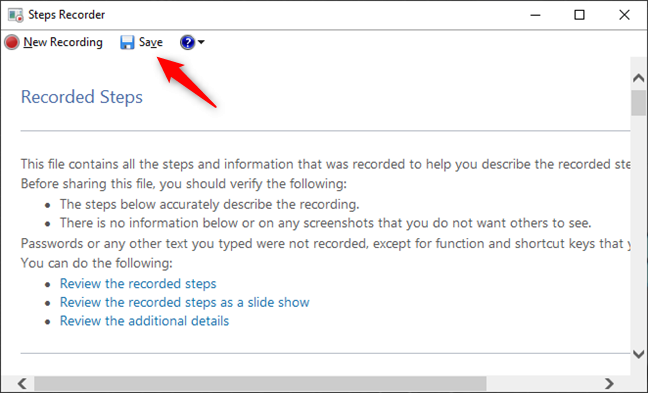
Save a recording with Steps Recorder
Steps Recorder saves all the recordings you make as compressed ZIP files, so you can send them easily to the person who helps you troubleshoot the problem. Inside the ZIP file, there is an MHTML Document file that you can open using the old Internet Explorer.
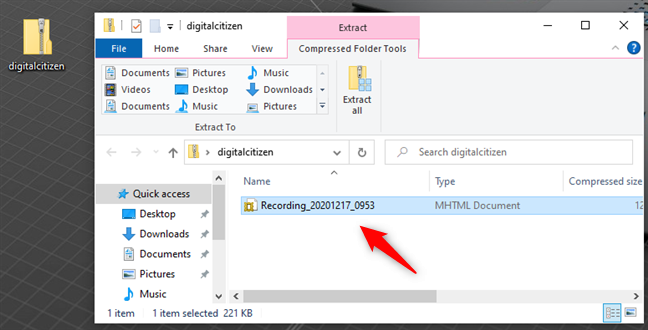
Steps Recorder saves recordings as mhtml files inside ZIP files
How to configure Steps Recorder in Windows 10
There are a few things that you can configure about the way Steps Recorder works in Windows 10. You can access them by clicking/tapping the “question mark & small downward arrow” button from the right side of the Steps Recorder window and then selecting Settings in the menu that shows up.
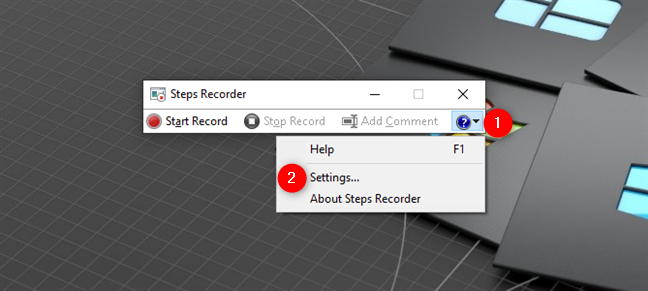
Steps Recorder Settings
That brings up a small window where you can set the location of your recording, whether you want to enable screenshots, and how many recent screenshots the program should store. If you are going to record a lengthy procedure, don’t hesitate to change the number from 25 to a higher value.
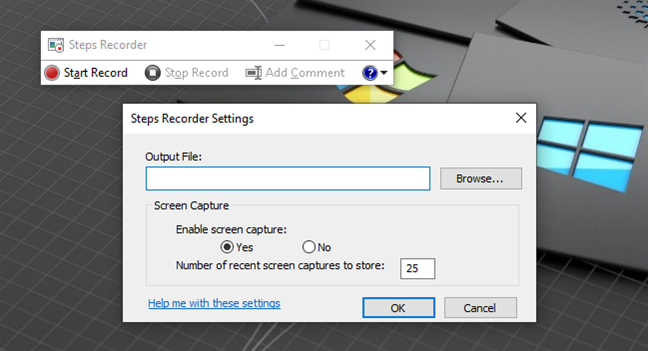
Settings available for Steps Recorder
When to use Steps Recorder?
The Steps Recorder can be useful in a few scenarios:
- When you want to record a problem that you stumbled upon and want to share the details with someone who can help you. For example, you can make a recording, upload it online, and share the link with us, a friend, or your network admin, when you need help.
- Record what you are doing, not necessary for troubleshooting purposes. For example, you can record an entire tutorial with this tool and share it with others so that they can follow it when needed.
TIP: If the recordings you made with Steps Recorder are not enough for the person who helps you troubleshoot issues, there are other tools in Windows 10 that can provide additional information. Check whether the data you can extract with the tool we presented in this tutorial can help. Also, see how to use the Resource Monitor in Windows, and how to use Diagnostic Data Viewer and see what data Windows 10 sends to Microsoft.
Do you use Steps Recorder?
We found Steps Recorder to be quite useful. We can share this tutorial with some of our friends and family and ask them to record what they are doing when they need our help to solve issues. However, most people never heard about it. Did you know about it before this guide? How did you find out about Steps Recorder? Let us know in the comments section below.


 22.12.2020

