Whether you have a PC, a laptop, or any other device that runs on Windows, it probably has a screen attached to it. It can be a monitor, a laptop or tablet display, or even a TV screen. Have you wondered what your screen’s resolution is? Do you want to know how to find what resolution your display uses? If you did, read this article, and you’ll find out several ways to check your resolution:
NOTE: If you don’t know what the screen resolution is, you should first understand the context and notions related to display resolutions. For that, it would be best to read this article first: What do 720p, 1080p, 1440p, 2K, 4K, and other resolutions mean?.
1. How to check the screen resolution in Windows 11’s Settings
If you’re using Windows 11, probably the easiest way to find your screen resolution is to check the Display section from the Settings app. Open Settings (Windows + I), make sure that System is selected in the left sidebar, and then click or tap Display on the right pane.
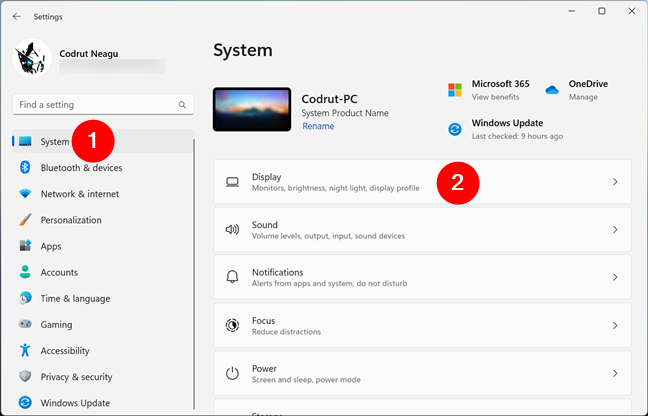
Open Settings and head to System > Display
Alternatively, you can also right-click (or press and hold) an empty space on your desktop and select Display settings in the context menu.
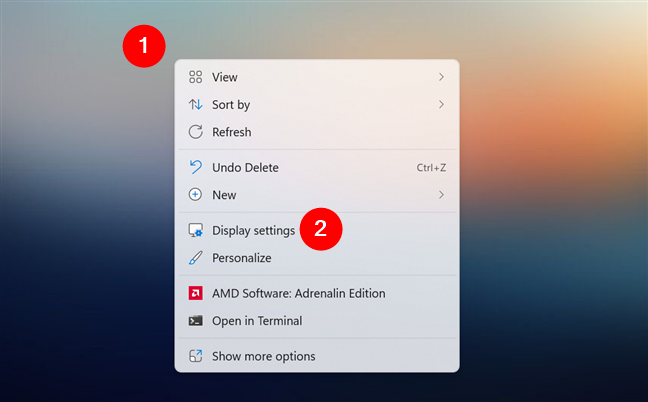
How to open the Display settings from Windows 11's desktop
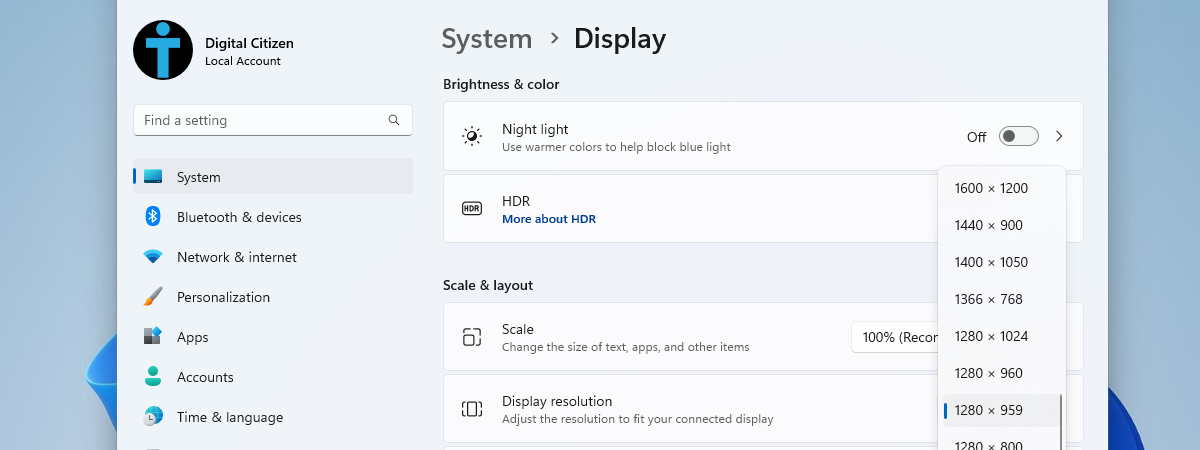
On the Display page, look for the Display resolution setting under Scale & layout. The value next to it shows you the resolution used by your screen. For example, in the next screenshot, you can see that the monitor connected to my desktop computer is set to use a 4K resolution of 3840 x 2160 pixels.
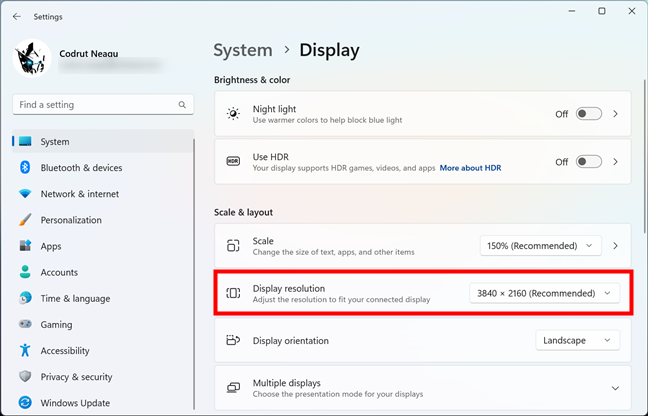
How to check the screen resolution in Windows 11's Settings
TIP: Setting the screen resolution and refresh rate in Windows 11 is easy, but there are some things you should know before doing so. You can find all the information you need in these tutorials: How to change the screen resolution in Windows 11 and How to change the refresh rate in Windows 11.
2. How to check the screen resolution in Windows 10’s Settings
If you are using Windows 10, one of the easiest methods to determine your screen’s resolution is to check the Display section from the Settings app. The fastest way to get there is to right-click (or press and hold) an empty space on your desktop, and then click or tap the Display settings option in the contextual menu.
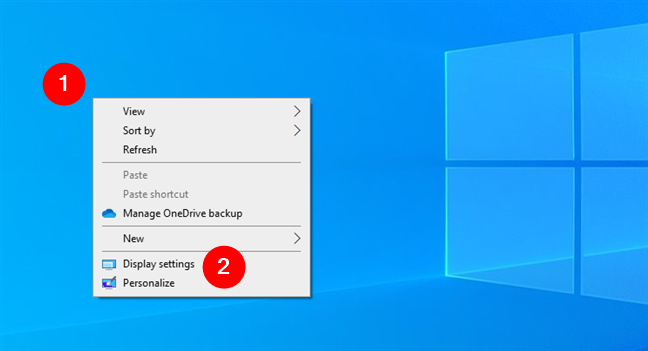
How to open Display settings in Windows 10 fast
Alternatively, you can open Settings (Windows + I) and click or tap on System.
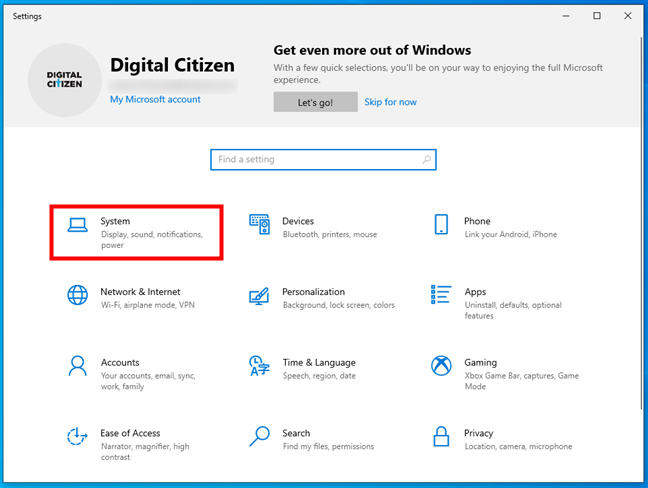
Open System in Windows 10's Settings
Regardless of how you decide to get here, you should now see the Display page from the Settings app. If you don’t, make sure that Display is selected in the left sidebar. Then, locate the Scale and layout section on the right side of the window. This is where you find the Display resolution setting. Its current value is the resolution that your screen is using. For example, in the following screenshot, you can see that my laptop has a screen resolution of 1920 x 1080 pixels.
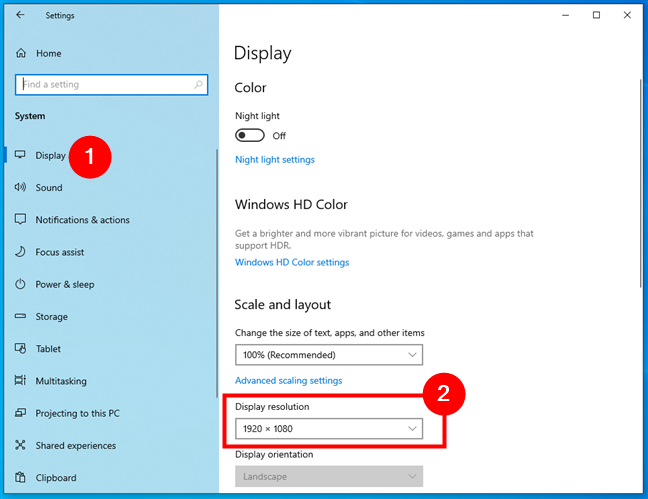
How to check the screen resolution in Windows 10's Settings
TIP: If you want to change the display resolution on your Windows 10 PC, you can find all the steps detailed in this guide: How to change the screen resolution in Windows 10. And, if you want to adjust your display’s refresh rate, here’s everything you need to know about it: Where to find the Windows 10 refresh rate. How to change it.
3. How to get the screen resolution in CMD or PowerShell
If you like using command-line environments, know that you can use Command Prompt (CMD) to get the screen resolution, just as well as you can use PowerShell. And it works exactly the same in both Windows 11 and Windows 10. Here’s how:
Launch Command Prompt or Powershell, depending solely on your preference. If you want, you can also start Windows Terminal and open a CMD or PowerShell tab in it. No matter what command-line app you choose, run this command in it:
The output of the command tells you what your screen resolution is, just like in the next screenshot.
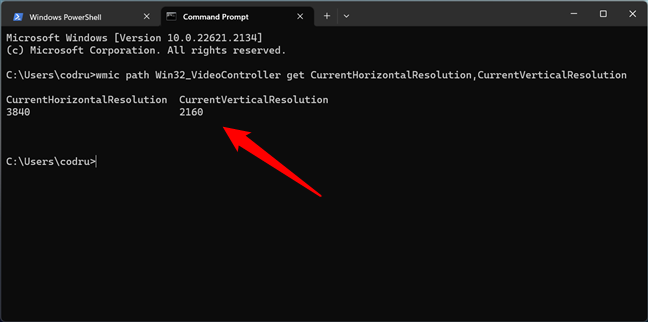
How to use CMD to get the screen resolution
4. How to find the screen resolution using the System Information app
No matter if you have Windows 11 or Windows 10, you can also see your screen’s resolution in the System Information app. Open it: a quick way is to use the search field on the taskbar to look for System Information.
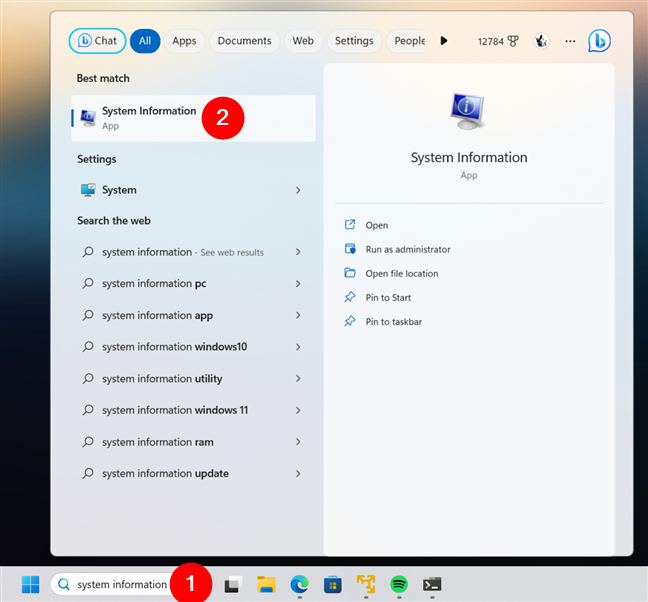
Open System Information
Then, once System Information is up and running, expand the Components list from the left side of the window, and click or tap Display. In the panel on the right, scroll until you find the item called Resolution. Its value tells you what your screen resolution is.
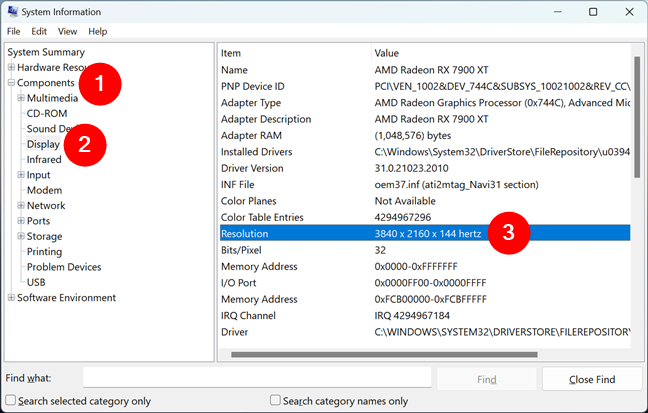
How to find the screen resolution using the System Information app
As you’ve noticed in the screenshot above, the Resolution item also tells you the refresh rate of your screen. You may find this information useful too.
5. How to check the screen resolution with the DirectX Diagnostic Tool
Regardless of whether you’re using Windows 11 or Windows 10, the DirectX Diagnostic Tool can show you what your display resolution is. To launch this app, click or tap inside the search box on the taskbar, type dxdiag, and press Enter as soon as the results show up.
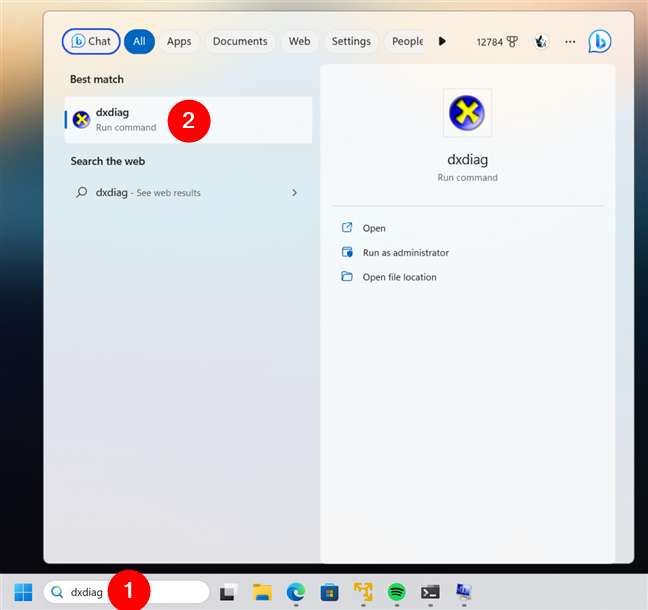
Open DirectX Diagnostic Tool
In the DirectX Diagnostic Tool, select the Display tab and scroll down the list under Device until you find the “Current Display Mode” entry. The value to its right tells you the current resolution of your screen.
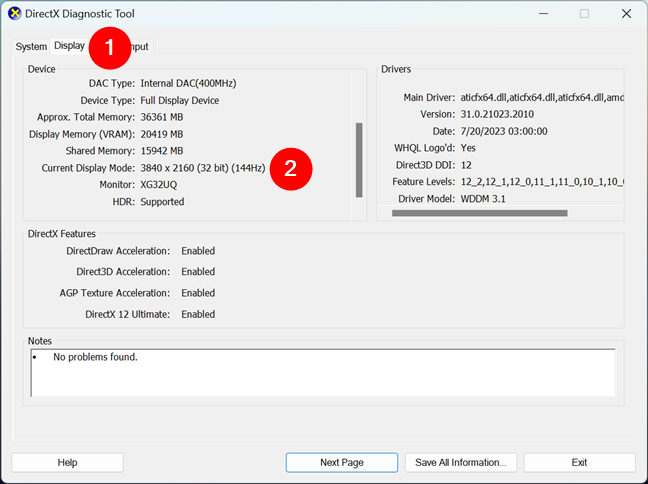
How to check your screen resolution with dxdiag
6. How to check your screen resolution online
This might be the easiest method to find out your screen’s resolution, but it might also be unreliable on some hardware configurations. To put it briefly, you can use any web browser to visit a website that’s able to identify your screen resolution automatically. The best example of such a website that I’ve found is whatsmyscreenresolution.org.
When you visit it, you first see the resolution it detects for your screen. However, while the information shown is correct in most cases, it’s not true every time. For instance, I’ve learned that scaling Windows makes the website report a wrong resolution, which seems to be a general problem with screen resolution detectors. Still, this website also shows the correct display resolution but in a different location: next to Device Resolution, under Other Information.
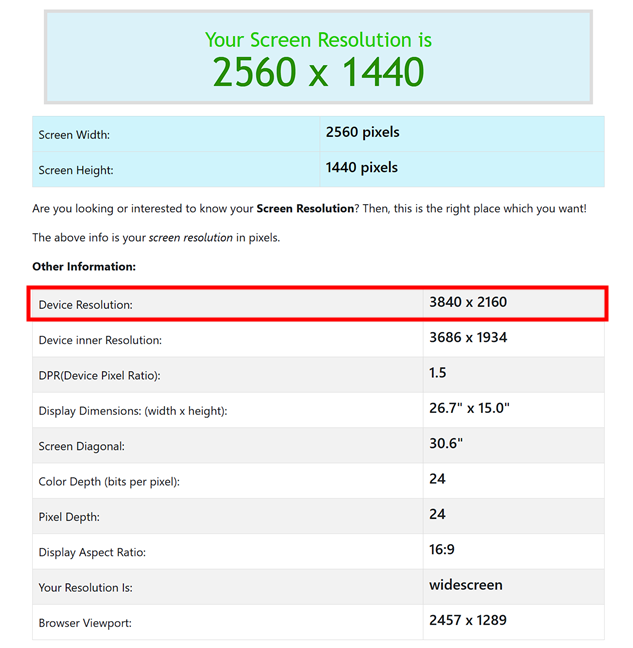
How to determine the screen resolution online
That’s it!
How do you check your screen resolution?
These are the methods I know for finding out the display resolution in Windows 11 and Windows 10 without using third-party software. Do you know other ways to find this information? Which method do you like best? Don’t forget that you can always share your opinions and questions in the comments section below.


 23.08.2023