


Windows 11, just like Windows 10, wants you to use a Microsoft account on your computers and devices. It’s true that such accounts come with certain advantages like synchronization and built-in support for a wide range of Microsoft services. However, it also means that you might be worried about giving access to some personal information to Microsoft. Fortunately, you can switch to a local account in Windows 11, from a Microsoft one, anytime you wish. You can do it even on Windows 11 Home, where Microsoft practically forces you to sign in or create a Microsoft account when you install it. Without further ado, here’s how to turn your Windows 11 user account from a Microsoft one to an offline local account:
 Access Your info in Windows 11's Settings app
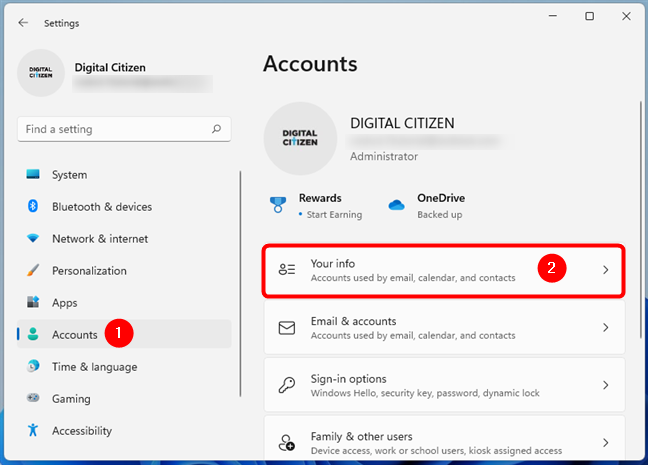
On the Your info page, click or tap on “Sign in with a local account instead” under Microsoft account, in the Account settings section.
Access Your info in Windows 11's Settings app
On the Your info page, click or tap on “Sign in with a local account instead” under Microsoft account, in the Account settings section.

 Sign in with a local account instead of a Microsoft one
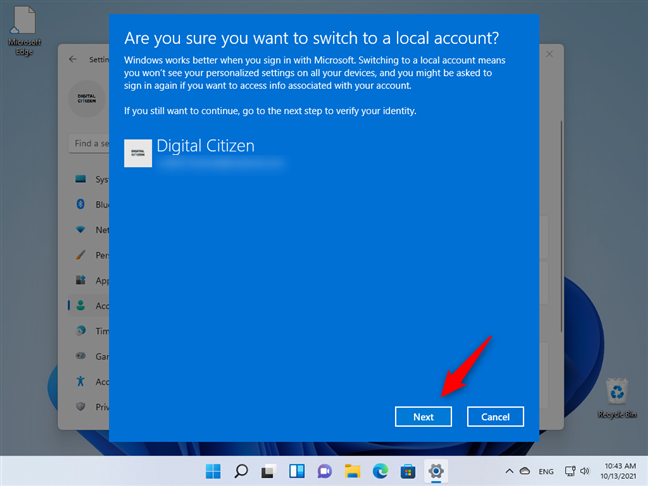
Next, Microsoft asks you whether you’re sure you want to switch to a local account. The company tries to convince you that “Windows works better when you sign in with Microsoft” and that “Switching to a local account means you won’t see your personalized settings on all your devices.”
If you don’t care about the benefits of using a Microsoft account and still want to switch to a local one, click or tap on Next.
Sign in with a local account instead of a Microsoft one
Next, Microsoft asks you whether you’re sure you want to switch to a local account. The company tries to convince you that “Windows works better when you sign in with Microsoft” and that “Switching to a local account means you won’t see your personalized settings on all your devices.”
If you don’t care about the benefits of using a Microsoft account and still want to switch to a local one, click or tap on Next.
 Continue the process of switching to a local account on Windows 11
Next, you need to verify your identity by entering your PIN code. If you didn’t set one, you are asked to enter the password of your Microsoft account.
Continue the process of switching to a local account on Windows 11
Next, you need to verify your identity by entering your PIN code. If you didn’t set one, you are asked to enter the password of your Microsoft account.
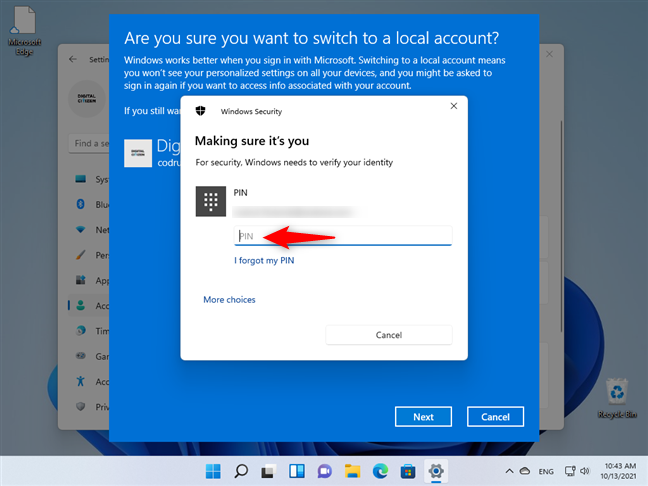 Enter the PIN or password of your Microsoft account
Then, Windows 11 asks you to choose a User name, a password, and a Password hint. Once you’ve entered the requested details, click or tap on Next.
Enter the PIN or password of your Microsoft account
Then, Windows 11 asks you to choose a User name, a password, and a Password hint. Once you’ve entered the requested details, click or tap on Next.
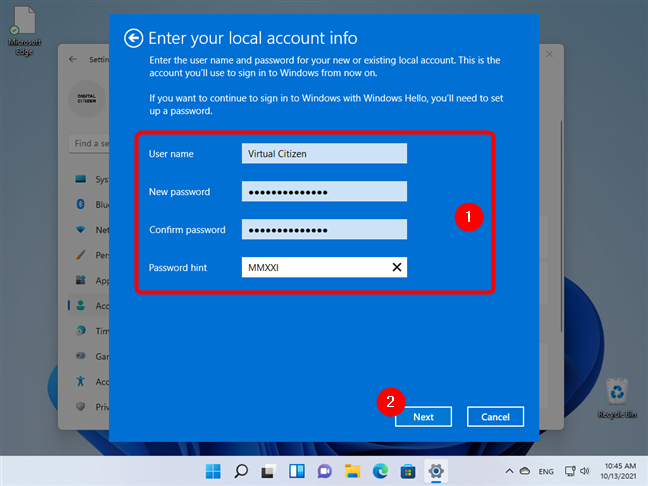 Enter the details of your local Windows 11 user account
NOTE: It’s not recommended, but you can leave the password fields blank for the local account. That means that your new local account is not protected by anything, but it also means that you don’t have to enter a password each time you log in to your Windows 11 PC.
Once you’ve entered the credentials for the local account, all that’s left for you to do is “Sign out and finish.”
Enter the details of your local Windows 11 user account
NOTE: It’s not recommended, but you can leave the password fields blank for the local account. That means that your new local account is not protected by anything, but it also means that you don’t have to enter a password each time you log in to your Windows 11 PC.
Once you’ve entered the credentials for the local account, all that’s left for you to do is “Sign out and finish.”
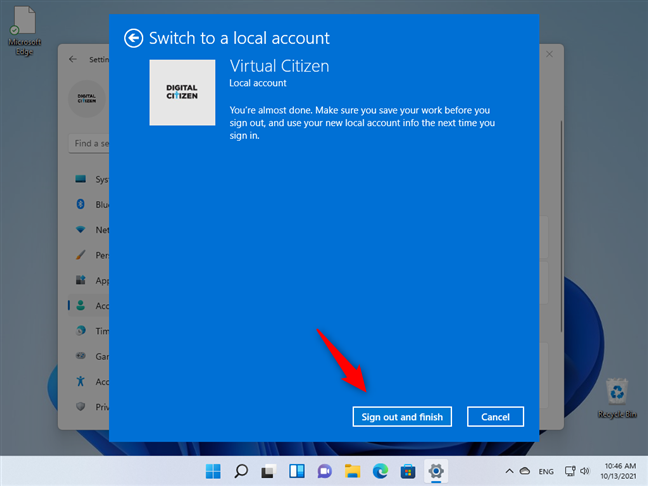 Sign out and finish
After Windows 11 signs you out of your Microsoft account, you can sign back in using your new local account. Then, you can check that you’ve really switched to a Windows 11 local account from your Microsoft one by going to Settings. There, both on the top-left corner of the app and on the Your info page, you can see that you’re now using a local account.
Sign out and finish
After Windows 11 signs you out of your Microsoft account, you can sign back in using your new local account. Then, you can check that you’ve really switched to a Windows 11 local account from your Microsoft one by going to Settings. There, both on the top-left corner of the app and on the Your info page, you can see that you’re now using a local account.
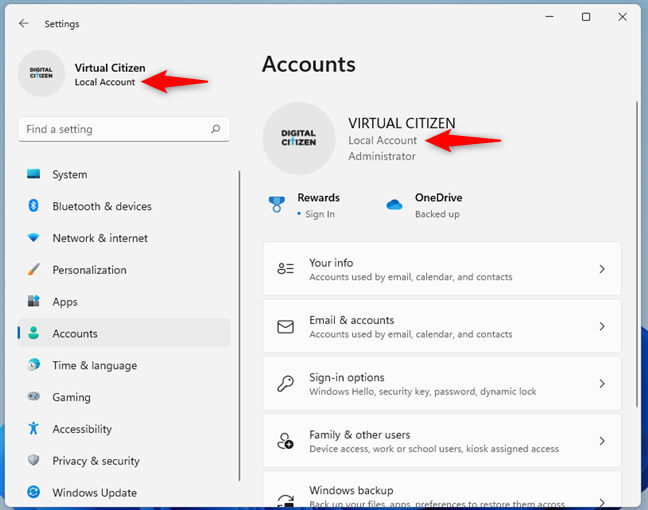
 You've switched to a Windows 11 local account from a Microsoft one
That’s it!
TIP: If you want to install Windows 11 without a Microsoft account, follow this guide: How to install and use Windows 11 with a local account.
You've switched to a Windows 11 local account from a Microsoft one
That’s it!
TIP: If you want to install Windows 11 without a Microsoft account, follow this guide: How to install and use Windows 11 with a local account.
How to switch to a Windows 11 local account from a Microsoft one
To switch from using a Microsoft account on your Windows 11 PC to a local one, you first have to open the Settings app. A fast way to do that is to simultaneously press Win + I on your keyboard. Select Accounts on the left sidebar of the Settings app, and click or tap on Your info on the right panel.

Discussion (3)
This is the first time I set up a Windows 11 machine, and first off.. I hate it.. Nothing is letting me change to a Local User account, I need a local account because this is a clients PC intended to work on a Privet Network, and I want nothing to do with the Microshaft quick and easy linked to the internet world. I wish I could make this work.
YES, PRIVACY. SOMETHING THAT’S HARD TO KEEP (IF ONE REALLY HAS IT)
I haven’t tried it yet but if this works it will be a life changer. I’ve been wrestling with OneDrive for days since upgrading to Windows 11. Using Wifi to sync my iPhone to my Windows PC has proved impossible because of OneDrive’s invasive routines, which have been driving me nuts.
If your guidance works for me, and I’m sure it will, I shall be singing the praises of Digital Citizen to the skies.
Thank you!