21.08.2019
Many Internet Service Providers (ISPs) from around the world offer their internet services to residential users through Point-to-Point Protocol over Ethernet or PPPoE connections. To be able to use such internet connections, the ISP usually gives you a unique username and password that you must use to connect to their network. In this tutorial, we show you all the steps you need to take to configure Windows 10 to connect to the internet through PPPoE:
Open the "Connect to the Internet" wizard
To set up a PPPoE connection in Windows 10, you must first open the "Connect to the Internet" wizard. Launch the Settings app (a quick way is to press the Win + I keys on your keyboard).
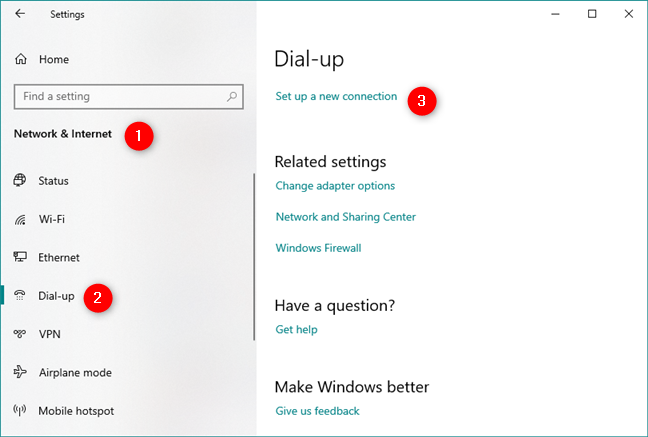
In the Settings window, open the Network & Internet section, go to Dial-up on the left side of the window, and click or tap on the "Set up a new connection" link from the right.
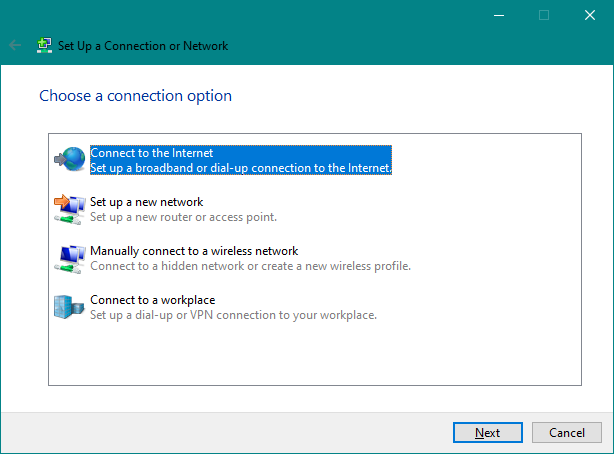
You should now see the "Set Up a Connection or Network" wizard.
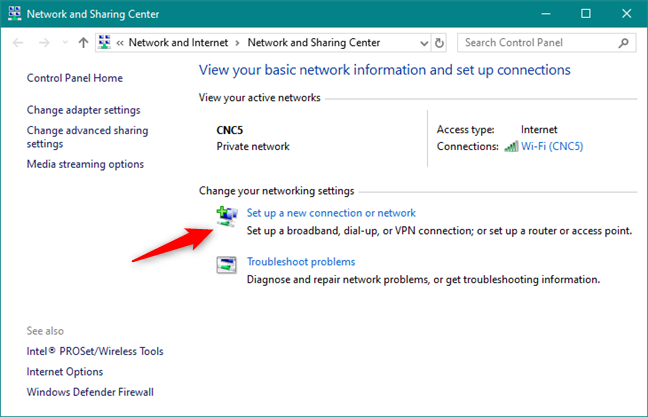
You can also open the "Connect to the Internet" wizard from the old-fashioned Control Panel. In the Control Panel, head to Network and Internet and open the Network and Sharing Center. Then click or tap on the "Set up a new connection or network" link, from the "Change your networking settings" section.
Regardless of how you chose to start the "Connect to the Internet" wizard, the next steps are the same.
How to set up a PPPoE internet network connection in Windows 10
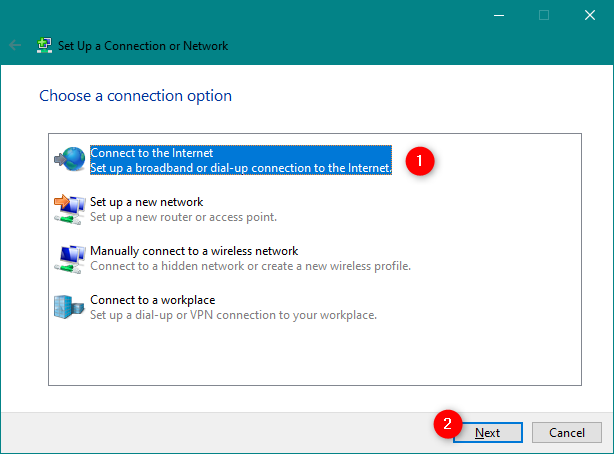
In the list of available connection options, choose "Connect to the Internet," and click or tap Next.
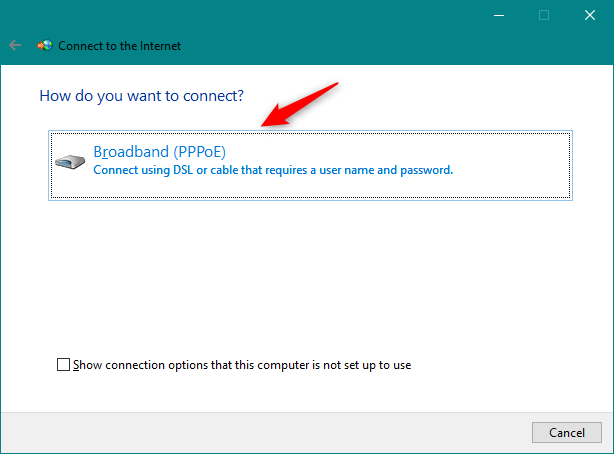
In the "Connect to the Internet" window, click or tap on Broadband (PPPoE).
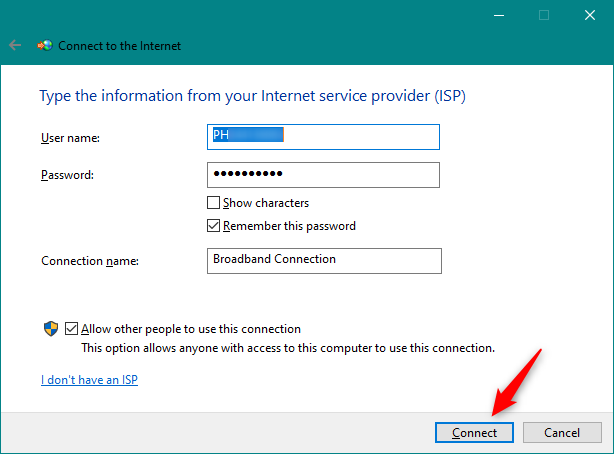
We've now arrived at the place where you provide the settings of your PPPoE connection. The most important thing to do is to type the User name and Password given to you by your ISP.
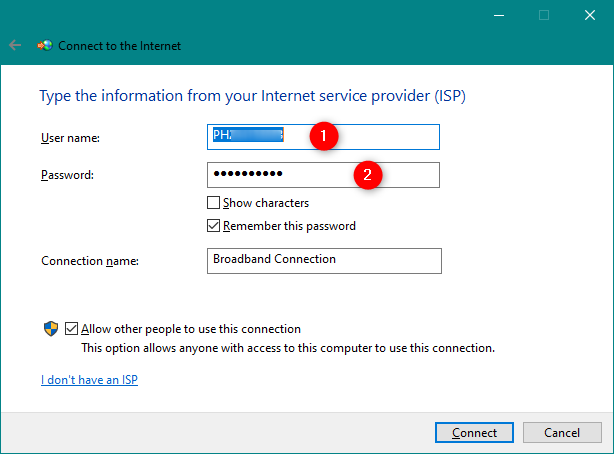
There are also some additional options that you can change:
- You can check the "Show characters" option if you want to see your password, to be sure that you typed it correctly.
- If you do not want your Windows 10 computer to ask you for your password each time you connect to the internet, you can make it "Remember this password."
- By default, Windows 10 gives your PPPoE connections the name Broadband Connection. However, if you would like to use another name, enter the one you want in the Connection name text field.
- Finally, if you want your newly set PPPoE connection to be available to all the people who have access to your computer, check the last option that says: "Allow other people to use this connection." However, note that to enable this option, you need to have administrative rights.
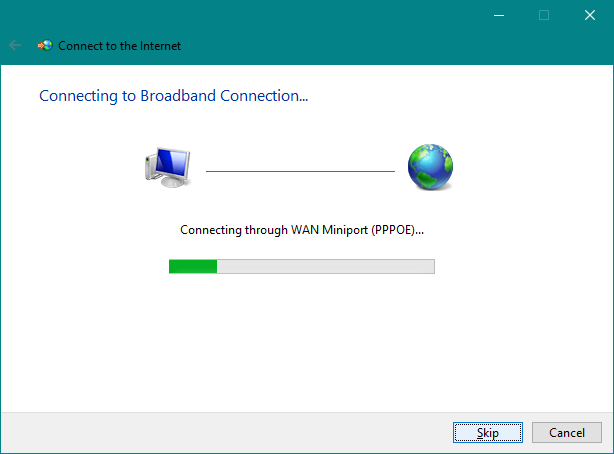
Once you have made all the settings, click or tap Connect to initiate the PPPoE connection*.*
The wizard goes through a few steps, verifying your username and password, and testing your internet connection.
If everything worked well, the wizard notifies you that now "The connection to the Internet is ready to use."
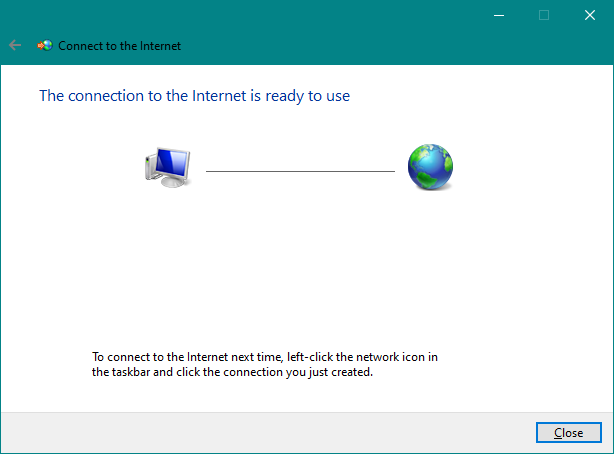
Close the wizard, and the PPPoE connection is now up and running. You can go ahead and use any web browser, or any Windows app that needs internet access.
How to connect to a PPPoE internet connection in Windows 10
Now that you have set up your PPPoE network connection, you can use it anytime you want to access the internet. However, there is a catch: to be able to use it, you have to connect to it each time you need it. Here's how to do that:
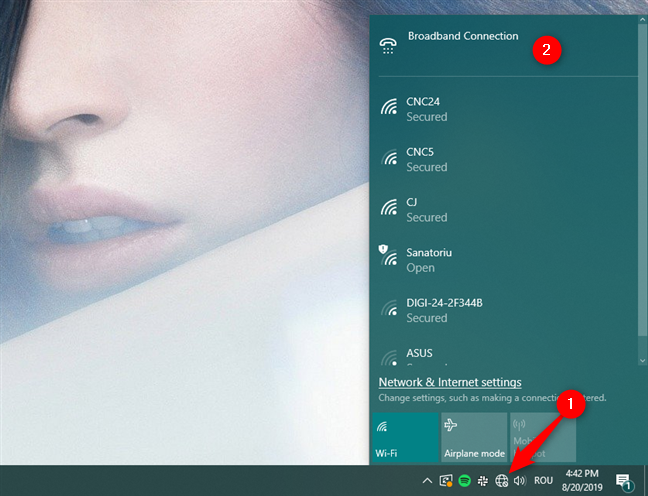
Click or tap the Network icon from the notification area on your taskbar, and then click or tap on the PPPoE connection that you want to connect to. If you did not change its default name, the connection should be called Broadband Connection.
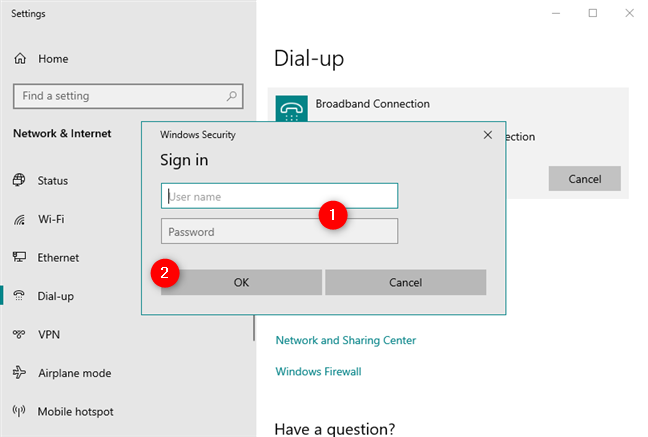
The previous action triggers the launch of the Settings app and takes you to the Dial-up section. Click or tap on your PPPoE connection, found on the right side of the window, and, to initiate it, press Connect.
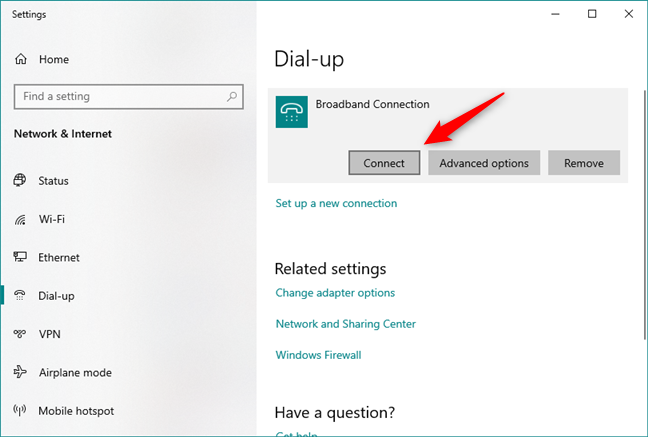
If you asked Windows 10 to remember your PPPoE connection credentials when you've set the connection, then your computer automatically connects to the internet. However, if you did not make that selection, you now have to enter the username and password for the PPPoE connection.
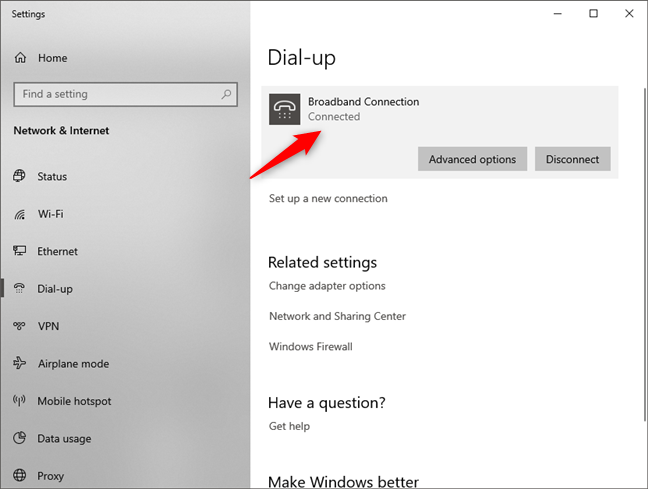
Either way, once your Windows 10 PC connects to the internet, you are brought back to the Network & Internet section of the Settings app. Here, you can see the Connected message displayed under your PPPoE connection.
NOTE: Now that you have configured your PPPoE connection, you might want it to connect each time you start your computer or device automatically. In that case, you should read how to dial a broadband PPPoE connection in Windows 10 automatically.
How to disconnect from a PPPoE internet connection in Windows 10
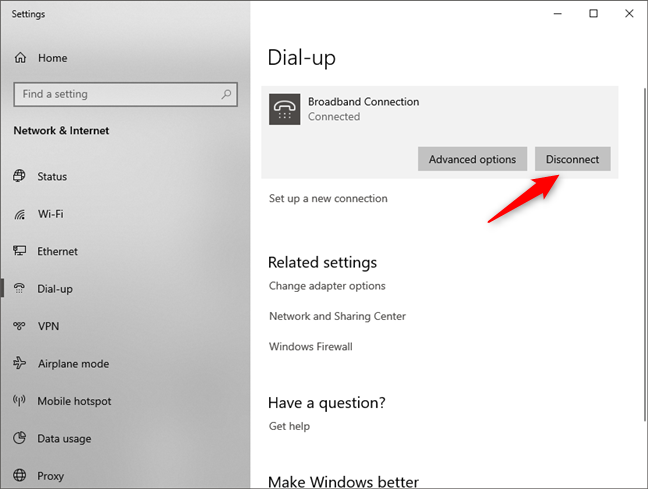
To disconnect from a running PPPoE connection in Windows 10, click or tap on the Networks icon from your taskbar, and then click or tap on your PPPoE connection. Finally, once you have reached the Dial-up options, click or tap on Disconnect.
There are no other steps involved in this process, and Windows 10 immediately closes the connection.
How to delete a PPPoE connection from Windows 10
At some point, you might decide to remove altogether a PPPoE connection you have set up on your Windows 10 PC. To do that, open the Settings app, then go to the Network & Internet section and head to your Dial-up options. Here, if needed, disconnect from your PPPoE connection, and then click or tap on the Remove button.
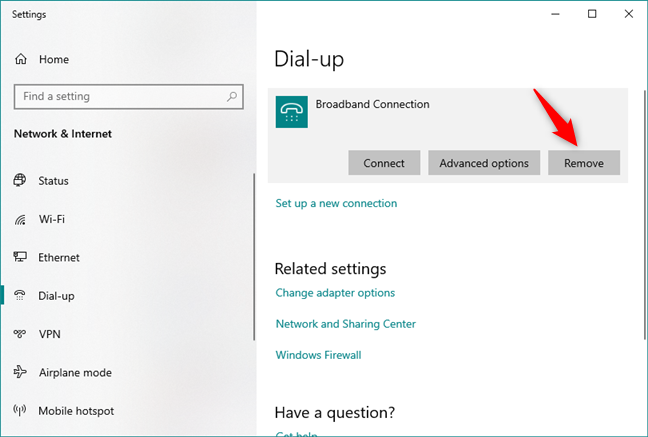
Windows 10 should notify you that "If you remove this VPN connection, you'll need to set it up again to reconnect." As you might have noticed, there's a small typo in Windows 10's message: it says VPN, but you are removing your PPPoE broadband connection. 🙂
If you are sure that you want to continue, click or tap Remove to delete the PPPoE connection permanently.

Do you use PPPoE connections on your Windows 10 PCs?
As you have seen in this guide, setting up, using and removing PPPoE broadband connections in Windows 10 are easy things to do. However, we must admit that we would have liked it better if all the connecting and disconnecting could be done straight from the Networks popup on the taskbar. Having to go through the Settings app to do that seems like an unnecessary annoyance in our opinion. What do you think? Comment below and let's discuss.