



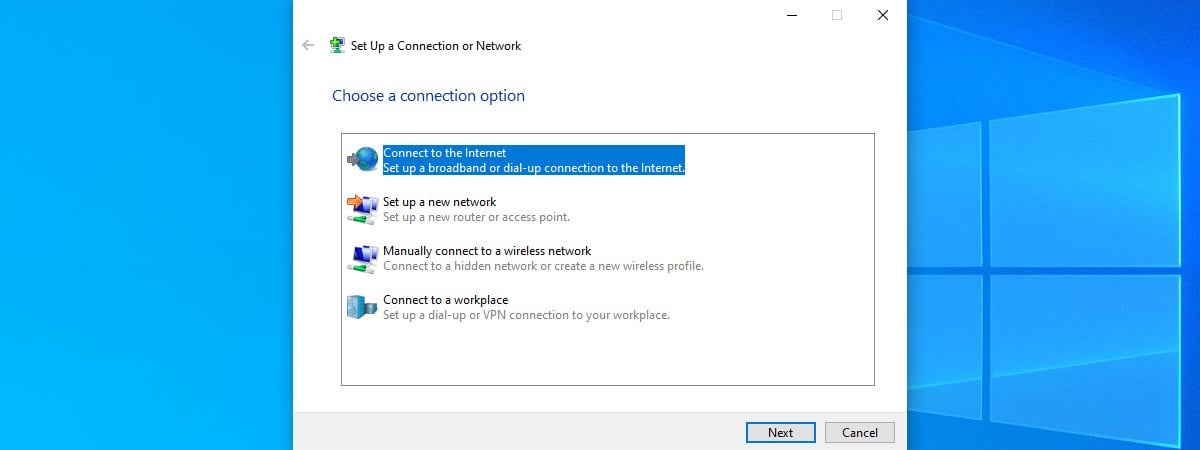
Creating, configuring, and connecting to a broadband PPPoE connection in Windows 10 is fairly easy. The only drawback is that, by default, you need to connect manually every time you log in. For many people, this extra step is inconvenient. If you’d rather have your PC automatically connect as soon as you log into Windows, you can configure Windows to do just that. In this guide, I’ll show you how to make your PPPoE Windows 10 setup dial automatically at startup.
NOTE: I’m assuming you already created and tested a PPPoE connection on your computer. If you haven’t, read this guide first: How to set up and use PPPoE internet connections in Windows 10.
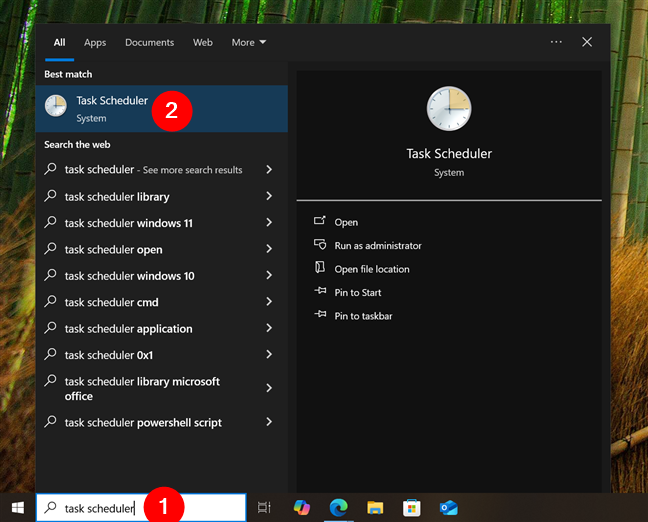
 Open the Task Scheduler using search
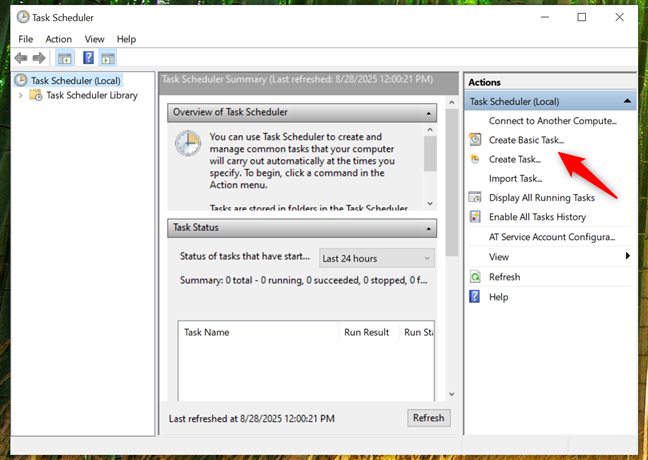
 The Create Basic Task action from the Task Scheduler
This launches the wizard. First, give your task a name, such as Auto Dial - PPPoE Connection.
You can also add a description if you want. Then, press Next.
The Create Basic Task action from the Task Scheduler
This launches the wizard. First, give your task a name, such as Auto Dial - PPPoE Connection.
You can also add a description if you want. Then, press Next.
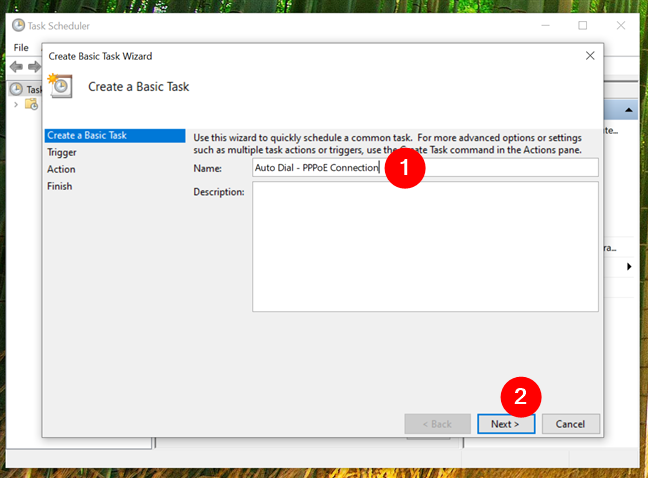
 Choosing a name for the PPPoE auto-connect task
Next, you decide when the task should run. Select When I log on, then click or tap Next. This ensures that the PPPoE connection is dialed every time you sign in.
Choosing a name for the PPPoE auto-connect task
Next, you decide when the task should run. Select When I log on, then click or tap Next. This ensures that the PPPoE connection is dialed every time you sign in.
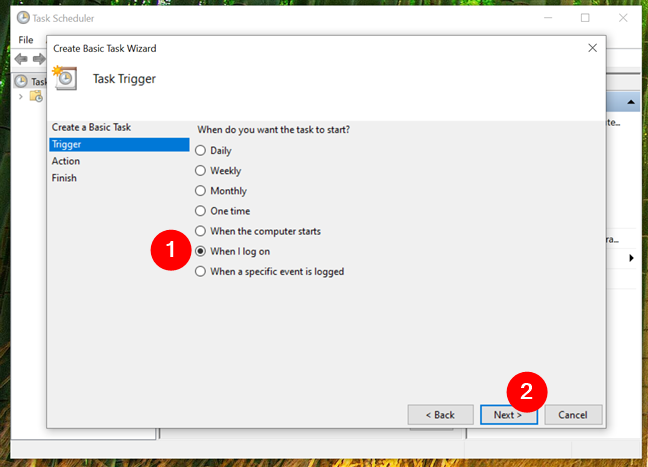
 Selecting the time when to auto-dial the PPPoE connection
Now, you need to specify the action. Since you want Windows to run a command, choose Start a program.
Selecting the time when to auto-dial the PPPoE connection
Now, you need to specify the action. Since you want Windows to run a command, choose Start a program.
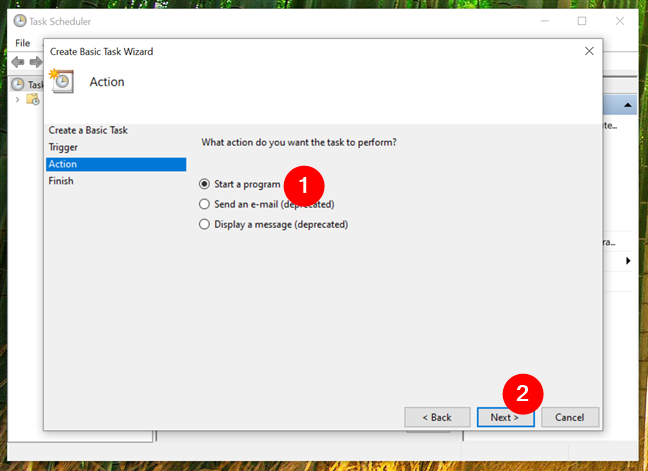
 Choosing to Start a program
After you press Next, the wizard asks you what Program / Script you want to execute on a scheduled basis. In order to make Windows 10 auto-dial your broadband PPPoE connection, each time you log into your computer, you must provide Task Scheduler with some information:
Choosing to Start a program
After you press Next, the wizard asks you what Program / Script you want to execute on a scheduled basis. In order to make Windows 10 auto-dial your broadband PPPoE connection, each time you log into your computer, you must provide Task Scheduler with some information:
 Configuring rasdial with the PPPoE connection name and credentials
After entering the details, click or tap Next. The wizard shows a summary of your scheduled task. If everything looks correct, press Finish.
Configuring rasdial with the PPPoE connection name and credentials
After entering the details, click or tap Next. The wizard shows a summary of your scheduled task. If everything looks correct, press Finish.
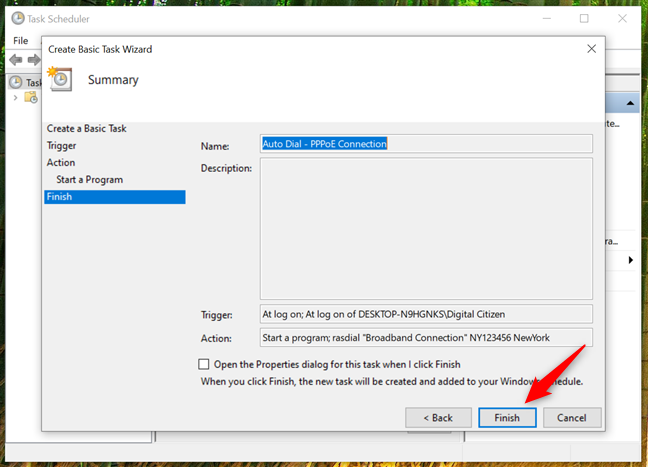 Finishing the configuration of the PPPoE auto-connect task
You’ll be returned to the Task Scheduler console, where your new task is listed in the Library.
Finishing the configuration of the PPPoE auto-connect task
You’ll be returned to the Task Scheduler console, where your new task is listed in the Library.
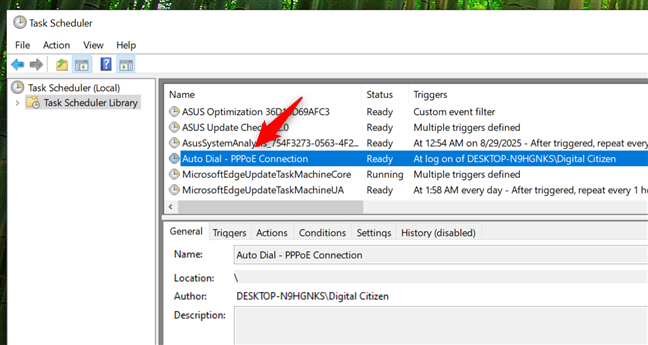
 The PPPoE auto-connect task is shown in the Task Scheduler Library
TIP: If at some point, you want to disable or delete the PPPoE auto-connect task and you need help, read this guide about the things you can do with existing tasks in Task Scheduler.
The PPPoE auto-connect task is shown in the Task Scheduler Library
TIP: If at some point, you want to disable or delete the PPPoE auto-connect task and you need help, read this guide about the things you can do with existing tasks in Task Scheduler.

 Windows 10 auto dials the broadband PPPoE connection
From now on, your PC should connect to the internet automatically, without you needing to click the Network icon each time.
Windows 10 auto dials the broadband PPPoE connection
From now on, your PC should connect to the internet automatically, without you needing to click the Network icon each time.
Step 1. Open Task Scheduler in Windows 10
To make Windows 10 automatically connect with your PPPoE credentials, you’ll need to create a scheduled task. This is done with Task Scheduler, which you can open by searching for Task Scheduler and then clicking or tapping the appropriate result.Step 2. Create a scheduled task that auto-dials your PPPoE connection
Inside the Task Scheduler, go to the right panel and click Create Basic Task….- In the Program/script box, type: rasdial
- In the Add arguments (optional) field, type:
- The name of your PPPoE connection (between quotes if it contains spaces)
- Your broadband username (as given to you by your Internet Service Provider)
- Your broadband password (exactly as it was set by you or your Internet Service Provider)
"Broadband Connection" NY123456 NewYork
Step 3. Restart Windows 10 and test the automatic connection
Now restart your computer. At login, Windows 10 should run the scheduled task and automatically connect using your saved PPPoE credentials. Depending on how fast it runs, you might briefly see a small connection window appear.

Discussion (25)
I’ve been looking for the solution to this for a while, and all the other websites suggested creating a Task running rasdial, which oddly didn’t work on my PC. Creating a simple task did the trick. Thanks a lot!
Thank you. I have tried this. I will see how it goes.
so once i able to connect the pppoe connection automatically after i log on,i wa s getting disconnected from internet automatically after 10-15 mins of usage .
the pppoe user session is not getting continued
Any solution for this ?
Thanks a lot. I got that working.
Thank you for this very useful article. I’m surprised Windows doesn’t provide this as a simple checkbox on the connection dialog.
In my setup I also found it useful to add a shortcut to the task for when the modem resets due to power outage/etc. This was the shortcut:
C:WindowsSystem32schtasks.exe /run /tn “YourTaskFolderYourTaskName”
Not sure if a router would provide auto redial (which was removed in Win 8/10), in which case I’d probably set it up that way.
Really helpful……….thanks
Does it work for startup ?
Thank you, Codrut, for the tutorial! Very clear and concise! Cheers!
In Step 2 sub 2, there is still a mention of “each with a hyphen before them”, please correct it as this contradicts with the example shown.
Thanks for this tutorial, it is helpful and it works!
Problem fixed. Thanks for highlighting it.
Best Sollution here:
Windows has feature to dial connection automatically whenever you start the computer.
Watch this:
https://www.youtube.com/watch?v=qnQx5PnScT4
Thank you, yes the command should be without the "-" before the user and password. That was changed in a Windows 10 update 🙂 I corrected the tutorial.
It works if you eliminate the hyphens in the rasdial command
Thank you, Codrut, it works but as they said in comments without the “-” before the user and the password.
Big up! Keep Going!
deci pe mine ma bate….am facut exact la fel si mi-a dat eroarea 691.Nu stiu cum sa fac sa porneasca automat netul.Mentionez am RDS!
Error 691 means that either the user or the password are incorrect.
Worked, but not 100%, looked first in Local Area Connection and it showed “error”.
Next I had to click connect to Broadband, settings opened and then I clicked connect.
You dont actually need – before the user and the password , writing it will only get an error and wont work
Thank you for your help dear Mychao,
I managed to do it, using my computer is more fun now! 🙂
Hi dear Codrut,
I checked again paying more attention and it is working indeed!!! 🙂
The things that ceased disturbance in the Force were that
1. I also omitted “-” before the username and the password
2. I typed my connection name insted of the one you wrote ” Broadband Connection”
3. I also omitted the “….” sign at the connection name.
Thank you again, you made my daily life much more easier! 🙂
Best regards,
Gergely Takács from Hungary
Dear Codrut Neagu,
I tried all you wrote but unfortunately it does not work for me. Maybe there is some small setting that is need to be done?
Thank you for your help in advance,
Best Regards:
Gergely Takács
Hi, double check that you did every step exactly as in our tutorial. It should work.
Doesn’t work, at startup I get the error 691 – password or user incorrect/unrecognized, something like that. I’m sure they are correct in the task I’ve created, and they also work if I manually connect from Network&Internet>Dial-up>Connect.
**edit**
I got it working. I had to eliminate the “-” before the user and pass in the task because it was trying to connect with “-user” rather than -“user”, same with password.
Same Problem