In many of our tutorials about networking in Windows, you will see that we often mention the Network and Sharing Center. Obviously, it is the entrance point to many Windows networking features and tasks. However, if you are wondering what does it do exactly and what it's useful for, in this article we will show you what the Network and Sharing Center is , how you can launch it and which are the main tasks that you can start from here.
What is the Network and Sharing Center?
Simply put, the Network and Sharing Cente r is the control panel from which most of the networking settings and tasks can be launched in Windows 7, Windows 8.1 and Windows 10. In Windows 10, even if some tasks were moved to the new Settings app, the Network and Sharing Center still holds a very important place.
Which tasks can be launched from the Network and Sharing Center?
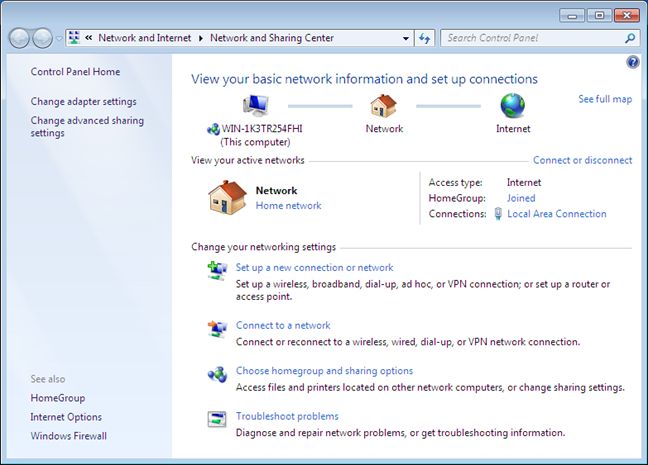
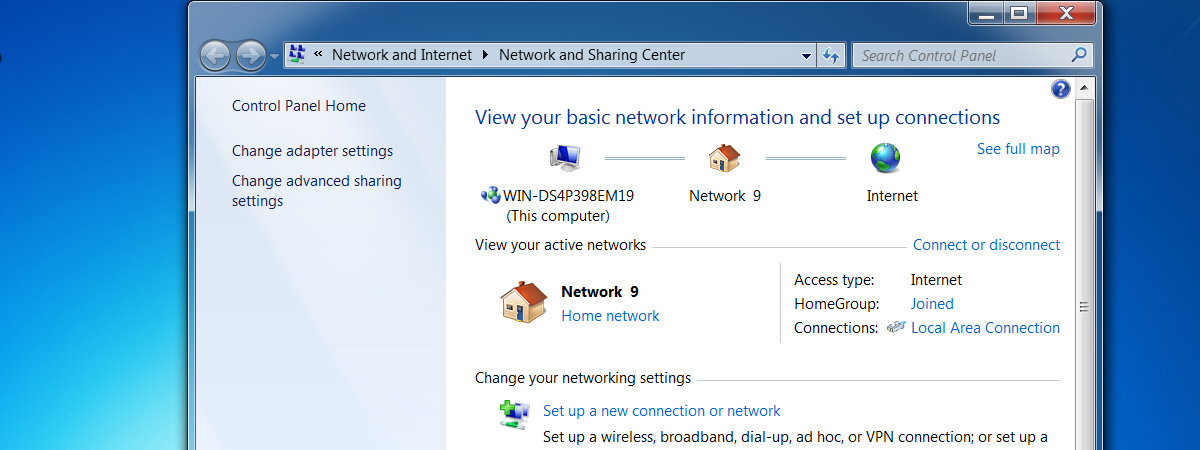
Let's start with Windows 7: the Network and Sharing Center window is split in two. On the left side there is a column with shortcuts to tasks such as: managing your wireless networks, changing settings for all network adapters and changing network sharing settings. On the bottom left side there are shortcuts to the HomeGroup settings panel, to the Internet Options panel and to the Windows Firewall panel.
On the right there is a big white area split in two parts. The upper side shows you basic information about your current network connection: the name of the active network, access type and the HomeGroup to which your computer belongs. The lower part contains links to wizards which help you set up a new connection or network, connect to another network, change HomeGroup and sharing settings and troubleshoot problems.
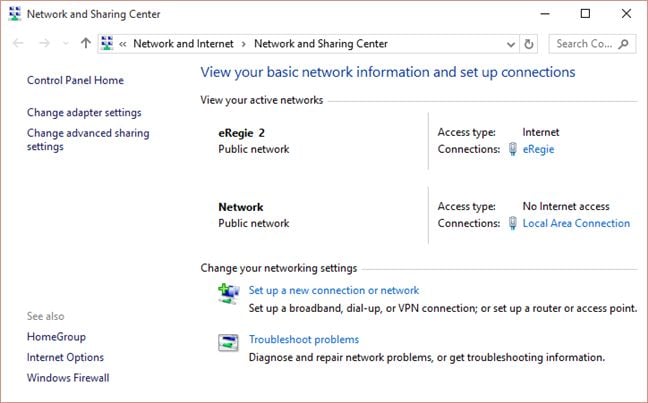
In Windows 8.1 and Windows 10, the panel looks almost the same, with some minor differences. For example, the "Connect to a network" link is gone because its wizard is the same as " Set up a new connection or network".
The " Choose homegroup and sharing options" link is also gone, because the same Homegroup settings can be accessed via the Homegroup link on the left column.
On the left column, you won't find the " Manage wireless networks" link, not even on laptops or tablets. That's because the management of wireless networks connections is done differently in Windows 8.1 and Windows 10. More details about it can be found in these guides:
- How to Manage Wireless Network Connections & Profiles in Windows 8
- How to Delete or Forget Wireless Network Profiles in Windows 8.1
How to start the Network and Sharing Center
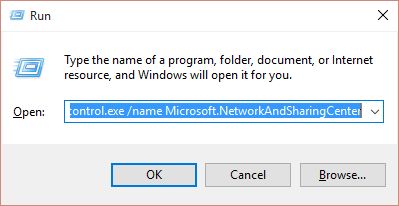
There are several ways to launch the Network and Sharing Center. One way is to launch the Run window by pressing the " Windows + R" keyboard keys , type "control.exe /name Microsoft.NetworkAndSharingCenter" and press OK. This works in all versions of Windows that include this feature.
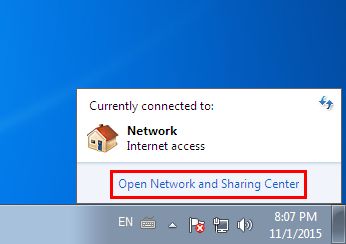
A second alternative, that works only in Windows 7, is to click on the network icon on the right side of the taskbar and then on " Open Network and Sharing Center".
In Windows 8.1 and Windows 10 you must right-click the network icon, on the right side of the taskbar, then click or tap on " Open Network and Sharing Center".
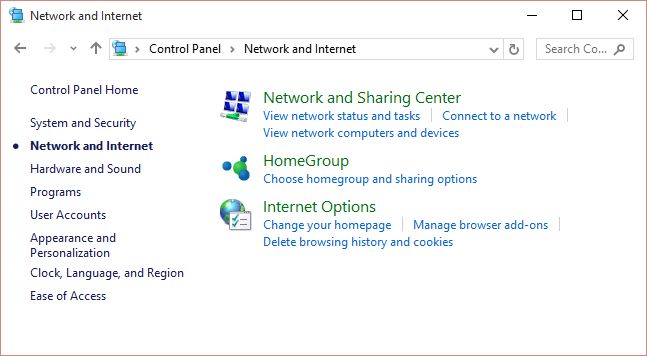
The third way is to go to "Control Panel -> Network and Internet -> Network and Sharing Center". This works in all versions of Windows.
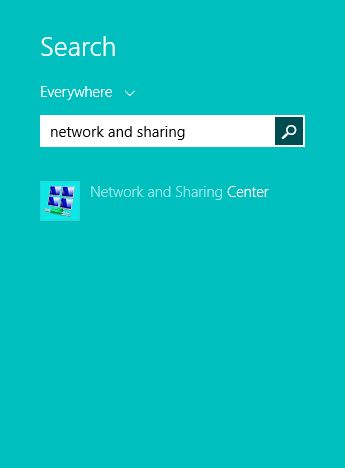
In Windows 8.1, search for the words "network sharing" and click or tap the appropriate search result.
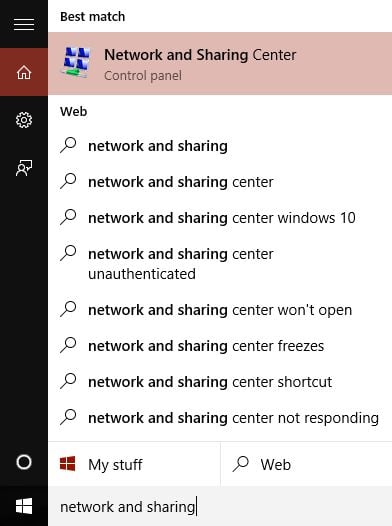
The same search can also be done in Windows 10's Start Menu search box and Windows 10's search box from the taskbar.
Conclusion
As you can see from this article, the Network and Sharing Center is one of the most important panels for managing your network connections. If you are looking for other cool tips and tricks on networking, check our recommendations below. Also, if you have any questions, don't hesitate to ask us in the comments section.


 05.11.2015