29.02.2024
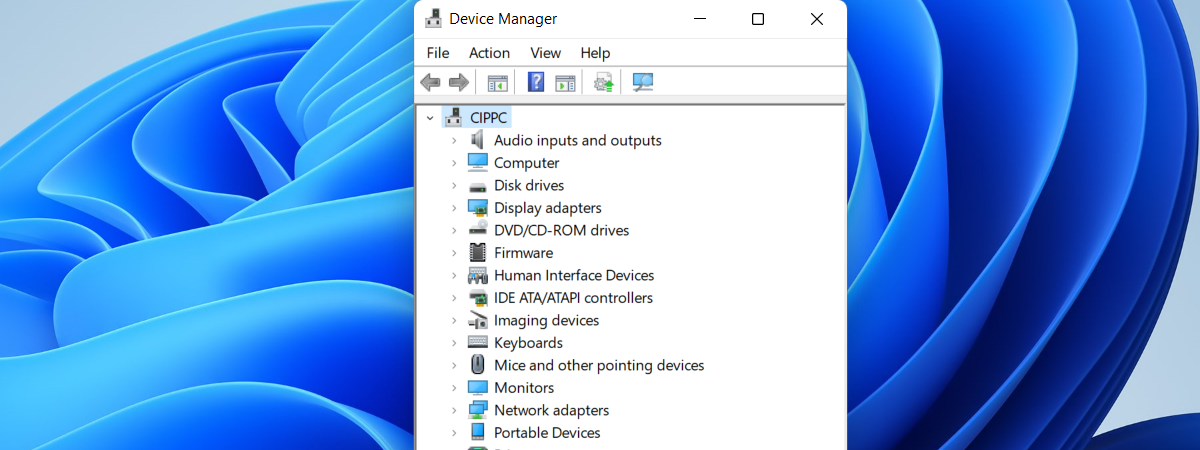
Did you hear about the Device Manager? Do you know what it is and what it’s used for in Windows operating systems? With just a few clicks or taps, Device Manager lets you see and manage all the hardware installed on your Windows PC or device, view the devices for which you did not install appropriate drivers, and also see and manage “hidden” devices. If you want to know everything you can do with the Device Manager from Windows 10 and Windows 11, read on:
What is the Device Manager?
The Device Manager is a tool found by default in Windows operating systems. Designed to allow users to view and manage the hardware devices installed on their computers, it was first introduced with Windows 95 almost three decades ago. Its interface offers a centralized view of your computer’s components and peripherals, organized into categories, and each category can be expanded to reveal the specific devices within it. This includes the processor, graphics cards, network adapters, and storage controllers.
What items are in the Device Manager from Windows?
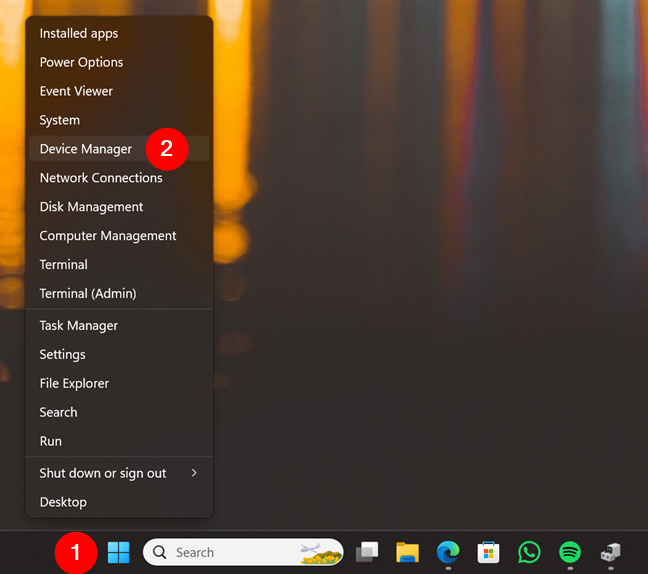
You can access the Device Manager by right-clicking (pressing and holding) on the Start button and selecting Device Manager from the menu. However, there are other ways to start it; you can find them all described here: How to open the Device Manager in Windows 10 & Windows 11 (14 ways).
How to open the Device Manager
Before going ahead and showing you what the Device Manager is used for, I’d like to note that everything in this guide applies to both Windows 10 and Windows 11. Furthermore, everything looks the same too. So, without further ado, let’s see…
What is the Device Manager used for?
The Windows Device Manager is a tool that enables you to perform a variety of tasks, including changing hardware configuration options, managing drivers, enabling or disabling hardware, and identifying conflicts between hardware devices. Let’s look at each of these tasks one by one:
1. Use Device Manager to view all your hardware components
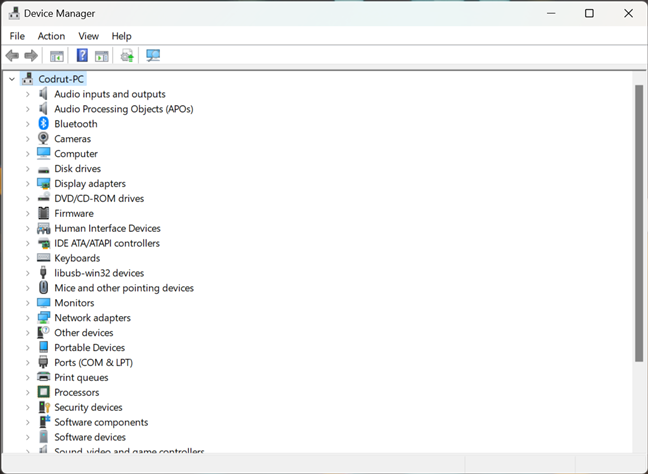
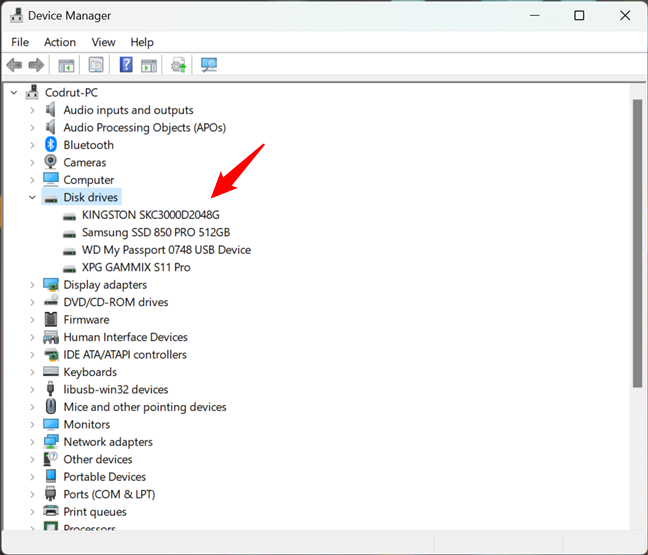
The Device Manager lists all your computer’s hardware components: both real, physical components and hardware components that are emulated by the software you installed. The components are grouped by category. Among others, you’ll find common categories such as Audio inputs and outputs, Disk drives, Display adapters, DVD/CD-ROM drives, Printers, Sound, video, and game controllers, and Universal Serial Bus controllers. You can expand any category to see the devices it includes and check their status. For example, in the screenshot below, under Disk drives, you can see that I have four drives installed. You can also see their exact model and type.
How to check your hardware with Device Manager
2. Check the properties of your devices with Device Manager
If you want to view more information about a particular device, right-click or press and hold it and then select Properties. You can also double-click or double-tap on it. Inside the Properties window, you see listed detailed information about the device, including its status. However, it might not be as complete as the information shown by System Information.
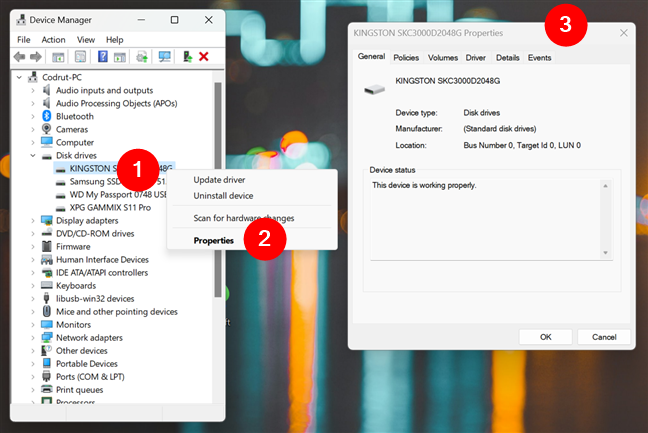
Get information about a device with Device Manager
3. Use Device Manager to find missing drivers for your components
A great use for Device Manager is to see if there are any hardware components whose drivers you missed installing. If there are any components without drivers, you will find a category named Other devices, as shown in the screenshot below. Expand it, and Device Manager displays all the devices that are unknown to Windows.
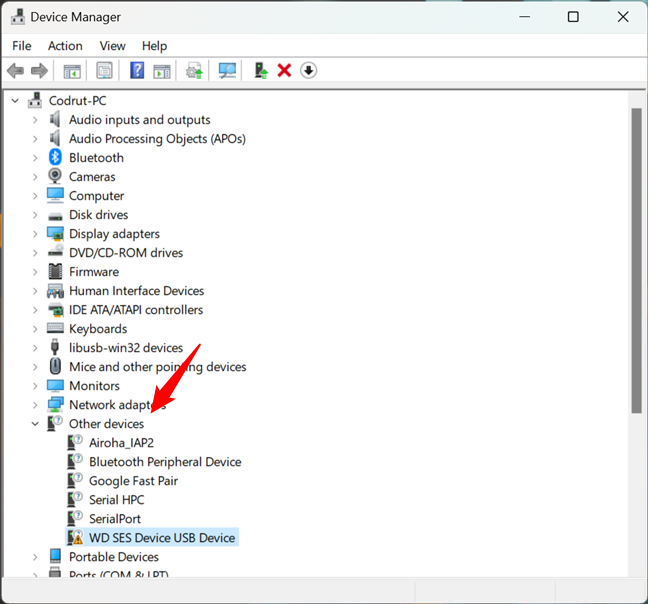
Other devices
Here, you may find a series of devices with generic names listed. For instance, Device Manager might tell you that it found an Unknown device or a Network Controller.
4. Install drivers for your hardware components and peripherals
Let’s see how to install drivers, both for components without appropriate drivers and with drivers installed. Right-click or press and hold the device for which you want to install drivers, then click or tap Update Driver.
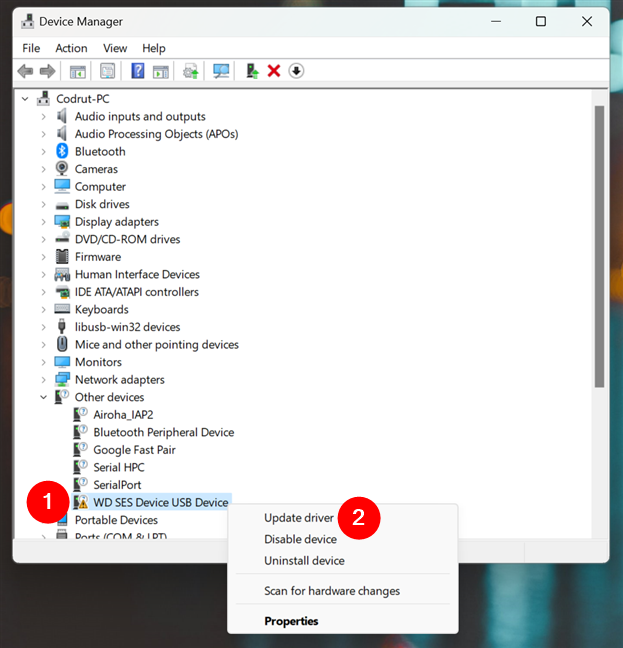
How to update drivers for a device
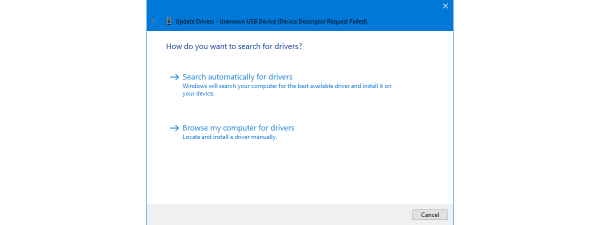
The Update Drivers wizard starts, and you are given two options: let Windows “Search automatically for drivers” (it will search both your PC and Microsoft’s servers with drivers) or browse your computer and select the driver yourself. I selected the first option to see how it works.

Search for drivers
The Update Driver wizard searches for the driver on your Windows computer. If that doesn’t work, it goes online, and if it finds a suitable driver, it automatically installs it. Then, you can view the device shown under its appropriate devices category. It will no longer be part of the list of other devices.

A driver has been installed
It can happen that Windows cannot find drivers for your hardware component. In this case, you need to install them manually yourself by downloading them from the manufacturer’s website and running their setup program.
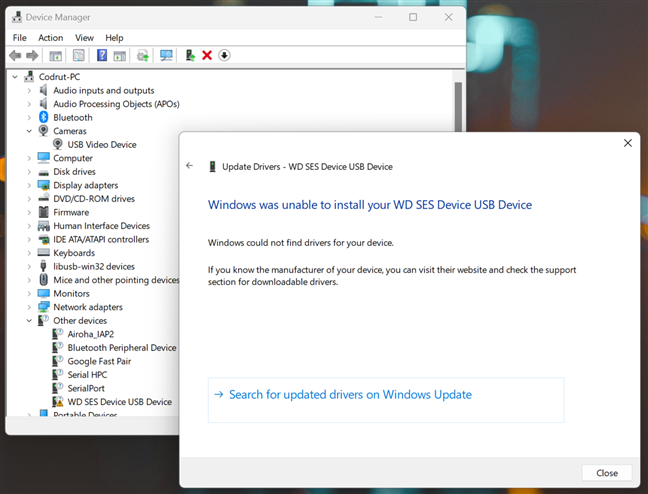
Windows can't find a proper driver for a device
TIP: Would you like to know more about drivers and their purpose? Here’s a guide that explains all that and more: What are drivers? What does a driver do?.
5. View hidden devices in Device Manager
Another less-known use for Device Manager is that it can display “hidden devices.” Most of the time, these are drivers installed by the software you are using on your computer or devices connected at some point to your Windows PC but not disconnected. To view them, click or tap the View menu and check “Show hidden devices.”
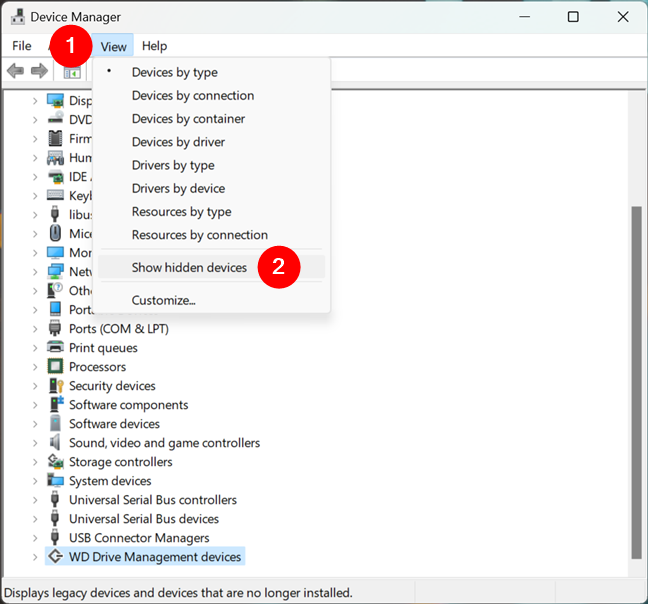
Show hidden devices in Device Manager
The hidden devices are listed in their usual categories of devices, but they’re grayed out. Also, more groups of devices may be displayed in Device Manager. For example, in the screenshot below, you can see that I once had a Kingston DTLocker+G3 USB memory stick connected to my computer.
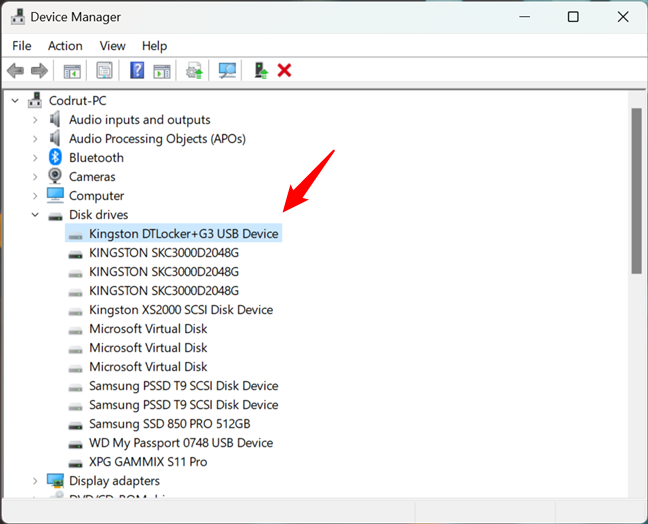
A hidden device listed by the Device Manager
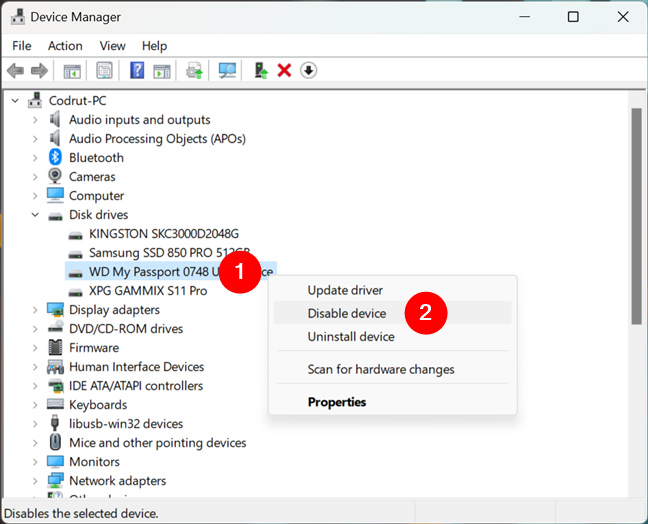
6. Disable or enable devices from Device Manager
Even though I don’t recommend doing this, you can disable devices from the Device Manager. This prevents Windows from using them, so be careful about what you disable. How do you disable a device? Right-click or press and hold the device, and then choose Disable device.
How to disable a device with Device Manager
Windows warns you that this device will stop functioning and asks for your confirmation on whether to disable it. Choose Yes or No, depending on what you want.
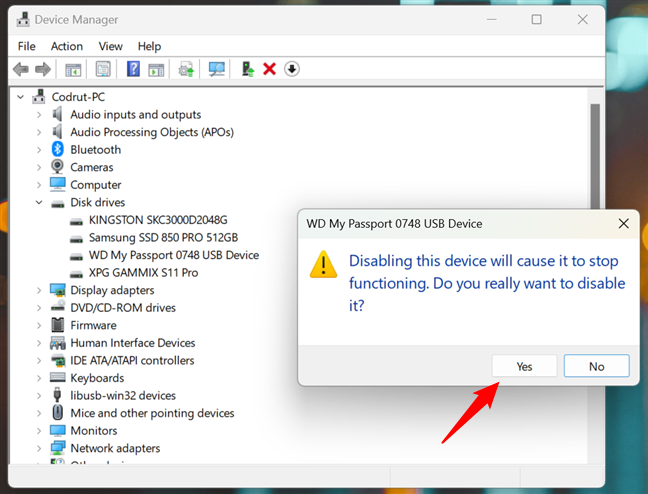
Disabling a device will cause it to stop functioning
If you choose Yes, Windows disables the device and stops using it. Depending on what kind of device you decide to disable, you might be asked to restart your computer. If you are, close any open apps and reboot your computer.
Re-enabling a device is just as easy: right-click or press and hold it, and choose Enable device.
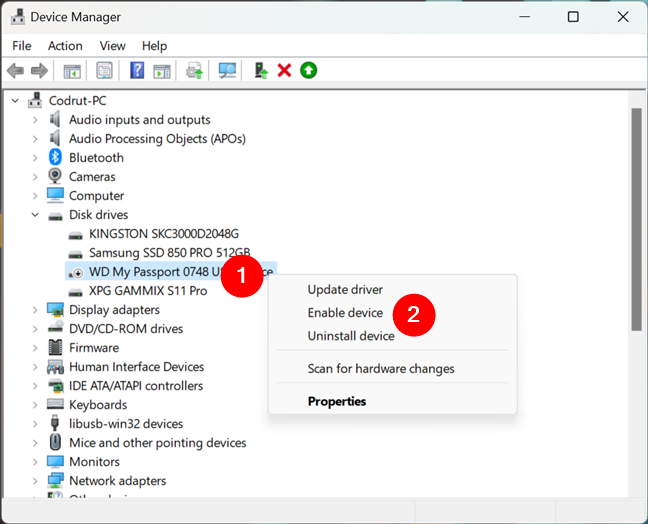
How to enable a device with Device Manager
Windows can now use the device you re-enabled.
7. Use Device Manager to force Windows to scan for new hardware
If, for some reason, Windows doesn’t detect a hardware component that you plugged into your computer, you can use the Device Manager to force it to scan for hardware changes. One way to do that is to click or tap the Action menu at the top and choose “Scan for hardware changes.”
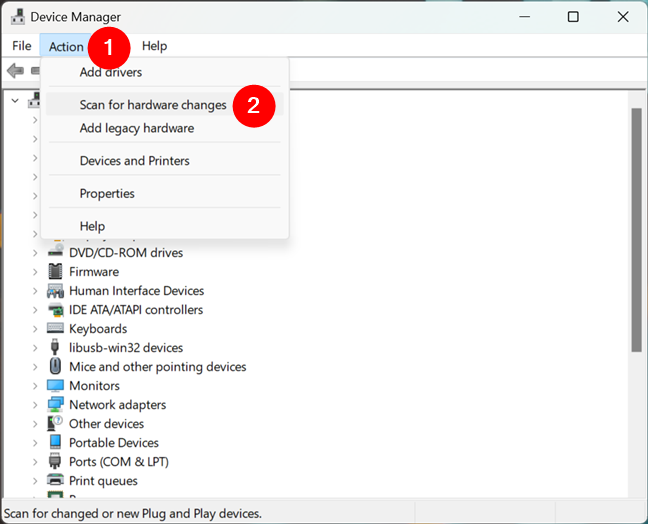
Scan for hardware changes
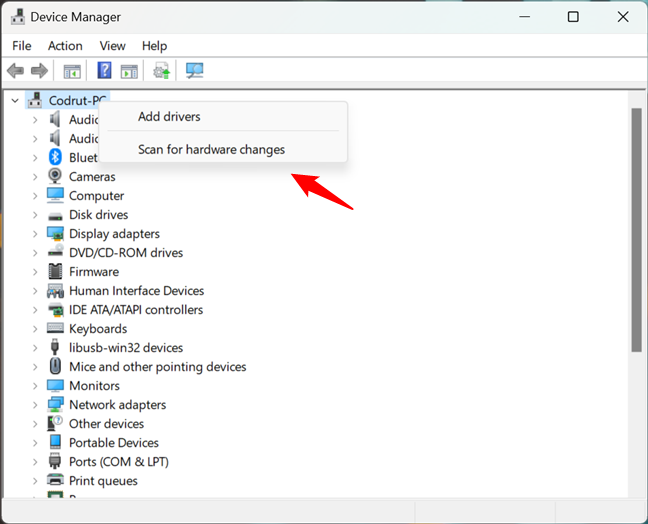
Another way to do the same thing is to right-click your computer’s name in the list of devices and choose “Scan for hardware changes.”
Another way to scan for hardware changes
Windows now scans for any hardware change that may have been performed.
What are you using the Device Manager for?
Having reached the end of this tutorial, I believe that you’ll agree with me when I say that the Device Manager is a useful tool for managing your system’s hardware components and peripherals. Try it out and see how well it works. If you have questions or issues about the Device Manager, don’t hesitate to comment below.