Drivers are critical because you cannot fully use your computers and devices without them. However, some drivers can be too old and incompatible with your version of Windows or new and insufficiently tested. To get rid of errors, crashes, and Blue Screens of Death, you may need to delete the drivers that are causing problems. Here's how to uninstall drivers from Windows completely:
NOTE: The steps from this guide show you how to uninstall drivers from Windows 10 with May 2020 Update, and also from Windows 7.
Step 1. Try to delete a driver by using the device's uninstaller
Before anything else, you should check whether the driver that you want to remove has an uninstaller. A typical example is graphics cards from Nvidia and AMD, which have complex driver kits that also include other software. Regardless of the device, if you installed its drivers using an installer, it should also provide an uninstaller.
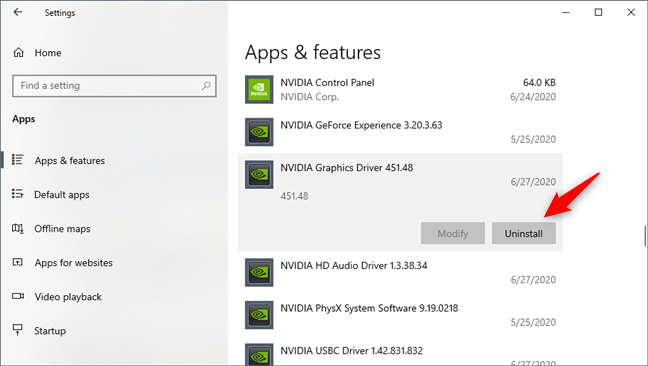
To find if you have this option, open the Settings app from Window 10, go to Apps, and check whether your device's software is shown in the list of Apps & features. For example, if you want to uninstall Nvidia drivers, all you have to do is find them in the list and click or tap on Uninstall.
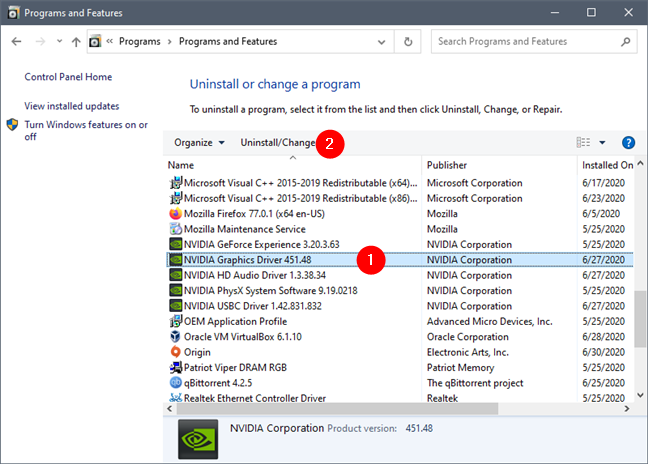
In Windows 7, the steps are similar: open the Control Panel, go to Programs, then to Programs and Features, and find the device drivers that you want to uninstall. Then, click or tap Uninstall and remove those bad drivers.
If your device doesn't come with a driver uninstaller, follow the next steps to get rid of it:
Step 2. Open the Device Manager
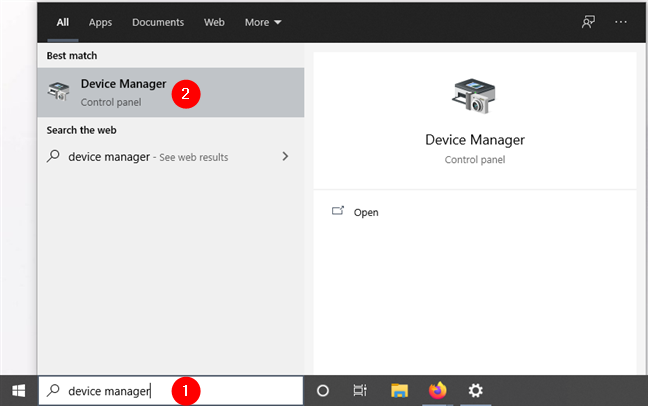
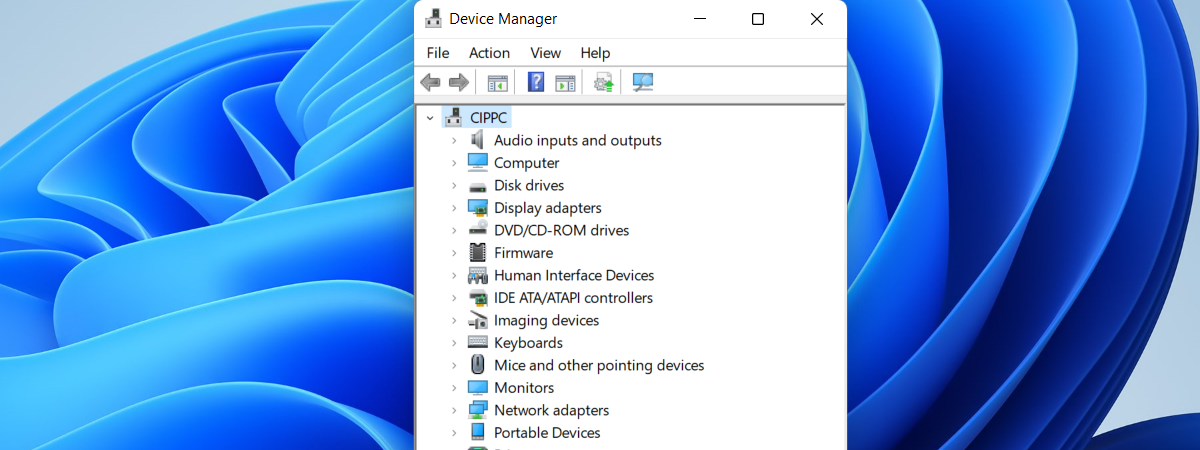
Open the Device Manager: a quick way to do that, both in Windows 10 and Windows 7, is to search for the words "device manager" and click or tap the appropriate search results.
Step 3. Find the device or hardware component with the faulty drivers
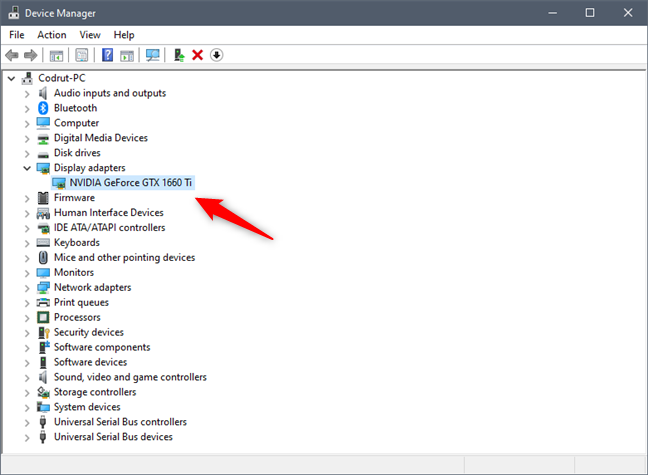
The Device Manager shows a list of all the hardware components that are inside your computer or connected to it. It also includes emulated hardware by the apps that you have installed. They are organized by type.
Browse the list of hardware and find the device for which you want to uninstall the driver because it's causing you troubles.
Step 4. Open the properties of the hardware device with the bad drivers
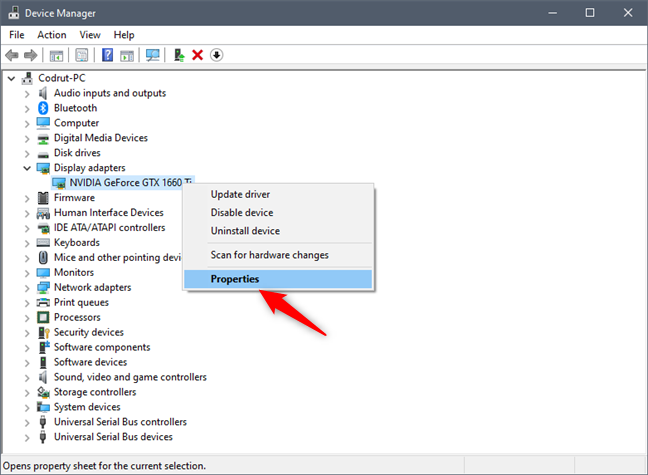
Right-click or press-and-hold (on a touchscreen) the name of the component with the problematic driver. In the menu that opens, choose Properties.
You can also select the device and then press Alt + Enter on your keyboard.
Step 5. Uninstall and delete the drivers completely
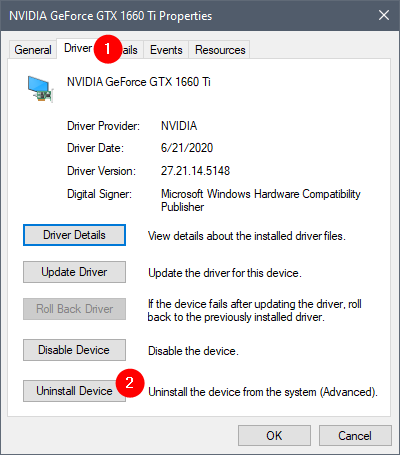
Now, Windows opens a window with the properties of the hardware device that you've selected. To completely remove its driver, go to the Driver tab and click or tap on the Uninstall Device button*.*
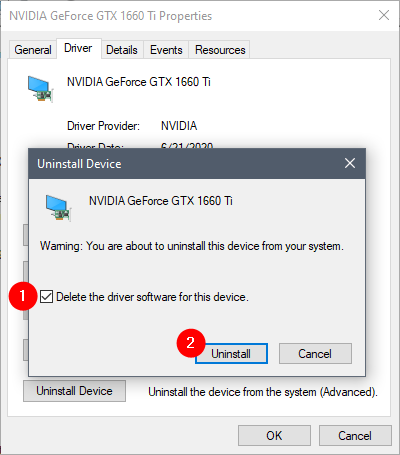
In the Uninstall Device dialog window, make sure that you check the box that says: "Delete the driver software for this device." Then, click or tap Uninstall. If you don't check the box we mentioned, Windows does not completely delete the driver for that device. Instead, it keeps the driver files on your PC and uses them the next time it detects your device.
The faulty driver is now deleted, and the device is gone from the Device Manager. You should be able to resume using your computer without the problems that you had.
I removed the faulty drivers, but Windows reinstalls them. How to turn off automatic device driver installation
If the faulty driver was delivered through Windows Update, the chances are that Windows will install it again automatically. To stop it from doing that, here's what you should do:
In Windows 10, you could try to hide the bad driver update and block it from ever installing, using the steps from this tutorial: Use the Show or Hide Updates tool to block unwanted Windows 10 updates, including drivers.
However, that only works in some situations, and it's not an option for those of you who are still using Windows 7. If you need a more radical way of stopping Windows 10 or Windows 7 from automatically installing drivers on your PC, follow the next steps:
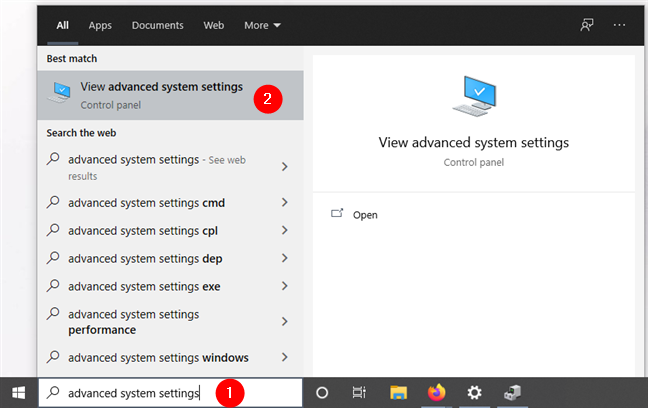
Use the Search from Windows 10's taskbar, or the search field from the Start Menu in Windows 7, to look for "advanced system settings." In the list of results, click or tap on "View advanced system settings."
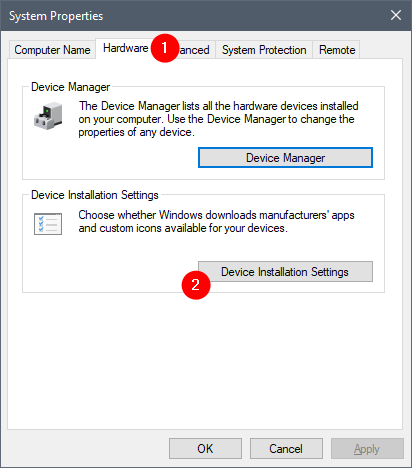
This opens the System Properties window. In it, select the Hardware tab and click or tap on the "Device Installation Settings" button.
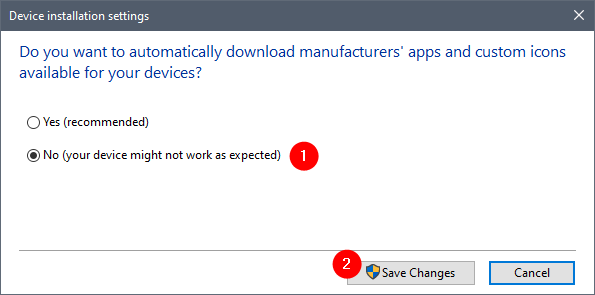
The previous action opens a window called "Device installation settings." On it, Windows asks you if "[...] you want to automatically download manufacturers' apps and custom icons available for your devices." Select "No (your device might not work as expected)" and push the Save Changes button.
IMPORTANT: Enabling this setting means that none of your devices, connected right now or which you will connect at a later time, will get driver updates from Microsoft via Windows Update.
My PC crashes with a Blue Screen of Death. How can I uninstall drivers in such a situation?
Bad drivers may cause Windows to crash with a Blue Screen of Death, which means you can no longer log in and use your computer. If that's the case for you, before taking the steps we've shown you in this tutorial, first boot into safe mode. Here's how:
- How to start Windows 11 in Safe Mode (8 ways)
- 8 ways to boot into Windows 10 Safe Mode
- 5 ways to boot into Safe Mode in Windows 7
Once you've managed to get into Safe Mode, follow the steps in this guide from beginning till the end.
Which driver for which component caused you problems?
We had problems with faulty drivers for video cards and wireless network cards, which caused crashes and instability. Both AMD and NVIDIA drivers were especially bad at times. What about you? What driver of which component caused you troubles? Comment below and let's talk.


 07.07.2020