If you need to join voice calls or video conferences, or if you want to make recordings or stream content online, you have to set up your microphone. Moreover, to ensure clear, high-quality audio during such activities, you must also test your microphone. Windows 10 lets you control your microphone settings, allowing you to adjust microphone sensitivity and boost volume. In this guide, I’ll show you how to access microphone settings, configure them, and test your microphone. Let’s get started:
How to access the microphone settings in Windows 10
Open the Windows 10 Settings (Windows + I) and click or tap System.
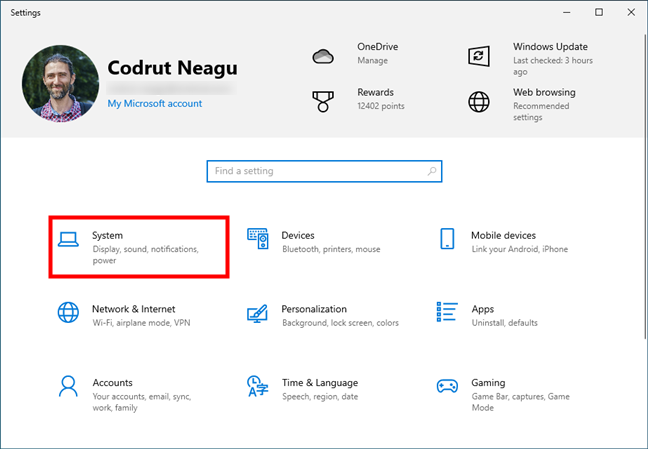
Open Settings and go to System
Then, select Sound in the left sidebar.
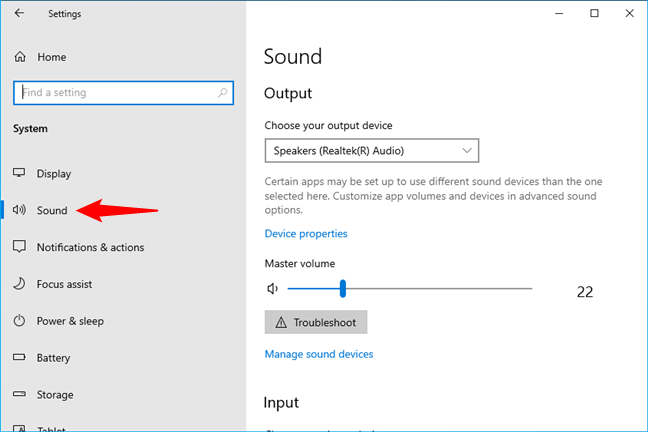
Select Sound in the left sidebar
On the right-hand pane, scroll down to the Input section. Here, you can see a drop-down list labeled Choose your input device that lists all microphones connected to your computer, as well as other options for accessing the properties of the default mic and for troubleshooting.
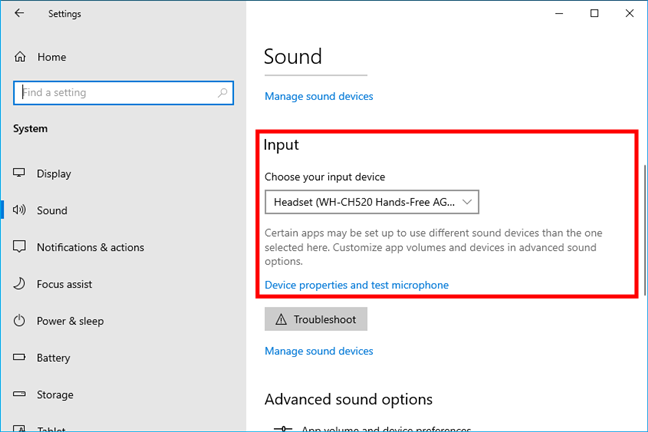
The microphone settings in Windows 10
Let’s take these options one by one and see how they allow you to adjust your microphone:
How to select the default microphone in Windows 10
In the Input section, choose your preferred microphone from the drop-down list labeled Choose your input device. If you have multiple microphones (e.g., an external mic, a built-in mic, and a headset mic), select the one you want to use as the default.
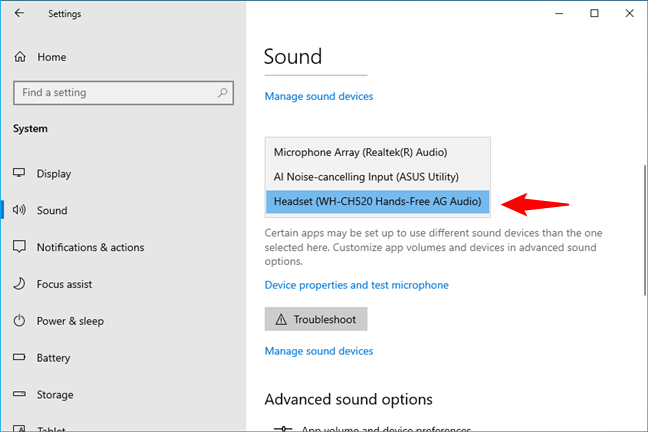
Choose the default microphone in Windows 10
TIP: Check out this guide for all the details and all the methods you can use to control which microphone is the default used on your Windows 10 computer.
Then, once you’ve selected the microphone, you can configure its settings and improve sound quality. Here’s how to do it:
How to adjust and test your microphone in Windows 10
After selecting your microphone, click or tap the Device properties and test microphone link under it to access its settings.
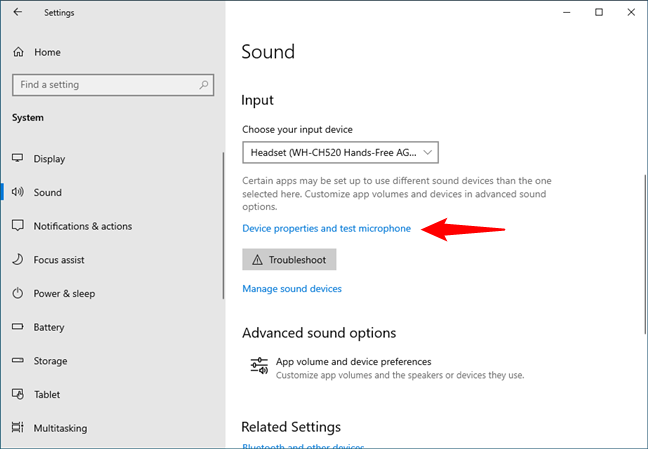
Device properties and test microphone
This action takes you to the microphone’s properties page. Read on to see what you can do there:
How to rename your microphone
First of all, you can rename the selected microphone to identify it easier. Type a name in the first text field on the page, and then click or tap Rename to save it.
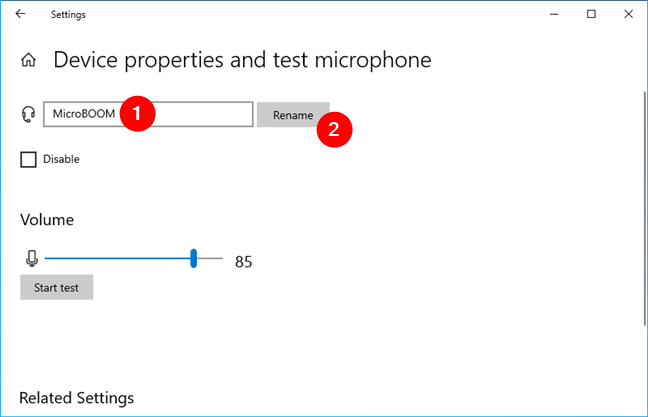
How to rename a microphone
How to enable or disable your microphone
Under the microphone name, there’s a checkbox labeled Disable. It has no explanations, but it’s pretty clear what its purpose is - turning off the selected microphone. In case that’s something you want, check the Disable option, and your mic is no longer used by Windows 10 or the apps you installed on your computer.
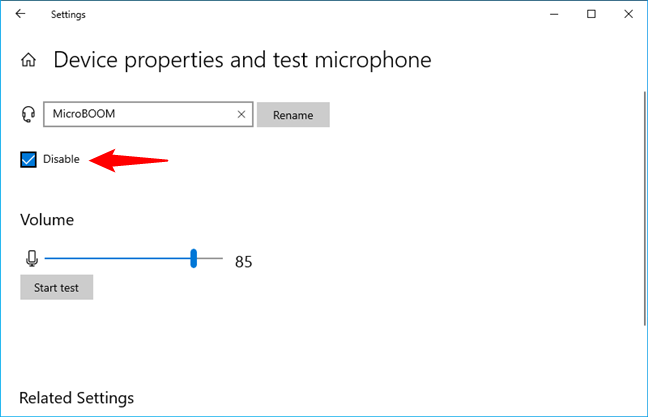
How to disable a microphone in Windows 10
If the microphone is disabled and you want to enable it instead, simply uncheck the Disable option.
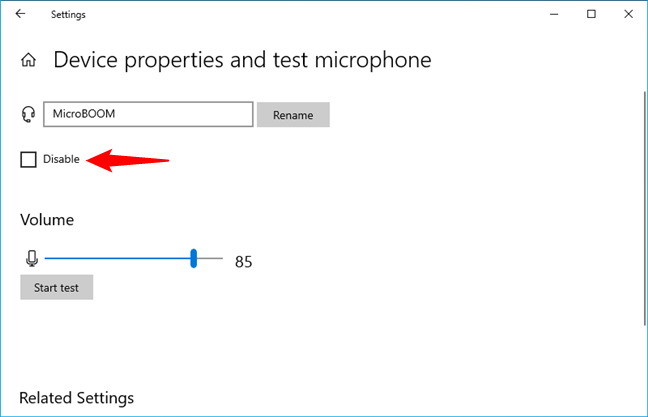
How to enable a microphone in Windows 10
TIP: You may also want to know how to change default sound devices in Windows 10 (playback and recording).
How to change the microphone volume
Next, you see a Volume slider. Adjust it to modify your microphone’s sensitivity. Increase it if the sound is too low, or decrease if the sound recorded is too loud or distorted.
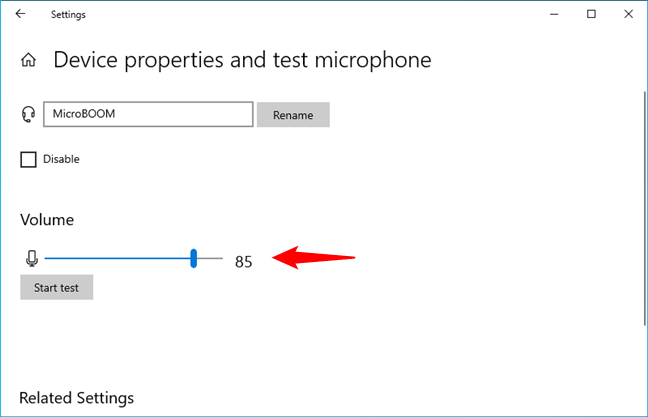
Change the input volume of the microphone
How to test your microphone in Windows 10
Following the Volume settings, you find a button named Start test. As you suspect, this button is used to check whether your microphone works properly. Press the Start test button and speak into your microphone for a bit.
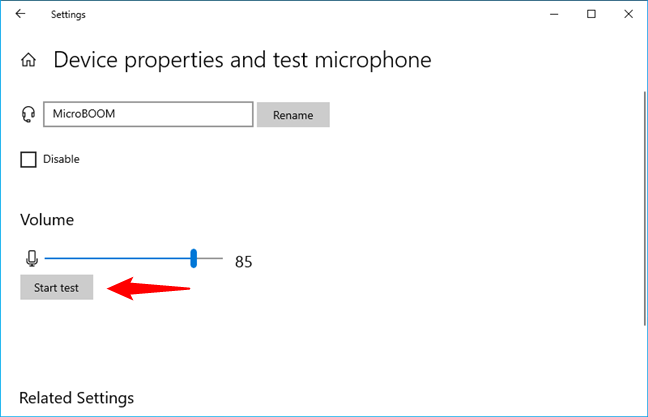
Press Start test to check the microphone
When you’re done speaking, press the Stop test button.
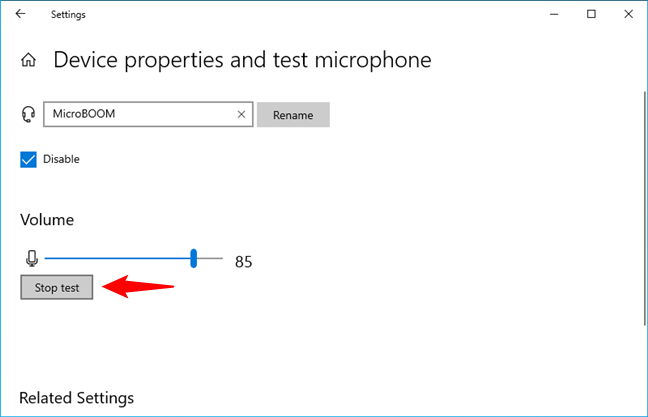
Click/tap Stop test to end the test
In an instant, Windows 10 will display a message like this:
Any value above 0 means that your microphone is picking up sound, so it works. However, the higher the value, the more sound it captures.
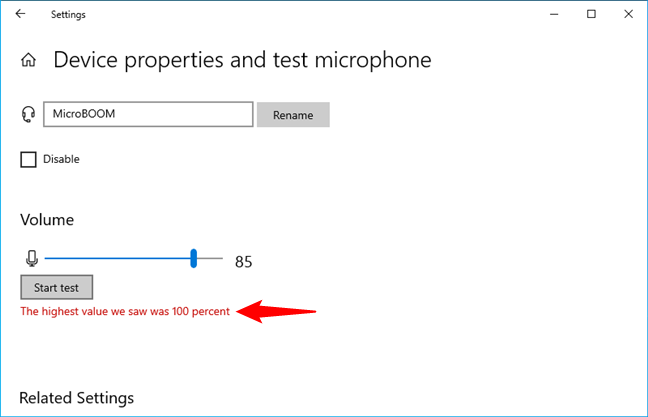
A message that shows the microphone is working well
NOTE: If the test result is zero, your mike doesn’t detect any sound. In other words, it doesn’t work. In this case, you should check the Volume slider above the Start test button and make sure your microphone isn’t muted. Furthermore, if your microphone works in some apps but not others, you might need to check Windows 10’s microphone privacy settings.
Did you change the microphone settings on your Windows 10 PC?
Now you know how to adjust mic sensitivity, boost your microphone volume, and test it in Windows 10. So, regardless of whether you’ve got a new mic or if you’re still using your old one, you’re now ready to choose the best microphone settings on your Windows 10 PC. Hopefully, your microphone will do a good job in any activity you require it, be that online meetings, streaming, or simply recording your voice. Do you have any questions or feedback to add to this guide? Let me know in the comments section below.


 31.10.2024