



In Windows 10, connecting a new microphone usually sets it as the default device for recording. However, if you constantly plug in various sound inputs, you might find that your usual microphone for Skype or Teams calls is not working anymore or that the default recording device is incorrectly set. In this tutorial, we explain how to check and set the default microphone in Windows 10. You can also set the default microphone separately, for each app, not only for the whole system. Let’s begin with a clarification:
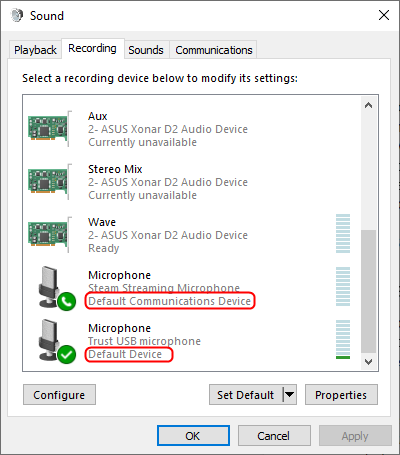
 You can set different devices as default for communication and audio
Since they have different usage scenarios, you should know which one applies to your particular case, so let’s clarify:
You can set different devices as default for communication and audio
Since they have different usage scenarios, you should know which one applies to your particular case, so let’s clarify:
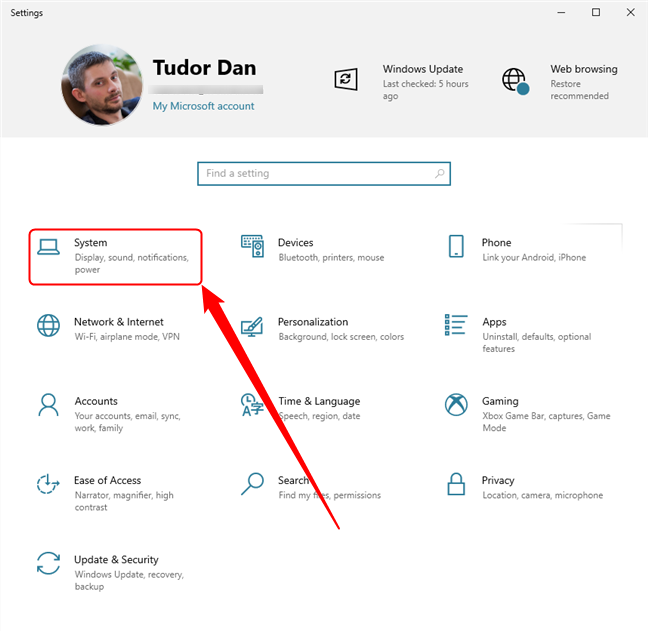
 Access the System section of the Settings app
Next, click or tap on Sounds in the left pane, then look for the Input section. Here, you can see the default microphone for the whole system. To change it, click on the name of the microphone.
Access the System section of the Settings app
Next, click or tap on Sounds in the left pane, then look for the Input section. Here, you can see the default microphone for the whole system. To change it, click on the name of the microphone.
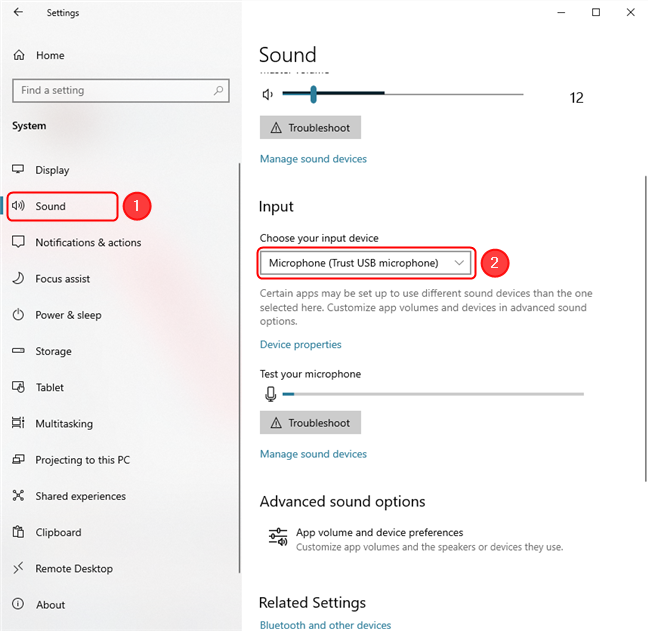 In the Sound section, you can see and modify the default microphone
This opens a drop-down list that contains all available sound input devices. Select the microphone you want to set as default. The changes are applied immediately.
In the Sound section, you can see and modify the default microphone
This opens a drop-down list that contains all available sound input devices. Select the microphone you want to set as default. The changes are applied immediately.
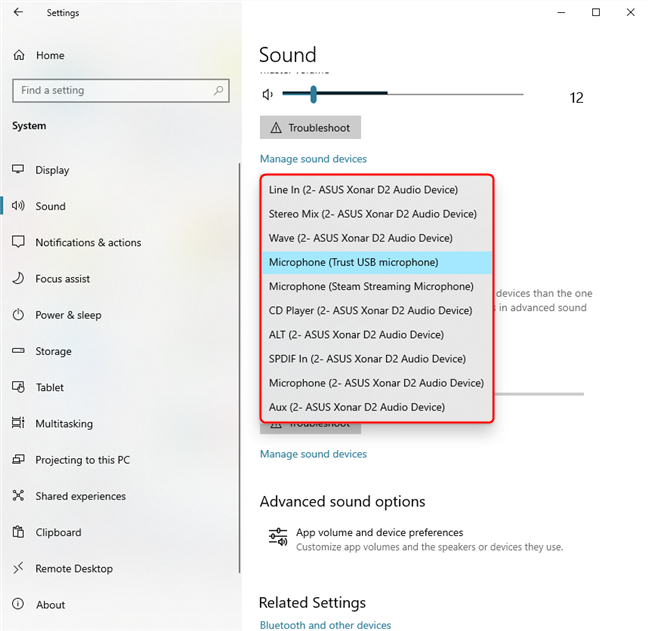 Select the microphone you want to set as default for the system
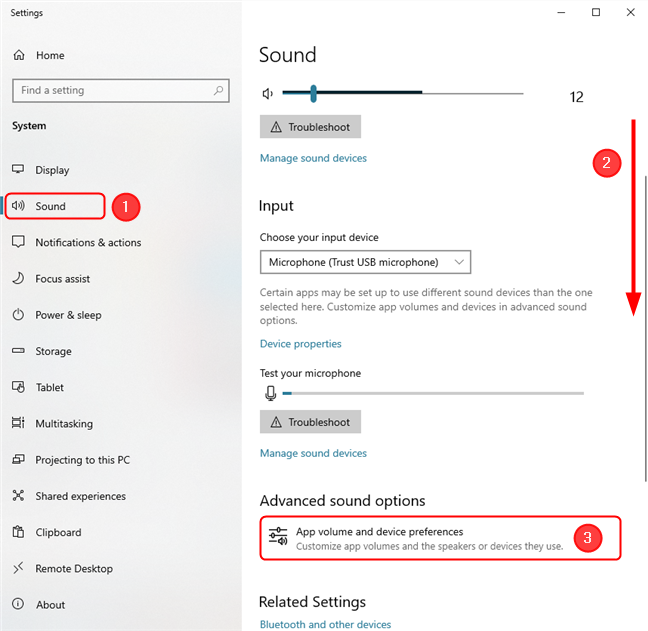 Change the default microphone for each app using Settings
In this next window, you can find a list of programs that have microphone access. For each one, you can modify the sound output device, the sound input device, as well as the output volume.
Find the app you’re interested in (for example, Google Chrome), then click or tap on the second field displayed next to it, as shown below.
Change the default microphone for each app using Settings
In this next window, you can find a list of programs that have microphone access. For each one, you can modify the sound output device, the sound input device, as well as the output volume.
Find the app you’re interested in (for example, Google Chrome), then click or tap on the second field displayed next to it, as shown below.
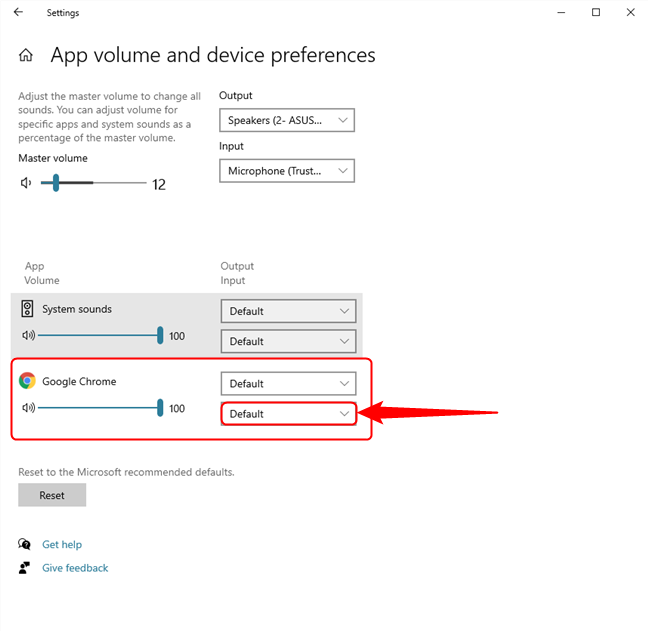 Locate the app you want to modify the default microphone for
This opens a dropdown list of sound input devices. Select the one you want to set as default, and the changes are applied immediately.
Locate the app you want to modify the default microphone for
This opens a dropdown list of sound input devices. Select the one you want to set as default, and the changes are applied immediately.
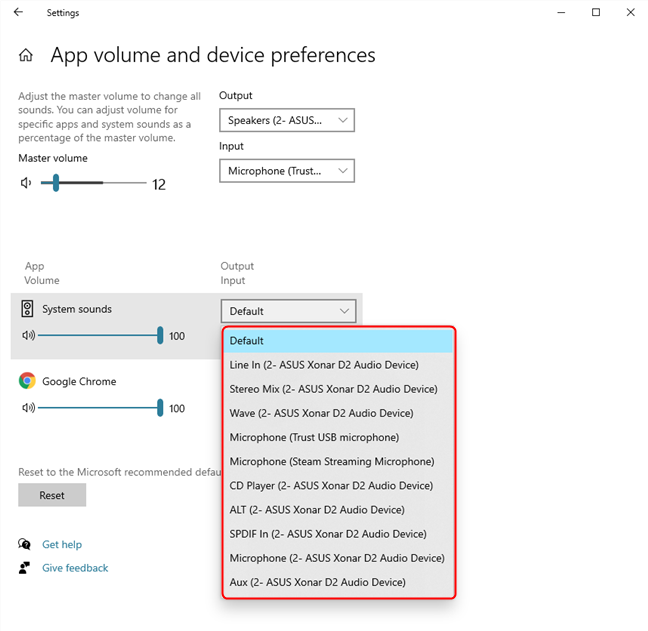 Select the microphone you want to set as default for Google Chrome
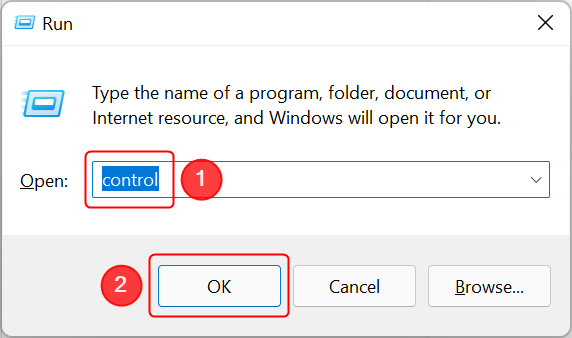
 Open the Control Panel using the Run window in Windows 10
In the Control Panel window, go to Hardware and Sound.
Open the Control Panel using the Run window in Windows 10
In the Control Panel window, go to Hardware and Sound.
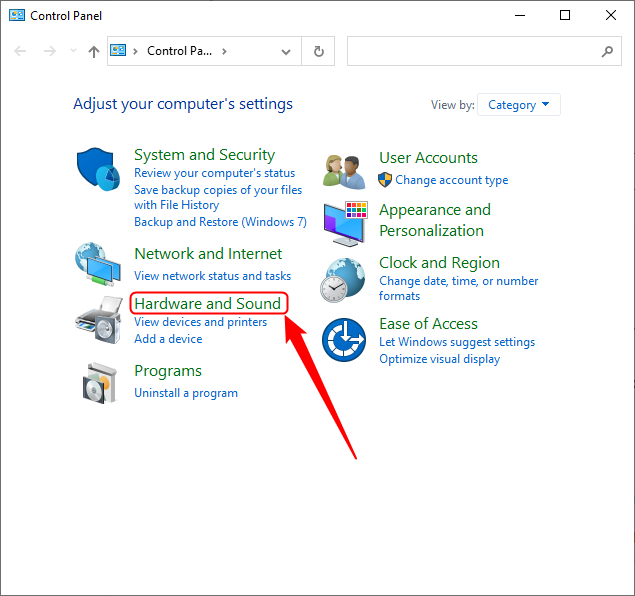
 Go to Hardware and Sound in the Control Panel
Locate the Sound section and click on it, on Change system sounds or on Manage audio devices. All of them open the Sound window.
Go to Hardware and Sound in the Control Panel
Locate the Sound section and click on it, on Change system sounds or on Manage audio devices. All of them open the Sound window.
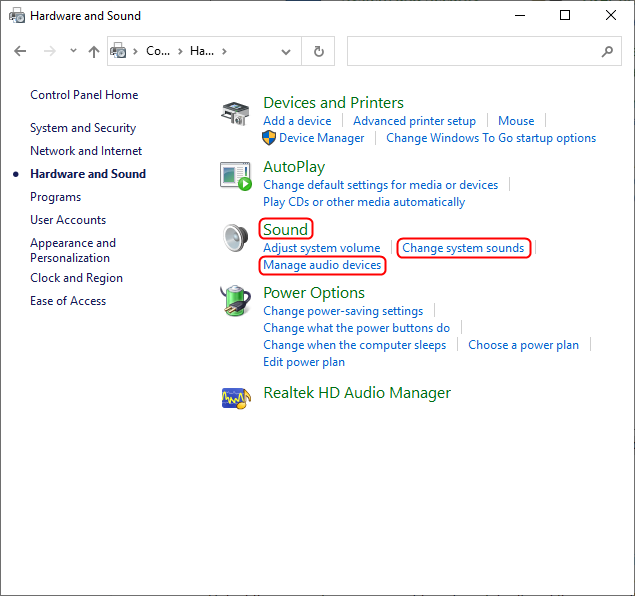 Any of the three highlighted links will open the Sound window
HINT: You can quickly access the Sound window directly from the desktop by pressing Windows + R, typing “mmsys.cpl” and hitting Enter.
Next, go to the Recording tab. The tab lists all recording devices, including microphones and other audio inputs. It also shows which of the devices are set as default.
Select the microphone you want to set as default and then press the Set Default button. If you want to set the microphone as default for audio or for communication only, press the arrow next to the Set Default button instead and choose one of the displayed options.
Any of the three highlighted links will open the Sound window
HINT: You can quickly access the Sound window directly from the desktop by pressing Windows + R, typing “mmsys.cpl” and hitting Enter.
Next, go to the Recording tab. The tab lists all recording devices, including microphones and other audio inputs. It also shows which of the devices are set as default.
Select the microphone you want to set as default and then press the Set Default button. If you want to set the microphone as default for audio or for communication only, press the arrow next to the Set Default button instead and choose one of the displayed options.
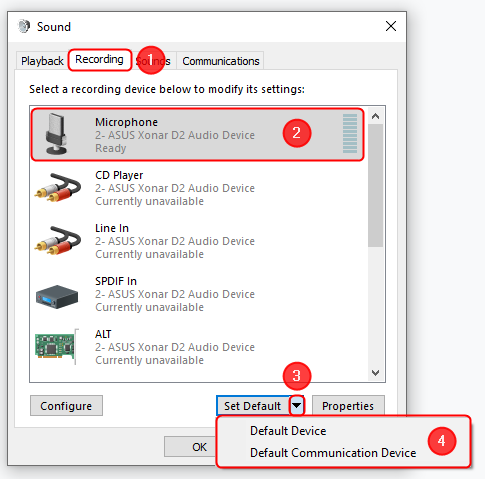
 Set the default output device using the Control Panel in Windows 10
Alternatively, you can right-click the microphone in the list, then select one of the options in the context menu. Press OK to close the Sound window.
Set the default output device using the Control Panel in Windows 10
Alternatively, you can right-click the microphone in the list, then select one of the options in the context menu. Press OK to close the Sound window.
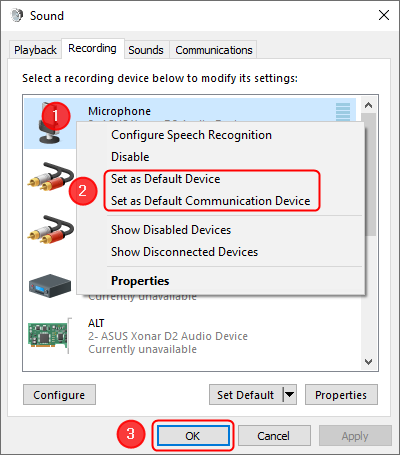 Use the context menu to set the default microphone in the Sound window
Default audio device or default communications device?
Windows has separate settings for communication and audio, and you can sometimes see the two options when selecting a default. However, Microsoft does a poor job at explaining the differences between the two.- Default communications device - the device that Windows uses for calls and video calls in dedicated apps such as Skype or Zoom
- Default audio device - also displayed as Default device - the device used by Windows for all other applications that need audio input and output.
How to change the default microphone using the Settings app
A simple way to set the default microphone in Windows 10 is by using the Settings app. Open Settings by pressing Windows + I and then click on System.How to set the default microphone for an app using Settings
If, instead, you want to change the default microphone for a particular app, you can do it using Settings. Open the Settings app, then go to System and select Sounds in the left pane. Next, scroll down to “Advanced sound settings” and click or tap on “App volume and device preferences.”How to change the default microphone for audio and communications using the Control Panel
Let’s say you have a microphone that you use for streaming, but for work calls, you want to use the microphone from your headset. Sadly, you can’t change the settings for communications and for audio separately from the Settings app. But you can from the Control Panel. Press the Windows + R keys on your keyboard to open the Run window. Then, type “control” and hit Enter on your keyboard or press OK. This opens the Control Panel.

Discussion (0)
Comments are closed.