The free Voice Recorder app bundled with Windows 10 is great in its simplicity, allowing you to make quick and clear audio recordings, without the use of a professional program or recording device. Whether you need to practice the acceptance speech for winning your Hearthstone Tournament, decide to interview your favorite pet or want to figure out if you are good enough for American Idol, the Voice Recorder is your go-to app in Windows 10. Let's see what it can do:
NOTE: The screenshots and the instructions in this guide apply to Windows 10 May 2019 update or newer. If you do not know what version of Windows 10 you have, read: How to check the Windows 10 version, OS build, edition, or type.
How to access the Voice Recorder app in Windows 10
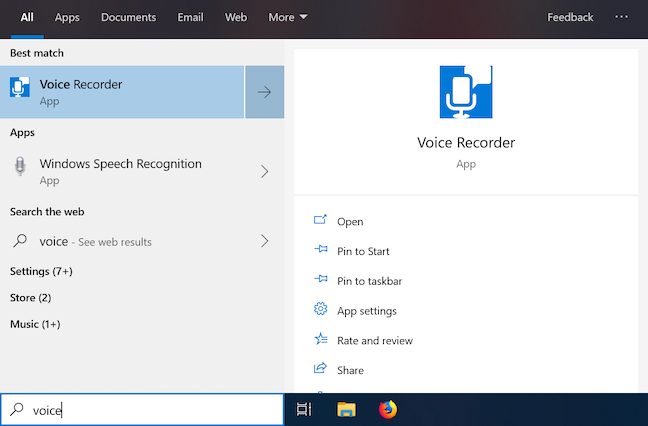
One way to access the Voice Recorder is to start typing the app's name in the Windows 10 search box and then click or tap the relevant result.
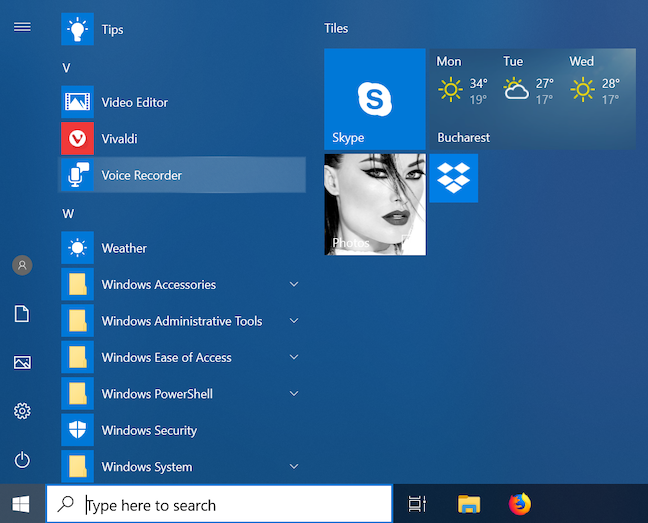
Another way is by finding the app in the list of apps from the Start Menu and then clicking or tapping on it.
The Voice Recorder app opens, and, if this is the first time you access it and there are no previous recordings saved, it asks for permission to access your microphone. Obviously, this permission should be given, otherwise the app does not work.
How to create a recording using Voice Recorder in Windows 10
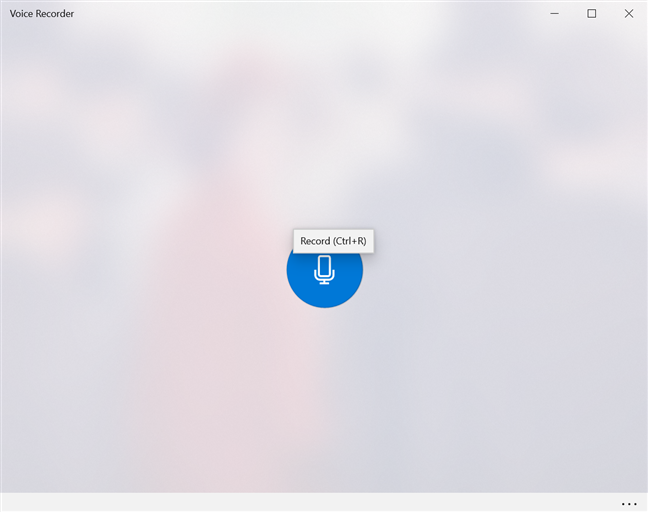
Click or tap the Record button or use the keyboard shortcut Ctrl + R to start your recording.
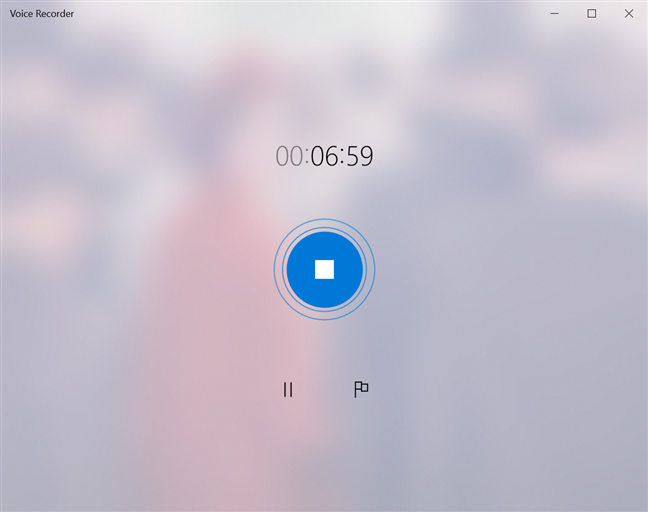
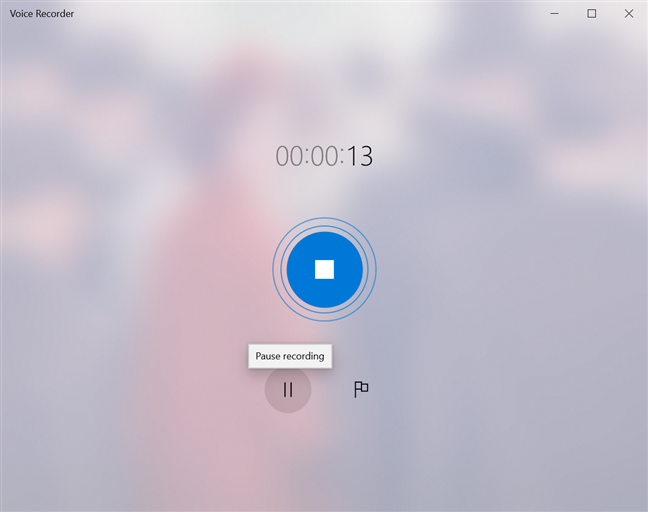
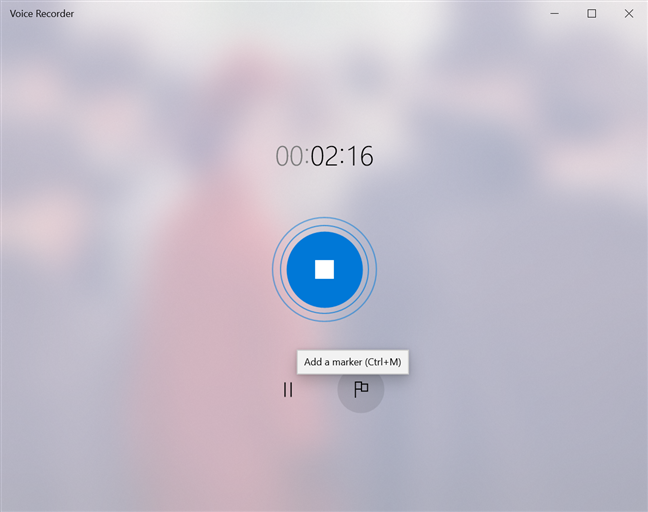
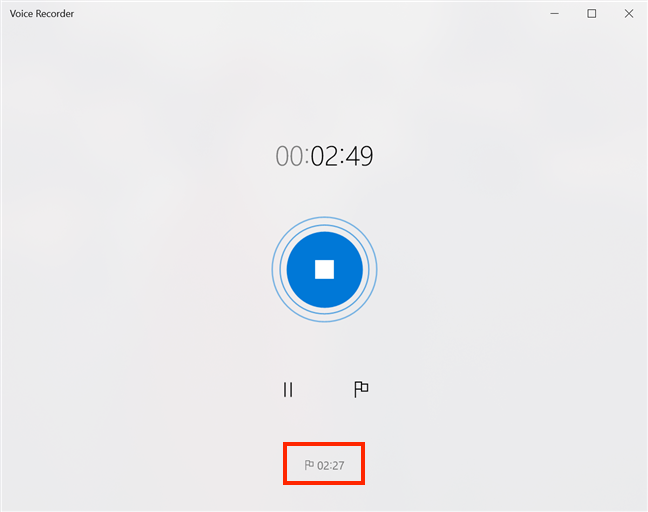
The app starts recording, displaying the time elapsed since the audio recording started.
Click or tap the Pause button to pause the recording at any time, without ending the current recording session.
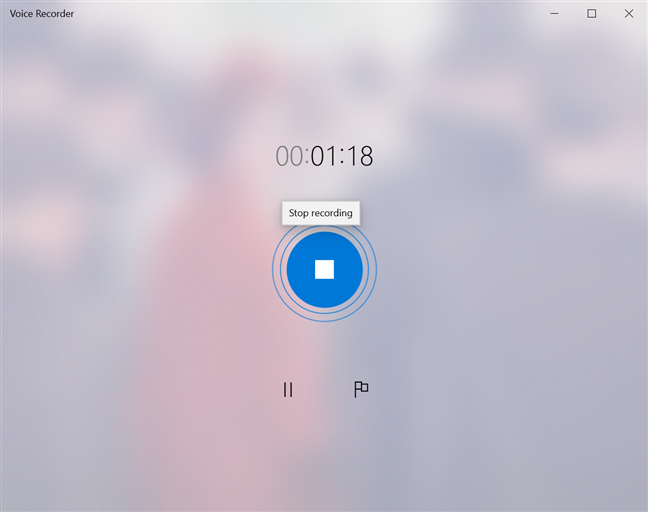
Clicking or tapping the Pause button one more time causes the app to resume the recording. When you are done recording, click or tap the Stop recording button in the center of the window, or press one of the following keys on your keyboard: Esc, Enter, Spacebar, or BackSpace.
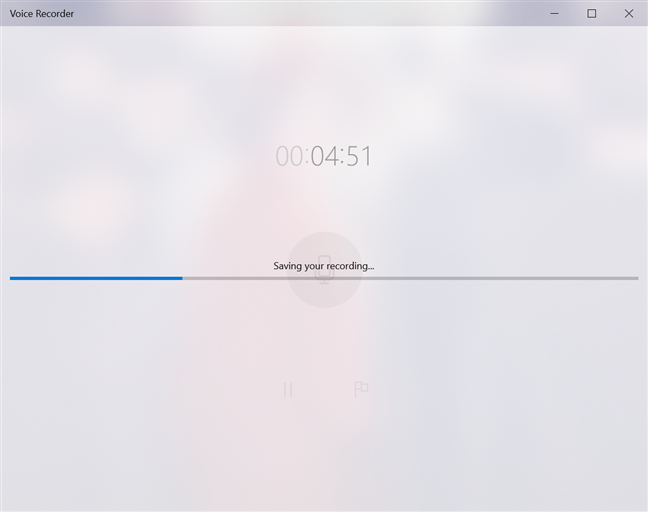
The recording session ends and, especially when it comes to long audio recordings, you are notified that it is being saved. Keep in mind that the limit for a recording is 2hours 59 minutes and 59 seconds, according to our tests.
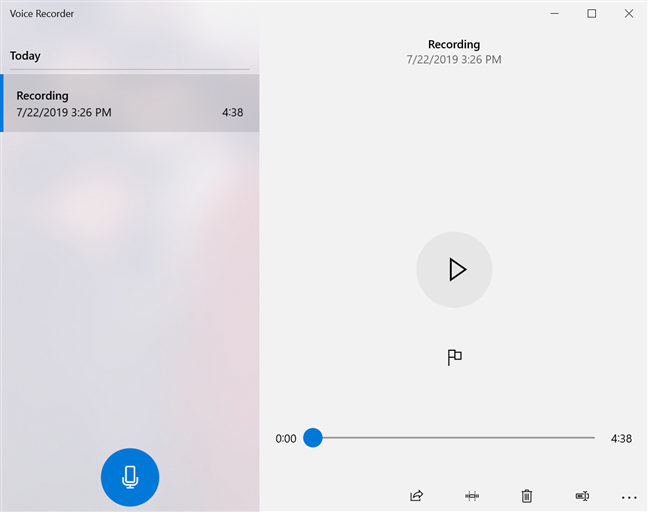
Your audio recording is saved under the default name Recording. The date and time when the recording was saved are displayed underneath, followed by the duration of the recording. Once you have at least one recording saved in Voice Recorder, the Record button is displayed in the lower-left corner of the window, and you can press it at any time to start a new recording.
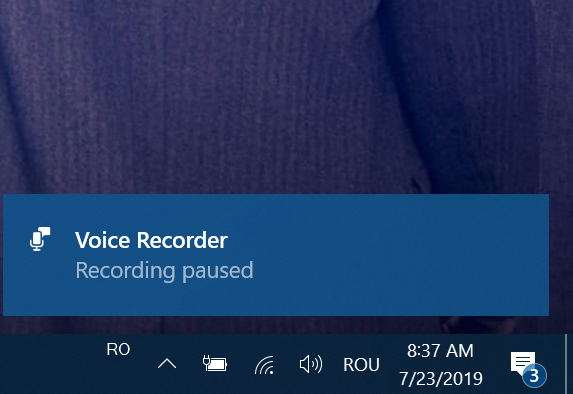
If the Voice Recorder is closed before saving the recording, you get a notification, letting you know that your recording is paused.
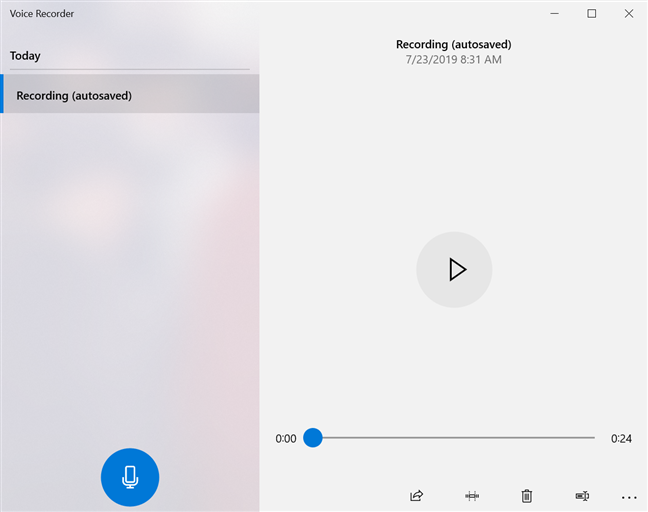
This is not entirely accurate, as your recording is actually saved under the name Recording (autosaved) and it can not be resumed.
In this specific case, any markers added to the recording are gone, same as the option to add a marker.
How to find and play your audio recording in Voice Recorder
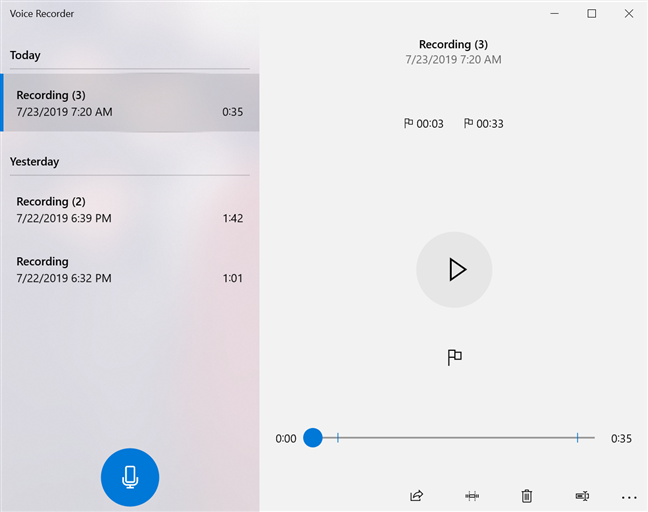
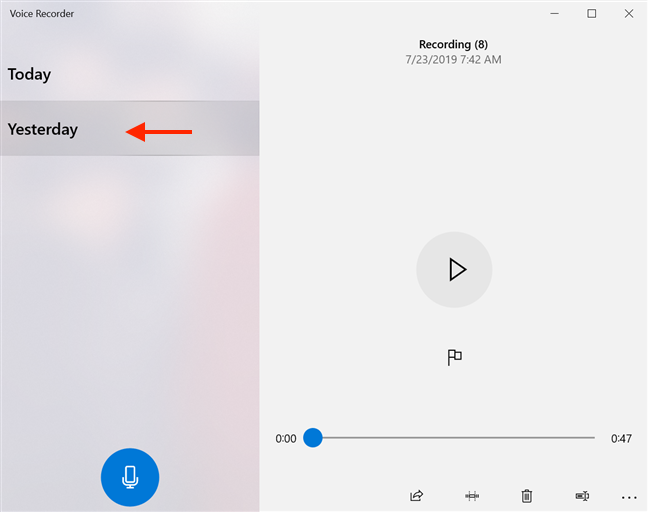
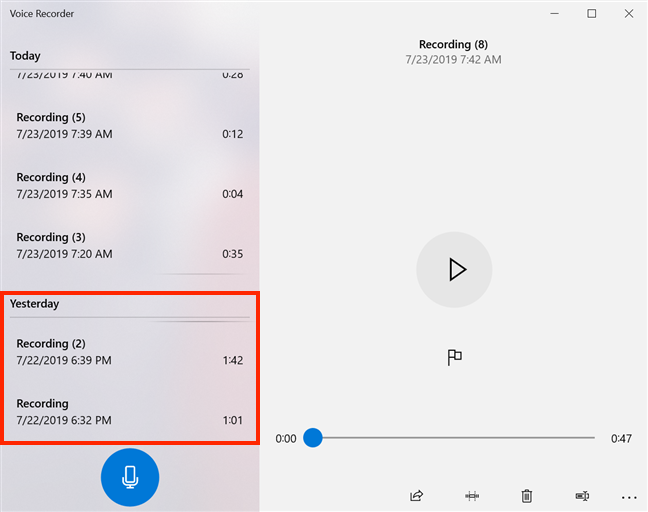
All your recording sessions are saved in a list in the Voice Recorder app under the default name Recording, the most recent being at the top. To make things less confusing for users, subsequent recordings display a number in brackets, and the list is divided by days.
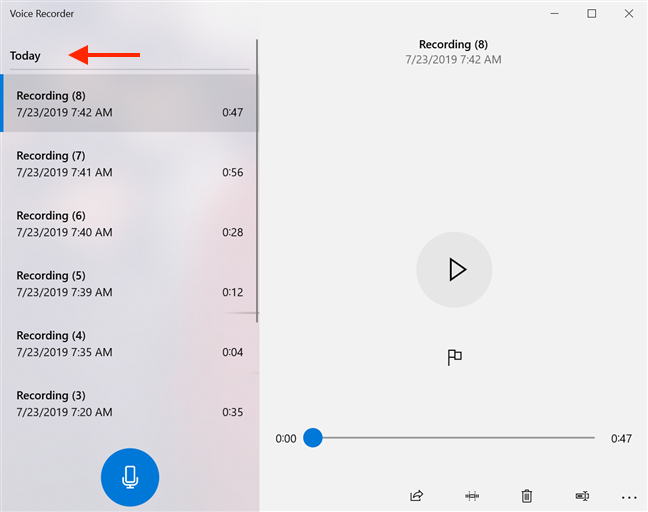
If you use the Voice Recorder a lot, scrolling through the list of recordings to find the one you want can become tiresome. Clicking or tapping the day subcategory displayed in the Voice Recorder takes you to a new window, where you can choose any of the days when recordings have been made.
Click or tap the day that interests you from the list.
This returns you to the initial list, where the recordings from that day come into focus.
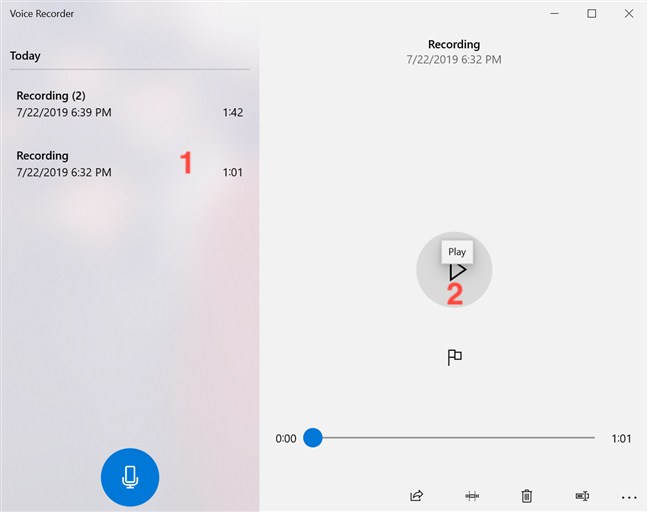
To listen to a recording, select it from the list and either click or tap on it again or press Play.
Press the Pause button to pause the recording at any time. To toggle between playing and pausing a recording, you can also click or tap on its name in the list, or use the Enter or Spacebar keys on your keyboard.
How to use markers inside a recording in Voice Recorder
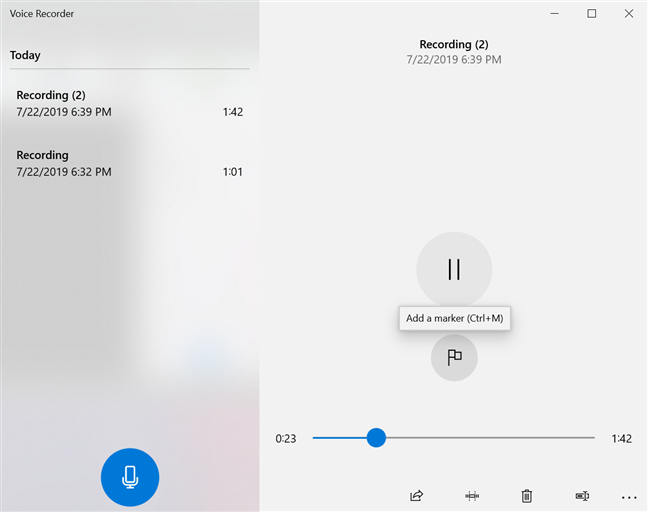
Markers let you "bookmark" important parts of a recording, making them easy to identify and access afterwards. You can use them to mark portions of a recording or to highlight key moments, and they come in handy, especially when it comes to long recording sessions. A marker does not alter or interrupt the recording in any way. While you are recording, the flag icon displayed next to the Pause button allows you to "Add a marker" inside your recording. To add a marker, click or tap the "Add a marker" button or use the keyboard shortcut Ctrl + M.
The marker is shown at the bottom of the window, next to a flag icon, and it displays the time elapsed since the recording started.
You can add as many markers as you want while recording. You can also add markers while playing a previously saved recording, by pressing the "Add a marker" button.
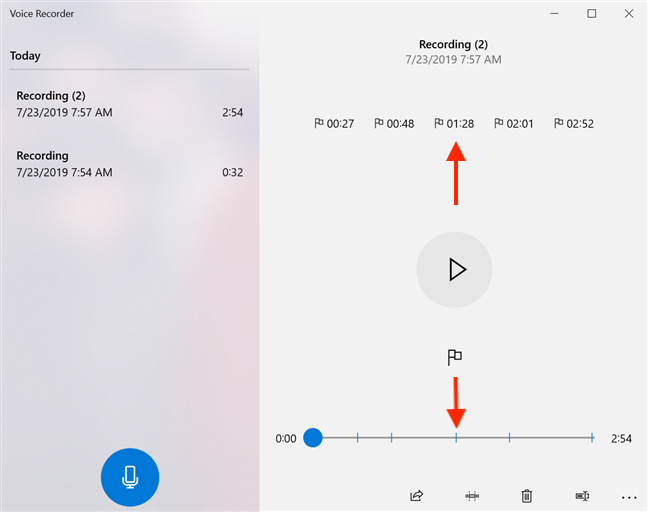
When you play a recording, all the markers for that recording (whether you added them doing the making of the recording or while listening to it) are displayed both in the upper right portion of the window, under the name and details of the recording, and in the play bar. Clicking or tapping a marker allows you to quickly jump to underlined moments.
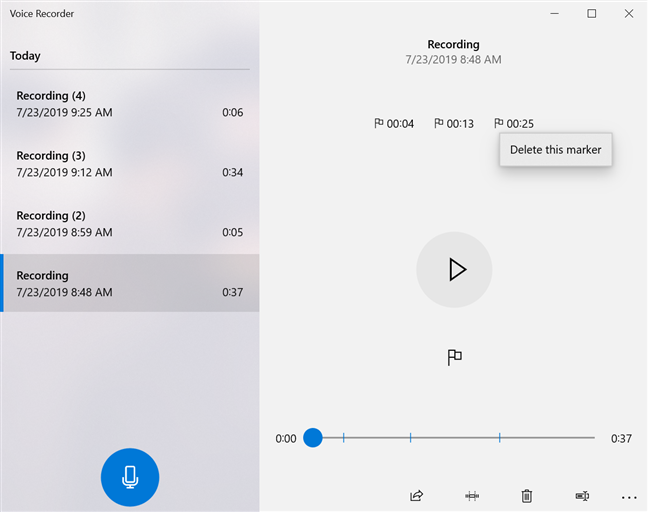
To remove a marker, right-click or press-and-hold on it, and then click or tap the only available option: "Delete this marker."
How to trim a recording with Voice Recorder in Windows 10
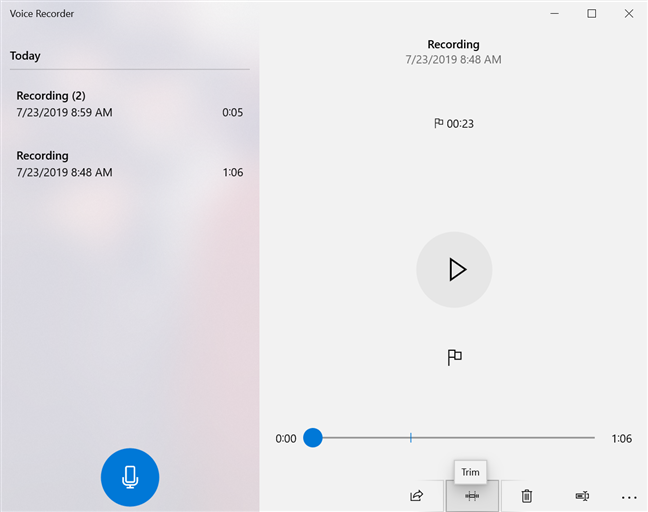
The Voice Recorder allows you to trim a recording, and only keep the relevant part(s) from it.
To do that, select the Recording from the list and then click or tap the Trim button at the bottom of the window.
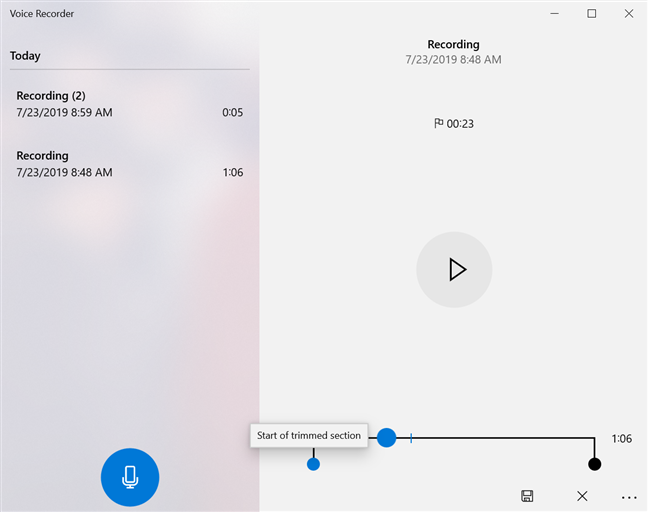
This causes two pins to appear on the play bar, named "Start of trimmed section" and "End of trimmed section." Drag them around to select the part of your recording you want to keep.
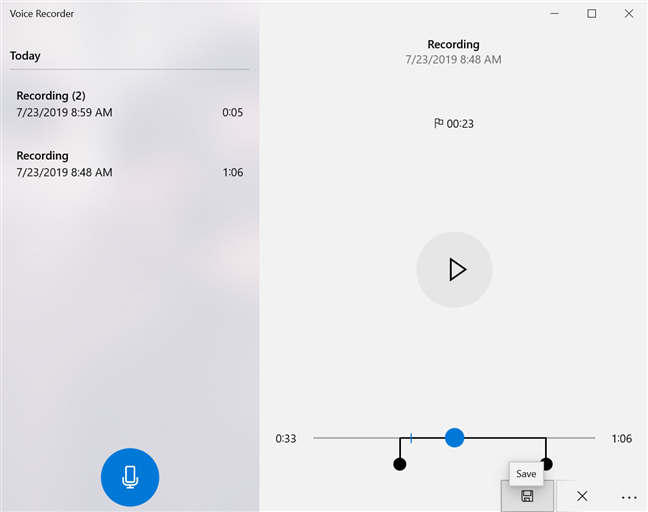
You can press the Play button at any time while trimming to make sure your selection is accurate. When you have made your decision, click or tap Save at the bottom of the window.
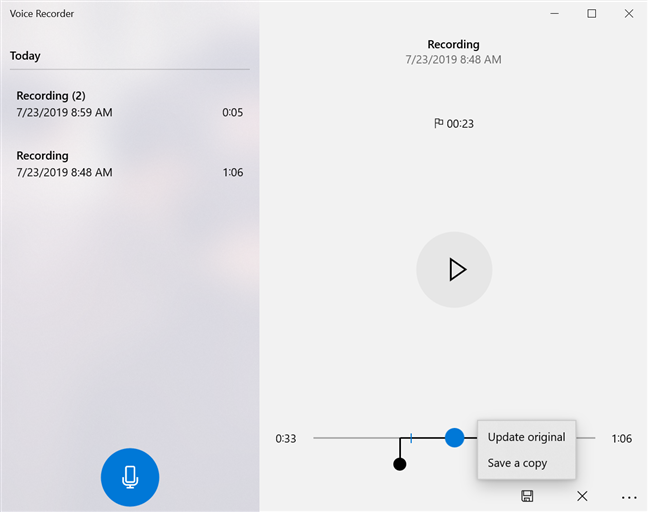
You now have two options: "Update original" or "Save a copy." If you choose to "Update original," the recording is replaced by the new version, while "Save a copy" creates a new recording in the list.
If you change your mind, use the Cancel button (marked with an X) at any point during the trimming process or select another recording from the list to cancel editing the recording.
How to rename a recording in Voice Recorder
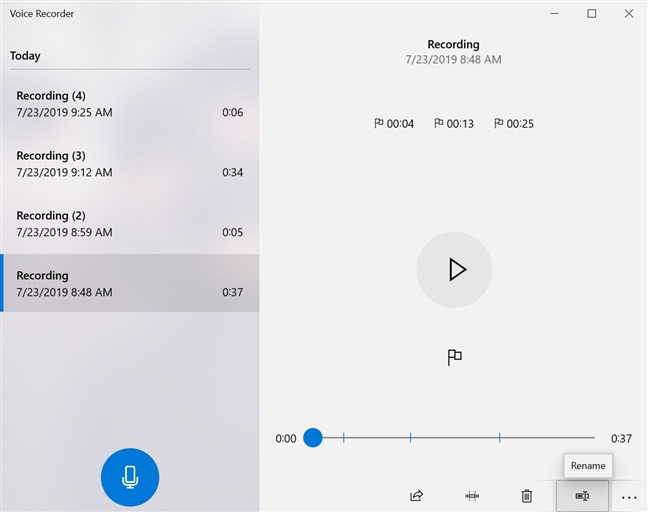
Having all the files in Voice Recorder named Recording can be inconvenient, so the option to rename them is a welcome addition. The easiest way to do this is by selecting the recording you want to rename and then clicking or tapping the Rename button at the bottom of the window.
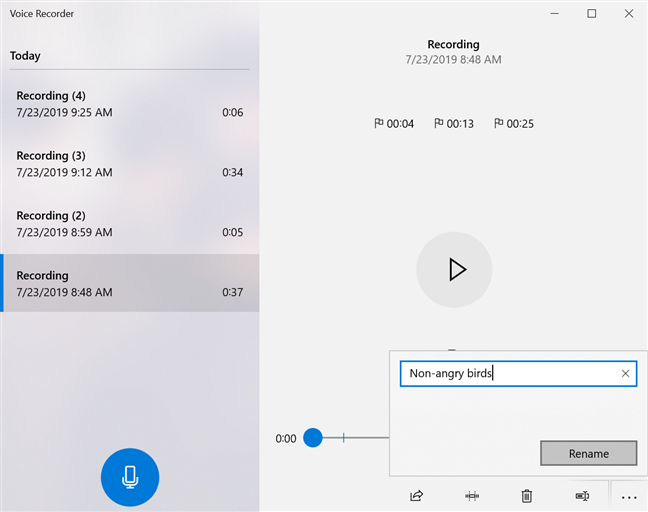
In the pop-up window that appears, insert the desired name for your recording, and click or tap Rename.
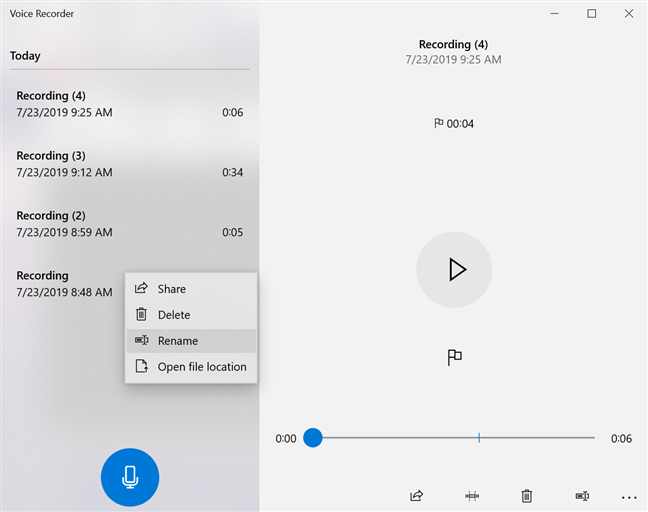
You can also rename a recording by right-clicking or pressing-and-holding it and then choosing Rename from its contextual menu.
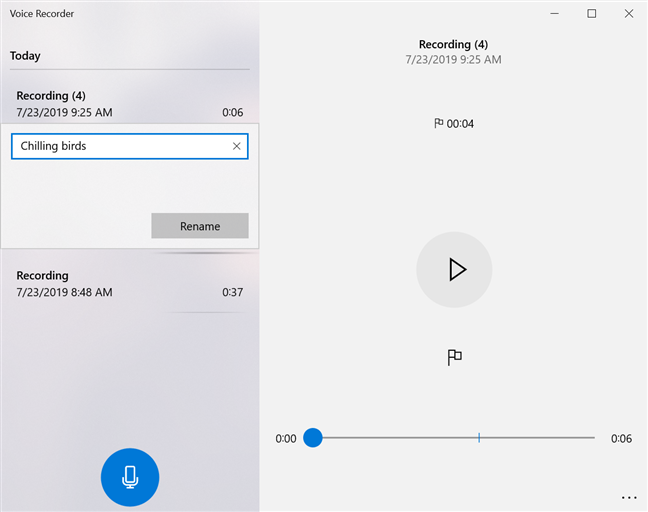
The pop-up window appears, and you can insert the name of your choice for the recording and click or tap Rename.
Your recording's new name is instantly displayed.
How to share your recordings from Voice Recorder in Windows 10
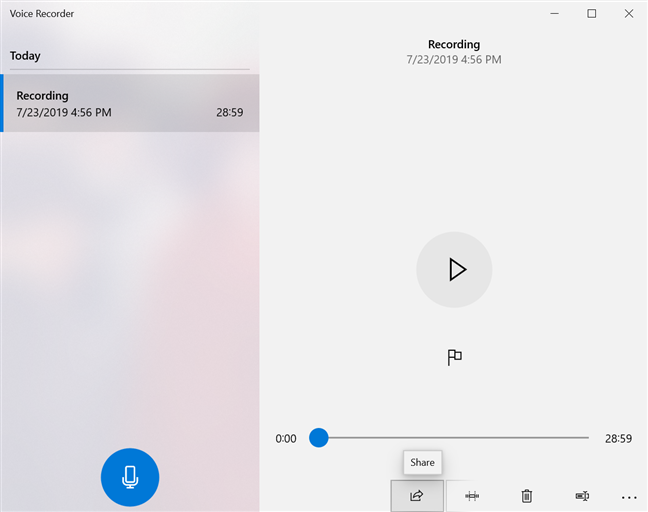
Once you are happy with your recording, the Voice Recorder gives you the option to share it with others. Select the recording you want to share and click or tap the Share button at the bottom of the window.
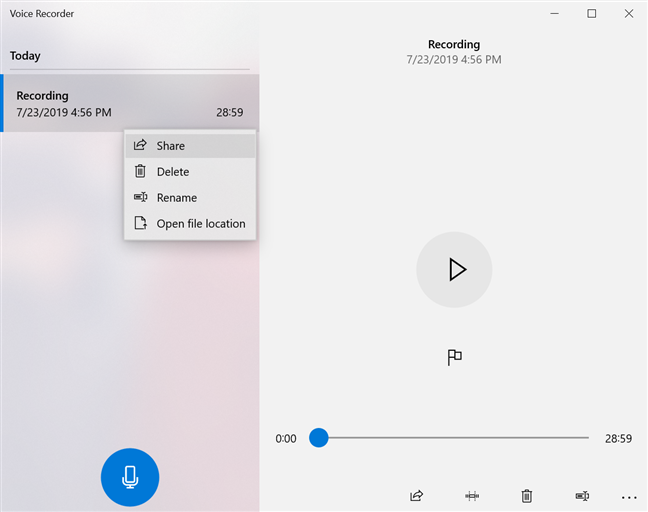
Alternatively, you can right-click or press-and-hold the recording in the list and click or tap Share from the contextual menu.
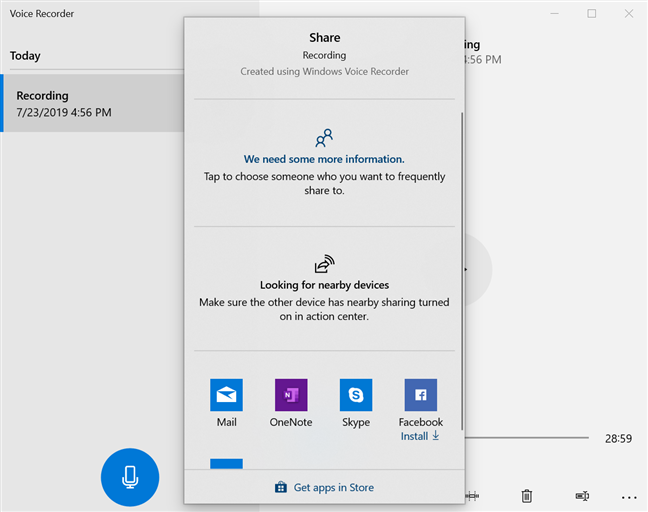
A window pops up, displaying the options available for sharing.
How to delete a recording from Voice Recorder
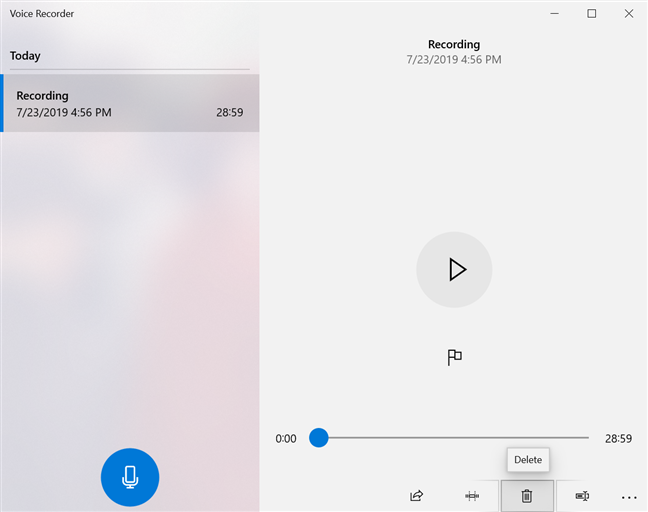
The obvious way to delete a recording is by selecting it and then clicking or tapping the trash-bin button at the bottom of the window, called Delete, or by pressing the Delete key on your keyboard.
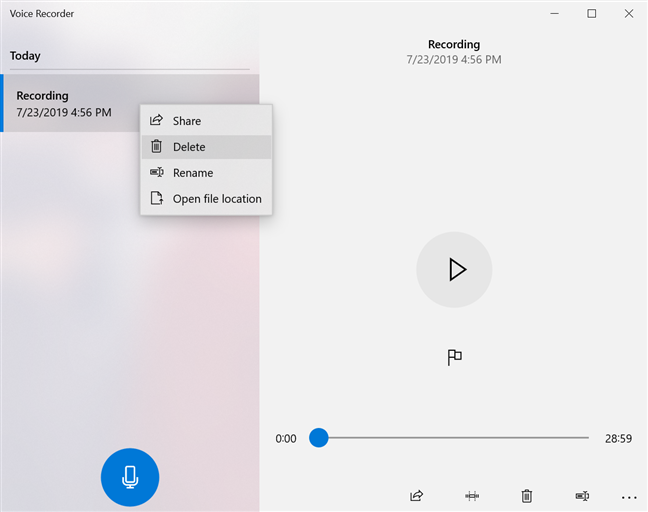
You can also right-click or press-and-hold on any recording, then click or tap Delete.
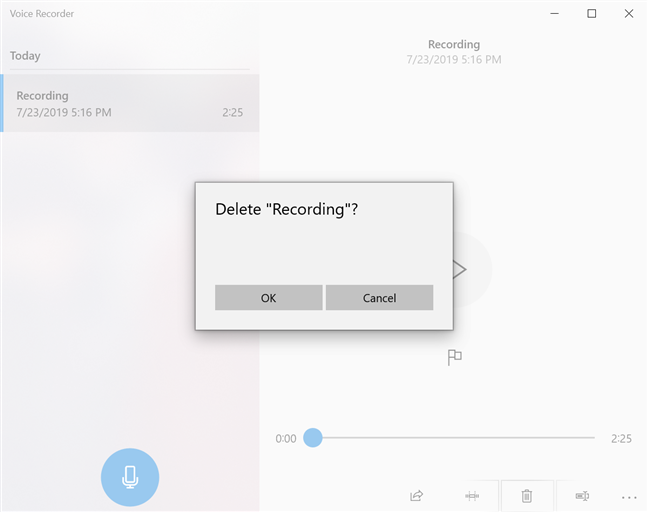
A pop-up window asks you to confirm the action.
How to open recordings in File Explorer from Voice Recorder
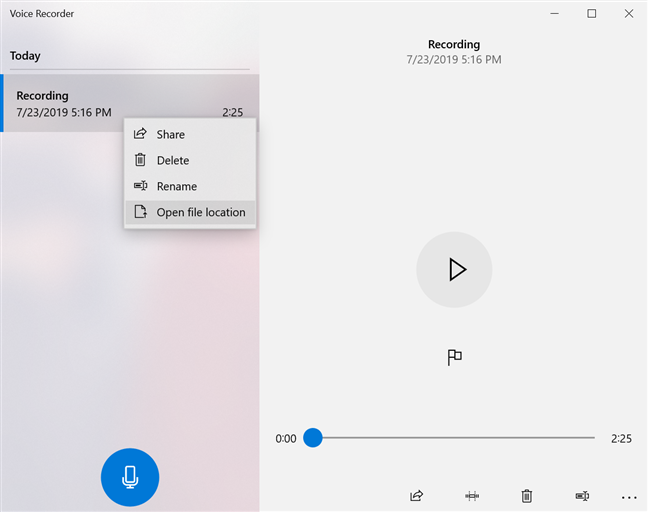
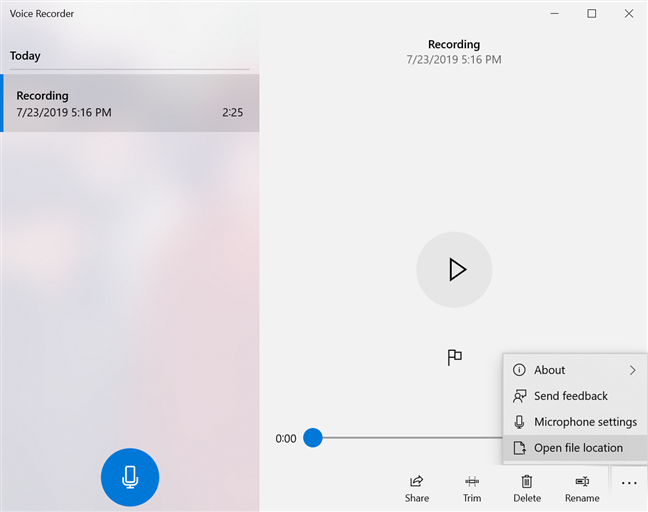
To open a recording from Voice Recorder, right-click or press-and-hold it and then press "Open file location."
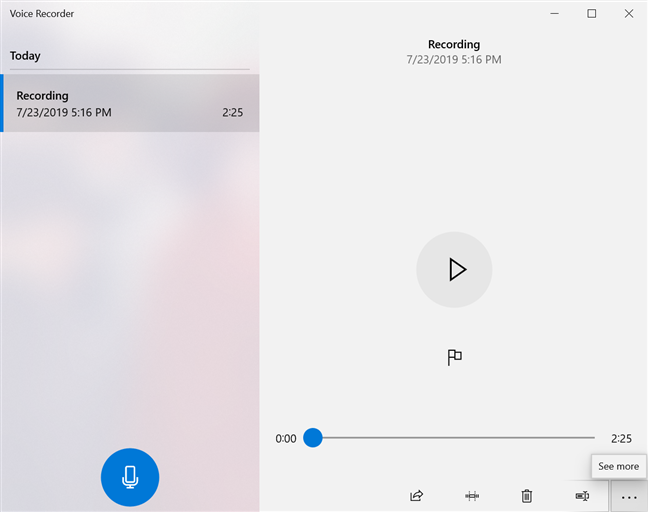
You can also click or tap the three dots in the bottom right corner to open the See more menu.
Then click or tap "Open file location" from the See more menu.
The Sound recordings folder opens in File Explorer, and your recording is highlighted within. You can find the Sound recordings folder in Documents. The default location is C:UsersusernameDocumentsSound recordingsRecording.m4a.
How to provide feedback to Microsoft about Voice Recorder
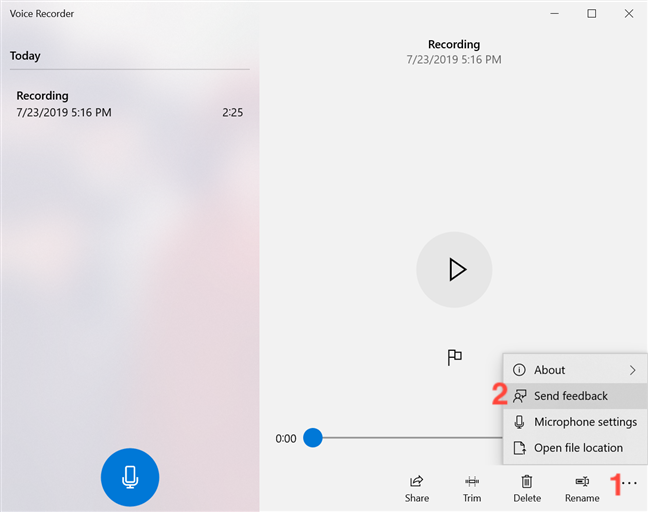
The Feedback Hub is easily accessible from the Voice Recorder app, allowing you to offer feedback to Microsoft. Click or tap the See more menu and then Send feedback.
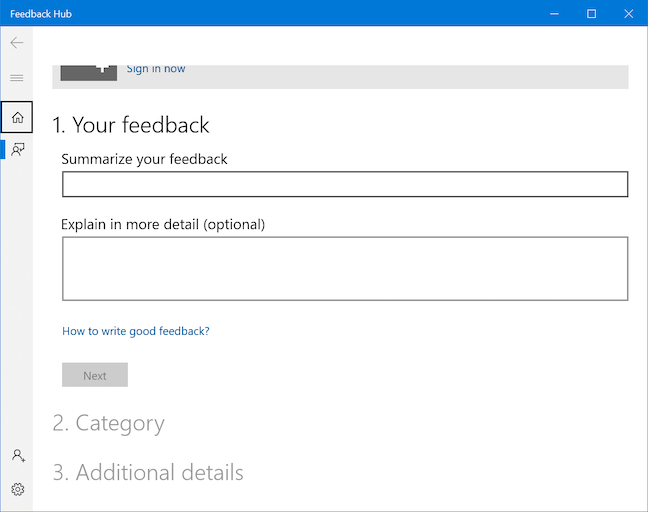
When the Feedback Hub opens, you can sign in with your Microsoft account and use it to send your opinion to Microsoft.
How to set up a microphone for the Voice Recorder app
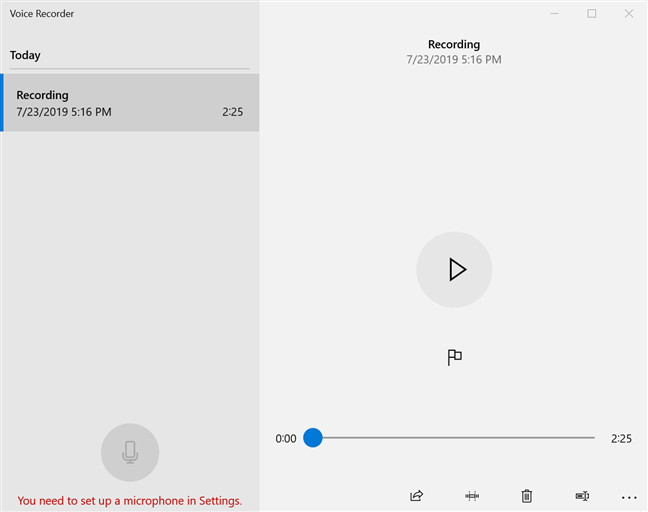
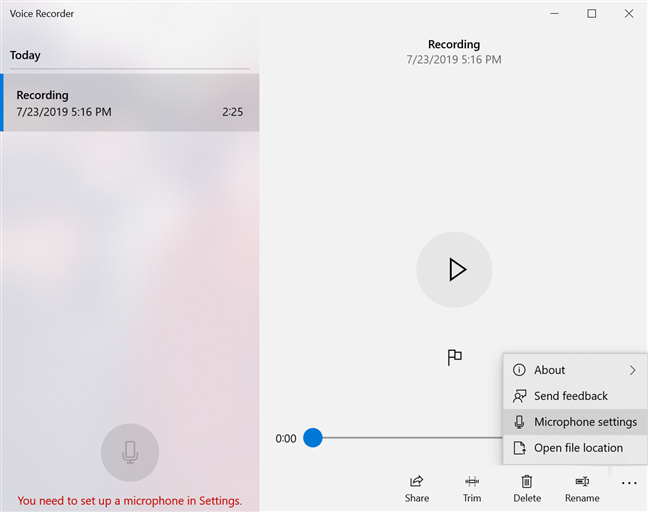
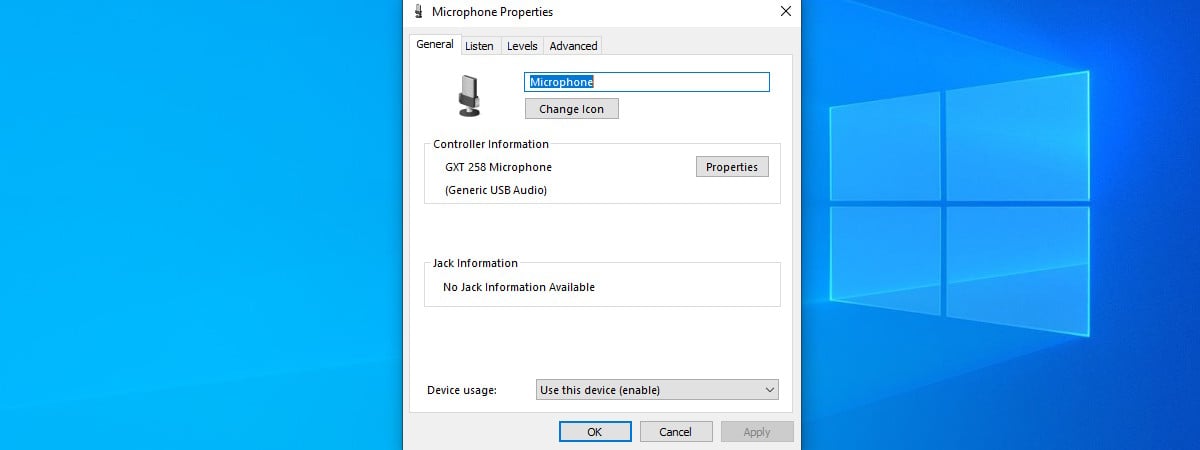
When you open the Voice Recorder app, you might find that the Record button is unavailable and the message "You need to set up a microphone in Settings" is displayed at the bottom of the window. This happens because you did not give this app access to your microphone.
To fix this problem, click or tap the See more menu to open it, and then Microphone settings.
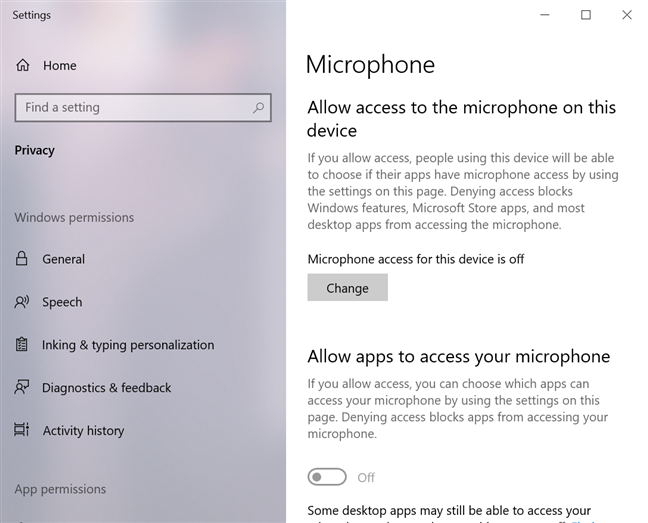
The Microphone window opens in the Settings app.
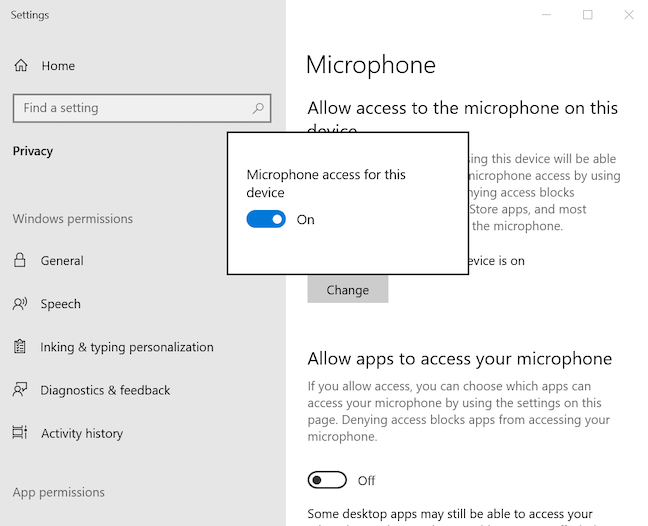
The first thing you need to enable is the "Allow access to the microphone on this device" option. Press the Change button at the bottom of this option if the status displayed is "Microphone access for this device is off," and then turn the switch On.
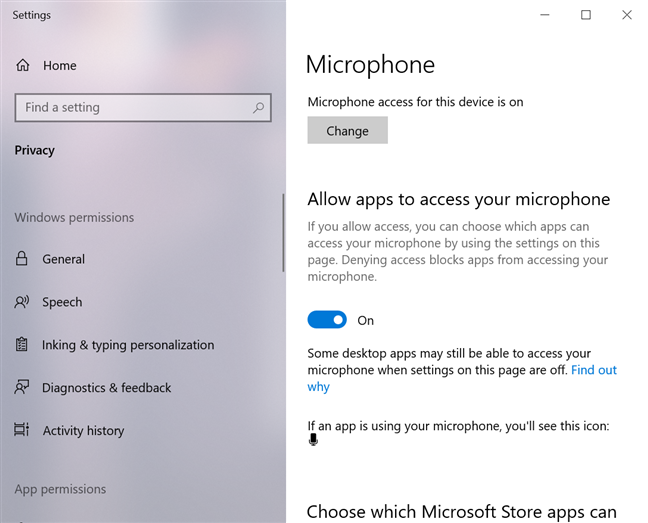
The option underneath, "Allow apps to access your microphone," also needs to be enabled, so turn it On.
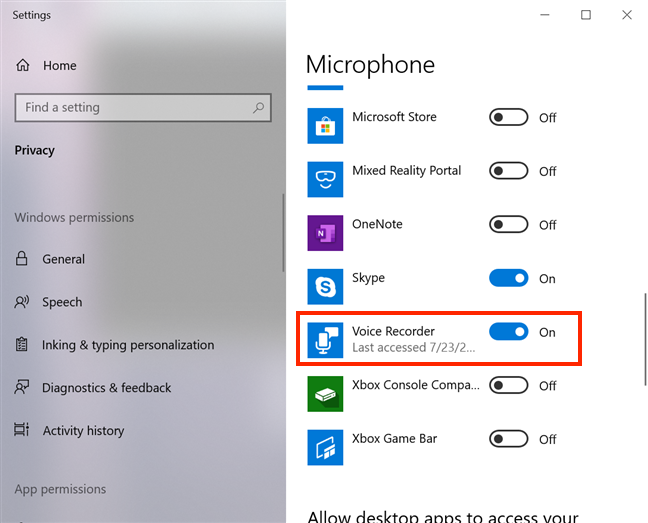
Scroll down to find a list containing apps and whether or not they are allowed to access your microphone. Find the Voice Recorder app in the list and make sure it is allowed to access the microphone, by turning the switch On.
This should resolve any issues, and the Voice Recorder app should work as intended.
What is the first recording you plan to make with the Voice Recorder?
Thank you for taking the time to read this very thorough tutorial! During its creation, our Lenovo Yoga Book kept picking up birds happily chirping outside, so we ended up creating lots of National Geographic soundtracks. Now that you know everything about the Voice Recorder app, let us know what you plan your first recording to be. Comment below and let's discuss.


 25.07.2019