12.05.2020
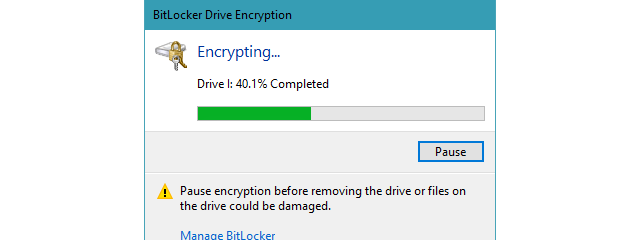
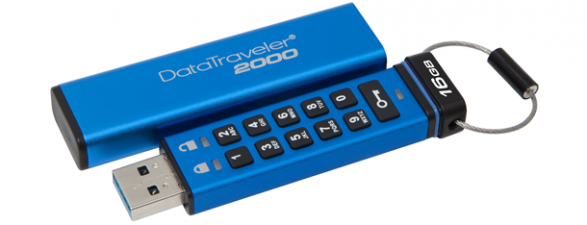
USB memory sticks, as well as external hard disk drives and flash drives, are convenient means of transporting data. They allow you to carry anything, including videos, documents, presentations, applications, system recovery tools, and even operating systems. Unfortunately, the fact that they're portable also makes them prone to being lost, which can put any sensitive information you have stored on them at risk. To protect your data and yourself, you can use BitLocker To Go, a Windows tool that encrypts your data to prevent unauthorized viewing. Without your password, smart card, or recovery key, your data is indecipherable to anyone who finds (or steals) your USB drive. Here's how to use BitLocker To Go in Windows 10 to encrypt any USB drive:
What is BitLocker To Go?
BitLocker To Go is a tool made by Microsoft, based on BitLocker, that allows you to encrypt removable drives. In other words, you can use it to encrypt and safeguard the data you store on USB memory sticks, external hard disks drives and solid-state drives, SD cards, and any other types of portable drives. BitLocker To Go can encrypt removable data drives that are formatted using NTFS, FAT32, FAT16, or exFAT file systems.
BitLocker To Go is available in Windows 10 Pro, Enterprise, and Education editions, but it is not present in Windows 10 Home. If you don't know what edition of Windows 10 you are using, here's how to check the Windows 10 version, OS build, edition, or type.
How to use BitLocker To Go in Windows 10 to encrypt a USB drive
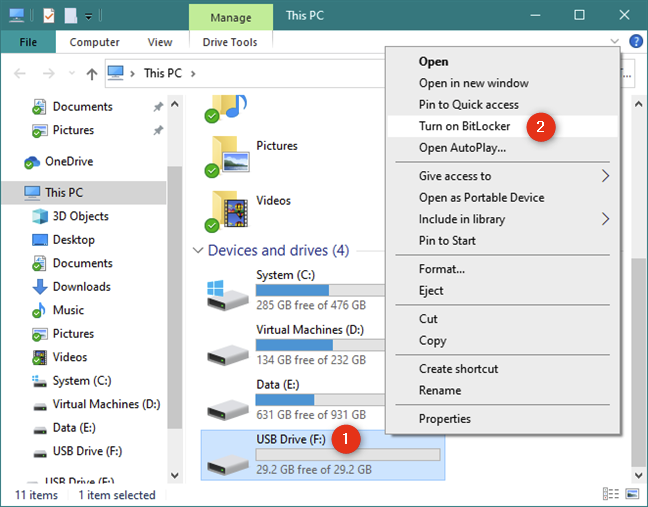
To encrypt a USB drive in Windows 10, you have to start the BitLocker Drive Encryption wizard, which you can open either from File Explorer or from the Control Panel. If you choose to use File Explorer, go to This PC, right-click or press-and-hold on the USB drive that you want to encrypt, and select "Turn on BitLocker."
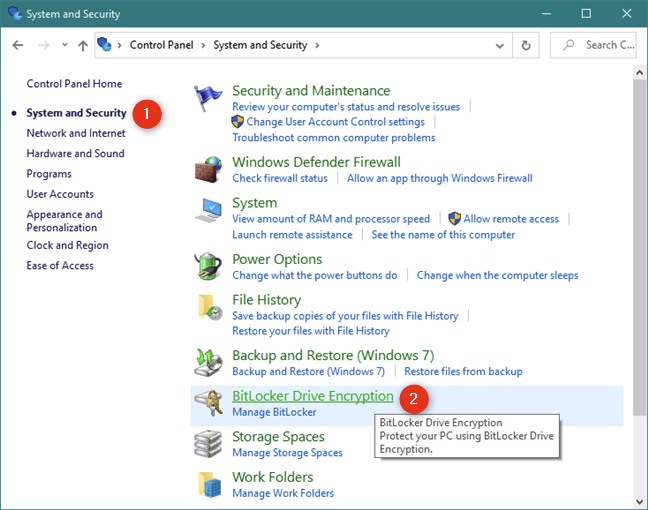
If you prefer using the Control Panel, open it, navigate to System and Security, and then click or tap on BitLocker Drive Encryption.
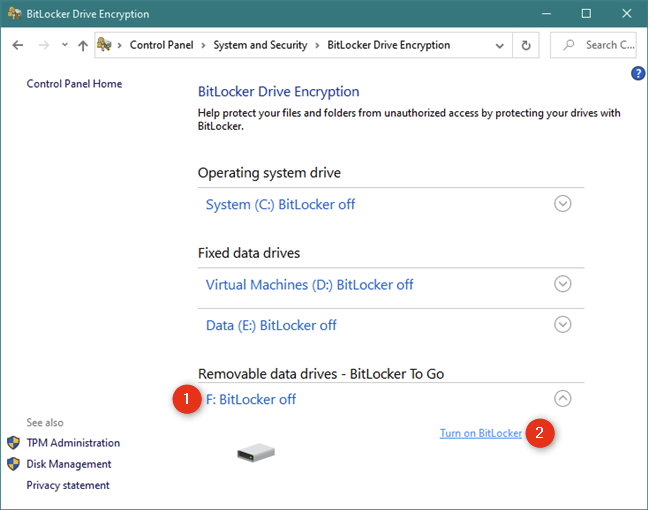
In the BitLocker Drive Encryption window, click or tap "Turn on BitLocker" next to the removable USB drive that you want to encrypt.
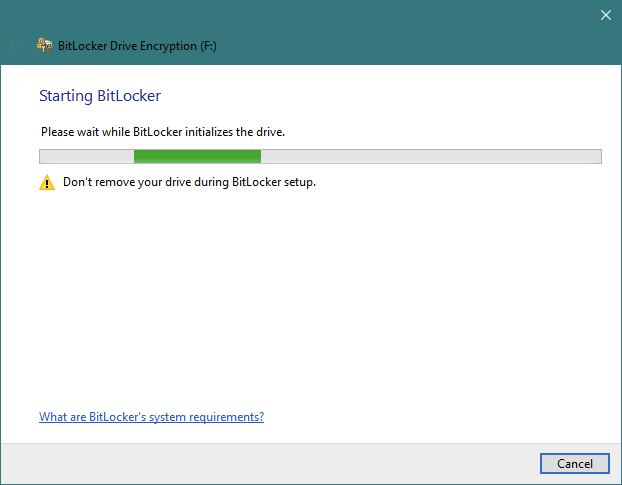
Regardless of how you chose to start the BitLocker Drive Encryption wizard - via File Explorer or from the Control Panel - now it's open. The first thing it does is ask you to "Please wait while BitLocker initializes the drive."
Depending on how fast your Windows 10 PC and your USB drive are, this can take a few moments. Take care not to unplug your removable drive during this step. Otherwise, the data on it can be corrupted.
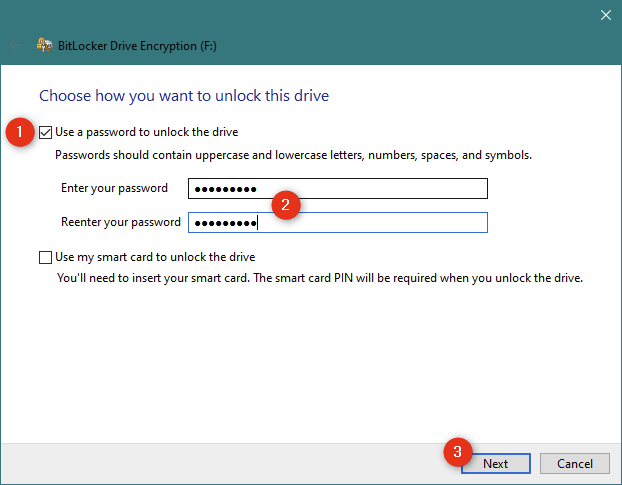
After BitLocker initializes the USB drive, you can "choose how you want to unlock [...]" it after it's encrypted. You can use either a password or a smart card. Since most people don't own a smart card (which are mostly used in companies), you should choose to "Use a password to unlock the drive." After you select this option, enter the password that you want to use and confirm it. Then, press Next.
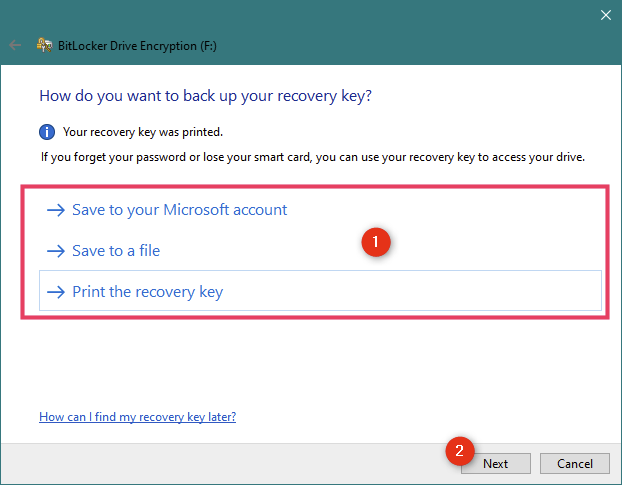
BitLocker requires you to select where to back up the recovery key for the encrypted USB drive. You can use this key to recover the data on the removable drive, should you forget the password or lose the smart card you selected on the previous step. Without it, your data is forever lost. You can opt to:
- store the file on your Windows 10 PC - BitLocker generates a text file and asks you to select where to save it
- print it and keep it for your records - print a page with a unique identifier for your encrypted device and the unique recovery key
- save the recovery key on your Microsoft account - uploads the backup BitLocker key in your Microsoft account, which you can find at this link
We recommend exercising all options to ensure you do not lose the recovery key. Then, click or tap Next.
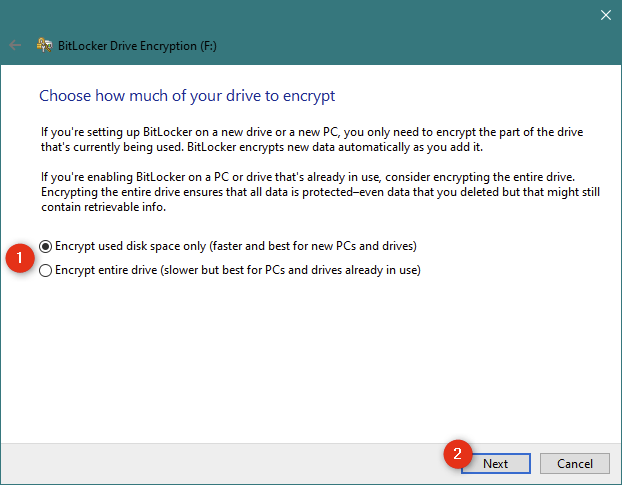
Choose whether you want to encrypt the entire USB drive or just the storage space used by the files on it. As you can see in the next screenshot, Microsoft recommends to:
- "encrypt used disk space only (faster)" - if you're using a new removable drive with no data on it
- "encrypt [the] entire drive (slower)" - if it already has data stored on it.
After you make your selection, press Next.
Next, Windows 10 asks you to choose the type of BitLocker encryption you prefer to use. You can choose between:
- New encryption mode, which is a more secure encryption mode called XTS-AES, but is incompatible with old versions of Windows 10 (before version 1511, which was released in November 2015)
- Compatible mode, which is the traditional BitLocker encryption mode that's compatible with other (older) Windows versions. Select this mode if you want to be able to use the encrypted USB drive on computers and devices running Windows 7 or Windows 8.1.
After you've made your choice, click or tap Next.

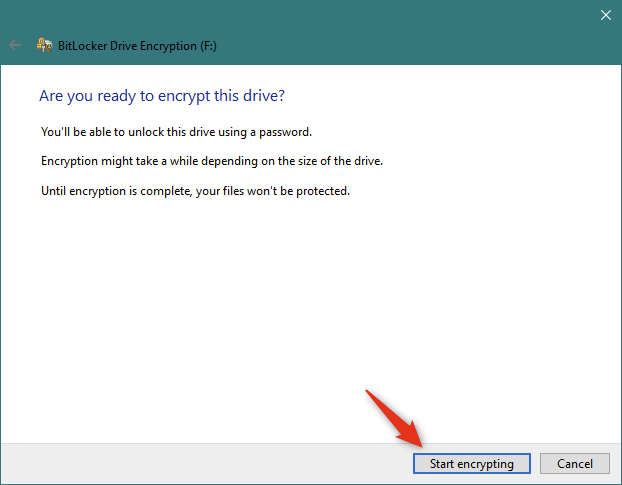
At this point, all you have left to do is encrypt the drive with BitLocker To Go. Click or tap on Start encrypting.
Encrypting a USB drive with BitLocker To Go, especially if it's a large one, can take some time.
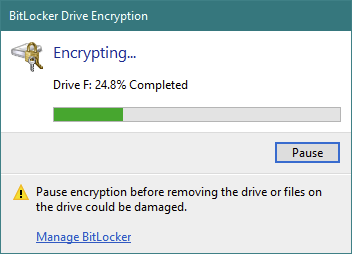
NOTE: If you need to remove your drive during the encryption process, press Pause in the BitLocker Drive Encryption window before proceeding to avoid corrupting the data on it. When you're ready to resume the encryption process, insert your removable drive back into one of your Windows 10 PC USB ports. Type the drive's password, and BitLocker To Go continues to encrypt the USB drive from where you left off.
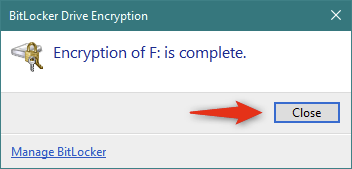
When your drive is fully encrypted, you are notified with a quick pop up, which you have to Close to complete the process.
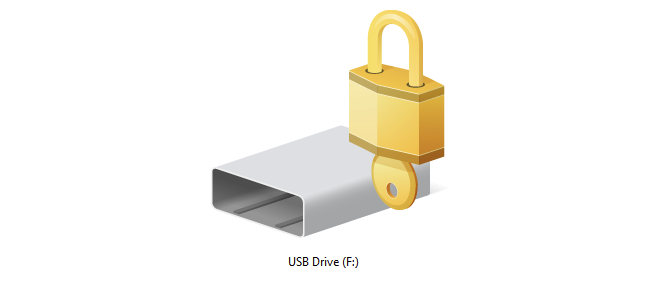
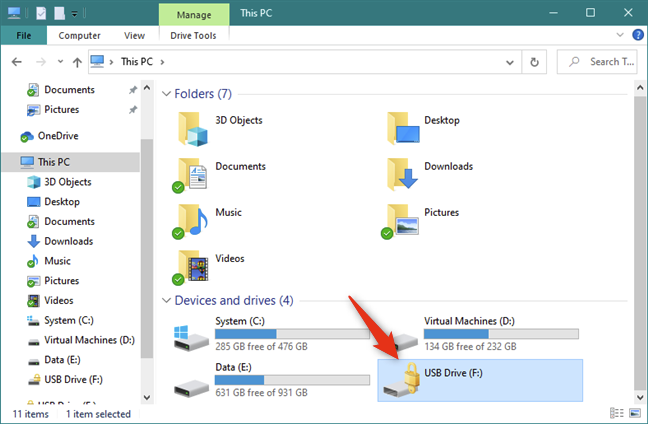
Your USB drive is now encrypted with BitLocker To Go, and thus protected from unauthorized access. From now on, the icon of the USB drive is different in File Explorer. It has a small lock on it to highlight the fact that it's encrypted.
If you later want to adjust the settings of BitLocker To Go on your encrypted USB drive, read this tutorial: Managing your BitLocker To Go encrypted flash drive. In it, we show you things like how to change the BitLocker password on the drive, and how to enable or disable the BitLocker auto-unlock feature in Windows 10.
Are you using BitLocker To Go to encrypt USB drives?
If you are working with sensitive or private data, you should consider using BitLocker To Go. It offers one of the best and easiest ways to encrypt USB memory sticks, flash drives, and any other USB drives in Windows 10. Before you close this article, let us know whether you use BitLocker To Go in Windows 10 and what your experience is with encrypting removable drives.