Windows 10's Task Manager can be a gold mine of information when it comes to apps and how they use your computer's resources. While most of the tabs display real-time data, the App history tab collects and reports usage statistics for the apps and programs running on your computer or device over the last month. This feature is useful, especially for users of mobile devices, like laptops, tablets, or 2-in-1 gadgets, because it helps identify apps that hog the more limited resources of such devices. Here is everything you need to know about the App history tab in Windows 10's Task Manager:
How to access the App history tab in Windows 10's Task Manager
To access the App history tab, you first need to launch the Task Manager. We found it easiest to use the keyboard shortcut "Ctrl + Shift + Esc." If you did not access this tool on Windows 10 before, it opens in the so-called compact view, providing a list of apps currently running on your device. Clicking or tapping More details opens the full version of the Task Manager.
Click or tap More details to open the full version of the Task Manager
By default, the full version of the Task Manager opens in the Processes tab. The next step is to go to the App history tab.
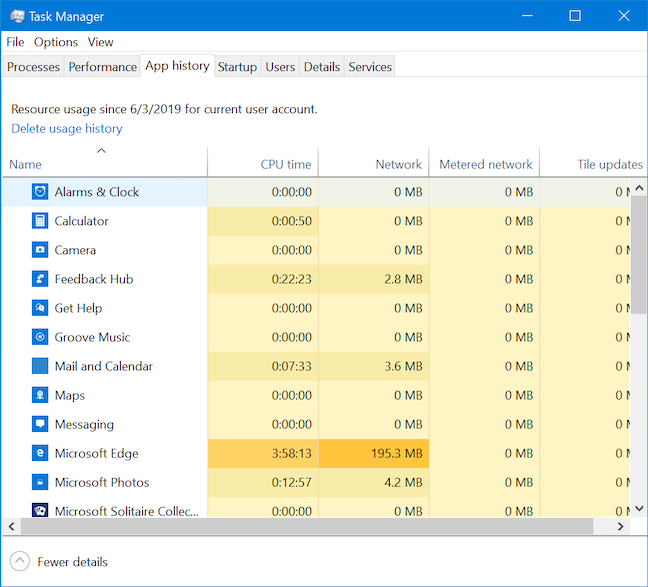
The App history tab in the full version of the Task Manager
How to customize the app data displayed in Task Manager's App history tab
The App history tab is organized in columns. You can click or tap on a column's header and drag it left or right to make it easier to view the information you are interested in. When you first open it, the App history tab displays five columns:
Name - displays the name of the app.
CPU Time - shows the total amount of processor time that an app has taken up.
Network - displays the total network usage of an app in MB.
Metered Network - displays the total network usage on a network marked as metered.
Tile Updates - shows the amount of network usage for updating the chosen app's live tile.
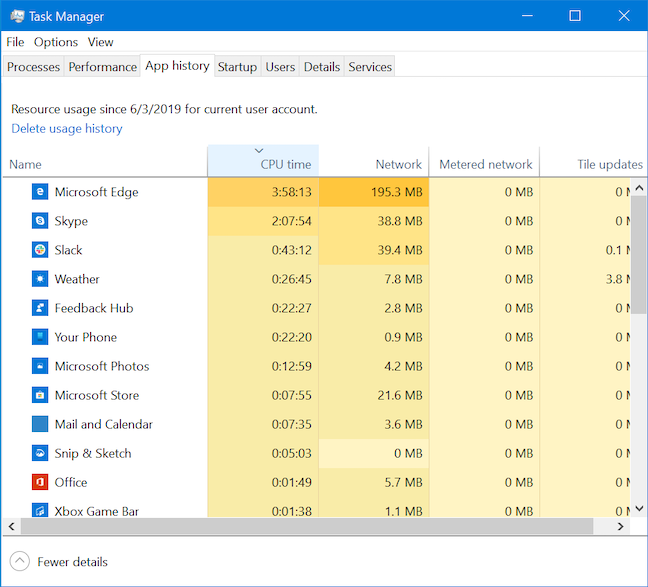
By default, the apps in the list are sorted alphabetically. Clicking on any of the column headers sorts the data displayed based on the values displayed in that column.
Apps arranged by the values displayed in the CPU column
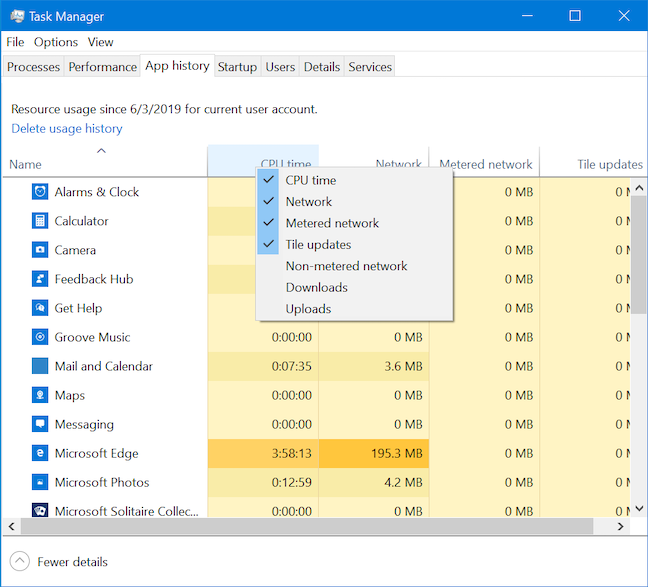
If you right-click or press-and-hold on any of the column headers, you access a contextual menu that allows you to add more columns of data to the App history tab. Just select the columns useful to you and deselect any of the ones you are not interested in.
Customize the App history tab by only selecting the relevant columns
Here is a run-down of what the additional columns display when selected:
Non-Metered Network - shows network usage on networks that are not marked as metered.
Downloads - displays the amount of data downloaded by an app in MB.
Uploads - displays the amount of data uploaded by an app in MB.
How to access apps from the App history tab in Windows 10's Task Manager
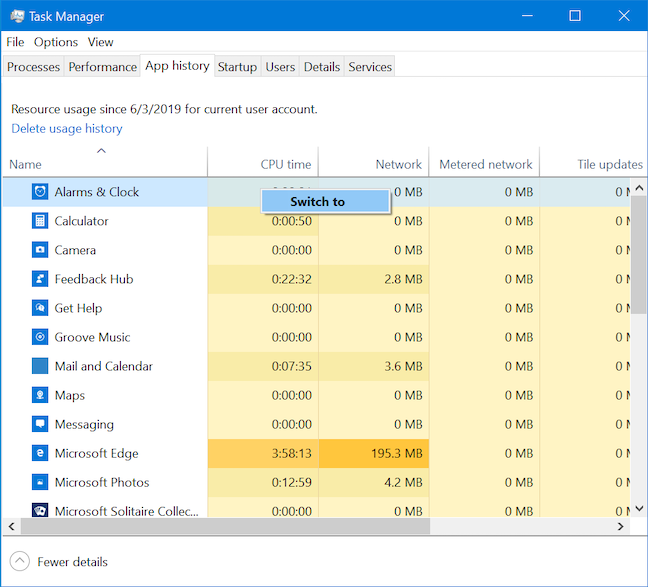
While the Startup tab of the Task Manager allows you to disable certain apps, and services can be fully managed from their corresponding tab, the App history tab lets you access any of the apps listed under it. Right-click or press-and-hold an app to open the contextual menu, and click or tap the only available option: Switch to.
Access any listed app by pressing Switch to
This causes the corresponding app to open or its app window to become active in the foreground.
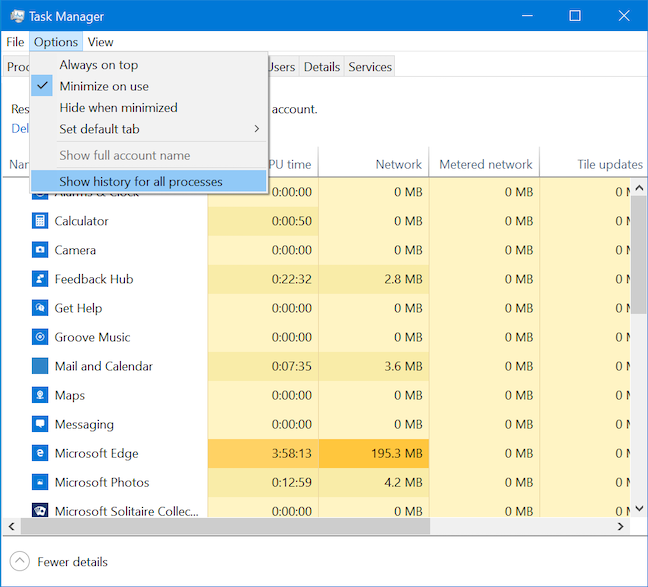
How to show historical data for all processes in Task Manager's App history tab
By default, the App history tab only displays usage for modern apps that are distributed through the Microsoft Store. However, you can get more out of it and have it display the same info for all the processes on your Windows 10 device. Click or tap Options and then "Show history for all processes."
Show history for all processes to get the most out of the App history tab
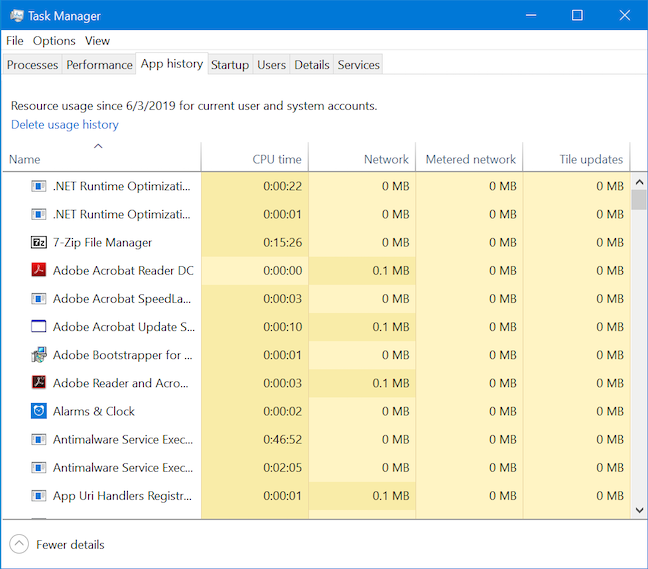
Once that option is selected, the Task Manager'sApp history tab list all the apps, programs, and background processes that run on your Windows 10 computer or device. This gives you a complete overview of the resources used by processes running on your device over the last month.
The App history tab displaying all the apps, programs, and background processes
How to use the App history tab to learn more about processes
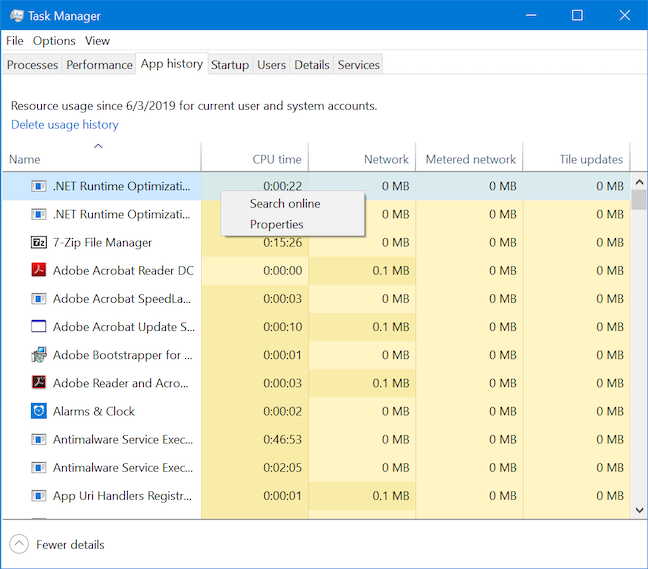
When monitoring your App history tab, you might notice processes that seem to be gobbling up megabytes as if they were hot wings during the big game. This can become a problem, especially if the resources used by a particular process are scarce, so, if you are like us, you might want to put a stop to any unnecessary usage of resources. The trouble is, not all processes are named in a friendly and recognizable way. If you find yourself with a mystery process, right-click or press-and-hold on it to reveal a contextual menu that offers a couple of helpful options.
The contextual menu for processes displayed in the App history tab
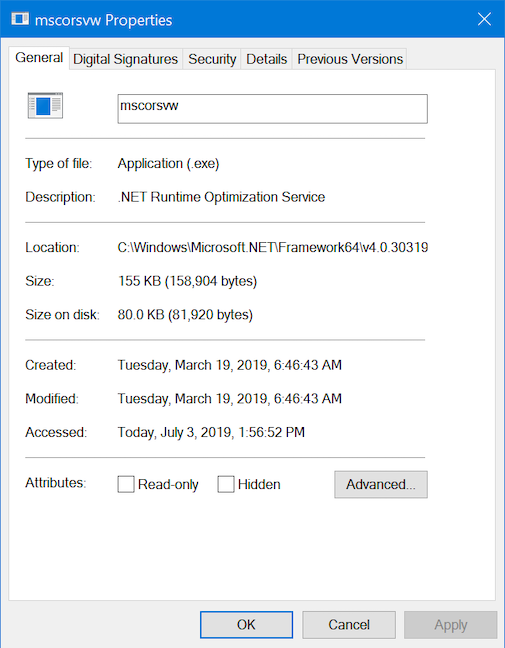
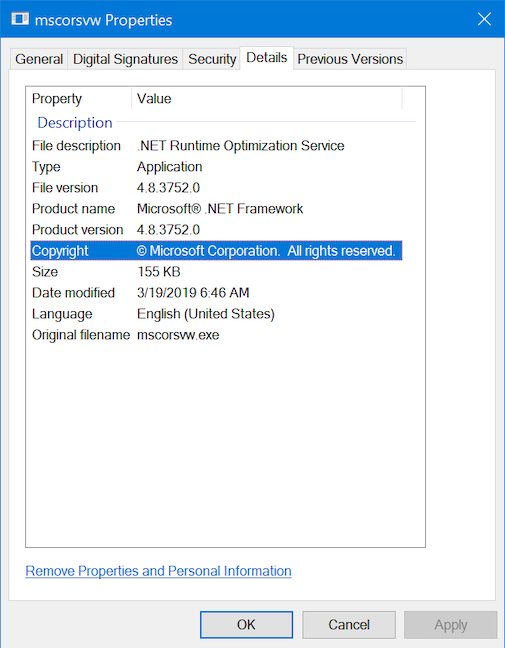
Click or tab on Properties to open the Properties window for any of the processes listed.
The Properties window for a Windows 10 process
Go to the Details tab for a list of information about the app. You might be able to find out who created it. If you see Microsoft, Intel, or another trusted name like your antivirus' name, it is probably an essential or otherwise important process.
The Details tab of the Properties window for a Microsoft process
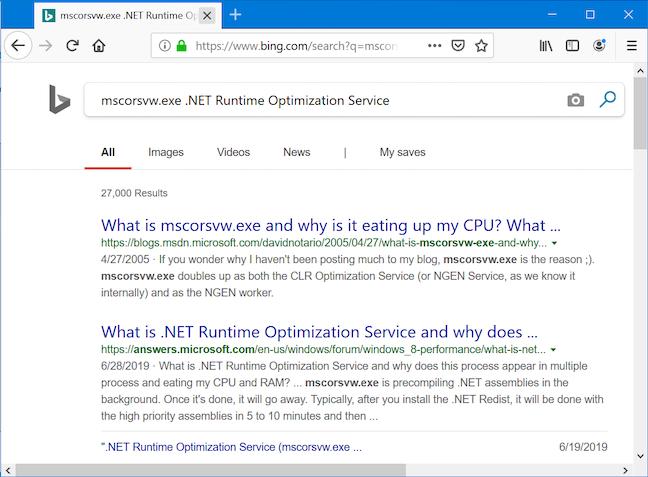
If this is not enough to go on, try selecting Search online from the contextual menu. Your default web browser opens a new tab and searches for the name of the process on Bing (regardless of your default search engine). Browsing through the top results should offer all the info you need to identify the process and figure out why it is using so much of your data allotment.
Your browser runs a Bing search with the service's name
Useful ways to work with the App history tab in Windows 10's Task Manager
As you get used to monitoring Windows 10 apps in Task Manager'sApp history tab, you start to notice what apps use what resources the most. But to give you a head start, here is what sort of apps to look out for:
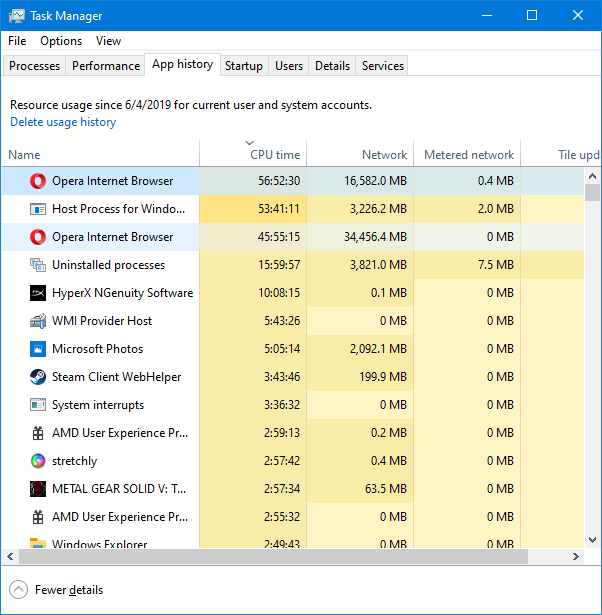
CPU time users - you want to keep a handle on CPU users as they waste a lot of your mobile device's battery life. Obviously, any app you use for a long time accrues CPU time (the amount of time using the processor). Even Opera, which is relatively lightweight, can add up if you spend a lot of time online. The apps you want to look out for are larger and more intense apps, including games and multimedia applications.
Apps and processes sorted by CPU time
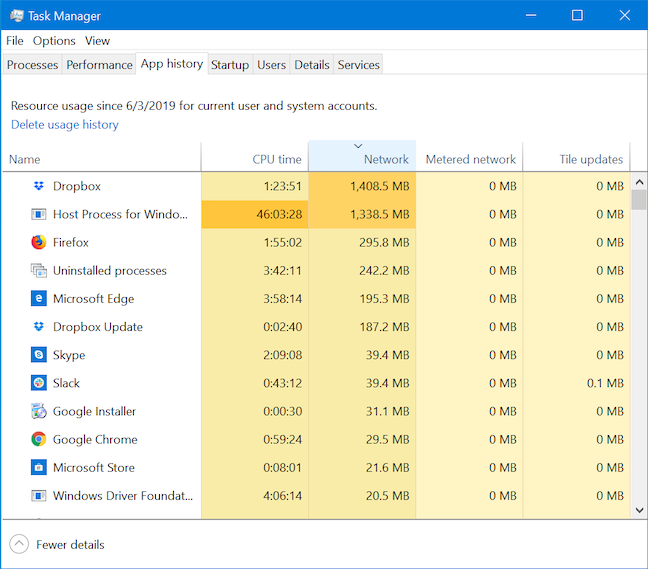
Network users - wasting battery life can be an annoyance, but overusing your network can cost you money. You want to make sure you pay attention to any app that operates over the Internet. That includes web browsers like Opera, Google Chrome, Microsoft Edge, or Mozilla Firefox.
Apps and processes sorted by Network usage
Worse by far than browsers, however, are apps that stream HD video. You may not realize it, but as you stream the latest Game of Thrones episode, that entire video file is being downloaded to your device while you view. You can rack up gigs of data usage in just a few hours without even working at it. Just like Jon Snow, you know nothing until you check the usage reports in the App history tab.
How to clear your App history data in the Task Manager
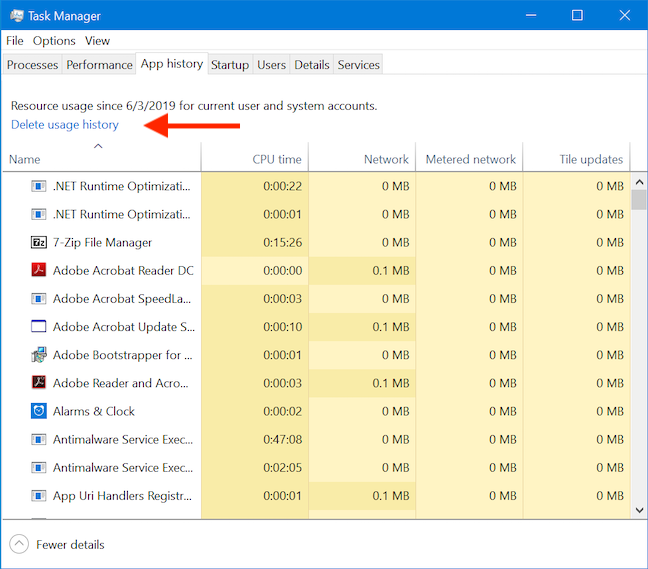
When viewing your app history data, it can be difficult to discern how quickly your apps are racking up network usage. You may see that Netflix has used gigs of data, but if that data is over the last month, that may not be so bad. However, if only a few minutes have passed since data logging began, you might be in trouble. If you want to clear your data and start counting again from zero, go ahead and click or tap on "Delete usage history."
Delete usage history to clear usage statistics and reports
The recorded history gathered so far is deleted, all columns are zeroed out, and the date listed on top of the Delete usage history option (which is usually a month before the date you are in) is replaced by the date of the deletion. With careful monitoring, you can now see how some of your apps quickly chew up data.
Deleting your usage history clears out the data in the App history tab
Do you plan to monitor your usage history on your mobile devices?
While the App history tab may not have the universal appeal of other Task Manager tabs, to a Windows 10 mobile user with a weak battery or a cheap data plan, this is likely to be the most important tab. By giving you quick access to the apps that are wasting the most resources, it can help you prevent waste, prolong your autonomy, and avoid damaging fees. Before you close this tab, please let us know if we convinced you to monitor your resources using the App history tab. What devices do you plan to use it on? Did you find out anything interesting? Let us know let's discuss in the comments below.


Discussion (3)
Can you view usages from past months or are you only able to recover last month?
Thanks. Well explained for new users. While old one also helped and can learn some forgotten things.
All this info still doesn’t tell me exactly what to leave alone & what to disable !
Hard to know what’s what !