

Regardless of how new or old your Windows 10 computer is, at times, you might find that it starts lagging and stops being responsive. That usually means that something is hogging its resources. It might be an app that takes up all your processor, one that consumes all your graphics resources, makes your hard drive spin at maximum speed, or sends massive amounts of data online. Whether it is one or the other, read this tutorial, and see how to identify the Windows 10 apps that hog system resources:
What you need to know before going further
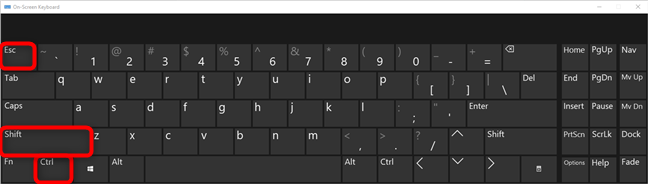
To be able to tell which Windows 10 app avidly consumes your resources, you have to know how to work with Task Manager. You can quickly open it by pressing the Control + Shift + Escape keys on your keyboard. However, that's just one means of opening it: we documented 10 ways to start Task Manager in Windows 10.
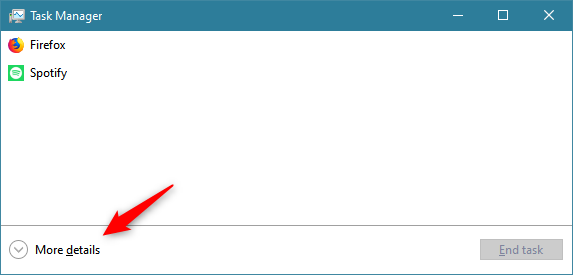
You need the Task Manager to show its detailed view so, if the Task Manager opens up in its compact mode, click or tap More details at the bottom-left corner of the window.
Unless you changed the default view that loads in Task Manager, it should open the Processes tab. If it opens another tab, select Processes before going further.
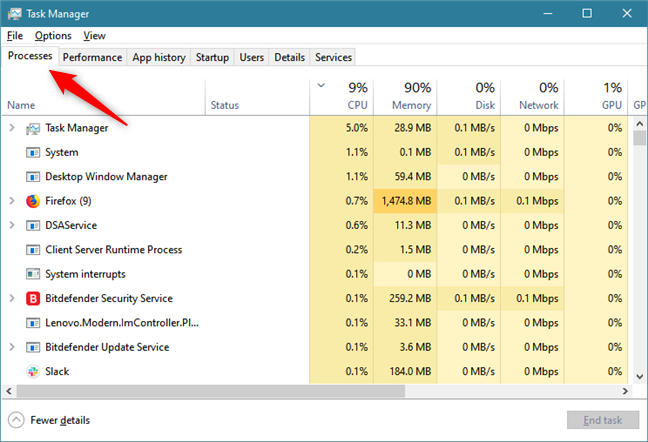
The Processes tab lists all the processes running on your Windows 10 PC. Each of them has a descriptive name rather than an obscure filename, which helps you see what is what with little fuss. It is important to note that you can click or tap on each column header to reorder the list of processes by name, resource usage, or any other available criteria. By using this simple feature of sorting the Processes, we can find out which Windows 10 apps are hogging your computer's resources. Let's see how:
How to identify the Windows 10 apps that use all your processor (CPU usage)
Look at the top of the Task Manager window: if you see that the CPU (Processor) is running high, that's likely the cause of your bottleneck. In the screenshot below, our processor was the cause of slowness.
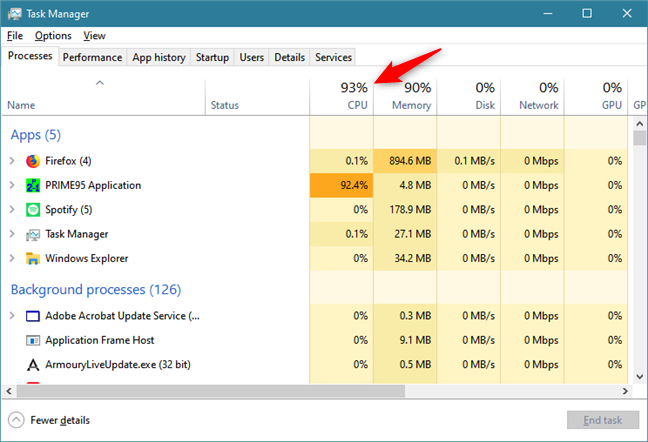
Click or tap on the CPU header to sort the processes list by processor usage, in descending order. This brings whatever applications are hogging your processor to the top of the list. If the list is sorted in ascending order, click/tap again on the CPU header.
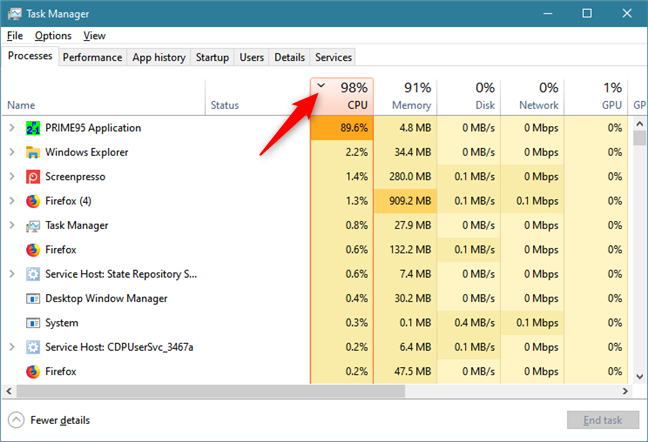
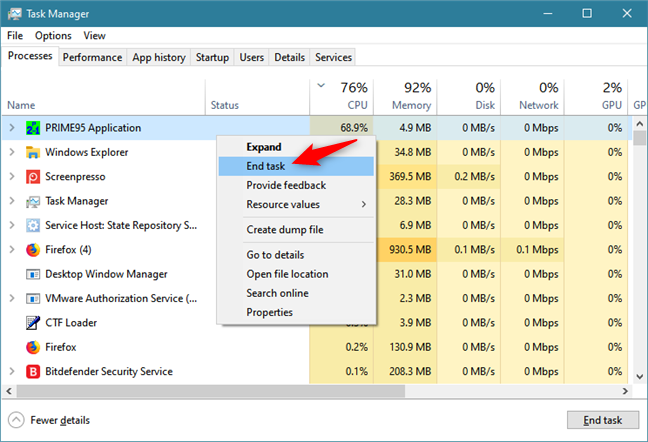
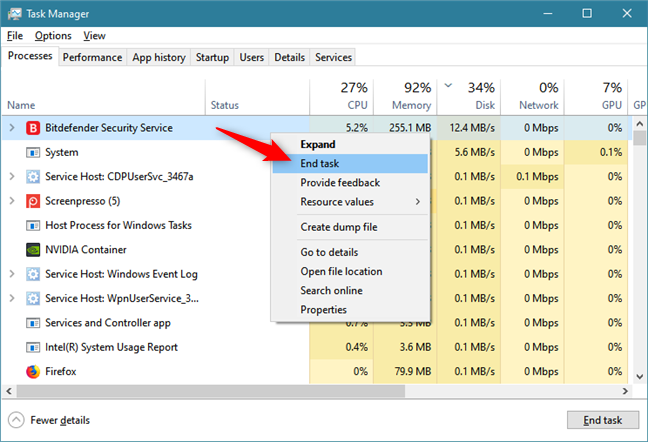
If you see a Windows 10 app that's shown at the top of the list, in red or a darker shade of orange, and with a large percent next to it, than that is the culprit using all your processor.
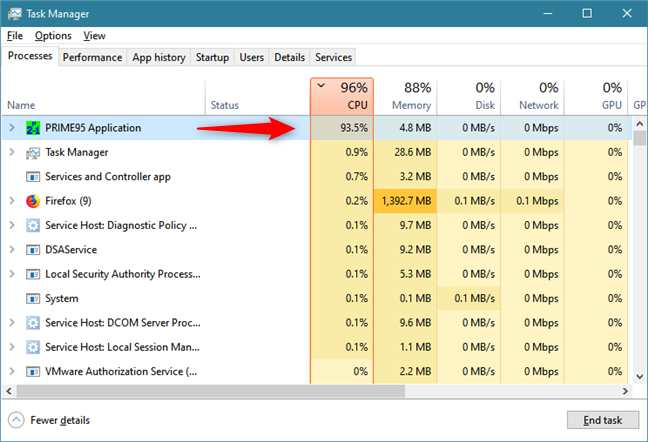
If the problematic app is taking all your processor, with 90% or more of processor usage, you'd probably be better off killing the app and then checking up on it later. To do so, select the offending app's process and click or tap End task from the bottom-right corner of the Task Manager window.
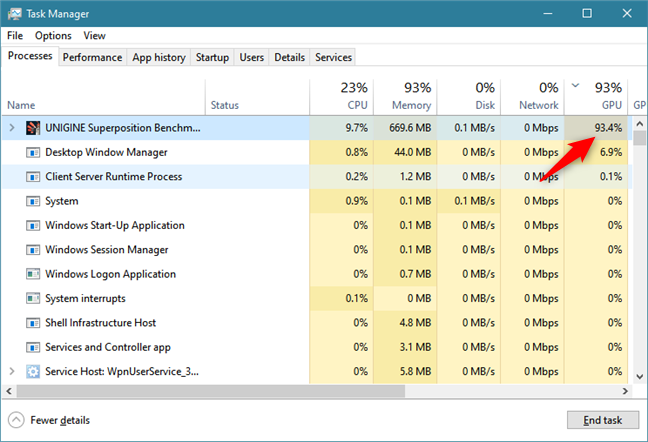
How to identify the Windows 10 apps that use all the graphics resources (GPU usage)
Similarly, look at the top of the Task Manager and, if you see that the GPU (Graphics Processing Unit) is high, your Windows 10 computer is lagging because an app is using all the graphics resources.
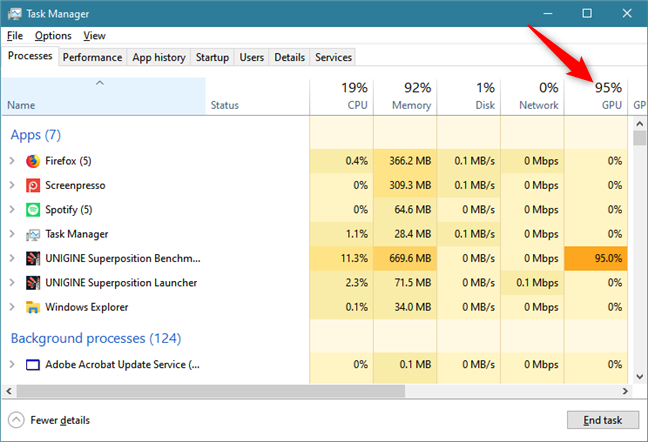
If you click or tap the GPU header, Task Manager sorts the processes list by graphics resources usage, in descending order. If the list is sorted in ascending order, click/tap again on the GPU header.
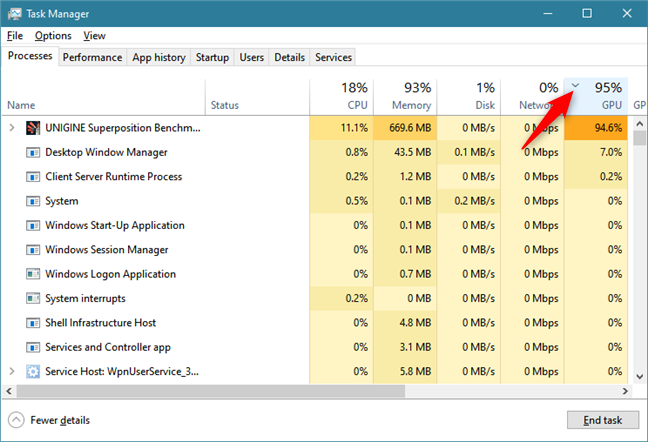
Whatever apps are hogging your GPUs are brought to the top of the list. If you see one that's shown in a darker shade of orange and with a large percent number then that's probably the app guilty of slowing your PC down.
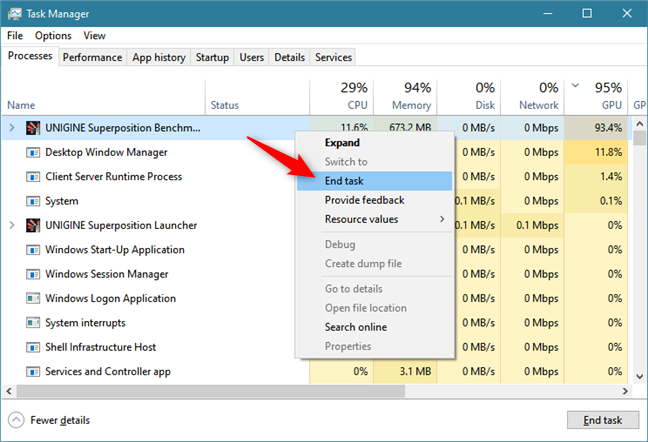
If the problematic app is taking all your graphic processor, with 90% or more of GPU usage, you would probably be better off killing the app and then checking up on it later. To do so, select the offending app's process and click or tap End task from the bottom-right corner of the Task Manager window.
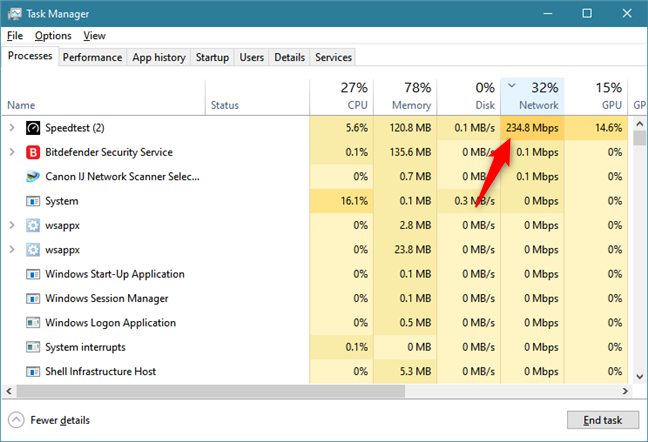
How to identify the Windows 10 apps that use the network intensively
Sometimes, everything might seem to be working just about right on your Windows 10 PC, but the internet speed is so slow that it takes forever to load a website. In such times, you should check if there's a Windows 10 app that makes intensive data transfers on the internet or on the network.
In Task Manager, press the Network data header, and the processes list should be sorted by the network data sent and received, in descending order. If the list is sorted in ascending order, click/tap again on the Network header.
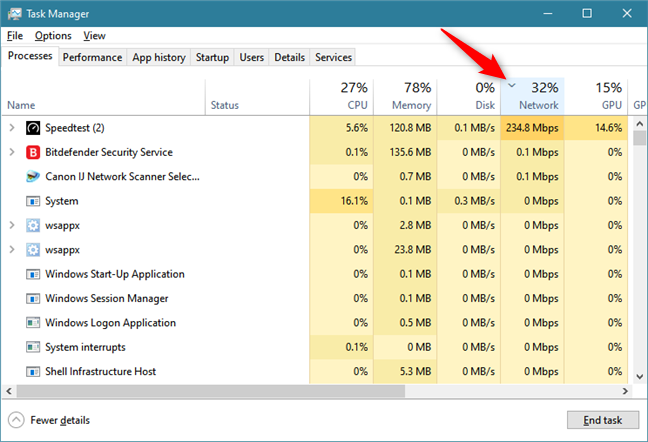
At the top of the list, you should now see the apps that are using your network connections intensively. If anyone of them is shown in dark orange and with an Mbps value that's close to your internet connection maximum speed, that app might be the one you are looking for. These are indicators that it sends and receives a lot of data online or on the network.
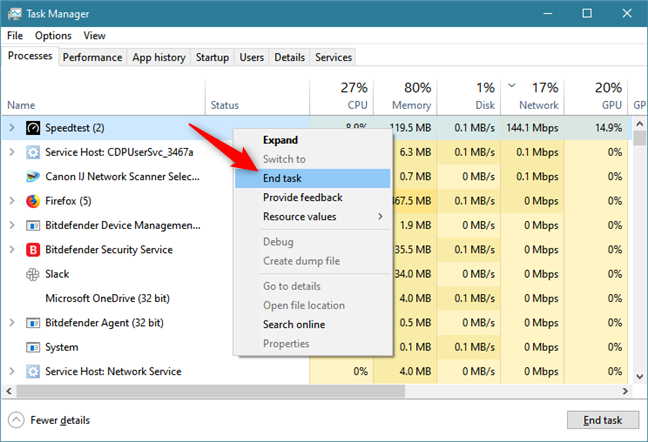
To close down the problematic app, right-click or tap and hold on its process, and then click or tap End task.
How to identify the Windows 10 apps that use the disk intensively
If you notice that the hard drives LED light on your Windows 10 PC or laptop looks like it's permanently lit, it means that your hard drive is used intensively. That usually leads to slowdowns that can become annoying. To identify the app that reads and writes data intensively on your Windows 10 PC, in the Processes tab from the Task Manager, click or tap the Disk data header.
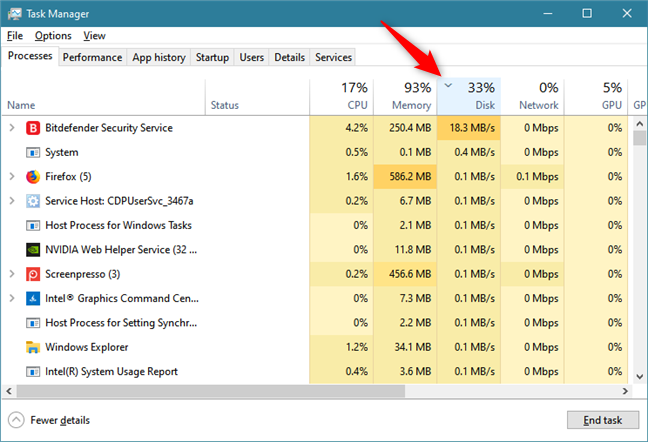
This action sorts the processes list by the data read and written on the disk, in descending order. If the list is sorted in ascending order, click/tap again on the Disk header. At the top of the list, you should now see the apps that are using your hard drive(s) intensively. If you see that one or more of them are shown in dark orange and with large percent numbers next to them, those apps are probably the ones that are slowing your system.
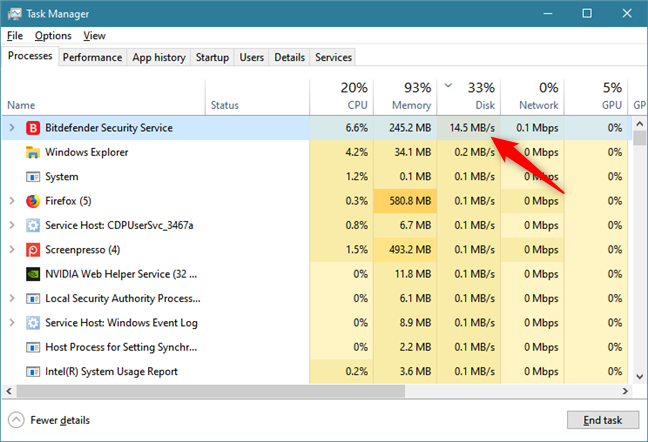
If you want to close the Windows 10 app(s) that uses your hard drive(s) too much, right-click or tap and hold on it, and then press on End task in the contextual menu.
We advise you to be cautious when killing system processes
Although closing down the Windows 10 apps and processes that are slowing down your system can be useful, be cautious when killing system processes. Ending an important system process could crash your system, causing you to lose unsaved information. Also, if you have got a file open that you have not saved, try and save it before you start killing apps and processes all willy-nilly.
Discussion (0)
Be the first to comment.