


Switching to a new operating system or moving your data can sometimes cause frustrating problems when trying to access your files and folders. This usually happens because your current user account doesn’t have ownership or the correct permissions for those files and folders. To overcome such issues, in this guide, I’ll help you understand how to see, change permissions, and take ownership of files and folders in Windows 10 and Windows 11.
NOTE: To perform the steps described in this guide, you need an account that is set as administrator. Otherwise, you can’t change permissions or take ownership of files or folders. Standard user accounts can’t perform the actions shared in this tutorial.
 Folder permissions for a user in Windows
If you’re using Windows 10 or Windows 11, here are the typical permission levels you come across:
Folder permissions for a user in Windows
If you’re using Windows 10 or Windows 11, here are the typical permission levels you come across:

 How to open the Properties of a folder or file
NOTE: The way the right-click menu looks is the only difference between Windows 10 and Windows 11 when it comes to permissions and ownership of files and folders. Thus, to keep things simple, I’ll use screenshots from Windows 10 for the remainder of this tutorial.
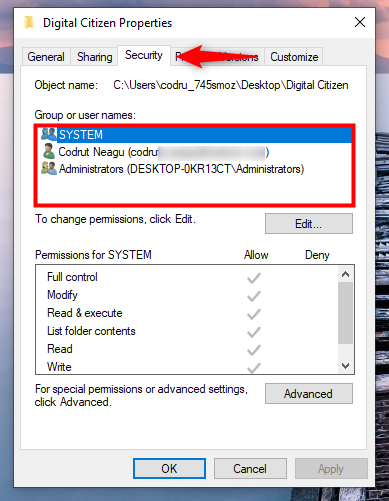
Selecting Properties option opens the Properties of the selected item. Click or tap the Security tab at the top to see a list of user accounts and groups that have permissions for the selected file or folder.
How to open the Properties of a folder or file
NOTE: The way the right-click menu looks is the only difference between Windows 10 and Windows 11 when it comes to permissions and ownership of files and folders. Thus, to keep things simple, I’ll use screenshots from Windows 10 for the remainder of this tutorial.
Selecting Properties option opens the Properties of the selected item. Click or tap the Security tab at the top to see a list of user accounts and groups that have permissions for the selected file or folder.
 Navigate to the Security tab
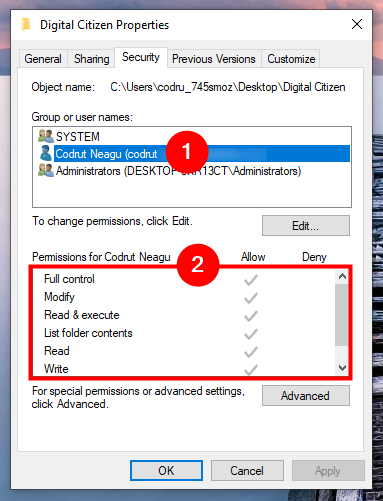
Select a user account or group from the list at the top, and you can see the specific permissions assigned to them in the lower section of the window, under Permissions for [user/group]. For instance, in the next screenshot, you can see that I have Full control permissions to do whatever I want with my Digital Citizen folder. 🙂
Navigate to the Security tab
Select a user account or group from the list at the top, and you can see the specific permissions assigned to them in the lower section of the window, under Permissions for [user/group]. For instance, in the next screenshot, you can see that I have Full control permissions to do whatever I want with my Digital Citizen folder. 🙂
 Select a user to see their permissions
What about actually managing which users have access and what level of control they have over the selected file or folder? Here’s…
Select a user to see their permissions
What about actually managing which users have access and what level of control they have over the selected file or folder? Here’s…
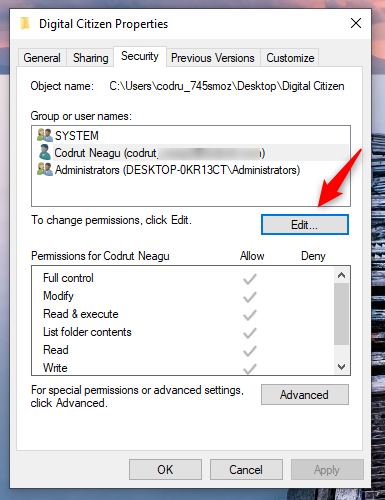
 Click or tap Edit
This opens a new window called Permissions for [user/group], where you can change permissions for existing users, as well as add new users and groups to the list of people who can work with the item.
If the user or group you want to assign permissions to is already listed under Group or user names, scroll down to the last step in this section of my tutorial (illustrated by the last two screenshots). Otherwise, if the user or group you want to configure permissions for isn’t listed, click or tap the Add button.
Click or tap Edit
This opens a new window called Permissions for [user/group], where you can change permissions for existing users, as well as add new users and groups to the list of people who can work with the item.
If the user or group you want to assign permissions to is already listed under Group or user names, scroll down to the last step in this section of my tutorial (illustrated by the last two screenshots). Otherwise, if the user or group you want to configure permissions for isn’t listed, click or tap the Add button.
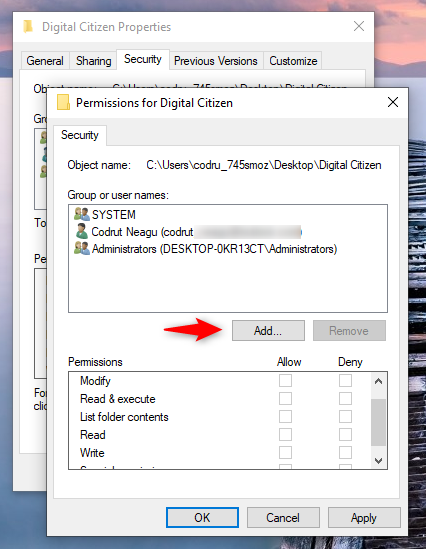
 Push the Add button
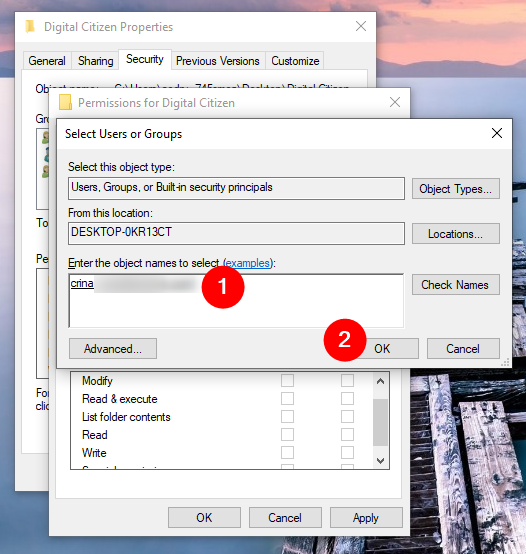
In the Select Users or Groups window, you can type the name of the user or group in the Enter the object names to select field. However, if you’re unsure of the exact name, just like me, click or tap the Advanced button.
Push the Add button
In the Select Users or Groups window, you can type the name of the user or group in the Enter the object names to select field. However, if you’re unsure of the exact name, just like me, click or tap the Advanced button.
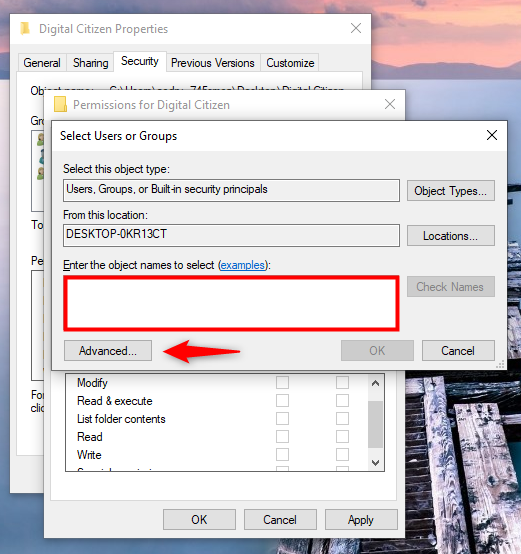
 Press the Advanced button
Then, press Find Now to display a list of all available users and groups.
Press the Advanced button
Then, press Find Now to display a list of all available users and groups.
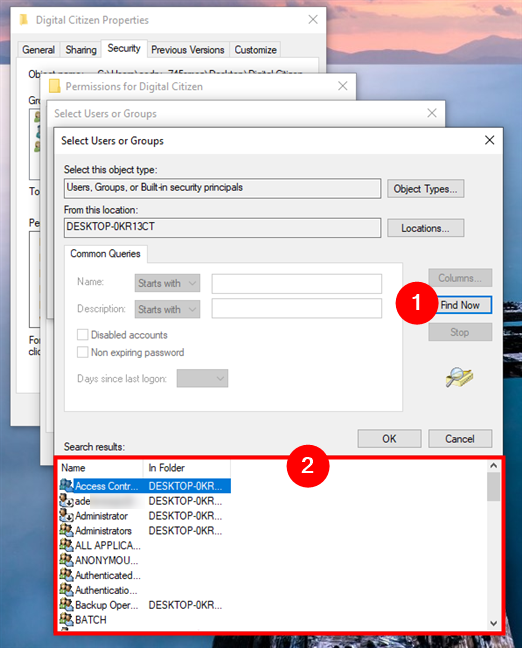
 Click Find Now and check the Search results
Select the user or group you want from the list, and click or tap OK to add them.
Click Find Now and check the Search results
Select the user or group you want from the list, and click or tap OK to add them.
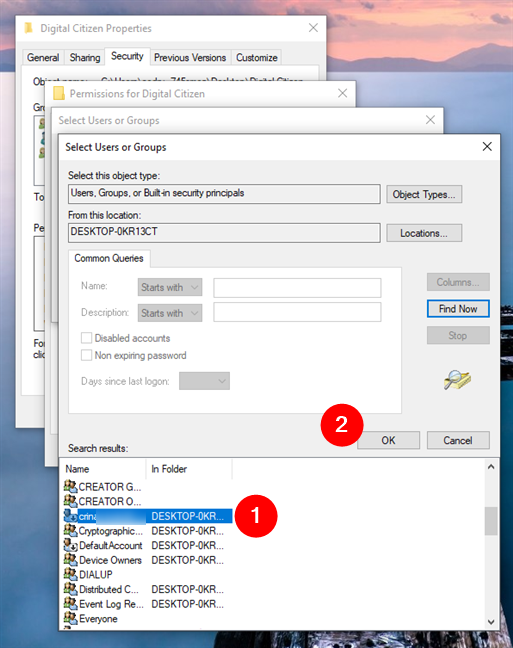
 Select the user or group and press OK
Immediately, the selected user or group is inserted in the Enter the object names to select field. Press OK to continue.
Select the user or group and press OK
Immediately, the selected user or group is inserted in the Enter the object names to select field. Press OK to continue.
 Click or tap OK
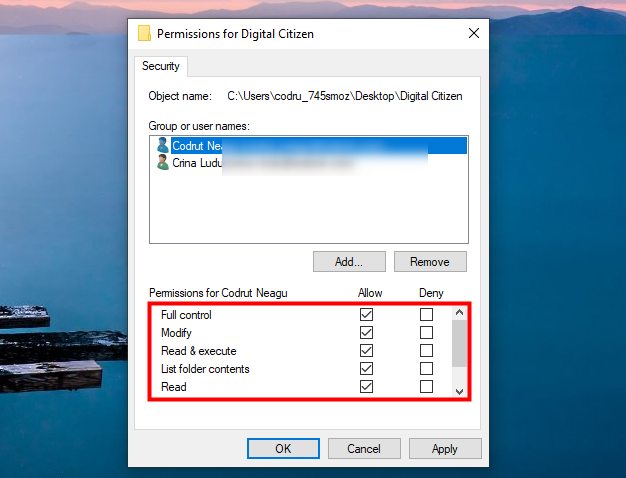
The time to actually assign permissions has come. In the Permissions window, select the user or group in the list at the top: either an existing one or the one you’ve just added. Then, in the lower section (the one labeled Permissions for…), check the boxes next to the permissions you want to give or take away. For example, to grant full control, check the Full Control box. Or to allow only reading and executing permissions, check the Read & execute box. Once you’ve made all the selections you wanted, click or tap OK to save the changes.
Click or tap OK
The time to actually assign permissions has come. In the Permissions window, select the user or group in the list at the top: either an existing one or the one you’ve just added. Then, in the lower section (the one labeled Permissions for…), check the boxes next to the permissions you want to give or take away. For example, to grant full control, check the Full Control box. Or to allow only reading and executing permissions, check the Read & execute box. Once you’ve made all the selections you wanted, click or tap OK to save the changes.
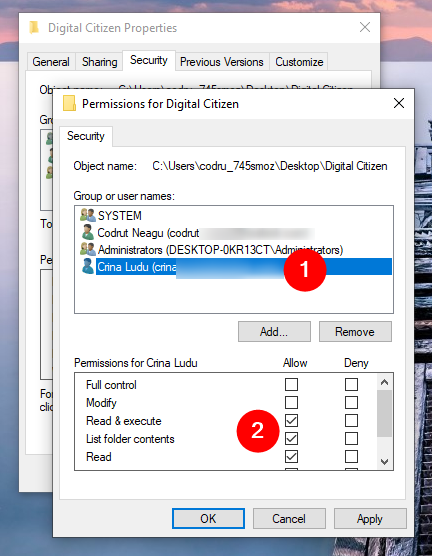
 Select the user/group and choose their permissions
Then, close the Properties window by pressing OK once more.
Select the user/group and choose their permissions
Then, close the Properties window by pressing OK once more.
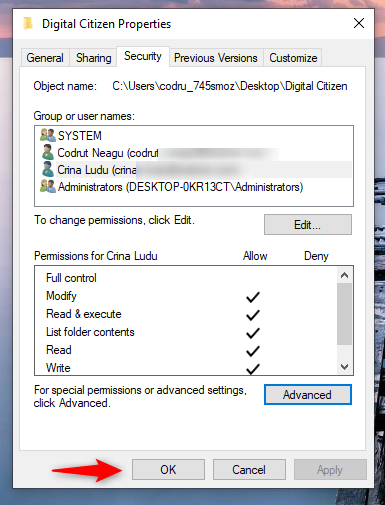
 Press OK to save the changes
In case you receive a security warning, confirm that you want to make the changes. You’ve now finished setting up who can access your file or folder, and what they can do with it. What about ownership of those items? Let’s see…
Press OK to save the changes
In case you receive a security warning, confirm that you want to make the changes. You’ve now finished setting up who can access your file or folder, and what they can do with it. What about ownership of those items? Let’s see…
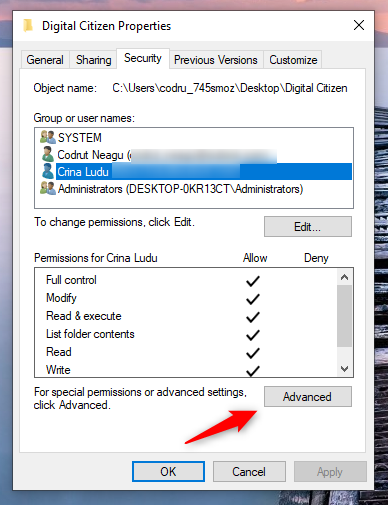
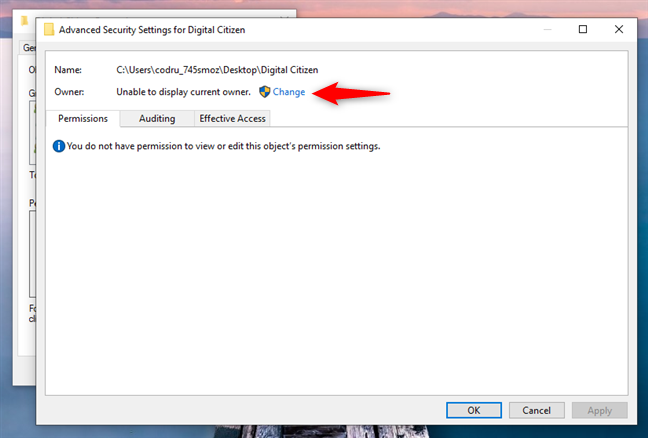
 Click or tap the Advanced button
This opens the Advanced Security Settings window. At the top, you should see the current owner of the file or folder, but if something’s not right, you might see only a message like Unable to display current owner. Either way, to continue and change the owner, click or tap the Change link next to the owner’s name.
Click or tap the Advanced button
This opens the Advanced Security Settings window. At the top, you should see the current owner of the file or folder, but if something’s not right, you might see only a message like Unable to display current owner. Either way, to continue and change the owner, click or tap the Change link next to the owner’s name.
 Press the Change link
The Select User or Group window opens. In the Enter the object name to select field, type the user you want to assign as the new owner. This can be your own user account or another account with administrative privileges. If you’re not sure of the exact name of the user, click or tap the Advanced button.
Press the Change link
The Select User or Group window opens. In the Enter the object name to select field, type the user you want to assign as the new owner. This can be your own user account or another account with administrative privileges. If you’re not sure of the exact name of the user, click or tap the Advanced button.
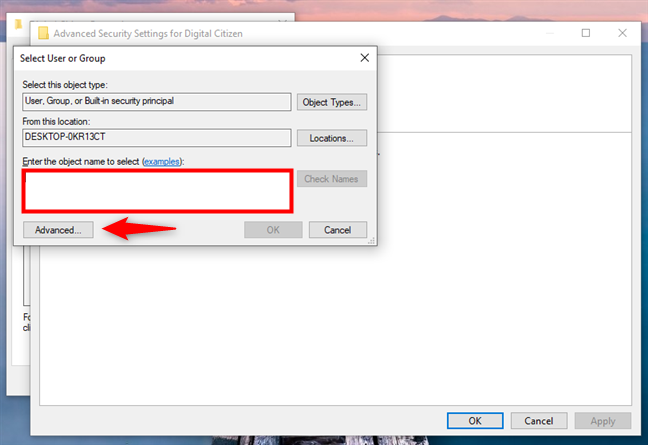
 Enter the user or group, or click the Advanced button
Then, press Find Now to browse through the list of available users and groups. Select the one you want to give ownership to, and click or tap OK.
Enter the user or group, or click the Advanced button
Then, press Find Now to browse through the list of available users and groups. Select the one you want to give ownership to, and click or tap OK.
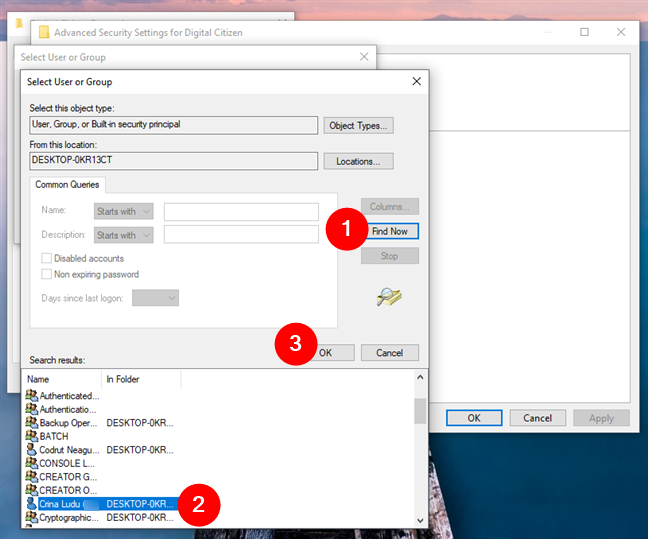
 Press Find now, choose the user/group, and click OK
The selected user or group is now added to the Enter the object name to select field from the Select User or Group window. Press OK to continue.
Press Find now, choose the user/group, and click OK
The selected user or group is now added to the Enter the object name to select field from the Select User or Group window. Press OK to continue.

 Press OK once more
Back in the Advanced Security Settings window, there is an option called Replace owner on subcontainers and objects: check this box if you want to take ownership of all the folders and files within the directory. Then, finalize the ownership change by clicking or tapping the OK button.
Press OK once more
Back in the Advanced Security Settings window, there is an option called Replace owner on subcontainers and objects: check this box if you want to take ownership of all the folders and files within the directory. Then, finalize the ownership change by clicking or tapping the OK button.
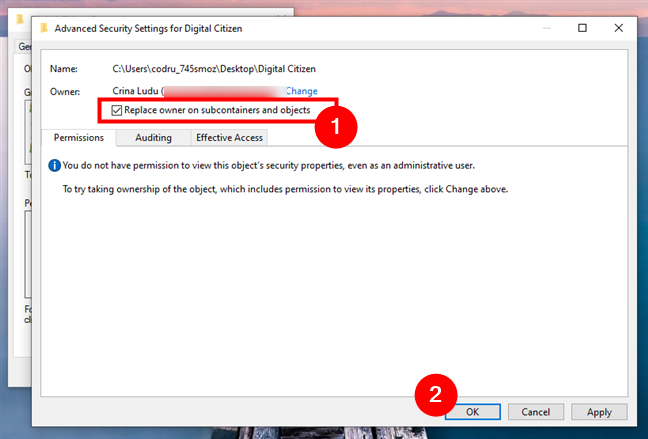
 Choose to Replace owner on subcontainers and objects and press OK
If a security warning or confirmation dialog appears, confirm that you want to take ownership. Then, you may want to check that you have full control over the file or folder. To do so and to take full control if you don’t have it already, follow the steps shown in the previous sections of this tutorial.
Choose to Replace owner on subcontainers and objects and press OK
If a security warning or confirmation dialog appears, confirm that you want to take ownership. Then, you may want to check that you have full control over the file or folder. To do so and to take full control if you don’t have it already, follow the steps shown in the previous sections of this tutorial.
 Open CMD as admin in Windows 10
And this is how it looks in Windows 11:
Open CMD as admin in Windows 10
And this is how it looks in Windows 11:
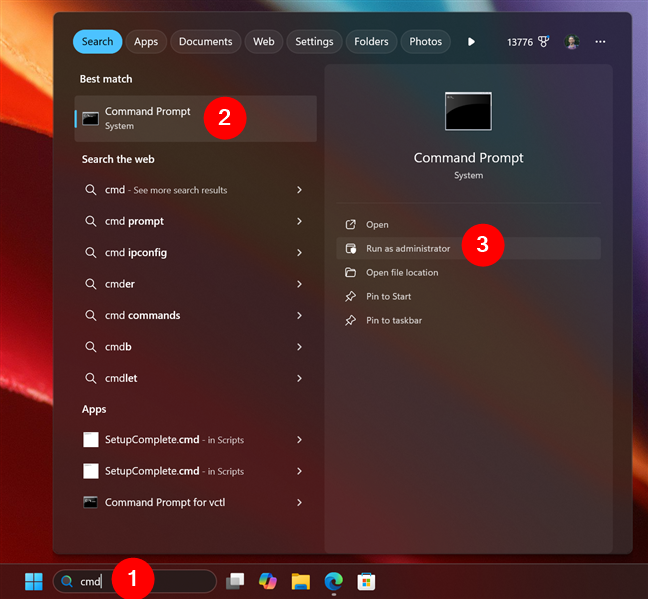
 Open CMD as admin in Windows 11
Next, you need to use the takeown command to take ownership of the folder you need, like this:
Open CMD as admin in Windows 11
Next, you need to use the takeown command to take ownership of the folder you need, like this:
 How to take ownership of a folder in CMD
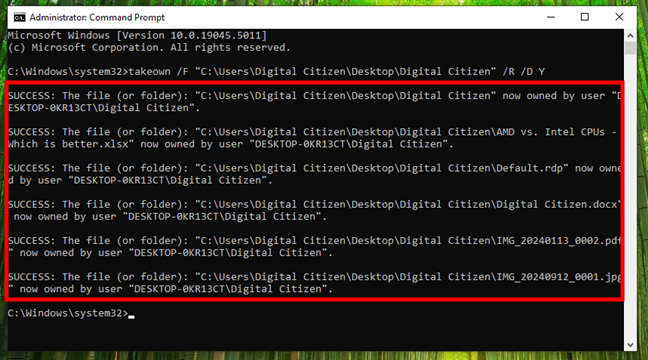
Running this command gives you ownership of the specified folder and everything inside it, without asking for further confirmation. However, you’ll see Command Prompt output information about the elements (files and folders) that you’ve taken ownership of successfully.
How to take ownership of a folder in CMD
Running this command gives you ownership of the specified folder and everything inside it, without asking for further confirmation. However, you’ll see Command Prompt output information about the elements (files and folders) that you’ve taken ownership of successfully.
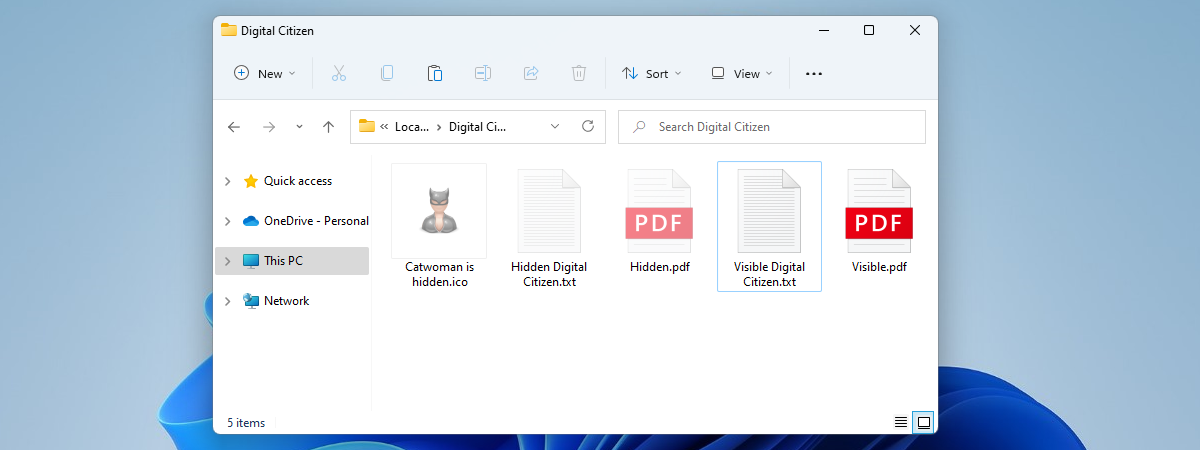
 The files and folders you've taken ownership with CMD
That’s it! You should now have full access to the folder and its contents.
The files and folders you've taken ownership with CMD
That’s it! You should now have full access to the folder and its contents.
Understanding permissions and ownership in Windows
In Windows, every file and folder has an owner and a set of permissions that determine who can do what. The owner has full control and can decide who else can access or modify that file or folder. Permissions define what actions someone can take, such as reading, writing, or deleting a file or folder. Understanding these concepts is important if you want to make sure you have proper access to your data or need to troubleshoot issues.- Full Control: Gives the user full rights, including reading, writing, modifying, and deleting. This level of permission is usually reserved for users who need complete management over the file or folder.
- Modify: Allows the user to read, write, and change, but not delete. This permission is a good choice for users who need to update or change a file, but shouldn’t be allowed to remove it.
- Read & Execute: Lets the user view and run files. This is useful when you want someone to be able to access and run an application, but not modify it.
- List Folder Contents: Shows the contents of a folder. This permission is usually given for folders, so users can browse the files without modifying them.
- Read: Grants view-only access, which is useful when you want someone to be able to see what’s inside a file or folder, but you don’t want them to make changes.
- Write: Allows changes and new content additions. In other words, this lets users add data or create new files in a folder without giving them complete control.
- Special Permissions: Provides more detailed control for specific situations. These are more advanced settings that allow for very precise control over what users can and cannot do.
How to view the current permissions of a file or folder in Windows
To see the current permissions of a certain file or folder, first, go to where that item is located and access its Properties. A fast method is to right-click or press and hold the file or folder you are interested in, and then select Properties in the context menu.How to change the permissions of a file or folder in Windows
If you need to modify the permissions for a file or folder, in the Security tab from that item’s Properties, click or tap the Edit button.How to take ownership of a file or folder in Windows
If you encounter a situation where you can’t change the permissions of a file or folder, it’s likely because you don’t have ownership of it. Taking ownership grants you the ability to modify permissions and access the item as needed. Here are the steps to take ownership: Just like when checking or changing permissions, start by right-clicking (or pressing and holding) the file or folder you want to take ownership of. In the context menu, select Properties, and navigate to the Security tab. Then, click or tap the Advanced button at the bottom.BONUS: How to take ownership of a folder in Command Prompt
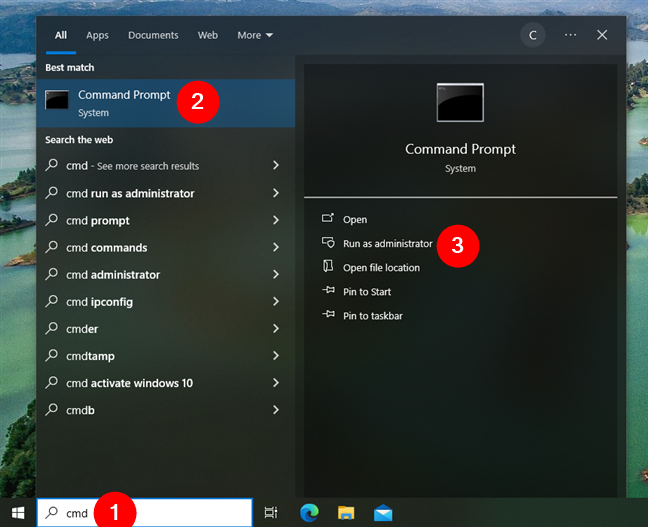
Before ending this guide, I’d also like to tell you how to take ownership of a file or folder from the command-line. Someone asked us about it, so maybe there are other readers who’d like to know this piece of information also. So here’s what you need to do: To get started, open the Command Prompt with admin rights. A quick way to do that would be to type cmd in the Search box on the taskbar, select Command Prompt, and click or tap Run as administrator on the right of the search panel. This is what it looks like in Windows 10:takeown /F “path\to\folder” /R /D Y
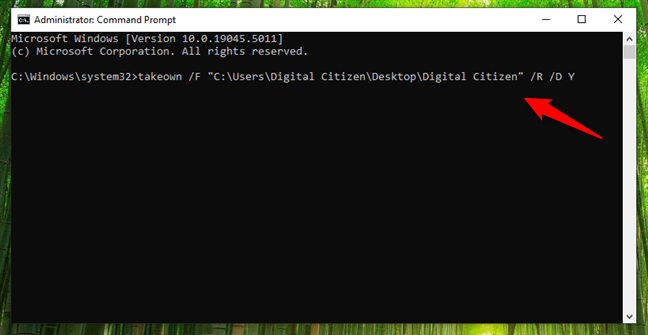
Make sure you replace “path\to\folder” with the real path to your folder. For example, if I want to take ownership of a folder called Digital Citizen found on my desktop, I’d have to enter the command like this:
takeown /F “C:\Users\Digital Citizen\Desktop\Digital Citizen” /R /D Y

Discussion (8)
“It’s not that hard,” and yet it doesn’t work. I still get the error message. I can’t change or edit anything (like specify album) on the .wav music file that I made on windows vista, and I can’t get permission on windows 7.
Hello and thanks for the article ,,,
I have just enabled the security option in a folder that contains to many folders with txt documents,pdfs,songs and videos,,,
while trying to disabling them it creating problems as i have to do it with every single file,,
can you help to figure it out ,,how to do this at once,,,?????
thanks
I had multiple wmpnscfg.exe problem so uninstalled as described by the turn on/off feature. Then did a search and found the same file plus a *.mui file dated 2009 so deleted them.. now I cannot reinstall media player 12 on my windows 7, and I cannot restore the 2 files that are sitting in recycle bin as I cannot change permission to put them back!! HELP!
I want to set security permissions on a portable hard drive such that data can be read/written only from my accounts that are connected to Windows live. So, if I have accounts on 2 PCs (running Windows 8.1 or 8.0) that are both connected to my Windows Live account, then I should be able to read/write data to the portable disk from those accounts only. No one else should be able to access any data on that portable drive. I added the Windows Live user id and I also modified the permissions for EveryOne to just Listing. But, it does not seem to work. For some reason, on the other PC it only gives me access to the disk as Everyone. So, I can list contents of the folder but cannot read the contents.
Guess you have to interchange picture 3 & 10.
Done. Thank you very much for highlighting the issue.
https://www.technixupdate.com/add-remove-take-ownership-in-right-click-context-windows-7-and-vista/
The tutorial is fine, but with so many programs available which add Take Ownership in the Context Menu, all one needs to do anymore is a right click, click. The link above provides a reliable program.
In a future tutorial we’ll simplify the things a bit. We will show you how to use such a program or, if you wish an easier way to add Take Ownership in the Context Menu you will be able to download a custom file that adds this option with only one click.