21.02.2020
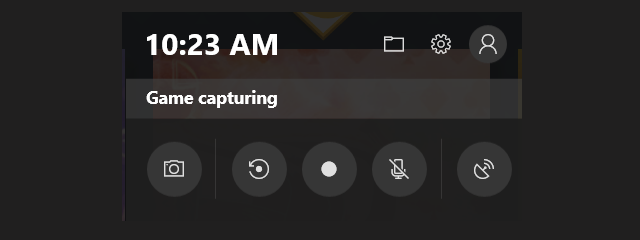
Gamers love to record their gameplay, and Microsoft has been working hard to make Windows 10 the most gaming-friendly operating system ever. One of its most useful gaming features is the Xbox Game bar, which, among others, lets you record game clips and take screenshots while you play your favorite games. If you want to learn how to record gameplay on Windows 10, as well as how to take screenshots of your games, read this guide:
NOTE: We created this guide using Windows 10 November 2019 Update. Microsoft first introduced the Xbox Game bar in Windows 10 Creators Update. If you are using a version of Windows 10 between Creators Update and November 2019 Update, the Xbox Game bar looks different. To open the Xbox Game bar during gameplay, simultaneously press the Win + G keys on your keyboard.
How to record your gameplay on Windows 10 with the Xbox Game bar (Win + Alt + R)
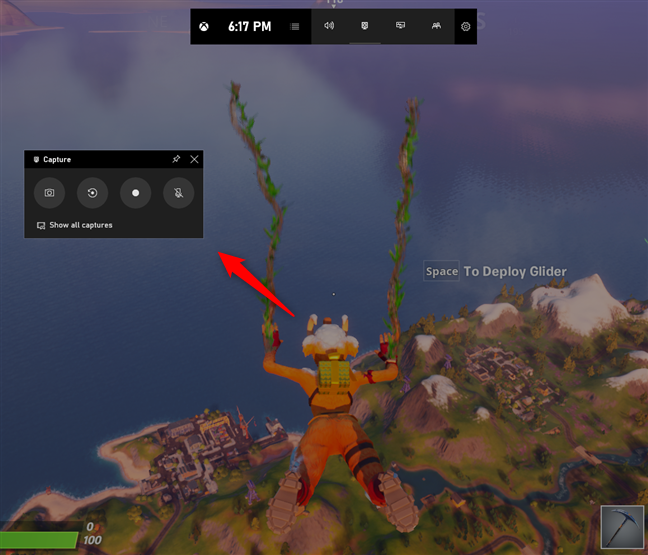
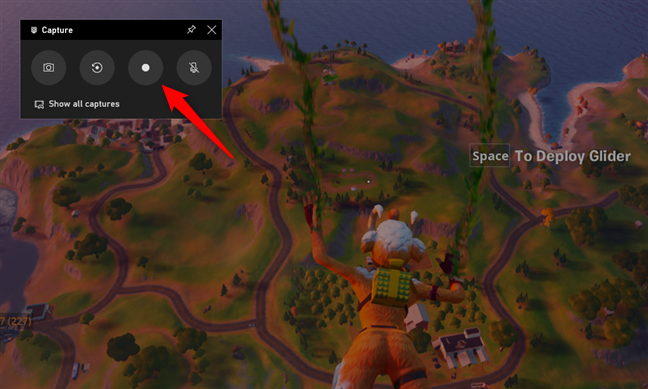
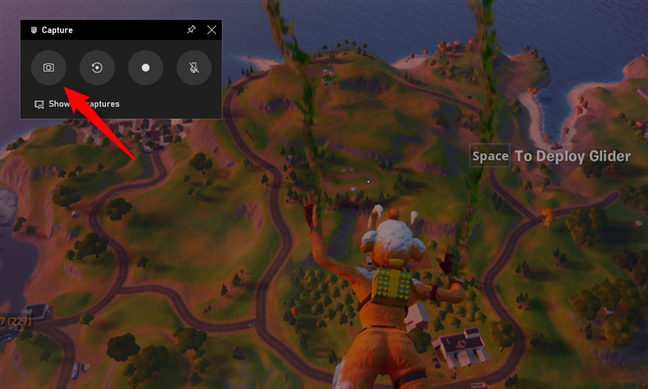
The Xbox Game bar lets you record a video of your entire gameplay. In other words, you can start recording anytime you want and finish recording anytime you choose, or when you stop playing a game. How do you do that? First, launch your game. Then, open the Xbox Game bar (Win + G) and look for the Capture widget on your screen. It looks like this:
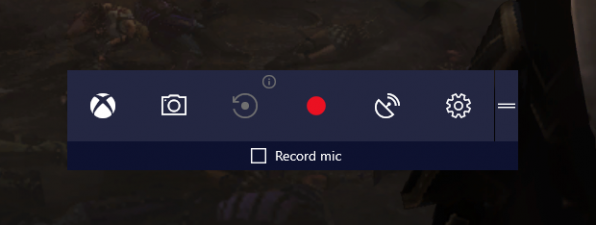
Push the third button, from left to right, in the Capture widget.
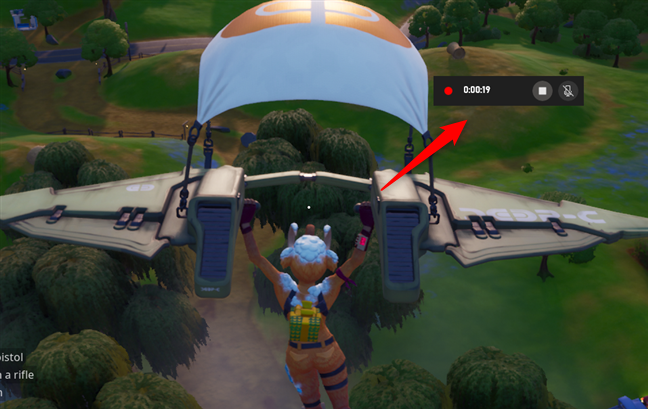
When you push the record button, your Windows 10 PC starts recording a video with your gameplay. The button changes to a stop button, and a small overlay is displayed on the screen, showing you the time that has been recorded.
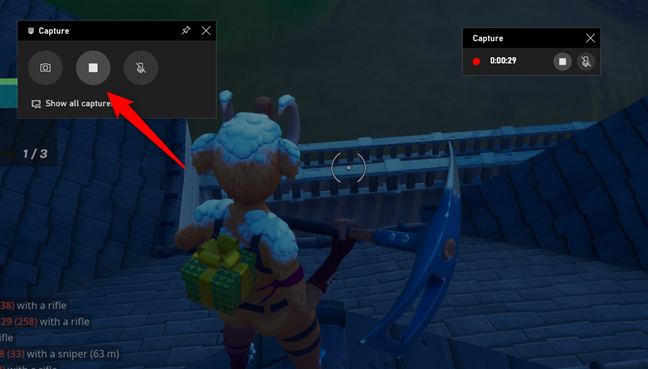
The gameplay recording overlay includes two buttons for stopping the recording, as well as muting or un-muting the microphone.
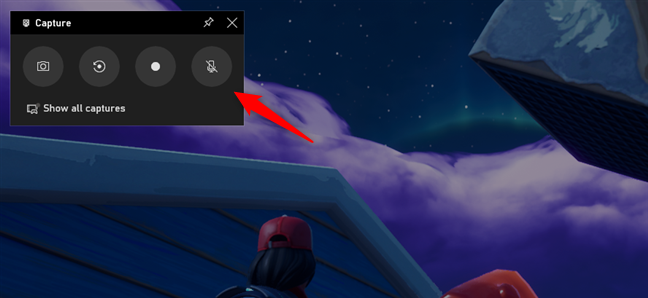
Furthermore, if you want to record your voice while playing, you can also use the last button on the Capture widget, which also lets you turn your microphone on or off.
As a final note, you should know that you can also start and end a gameplay recording session by simultaneously pressing the Win + Alt + R keys on your keyboard. That is much faster than opening the Xbox Game bar and then pushing the Record button.
How to record the last few seconds or minutes of your game using the Xbox Game bar (Win + Alt + G)
The Capture widget from the Xbox Game bar also lets you record a video with the last seconds or minutes of your gameplay. That's what the second button on this widget is for: if something spectacular happens in the game you play, and you want to keep it for posterity, you can, even if you didn't manually begin recording your gameplay like we've shown you in the first section of this guide. When the gameplay video is saved, you are also notified on the screen by a message such as this: "Game clip recorded."

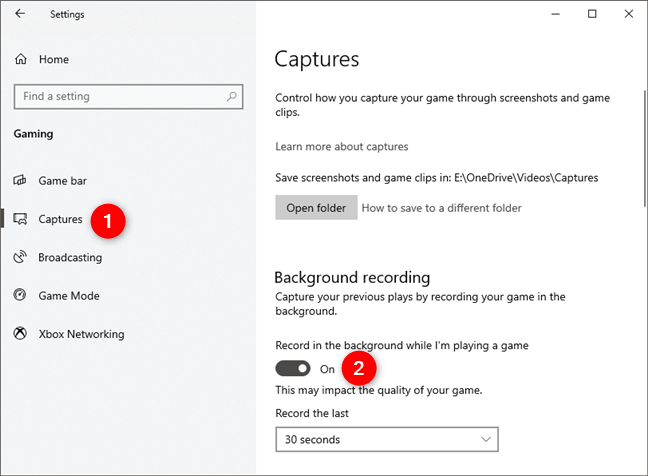
However, for this feature to be available, you must have enabled the Background recording in Windows 10. You can do that in the Settings app, in the *Captures (*formerly known as Game DVR) section from the Gaming category. There, you must turn on the switch for "Record in the background while I'm playing a game." Take heed of the fact that this feature requires additional processing power from your Windows 10 PC, so that it may affect the quality of your game.
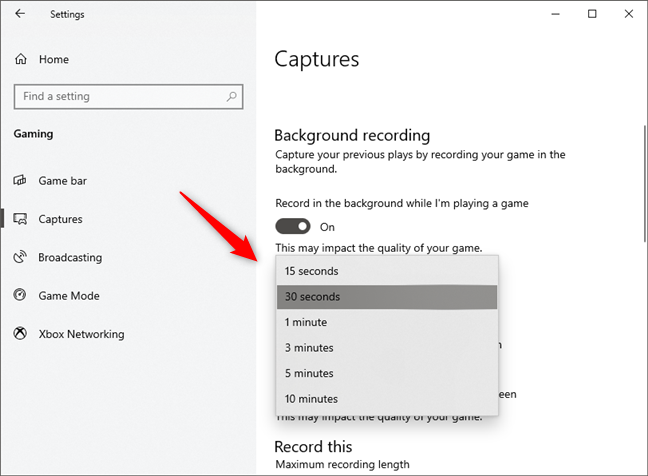
The Background recording feature lets you choose how much time is going to be recorded in the background during gameplay: 15 seconds, 30 seconds, 3 minutes, 5 minutes, or 10 minutes.
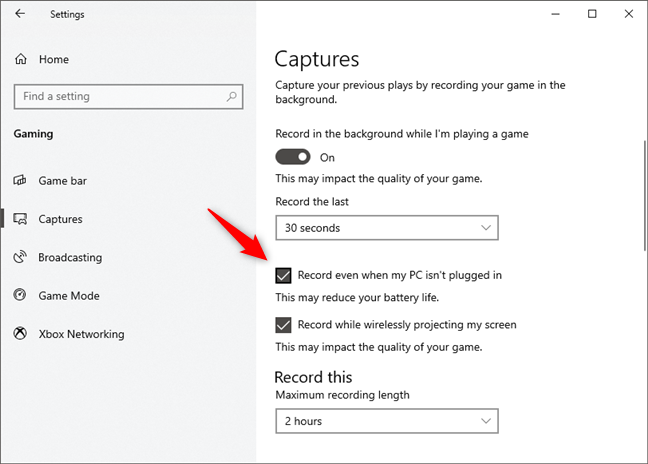
It is worth mentioning that you can enable the Background recording even if your Windows 10 device runs on a battery, although that might decrease the battery life significantly.
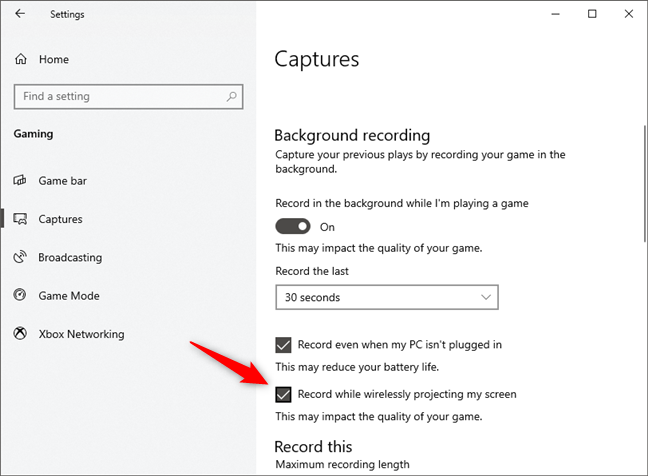
Similarly, Windows 10 lets you record your gameplay in the background even when you are wirelessly projecting your screen. However, if you enable this feature, the quality of your game might be affected, because of lower performance.
Once the background recording feature is enabled, you can trigger it either by opening the Game bar and clicking or tapping on the Record that button, or you can use the keyboard shortcut Win + Alt + G.
How to take gameplay screenshots on Windows 10, using the Xbox Game bar (Win + Alt + PrtScn)
The first button from the Capture area in the Game bar - the one that looks like a camera - is used for taking screenshots. When you want to take a screenshot of your game, click or tap on this button.
You can also take a screenshot by pressing simultaneously on the Win + Alt + PrtScn keys on your keyboard.
How to set the folder where Windows 10 saves recorded gameplay videos and screenshots
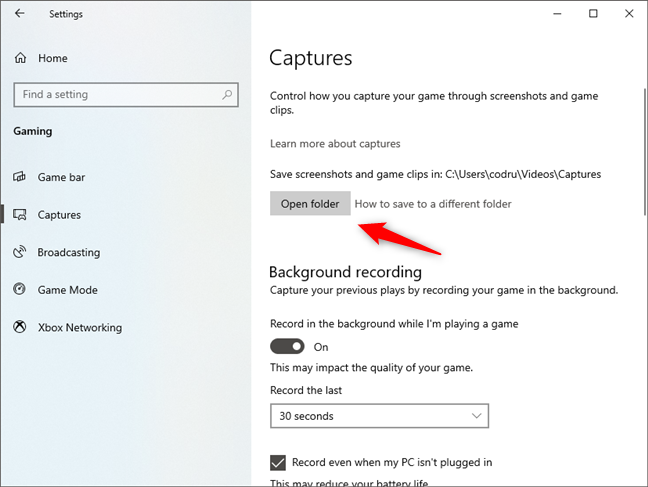
By default, all your gameplay recordings and screenshots are automatically saved by Windows 10 in the "C:\Users\[Your User Account]\VideosCaptures" folder. You can see that on the Captures page from the Gaming category, in the Windows 10 Settings app. If you want, you can open the Captures folder directly from here by pushing the Open folder button.
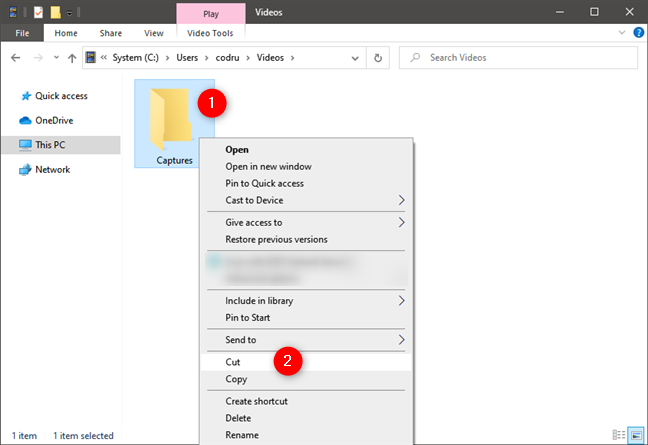
If you want to change the location where your gameplay recordings are saved, open File Explorer, head to the "C:\Users\[Your User Account]\Videos" folder, and move the Captures folder anywhere you want on your Windows 10 PC. The operating system keeps track of it and automatically saves your next gameplay recordings and screenshots in that folder.
How to configure the recorded gameplay settings (video quality, recording time, audio)
You can configure the quality settings of both the manually recorded gameplay videos and the ones you save using the Background recording feature. To adjust these options, open the Settings app, enter Gaming, and select Captures. On the right side of the window, in the Record this area, there's a setting called "Maximum recording length." By default, it is set to 2 hours, which means that any manual gameplay recording you start cannot be longer than two hours. However, you can change this time to 30 minutes, 1 hour, 2 hours, or 4 hours, depending on what you prefer.
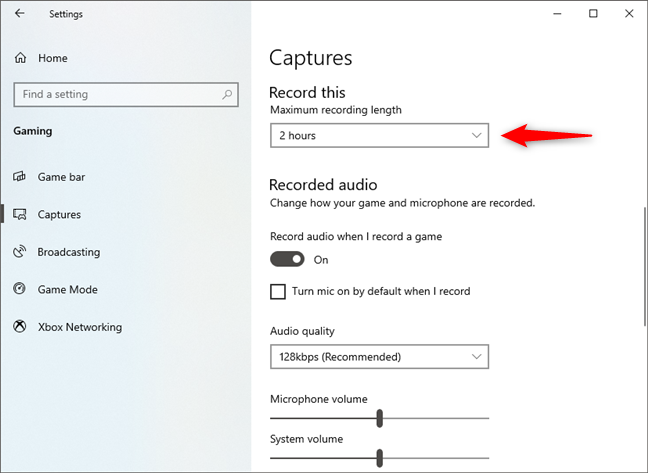
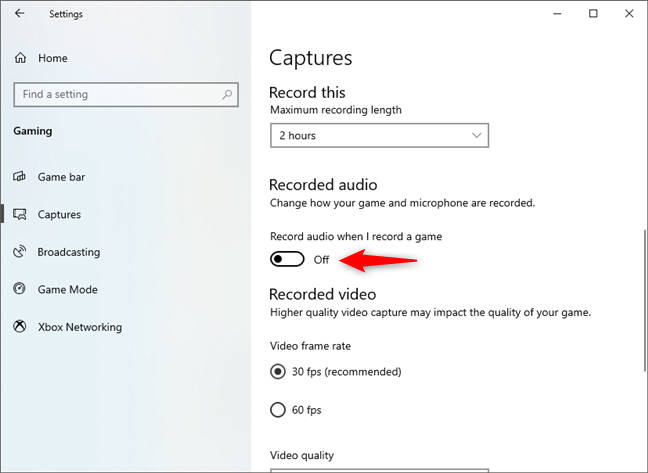
Although your Windows 10 PC is set to automatically record gameplay audio, as well as video, you can disable gameplay audio by turning off the "Record audio when I record a game" switch.
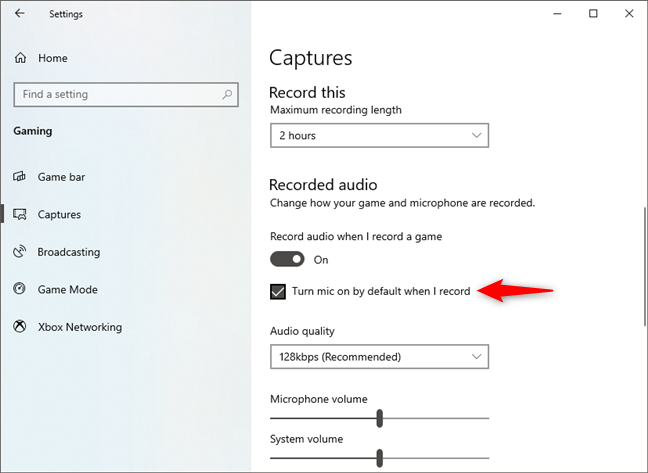
Furthermore, if you want Windows 10 to automatically start recording your voice too, you can enable the "Turn mic on by default when I record."
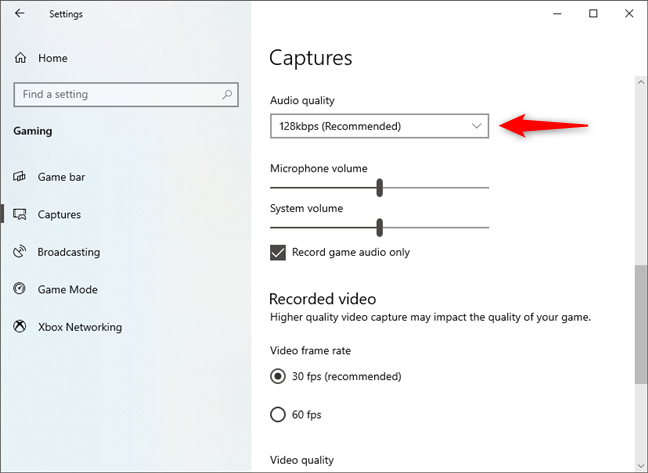
Audio quality is another thing you can adjust. By default, it's set to 128 kbps, which should be good enough for most gamers. However, if you want a higher or lower audio quality on your gameplay recording, you can choose between 96 kbps, 128 kbps, 160 kbps, and 192 kbps.
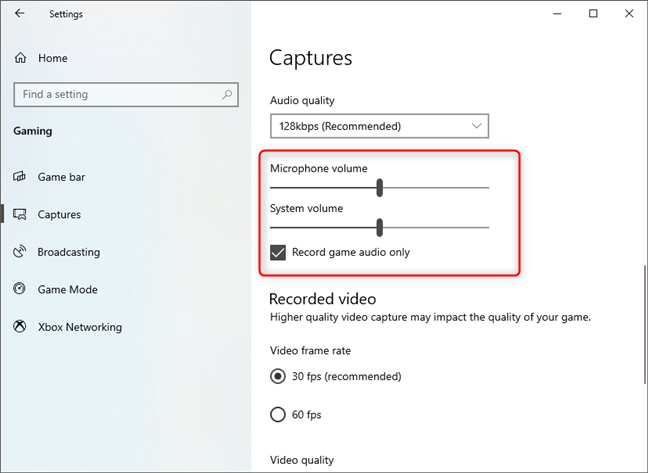
Windows 10 also gives you two sliders that you can use to adjust the levels of the Microphone volume and System volume. The "Record game audio" option is enabled by default. However, if you want your gameplay recordings to also include sound from other sources than your game, such as the music you're listening to on Spotify while playing your game, disable this option.
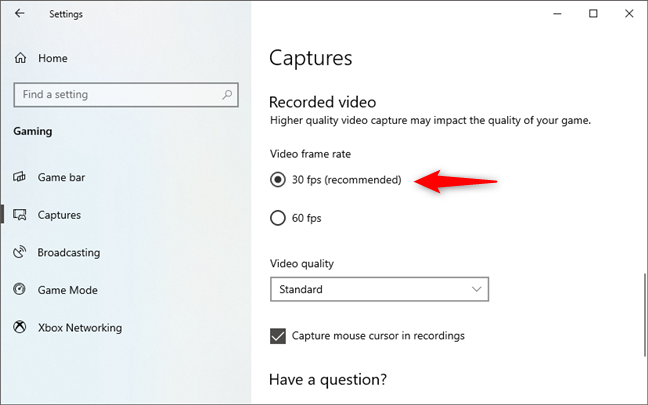
The next few settings control the video quality of your gameplay recordings. In the Recorded video area, you have two options to choose from regarding the Video frame rate: 30 fps and 60 fps. The latter gives you more fluent video recordings but comes at the expense of needing much more processing power. That can affect your gameplay experience significantly, so test and try whether your gaming rig can handle it.
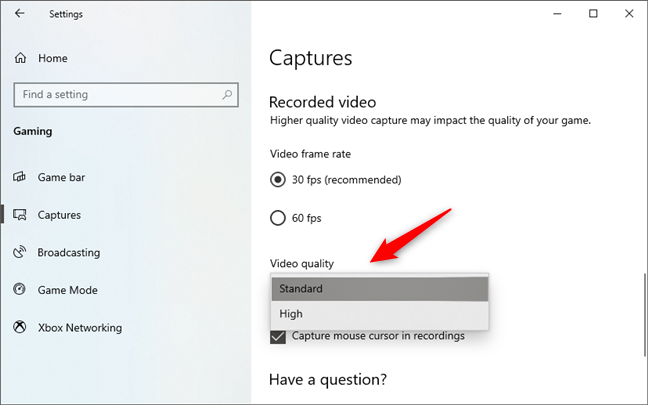
Similarly, the Video quality is a setting that controls how fine the details on your gameplay recorded videos are. By default, it's set to Standard, but you can switch to High if you want better video quality, and your computer can handle the additional processing power required.
The last option you have is to choose whether you want Windows 10 to "Capture mouse cursor in recordings." It is on by default, but you can disable it if you don't want to see your mouse cursor in the gameplay videos that you are recording.

That's it: now you know how to record gameplay videos on Windows 10, how to take screenshots while playing games, and also how to change the recorded gameplay video settings.
Do you record your games on Windows 10?
The Game bar from Windows 10 is an excellent companion for gamers. It lets you take screenshots, record gameplay videos, and more, without ever leaving your game. Have you tried recording your games while you play on Windows 10? Do you like how this feature works? What would you want to be added? Share your thoughts with us in the comments below.