In general, we recommend installing security suites on Windows 10 PCs, from the likes of Bitdefender, ESET, or F-Secure. They usually provide more features and better antivirus protection than the built-in Microsoft Defender Antivirus found in Windows Security. The thing is that, when you install a third-party Windows antivirus, the Microsoft Defender Antivirus gets disabled. This happens because simultaneously running two antiviruses is a recipe for failure, conflicts, and performance issues. However, in newer versions of Windows 10, you can keep your main Windows 10 antivirus on, and only use the antivirus from Windows Security to get a second opinion from time to time. It's a nice touch from a security point of view and doesn't cause any conflicts or issues between the two antivirus products. Here's how this works:
NOTE: The features presented are available in Windows 10 May 2020 Update or newer. If you are using an older version of Windows 10, you might not have access to all the features. Check your Windows 10 build and, if necessary, get the latest Windows 10 update available. Also, to be able to get a second opinion from the built-in Windows 10 antivirus, you must connect with a user account that has administrative permissions.
Step 1. Open the Windows Security app
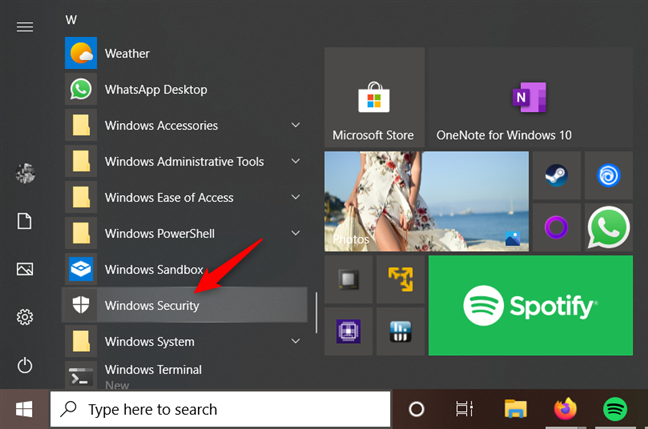
If you want to get a second opinion from the Microsoft Defender Antivirus, even if you're using a third-party Windows 10 antivirus, you must first open the Windows Security app. There are many ways to do that, and you can find them all here: 10 ways to start Windows Security in Windows 10. If you're in a hurry, know that one of the easiest and fastest methods is by clicking or tapping on the Windows Security shortcut from your Start Menu.
The Windows Security shortcut from the Start Menu
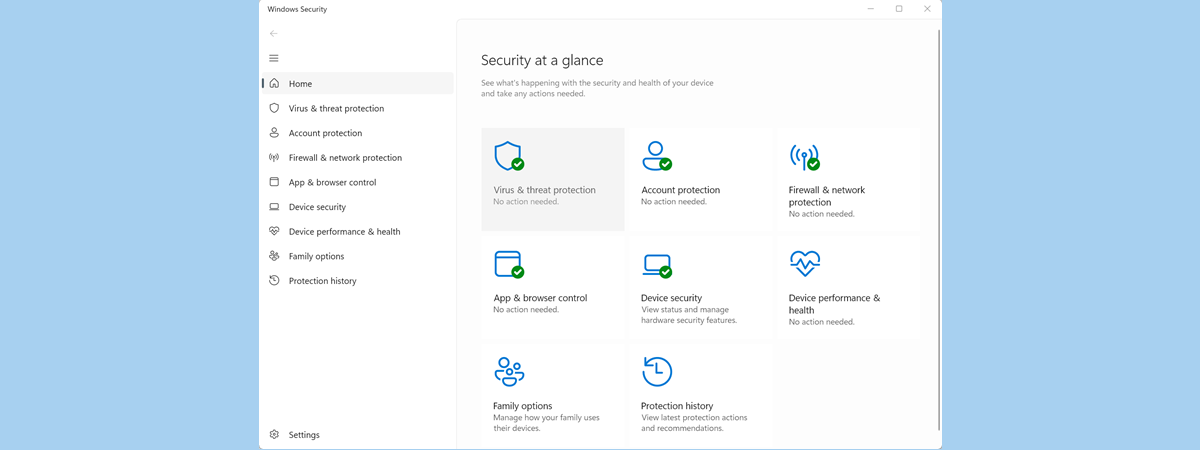
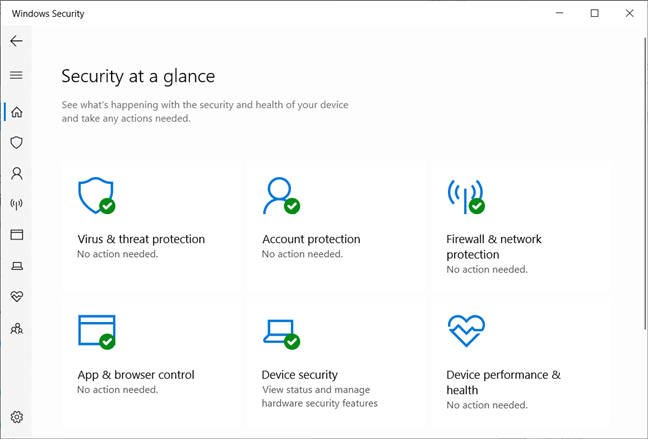
When you open the Windows Security app, you should see something similar to the screenshot below.
The Windows Security app
Step 2. Enable periodic scanning in Windows Security (Microsoft Defender Antivirus)
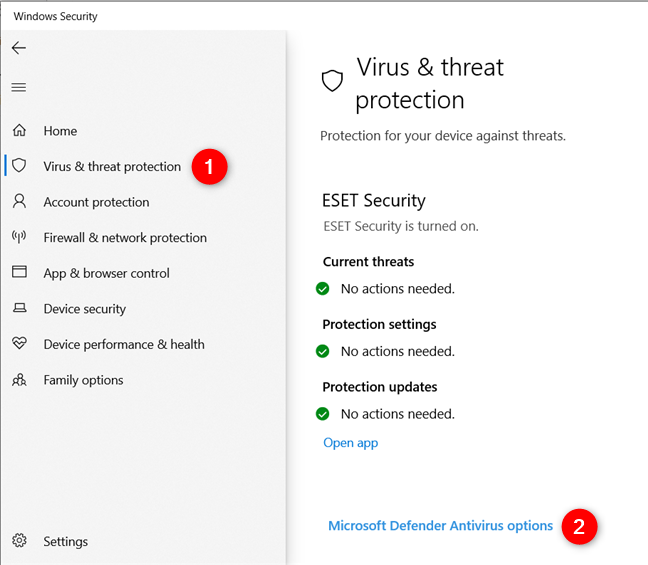
In the Windows Security app, click or tap "Virus & threat protection" on the left. Then, in the center of the window, click or tap the "Microsoft Defender Antivirus options" link.
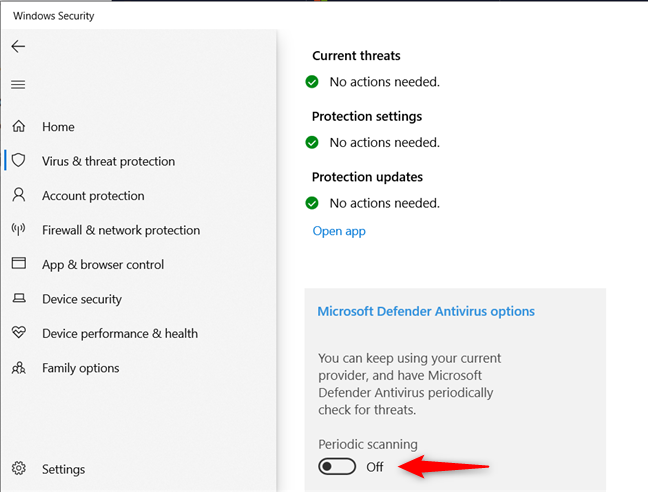
Virus & threat protection options in Windows 10
This opens a small section called "Microsoft Defender Antivirus options," where Windows Security tells you that "You can keep using your current provider, and have Microsoft Defender Antivirus periodically check for threats."
Under this piece of information, there's a switch called Periodic scanning: turn it On.
Enabling Periodic scanning with Microsoft Defender Antivirus in Windows 10
A UAC prompt is shown, asking you to confirm that you want to allow Windows Security to make changes to your device. Press Yes.
An UAC prompt generated by Windows Security
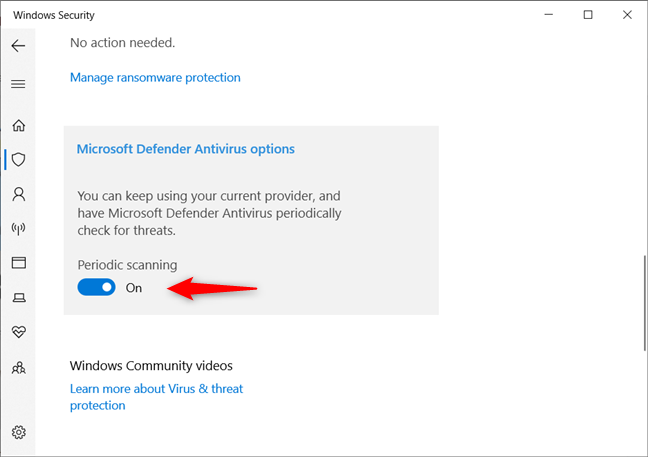
From now on, the built-in Windows 10 antivirus will scan your computer or device periodically, to give you a second opinion about the state of security on your PC. These scans don't have a negative impact on your main antivirus.
Periodic scanning enabled for Windows 10's Microsoft Defender Antivirus
Another cool feature is that you can also immediately start a manual scan, without having to wait for Microsoft Defender Antivirus to decide when it is time to run a scan:
Step 3. Run an antivirus scan on your Windows 10 PC, with Microsoft Defender Antivirus
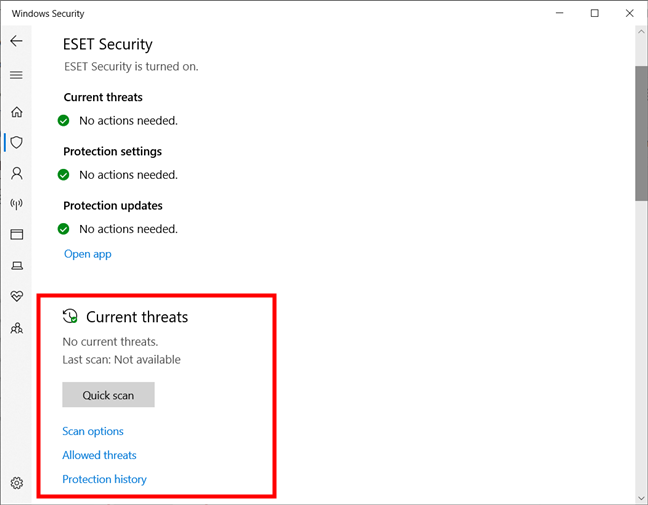
After you enable the periodic scanning feature, the Windows Security app changes and displays more options in the "Virus & threat protection" section. You get a Current threats section and a Quick scan button.
Start a quick scan with Microsoft Defender Antivirus
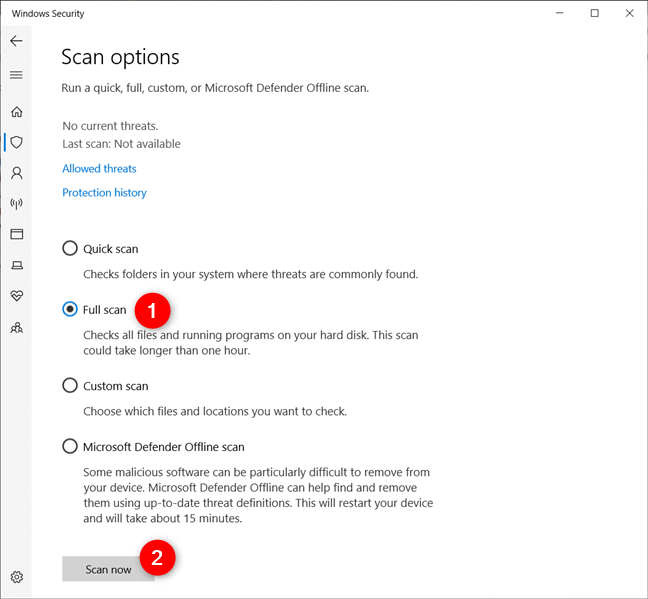
When you press Quick scan, the built-in Windows 10 antivirus makes a quick scan of your computer for malware and viruses and gives you a brief overview of its findings. However, it is a better idea to perform a full scan for a more meaningful second opinion. To do that, under the Quick scan button, click or tap the Scan options link. It gives you a list of scanning options, including a full scan or a custom scan. Choose the Full scan and press Scan now.
All the scanning options offered by the default antivirus in Windows Security
Microsoft Defender Antivirus now performs a full computer scan for malware and viruses and gives you a more meaningful second opinion.
P.S. Did you know that you can also use Microsoft Defender Antivirus to run offline scans and clean nasty viruses from Windows 10?
Do you like getting a second opinion from Microsoft Defender Antivirus?
Enabling the periodic scanning option is easy and something that you should do for increased security, even if you already have a good antivirus product installed from a company other than Microsoft. You never know when your main antivirus might miss a threat, and it is identified by Windows Security's Microsoft Defender Antivirus instead. Enable this feature, use it, and let us know how well it works for you. Do you feel more secure when you have the option of getting a quick second opinion from Microsoft's Windows 10 antivirus? Comment below and let's discuss.
You MUST activate Periodic Scan Mode; Microsoft Defender WILL NOT UPDATE to download the latest threat protection updates. It’s important that you turn ON this feature to keep Microsoft Defender updated with the latest threat protection software files. Then if you uninstall your 3rd party A/V, Defender will be up to date and ready to start running fully current and up to date. August 21, 2020
Kyle Marshall ·
Mr. Miller is correct. The Microsoft Defender software will not stay updated unless you turn “ON” Periodic Scanning. It may, however, cause your PC to use more memory, but it’s only 5% to 10% more, which is a modest amount.
Also, by leaving this feature turned on, it keeps Smart Screen updated as well.
10-12-2020
Lynn ·
Thank you so much! I didn’t know about this, so I have it activated now.
I was wondering about this the other day… if I should be turning on Windows Defender or would it be incompatible with another security software, so this article was incredibly helpful.
Richard Young ·
I have tried that periodic setting with Defender alongside Malwarebytes on my laptop. Thing is Defender reverts to inactive every time I start up and I have to go through the routine of resetting it to do periodic scans. This very likely means that it never gets to the periodic stage where it scans by itself – I believe the only way to get it to scan at all is if I select it manually using my own schedule (say, weekly). Is this a known bug?
Mel ·
The Limited Periodic Scanning option is not shown on my Windows 10 Build 10586. Is this scanning option still available?
Codrut Neagu ·
It will be – you have to have build 14367 or newer to be able to use this option.












Discussion (6)
You MUST activate Periodic Scan Mode; Microsoft Defender WILL NOT UPDATE to download the latest threat protection updates. It’s important that you turn ON this feature to keep Microsoft Defender updated with the latest threat protection software files. Then if you uninstall your 3rd party A/V, Defender will be up to date and ready to start running fully current and up to date. August 21, 2020
Mr. Miller is correct. The Microsoft Defender software will not stay updated unless you turn “ON” Periodic Scanning. It may, however, cause your PC to use more memory, but it’s only 5% to 10% more, which is a modest amount.
Also, by leaving this feature turned on, it keeps Smart Screen updated as well.
10-12-2020
Thank you so much! I didn’t know about this, so I have it activated now.
I was wondering about this the other day… if I should be turning on Windows Defender or would it be incompatible with another security software, so this article was incredibly helpful.
I have tried that periodic setting with Defender alongside Malwarebytes on my laptop. Thing is Defender reverts to inactive every time I start up and I have to go through the routine of resetting it to do periodic scans. This very likely means that it never gets to the periodic stage where it scans by itself – I believe the only way to get it to scan at all is if I select it manually using my own schedule (say, weekly). Is this a known bug?
The Limited Periodic Scanning option is not shown on my Windows 10 Build 10586. Is this scanning option still available?
It will be – you have to have build 14367 or newer to be able to use this option.