Windows Defender is Microsoft's in-house antivirus product, and it has been protecting users for a long time now. However, in Microsoft's Windows 8.1 and Windows 10, its interface and usability didn't improve much. Luckily, good times have come to it too, and in Windows 10 Creators Update we get a new app called Windows Defender Security Center, which promises to make it easier than ever for us to view and control the way Windows protects us from malware as well as from other security threats. In today's article, we'll show you what it has to offer and how to use Windows Defender Security Center:
How to open Windows Defender Security Center
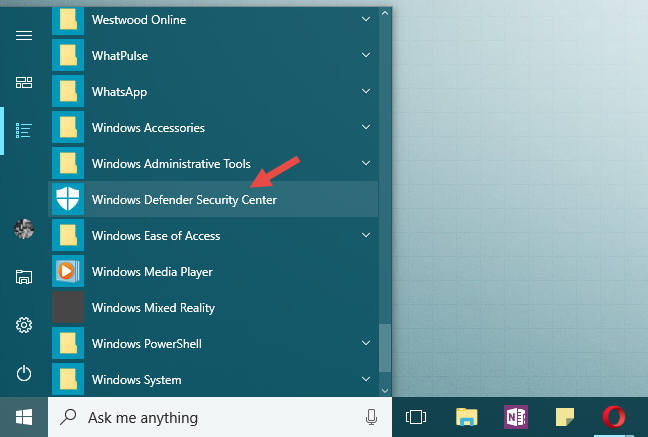
The Windows Defender Security Center is a universal Windows platform app, and it's pre-installed in Windows 10 Creators Update. You can find it inside the All apps list from your Start Menu.
Windows Defender Security Center
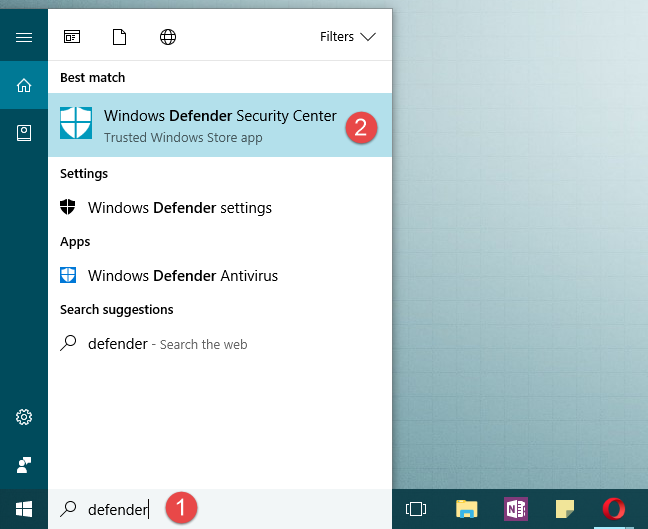
An alternative way to open Windows Defender Security Center is to search for it. In Cortana's search field from your taskbar, enter the word defender and then click or tap on the appropriate search result.
Windows Defender Security Center
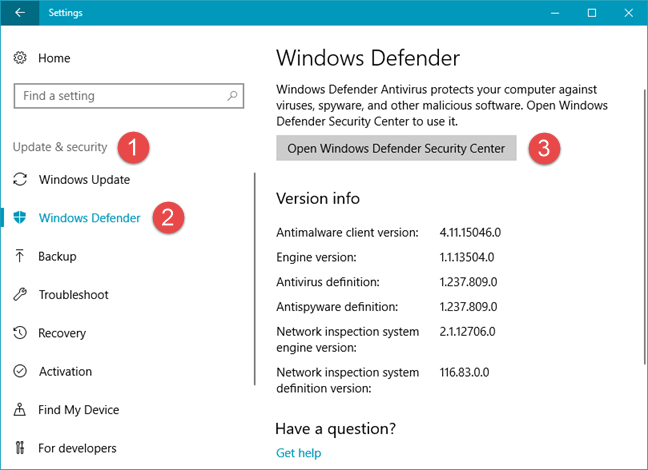
The third and the most cumbersome method to open Windows Defender Security Center is to do it from the Settings app. You'll find a launch button for it in the Windows Defender section from the Update & security category of settings.
Windows Defender Security Center
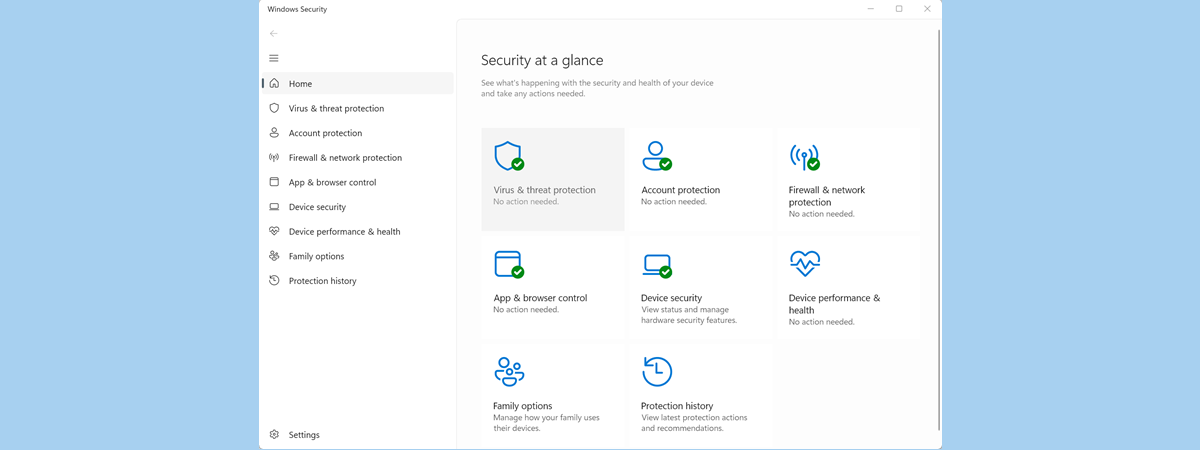
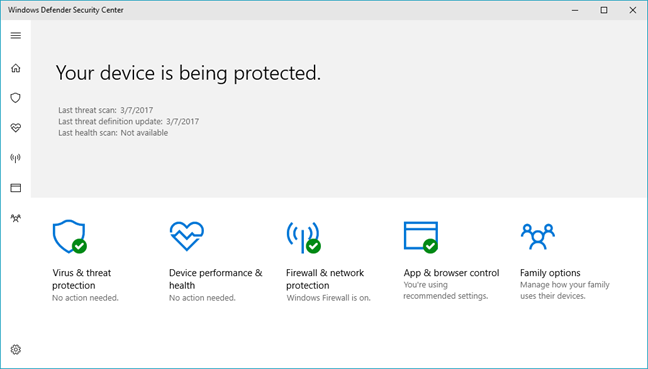
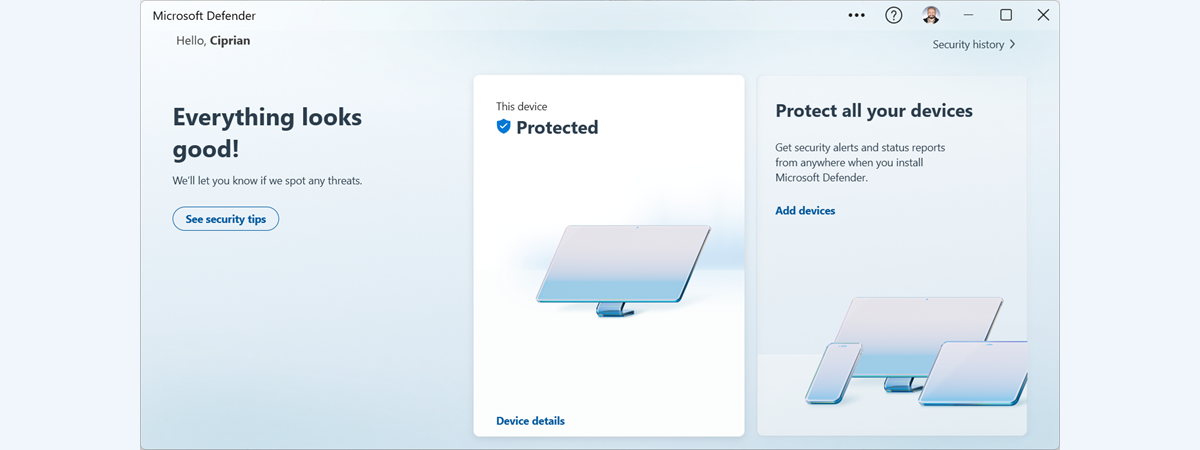
Once you've opened it, this is what the Windows Defender Security Center looks like:
Windows Defender Security Center
The security tools and controls you'll find inside Windows Defender Security Center
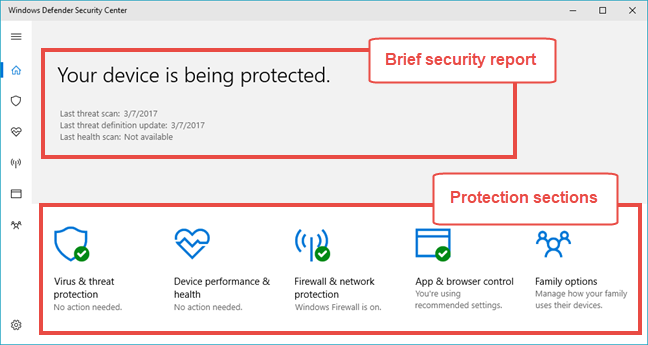
The Windows Defender Security Center home page is split into a few main sections. The top half of the window shows you a brief summary of your device's health, and the bottom half of the homepage gives you access to the essential protection tools and controls found in Windows 10. They are split into five main categories:
Virus & threat protection
Device performance & health
Firewall & network protection
App & browser control
Family options
Windows Defender Security Center
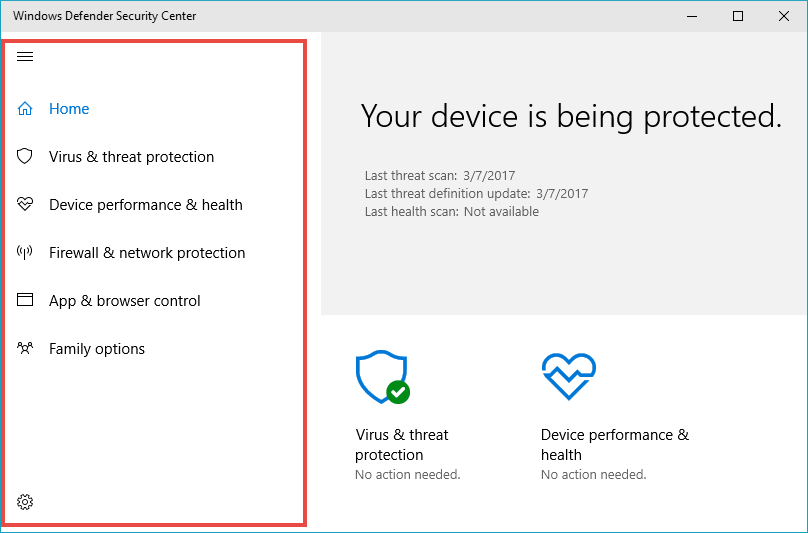
You can access each of these sections, plus a few additional settings from the left menu, which can be expanded with a click/tap on the hamburger icon found in the top left corner of the app window.
Windows Defender Security Center
Let's see what each of these security sections has to offer:
1. Check your antivirus protection and run scans
What the Virus & threat protection section shows you depends on whether you use Windows Defender as your main antivirus, or you have installed a third-party antivirus solution.
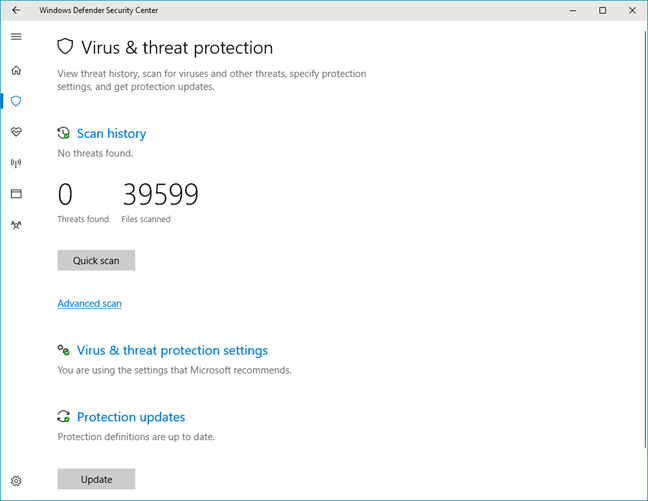
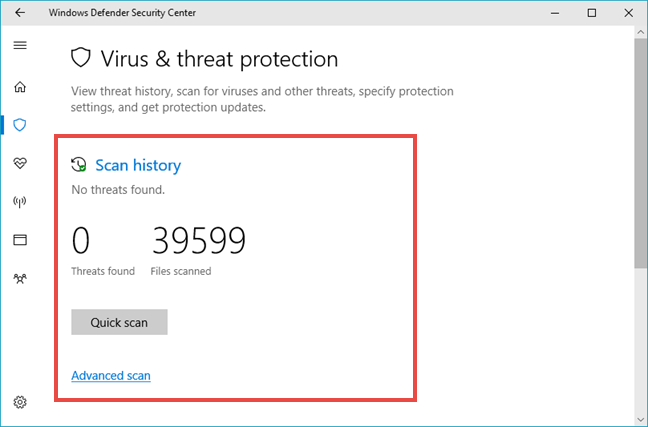
If you installed a third-party antivirus, you can launch it from here, and that's all. If however, you rely on Windows Defender to protect you against malware, this section will let you "View threat history, scan for viruses and other threats, specify protection settings, and get protection updates".
Windows Defender Security Center
The Scan history area shows you whether threats have been found on your Windows 10 device, how many of them were found, and the number of files Windows Defender has scanned. If you want to run a manual antivirus scan, this is the place from which you can start a Quick scan, or run an Advanced scan.
Windows Defender Security Center
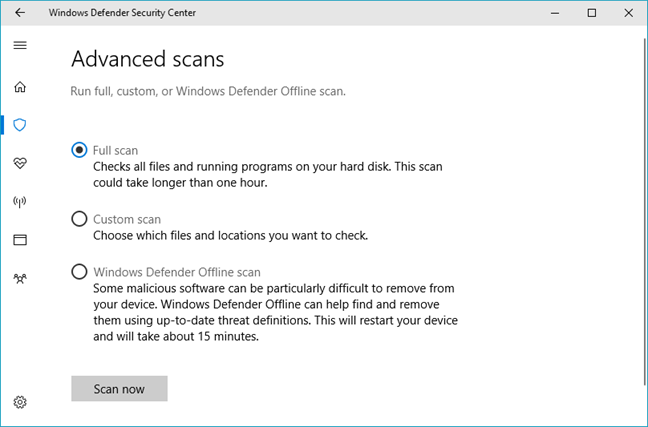
If you want to run an Advanced scan, click or tap on the link with the same name, and then choose the type of advanced scan that you want to run: full, custom, or offline scan. The Full scan "checks all files and running programs on your hard disk" and can take more than one hour. The Custom scan lets you "choose which files and locations you want to check". And the Windows Defender Offline scan will restart your Windows 10 device and will try to find and remove malicious software before the operating system boots.
Windows Defender Security Center
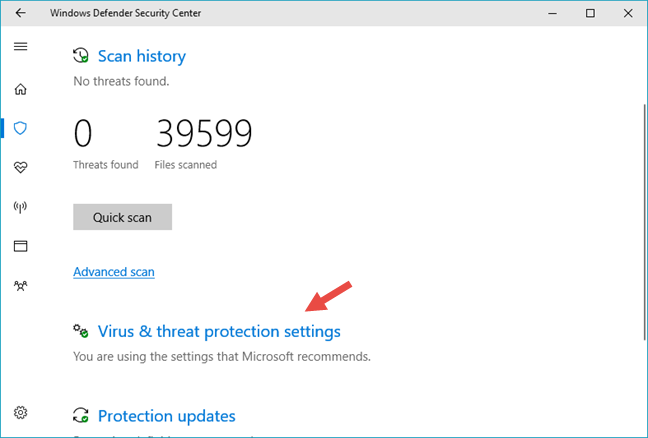
Back to the Virus & threat protection section, you also get access to the settings that control the way Windows Defender works on your PC. To get to them, click/tap on the Virus & threat protection settings link.
Windows Defender Security Center
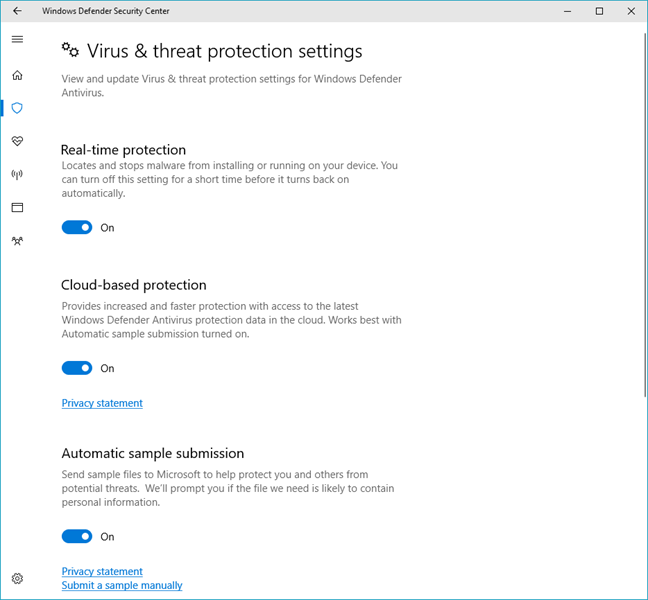
In the Virus & threat protection settings, you'll get a few switches and a few links for setting things the way you want to. You can turn the following features on or off:
Real-time protection - which "locates and stops malware from installing or running on your device". We firmly recommend you leave this feature on because it's your first shield against viruses. However, even if you do choose to disable it, after a short time, it will turn back on automatically.
Cloud-based protection - provides you access to the latest virus definitions available on Microsoft's servers from the cloud. It's recommended that you leave this option enabled.
Automatic sample submission - lets Microsoft fetch sample files from your Windows 10 device and analyze them for threats. If the files contain personal information, Microsoft promises to ask you about it. Otherwise, the samples are submitted without any other questions. It's recommended that you leave this feature turned on too because it helps Windows Defender react faster when new malware threats are found.
Windows Defender Security Center
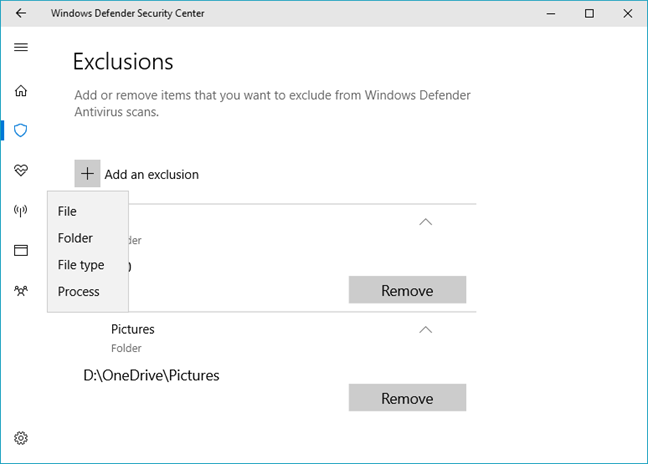
Exclusions - lets you choose files, folders, file types and processes that you don't want to be scanned by Windows Defender.
Windows Defender Security Center
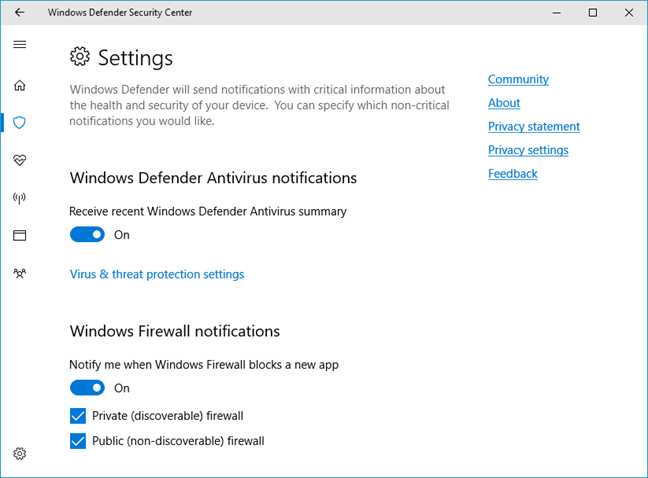
Notifications - allows or forbids Windows Defender to send you notifications about the latest antivirus scans, and/or about the apps blocked by Windows Firewall.
Windows Defender Security Center
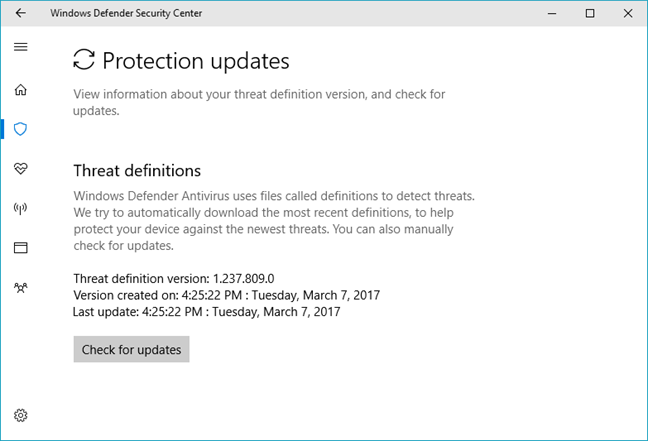
Finally, press the back arrow icon from the top left corner of the app to go back to the Virus & threat protection one last time. The last thing you'll see at the bottom of this page is an area called Protection updates. It's a place where you can "view information about your threat definition version, and check for updates".
Windows Defender Security Center
That's pretty much all there is to know about the Virus & threat protection section from the Windows Defender Security Center app. Let's move on to the second section: Device performance & health. Click on the second page of this tutorial to continue reading.
2. Get a health report from your Windows 10 device
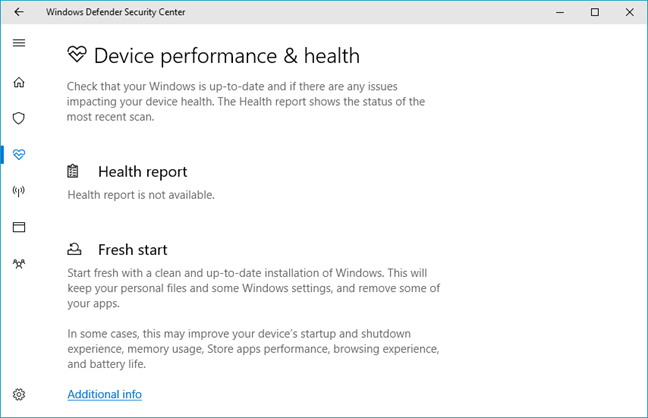
The Device performance & health section displays the Health report of your Windows 10 device. This report will include information about Windows 10 updates, drivers, battery life, and storage capacity. If any issues affect your PC's health, you will see them listed here.
Windows Defender Security Center
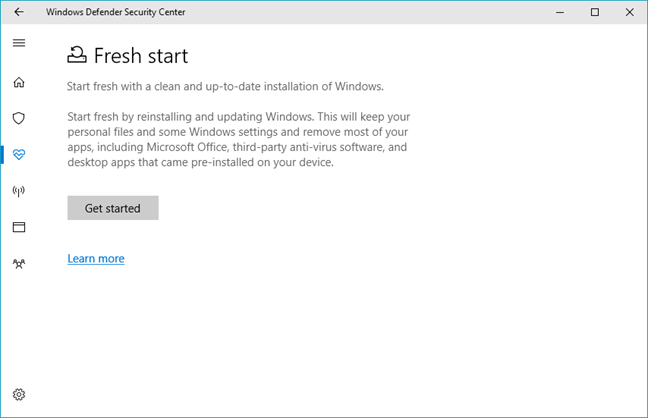
If there's something not right about your Windows 10 installation, this is also the place where you can start fresh. Fresh start is a tool that lets you reinstall and update Windows 10. If malware affected your operating system, if your PC is slow, or if it crashes a lot, a fresh start could be the answer you're looking for.
During the reinstallation, your personal files will be kept, as well as some Windows 10 settings. However, before you start, take notice of the fact that all the apps that are not pre-installed by default in Windows 10, are removed. That includes apps bundled by the manufacturer of your PC, as well as apps from Microsoft such as Office.
Windows Defender Security Center
3. View the status of your firewall and network connection
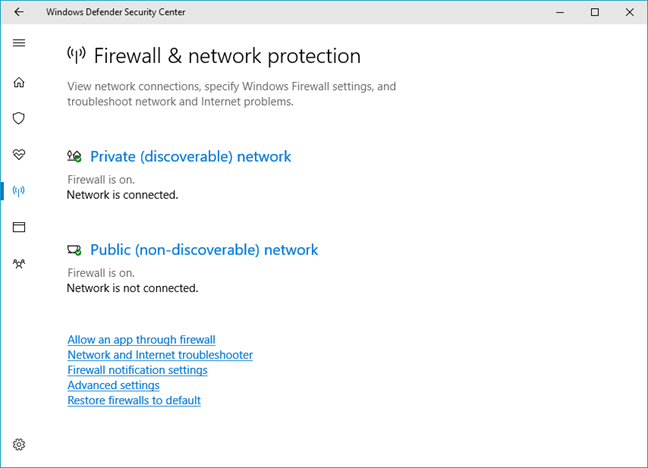
The next main section is called Firewall & network protection, and it tells you how Windows Firewall protects your network connections, both for private and public networks.
You also get a few links to some typical Windows Firewall settings such as allowing some apps through it or changing firewall notification settings, and to the "Network and Internet troubleshooter" wizard.
Windows Defender Security Center
4. Enable or disable Windows Defender SmartScreen for apps and files
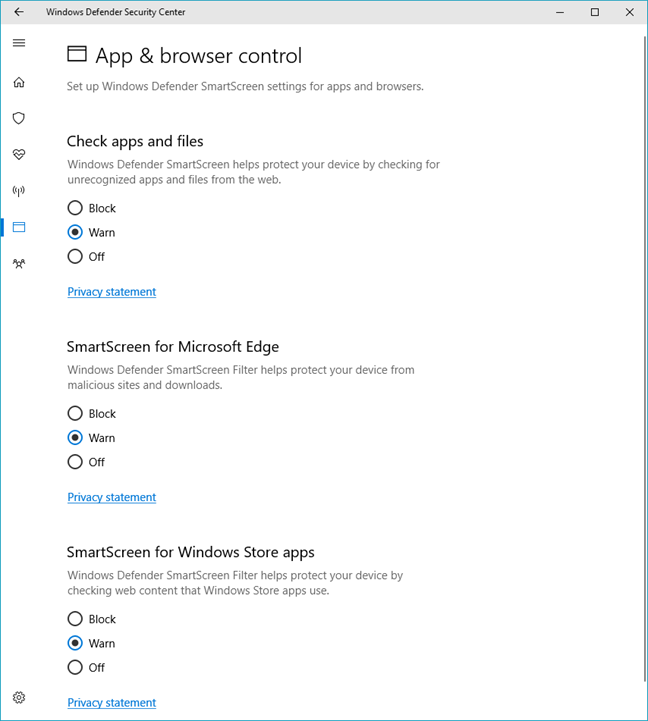
Next, comes the App & browser control section. It's a place from which you can configure the way the Windows Defender SmartScreen protection module works. You can change SmartScreen settings for both apps and browsers, and you can set it to check unrecognized apps and files, protect your PC against malicious websites and downloads, and protect your device against malicious web content displayed by some universal apps. For each of these, you can configure SmartScreen to block or warn you about the threats it identifies.
Windows Defender Security Center
5. Check the status of your parental controls in Windows 10
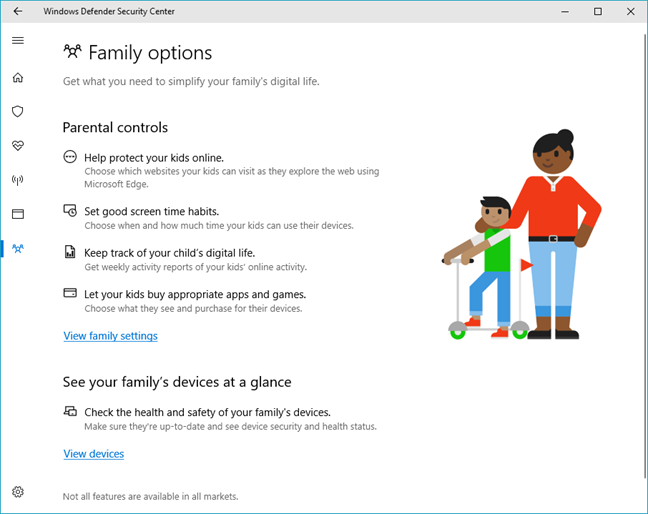
"Family options" is the final main section of the Windows Defender Security Center. Although it doesn't actually give you any settings to change, it lists several links that will take you online and help you protect your children. In your family settings online, you can choose which websites your kids are allowed to visit, configure how much time they're allowed to use their devices, get reports about their online activity, choose what apps and games they're allowed to use or purchase, and check the health of their devices. In short, this is a central starting point for all the family features and controls offered by Microsoft.
Windows Defender Security Center
That's it!
Conclusion
Although Microsoft has quite a long history of providing Windows users with security tools designed to protect them from malware, network threats or malicious web content, we never had a place from which to control everything with ease. Now we do: the Windows Defender Security Center is a hub where you can view and control everything that's security related in your Windows 10 device, starting from the antivirus, to the firewall, and to the SmartScreen filter. Try it out and let us know whether you like it. Do you find the Windows Defender Security Center useful and easy to use? Share your thoughts in the comments below.
A surprisingly complex set up which for probably 95% of users is irrelevant because they will almost certainly have trusted third party anti-virus functioning.
Typically these AV’s are designed to be simple to set-up (Unlike MS Win Def).
It amazes me that anyone would consider MS as a suitable organisation for such installs after the cavalier way they have manipulated Win 10, & their appalling record with “MS Security Essentials” (now code for “use something else MS can’t be bothered” with genuine security ).


Discussion (2)
A surprisingly complex set up which for probably 95% of users is irrelevant because they will almost certainly have trusted third party anti-virus functioning.
Typically these AV’s are designed to be simple to set-up (Unlike MS Win Def).
It amazes me that anyone would consider MS as a suitable organisation for such installs after the cavalier way they have manipulated Win 10, & their appalling record with “MS Security Essentials” (now code for “use something else MS can’t be bothered” with genuine security ).
very dificult soo bad