03.04.2025
Did you know that you can install Windows directly onto a USB drive, such as a fast portable SSD or even a high-capacity USB memory stick? Having Windows on a flash drive lets you carry your personalized operating system wherever you go, allowing you to run Windows 11 or Windows 10 on almost any computer. Moreover, you can do that without having to install anything on that PC, just on your portable SSD or stick holding Windows To Go. In this tutorial, I’ll show you step-by-step how to create your own Windows To Go drive for Windows 11 or Windows 10:
Step 1. Download a Windows ISO file
First, you need a Windows 11 or Windows 10 ISO file, which is essentially a complete copy of the Windows installation disc packaged into a single downloadable file. If you don’t know what an ISO file is, and how it can be used, I recommend this tutorial: What is a disk image file (ISO, IMG, NRG, BIN, etc.)?
Microsoft offers these ISO files for free directly on the official website. You can get them by using the direct download links offered for Windows 11, or if you need Windows 10, with the help of the Media Creation Tool.
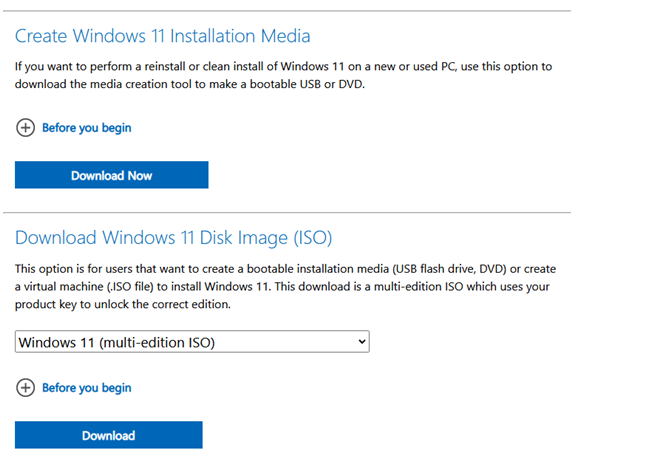
Download a Windows 11 or Windows 10 ISO file
Alternatively, you can use other methods we’ve recommended before, like these 4 ways to download the full version of Windows 11 for free or these 3 free ways to download Windows 10. Just make sure to choose the correct edition and version (Home, Pro, etc.) to match your needs.
Step 2. Download and run Rufus
Next, you need Rufus, a reliable and straightforward tool designed specifically for creating bootable USB drives. Head over to the Rufus official website and download the latest portable version.
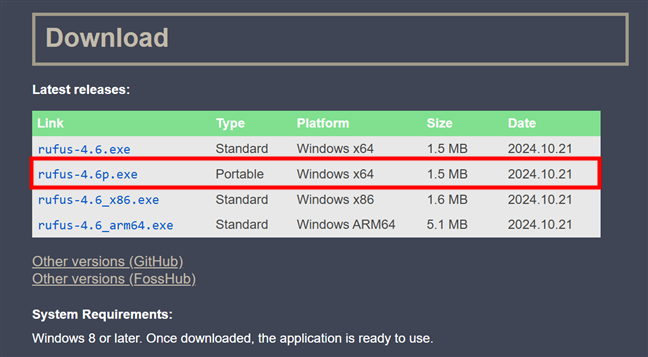
Download and run Rufus
The portable version of Rufus doesn’t require installation; simply run the downloaded executable directly, and the Rufus interface opens immediately.
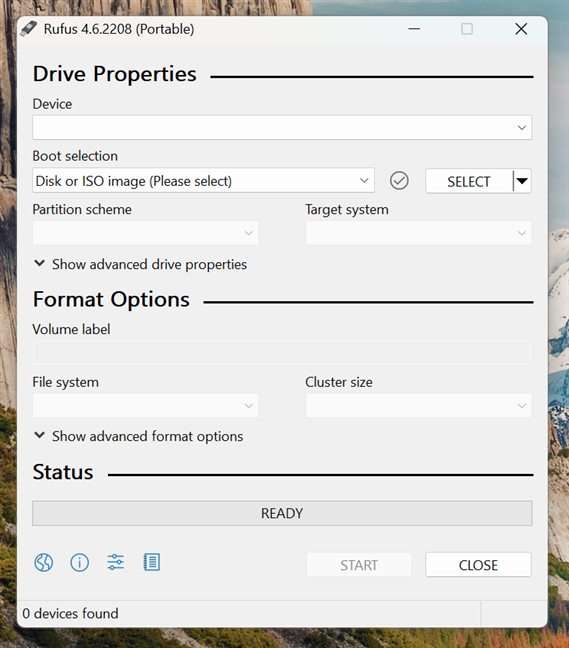
Welcome to Rufus!
Step 3. Choose the USB drive where you want to install Windows
Connect your chosen USB drive to your laptop or Windows computer. It’s essential to select a drive with sufficient speed and storage capacity for smooth performance. Ideally, you should use a high-quality portable SSD or a fast USB memory stick with at least 64 GB of space.
Once connected, open Rufus and select your USB drive from the Device dropdown at the top of the window.
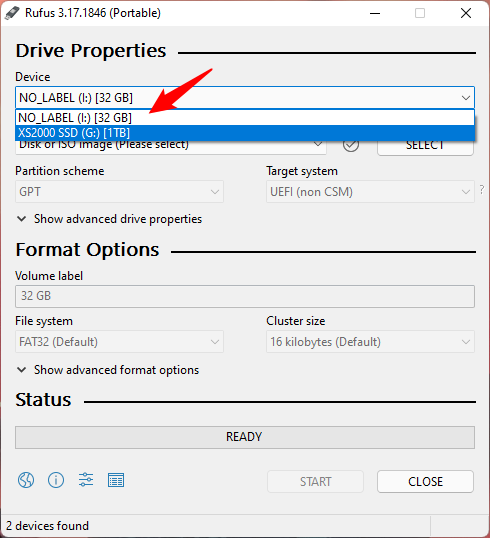
Connect and select the flash drive on which to install Windows
I personally use a 1TB Kingston XS2000 portable SSD because it offers excellent performance and Windows can run quickly and without noticeable delays or lag.
Step 4. Configure Rufus for Windows To Go
With your USB drive selected, configure Rufus to install Windows 11 or Windows 10 on the USB drive:
Under Boot selection, choose the option labeled Disk or ISO image.
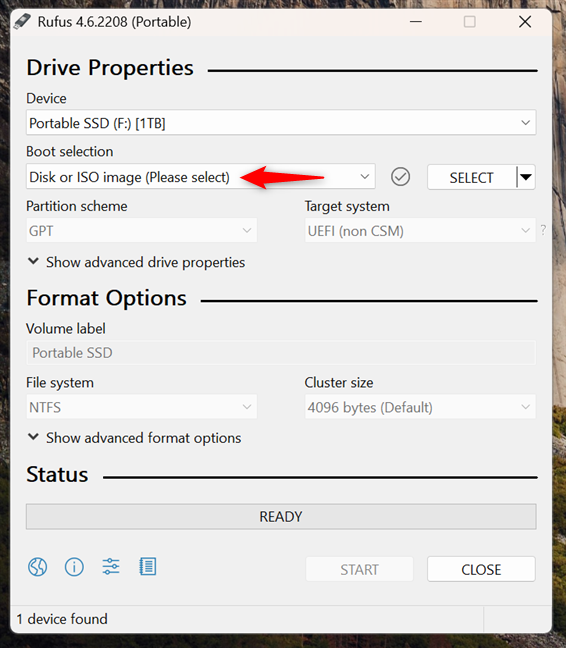
Choose Disk or ISO image under Boot selection
Click SELECT next to this option and browse your computer to select the Windows ISO file you downloaded earlier.
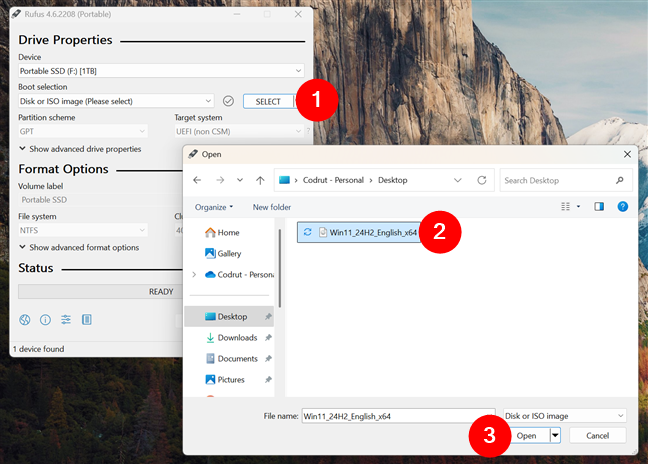
Select the Windows ISO file
In the Image option dropdown, select Windows To Go. Although Microsoft officially discontinued the Windows To Go feature with the launch of version 1903 (May 2019) of Windows 10, Rufus maintains this incredibly useful functionality.
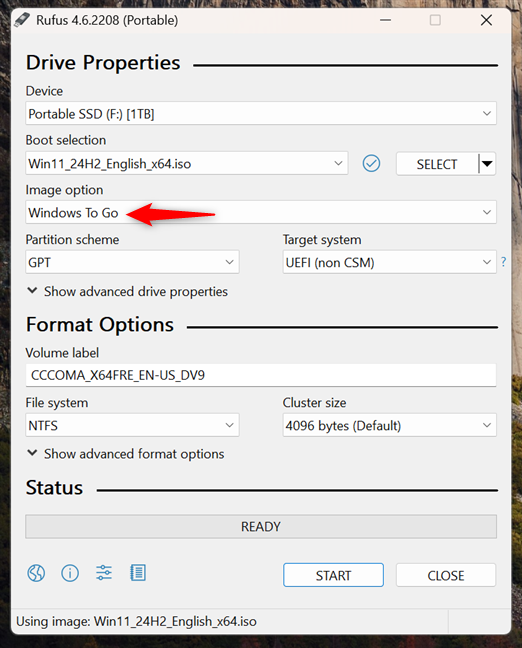
In Rufus, choose to create a Windows To Go drive
Next, select your preferred Partition scheme and Target system. There are two options for each. Depending on the types of computers where you intend to use the Windows To Go USB drive in the future, here’s what you should do:
- Choose GPT and UEFI (non CSM) if you plan to use modern computers primarily. This provides faster boot times and better compatibility with newer hardware.
- Choose MBR and BIOS or UEFI if you want to maintain compatibility with older hardware that still uses legacy BIOS systems.
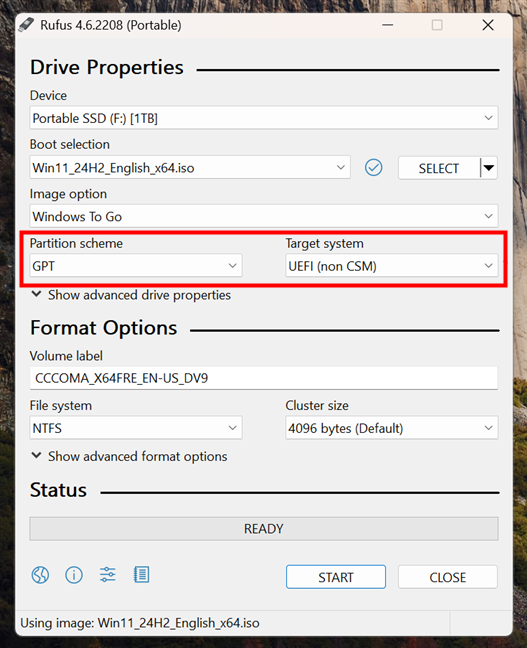
Select the Partition scheme and Target system
TIP: If you’re unsure about these technical terms, you can learn more by reading our guide on UEFI and BIOS.
Step 5. Install Windows on the USB drive
Now, you’re ready to proceed: Keep the rest of the default Rufus settings as-is, and click the START button at the bottom of the Rufus window.
Start creating the Windows To Go drive
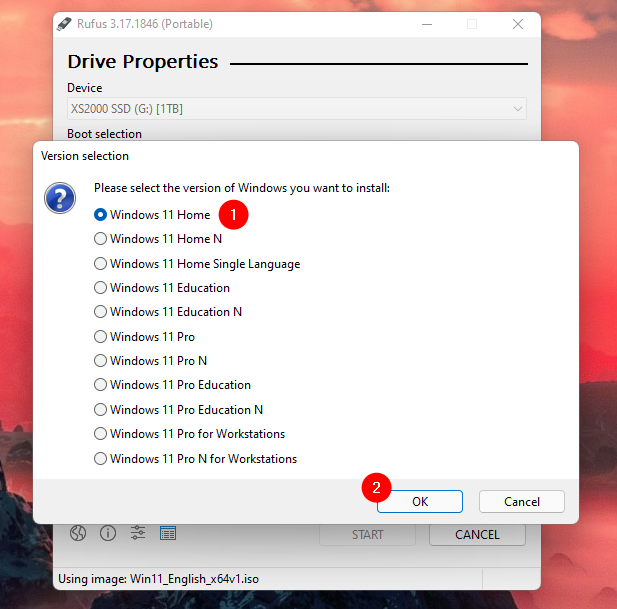
Rufus prompts you to select the Windows edition you want to install, such as Windows 11 Home or Pro. Choose your desired edition and confirm by clicking OK.
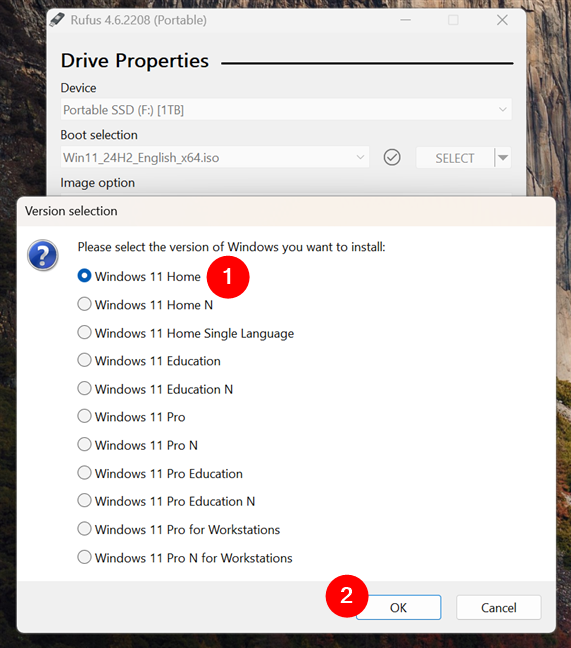
Choose the Windows edition to install on the USB drive
Rufus then opens a new window called Windows User Experience, asking you if you want to Customize Windows installation. Depending on your preferences, these are the options you can choose to enable or disable:
- Prevent Windows To Go from accessing internal disks: This stops your portable Windows installation (Windows To Go) from seeing or changing files on the computer’s internal drives. It helps protect the computer’s main files.
- Remove requirement for an online Microsoft account: This option appears only for Windows 11. It lets you install Windows 11 without having to log in or create an online Microsoft account. You can use Windows 11 right away with just a local account.
- Create a local account with username: Windows will automatically set up a local account with the username you enter (for example, codru). You won’t have to type it during installation.
- Set regional options to the same values as this user’s: Windows will copy your current language, timezone, and keyboard settings. It makes setup faster because you won’t have to choose these again.
- Disable data collection (Skip privacy questions): Windows usually asks questions about sharing your data and privacy settings during setup. Checking this option skips these questions and turns off most data collection automatically.
Once you’ve made your choices, click or tap OK to continue.
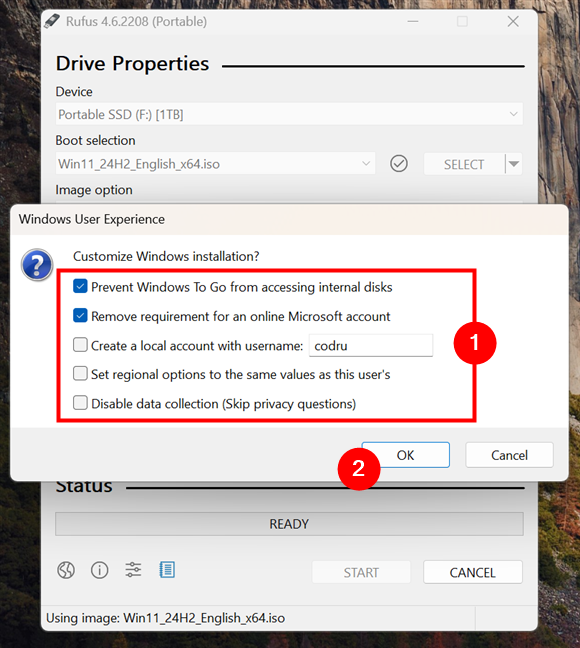
Customize Windows installation in Rufus
You’ll then see a critical warning: Rufus will erase all existing data on the USB drive. Verify once again that nothing important remains on your drive, and confirm your choice by clicking OK.
Rufus warns you that the data on the USB drive will be lost
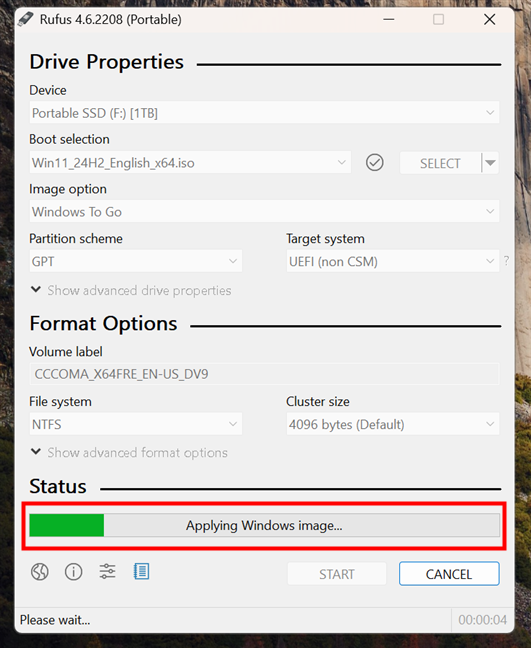
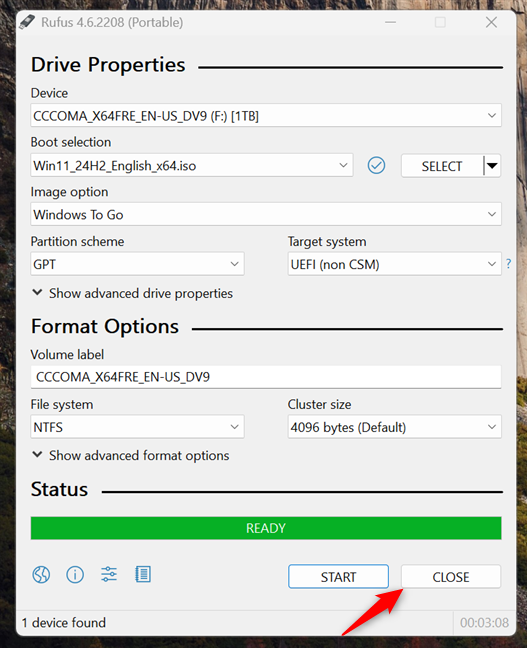
Now, all there’s left for you to do is wait for Rufus to install Windows 11 or Windows 10 on the USB drive. If you want, you can monitor the progress in the Status area of the window.
Rufus installs Windows on the USB drive (Windows To Go)
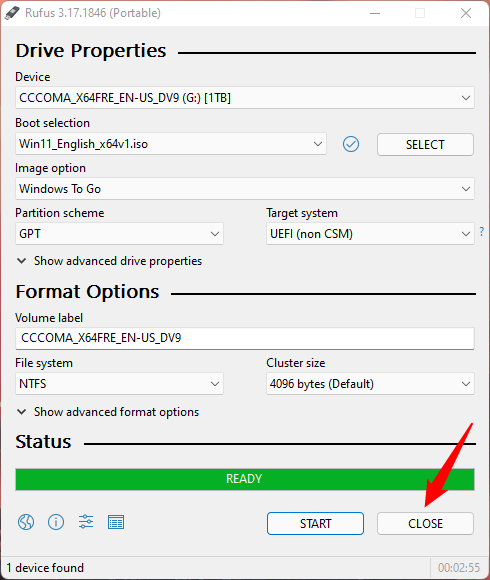
When it’s done, simply press CLOSE to finish creating the Windows To Go USB drive.
The Windows To Go drive is ready
Step 6. Boot from your Windows To Go USB drive
Your portable Windows To Go installation is now ready to use. Safely eject the USB drive and plug it into any other computer. To boot from the USB drive, you typically need to enter the computer’s boot menu by pressing a specific key during startup (often F12, F10, ESC, or DEL). If you’re unsure how to do this, refer to our detailed guides on how to install Windows 11 from USB and how to install Windows 10 from USB, which cover booting and initial setup thoroughly.
When booting for the first time, Windows guides you through a brief setup where you can customize preferences and settings. Once completed, your portable Windows system is fully functional.
IMPORTANT: You might wonder, “What is the difference between Windows To Go and normal Windows?” Essentially, Windows To Go means running Windows from an external USB storage, optimized for portability and compatibility with various hardware.
Why did you want to install Windows on a USB drive?
Congratulations! You now know how to install Windows 11 or install Windows 10 from USB, creating your own portable Windows To Go drive. Did this guide help you achieve your goal of having Windows on a USB drive? Share your experiences, questions, or tips with our other readers in the comments section below!