20.05.2025
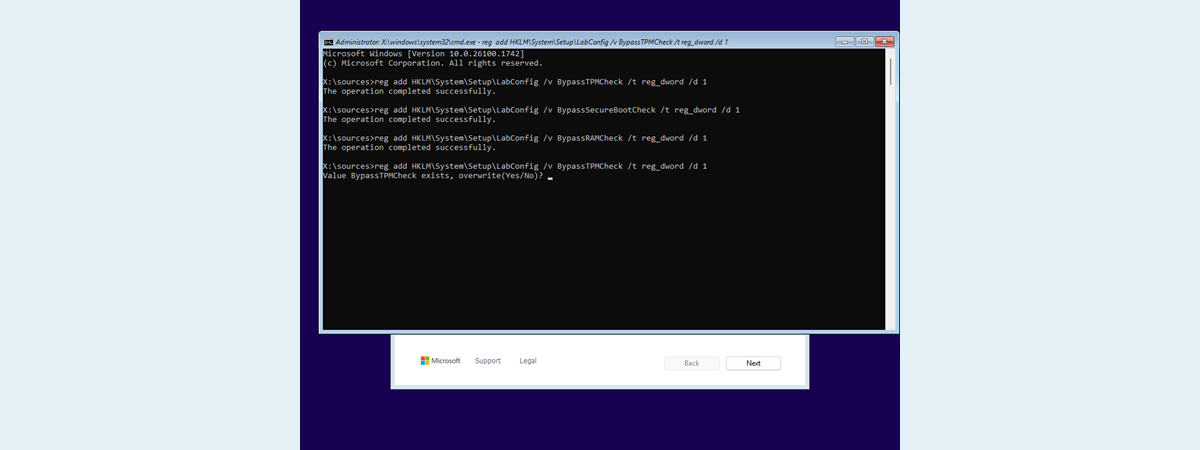
Windows 11 has stricter hardware requirements than any previous version of the operating system. Features like TPM 2.0, Secure Boot, a supported CPU, and at least 4 GB of RAM are officially mandatory. That means many older PCs are locked out, at least on paper. But if you’re determined to run Windows 11 on unsupported hardware, there are safe and effective ways to bypass these restrictions. In this guide, I’ll show you exactly how to install Windows 11 on unsupported hardware, including how to bypass checks for TPM, Secure Boot, RAM, and processor requirements. You’ll also learn how to create a USB installation drive that works on any computer, no matter how old:
IMPORTANT: Before proceeding, double-check if your PC is actually unsupported. To see if it checks all the boxes, read all the minimum Windows 11 system requirements. If your device meets them, you can install Windows 11 normally, as there’s no need to bypass anything.
Method 1. Install Windows 11 on unsupported hardware using command-line bypasses
This method lets you install Windows 11 from a USB drive or DVD even if your computer lacks TPM 2.0, Secure Boot, or sufficient RAM.
Step 1. Create installation media and boot from it
First, prepare a Windows 11 bootable USB memory stick using Microsoft’s Media Creation Tool, or burn a Windows 11 ISO file onto a DVD. Then, boot your PC using the Windows 11 installation disc or USB stick. Wait for a second, and your computer or device should briefly display a message asking you to “Press any key to boot from CD or DVD.” Do so and wait for the Windows 11 installation wizard to load.
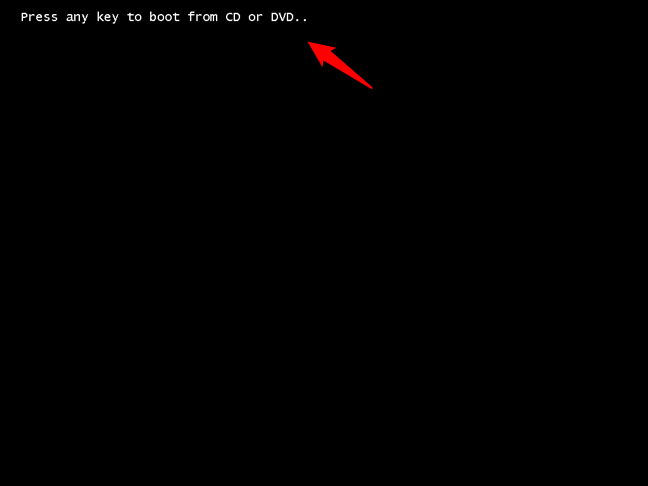
Press any key to boot from CD or DVD
Step 2. Open Command Prompt during setup
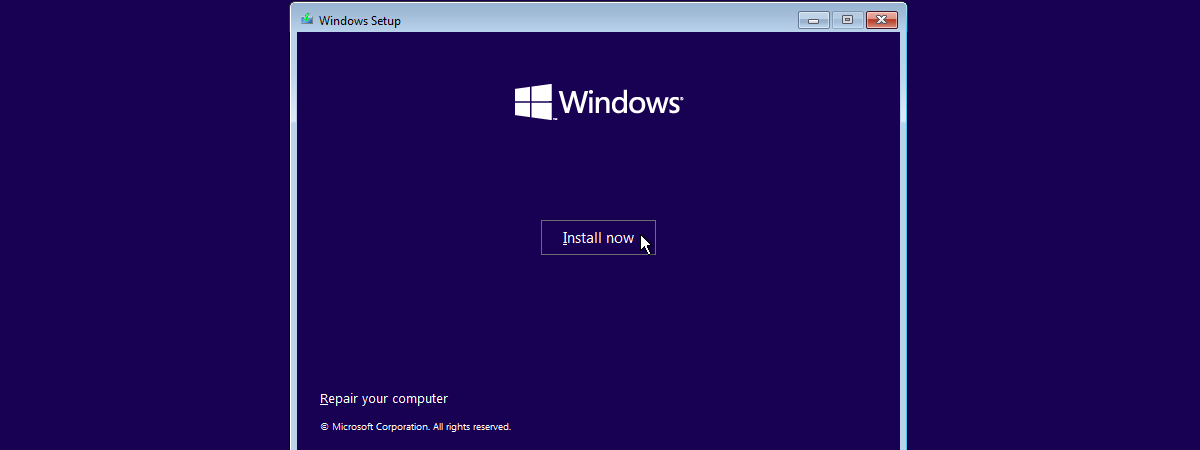
When the setup screen appears, asking for language, time, and keyboard layout, do not proceed yet. Ignore this for the moment.
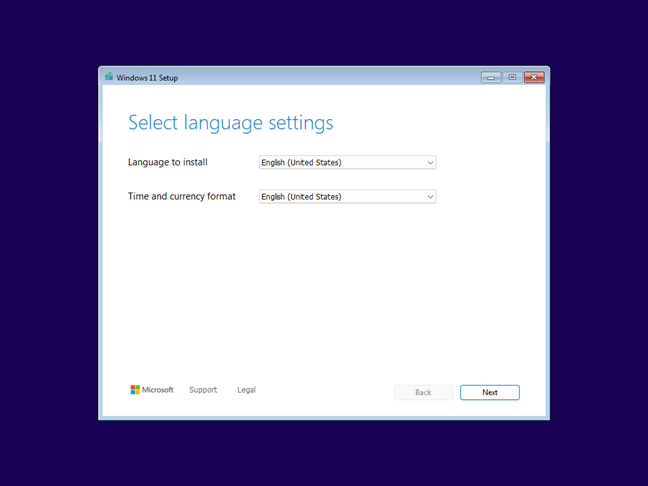
The first step of the Windows 11 Setup wizard
Instead, press Shift + F10 on your keyboard. This opens Command Prompt and represents a hidden feature that lets you enter commands directly during setup.
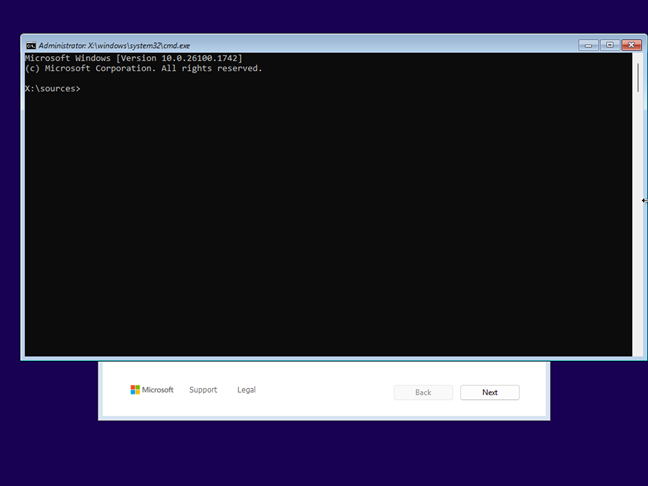
Press Shift + F10 to launch CMD during setup
TIP: If you want to partition your disks from the Command Prompt, here’s how to use disk management commands.
This step is important because if you had continued the setup process normally, it would have eventually told you that “This PC doesn’t currently meet Windows 11 system requirements” because “This PC doesn’t meet the minimum requirements to install this version of Windows.”
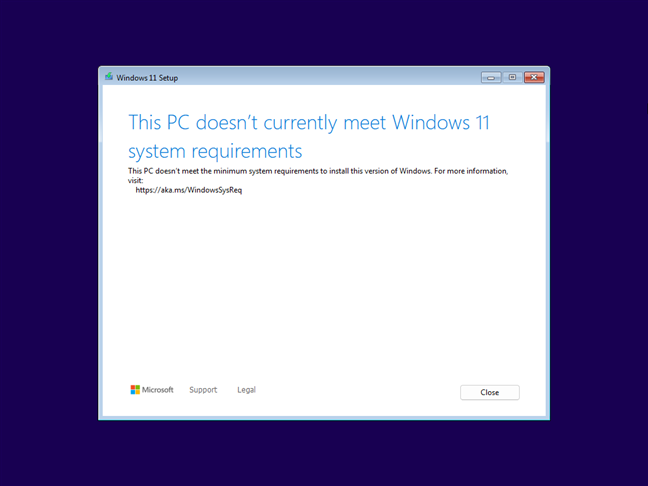
This PC doesn't currently meet Windows 11 system requirements
If your PC had met all the Windows 11 system requirements, like TPM and Secure Boot, there wouldn’t have been any problem. However, because it doesn’t, you need to bypass the operating system’s checks to successfully install Windows 11. That includes TPM, Secure Boot, RAM, and CPU if needed. Here’s how to do that:
Step 3. Bypass hardware checks with Registry edits
After pressing Shift + F10, the Windows 11 setup process launches Command Prompt. In its window, type and execute (by pressing Enter after each of them) the following commands one after the other, according to your needs:
Here’s what these commands do:
- The first one disables the TPM check,
- The second one bypasses the Secure Boot check,
- The third one removes the RAM verification,
- The fourth ignores the CPU requirements.
All the commands should end with messages telling you: “The operation completed successfully.” After you run all four of them, close the Command Prompt.
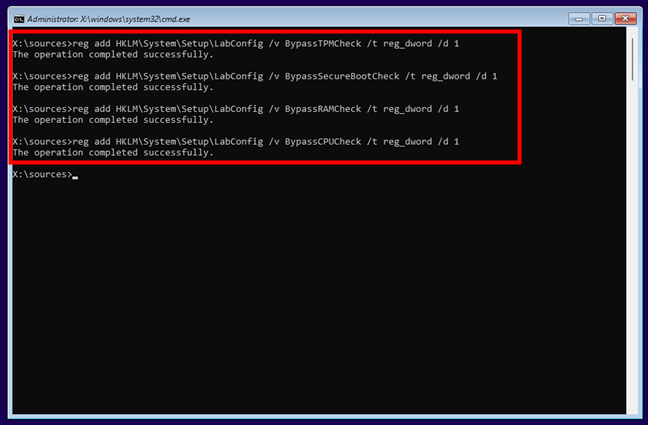
The commands that bypass Windows 11's TPM, SecureBoot, RAM, and CPU checks
Now that you’ve configured the Windows 11 setup to bypass the dreaded TPM, Secure Boot, RAM, and processor checks, you should be able to install it on any computer. From here on, you can continue the installation as you normally would. If you need help, we’ve detailed all the next steps in this dedicated guide: How to install Windows 11 for free. After installing it, you can start testing Windows 11 and see how you like it. 🙂
Windows 11 running on unsupported hardware
This method lets you install Windows 11 from USB drives on unsupported hardware, even on very old machines that don’t meet any of the official requirements. Next, let’s see a more graphical method to install Windows 11 without TPM, Secure Boot, or enough RAM.
Method 2. Use Rufus to install Windows 11 on unsupported hardware from USB
Rufus is a tool that offers yet another method to install Windows 11 on any computer, regardless of whether it meets the system requirements.
Step 1. Download Rufus and the Windows 11 ISO
First, you need to download a Windows 11 ISO file and Rufus. Ensure that you have the latest Rufus version, and keep in mind that you can also get it as a portable app. If you do that, you can simply run the executable file after downloading it without installing anything on your computer.
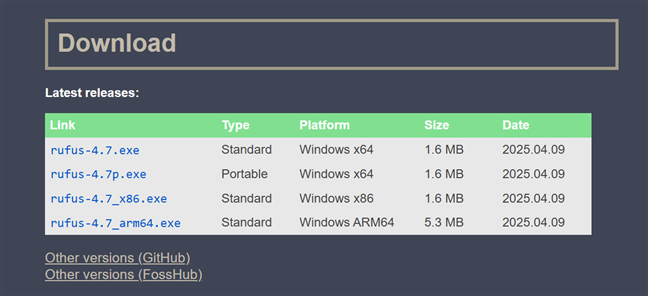
Download and run Rufus
Step 2. Prepare the USB drive
Once you have both Rufus and the Windows 11 ISO file, connect to your computer a USB drive, such as a portable SSD or USB memory stick. Use a drive large enough to fit the Windows 11 setup files. 8GB or more is what’s recommended. After you plug it into your PC, select it in the Device list from Rufus’ window.
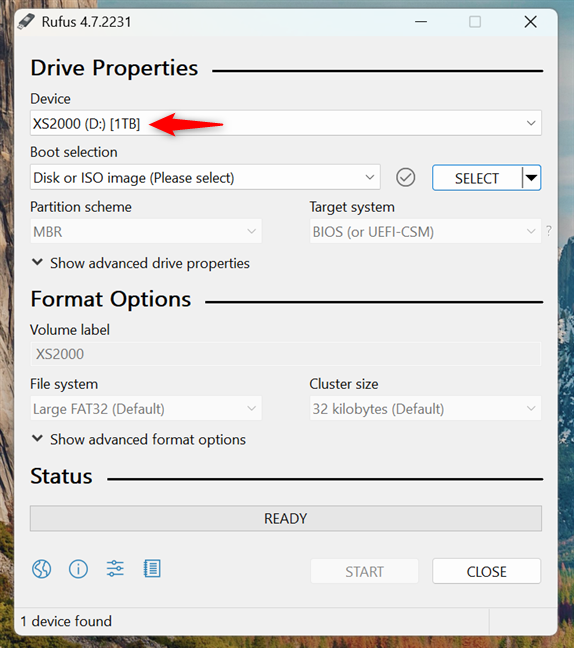
Connect and select the USB drive for Windows 11
Then, click or tap on Boot selection to open a dropdown menu, choose “Disk or ISO image,” and press SELECT next to it. In the new window that shows up, navigate and select the Windows 11 ISO file you downloaded earlier on your PC.
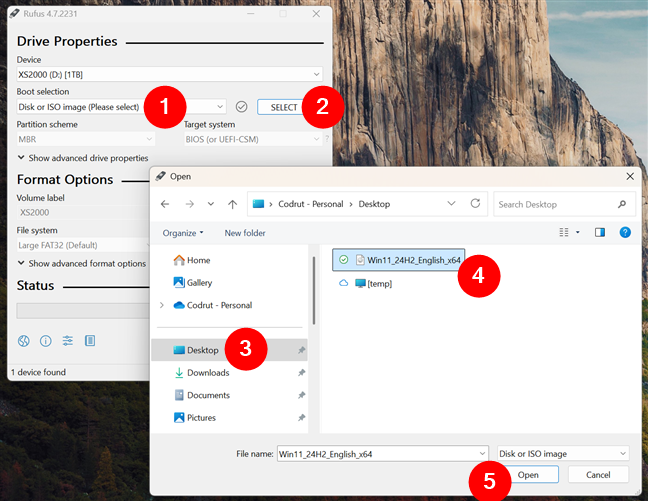
Select the Windows 11 ISO file
Next, select the Partition scheme and Target system. If you intend to install Windows 11 on a modern computer with UEFI, select the GPT Partition scheme and UEFI (non-CSM) Target system.
Otherwise, if you want to install Windows 11 on an older computer that still uses BIOS, choose the MBR Partition scheme and BIOS (or UEFI-CSM) Target system.
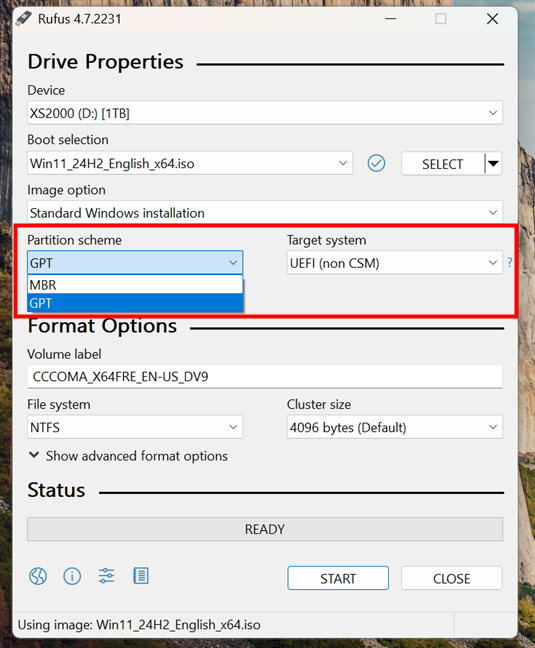
Choose between GPT (UEFI, non CSM) and MBR (BIOS, UEFI-CSM)
You can leave the other settings as they are. To start building the Windows 11 USB drive, press the START button at the bottom.
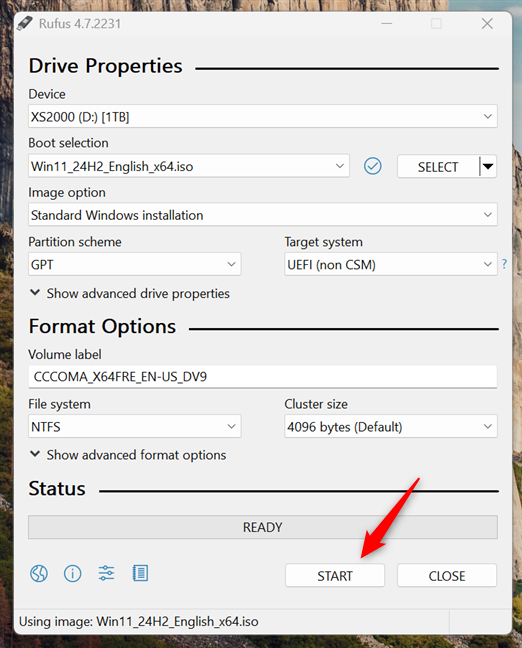
Start creating the Windows 11 installation drive
Step 3. Configure Rufus to bypass checks
Immediately after you press START, Rufus opens a window called Windows User Experience, allowing you to customize your Windows 11 installation. This is where you’ll configure Rufus to create a bootable drive that doesn’t check for Windows 11’s system requirements. To do that, in Rufus’ Windows User Experience window, check the “Remove requirement for 4GB+ RAM, Secure Boot and TPM 2.0” option.
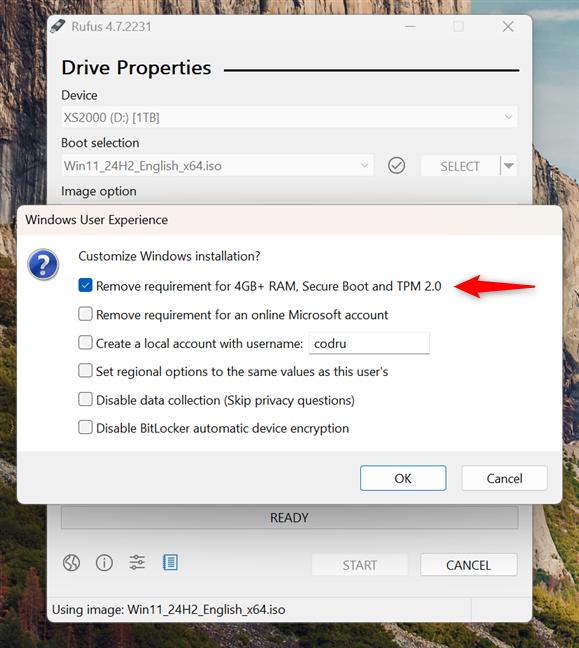
Remove requirement for 4GB+ RAM, Secure Boot and TPM 2.0
Press OK, and Rufus warns you that it will erase all the partitions on the USB drive. That means that all the data on it is deleted during the process. Ensure you have nothing on the USB drive you might still need, and press OK to continue.

Rufus warns you that the data on the USB drive will be lost
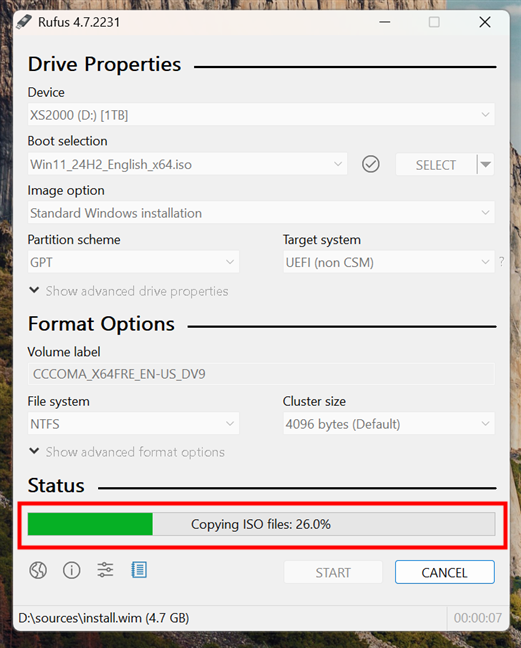
Rufus now creates a bootable Windows 11 USB drive that automatically skips the hardware requirements. If you want, you can check how the process is going by looking at the progress bar. Then, once the process is done, close Rufus.
Rufus creates the Windows 11 USB drive
Now, you can install Windows 11 on unsupported hardware from USB by booting from this drive and following the installation steps.
Should you upgrade to Windows 11 on unsupported hardware?
Although these methods allow you to install or upgrade to Windows 11 on unsupported hardware, keep in mind that:
- You may not receive official updates from Microsoft.
- Stability and performance can vary depending on how incompatible the system is.
- Security features like TPM and Secure Boot are disabled by design, potentially exposing you to more risks.
That said, if your PC runs Windows 10 well, there’s a good chance you’ll find Windows 11 usable too. And last but not least, it’s also important to note that Windows 10 support officially ends on October 14, 2025. After that, it won’t get security updates unless you’re on an extended support plan.
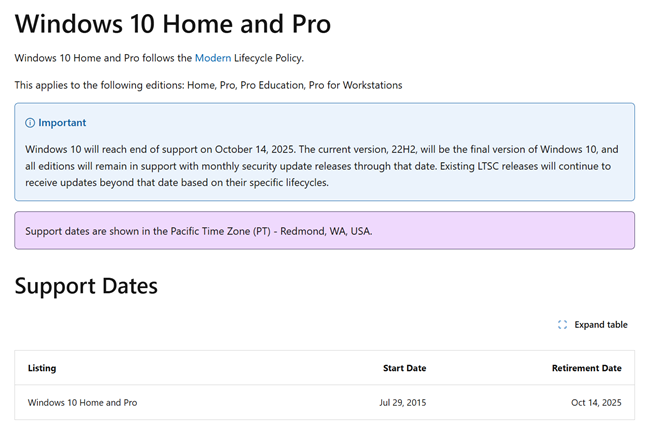
Windows 10 End of Support
You can get more information on that here: Windows 10 End of Support.
Did you manage to install Windows 11 on unsupported hardware?
Now, you know how to install Windows 11 on any computer, even if its hardware doesn’t meet the operating system’s requirements. So all that’s left to do is try Windows 11 and decide whether you want to keep it. 🙂 Let me know how it all worked out for you and whether you encountered any issues installing Windows 11 on an unsupported computer.