25.09.2018
Windows 10 October 2018 Update introduces a new app called Snip & Sketch, meant to replace the Snipping Tool. Snip & Sketch not only lets you take screenshots of your Windows 10 desktop but also includes a built-in image editor that you can use to edit your screenshots and other images. If you want to learn how to edit screenshots and pictures, read this tutorial:
NOTE: The Snip & Sketch tool is available starting with Windows 10 October 2018 Update. If you have an older version of Windows, you cannot use this app. If you do not know what version of Windows 10 you have, read this tutorial: What version, edition, and type of Windows 10 do I have installed?
How to take a screenshot or load an image in Snip & Sketch
If you want to edit a screenshot or an image with Snip & Sketch, you have to take a screenshot or open the image you want to use. If you want to take a screenshot with Snip & Sketch, use the New button or any of the methods we have detailed in this guide: How to use Snip & Sketch to take screenshots in Windows 10.

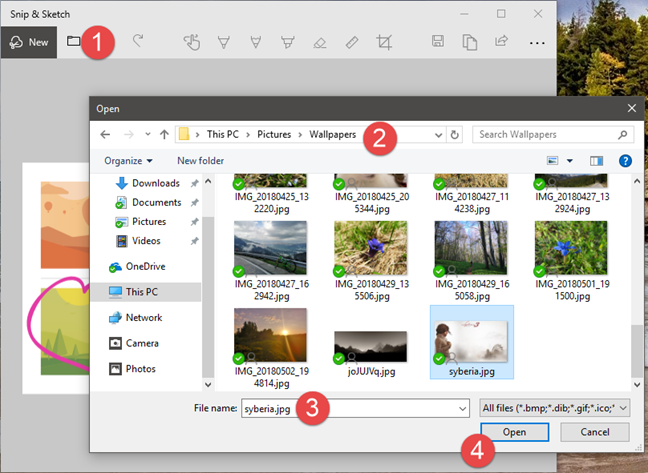
Otherwise, if you want to edit any other image found on your Windows 10 PC, click or tap the Open File button and select the image that you want to edit. Note that the Open File icon looks like a small folder.
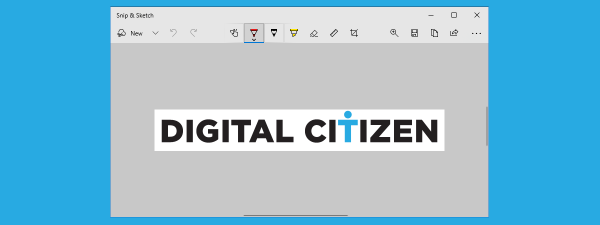
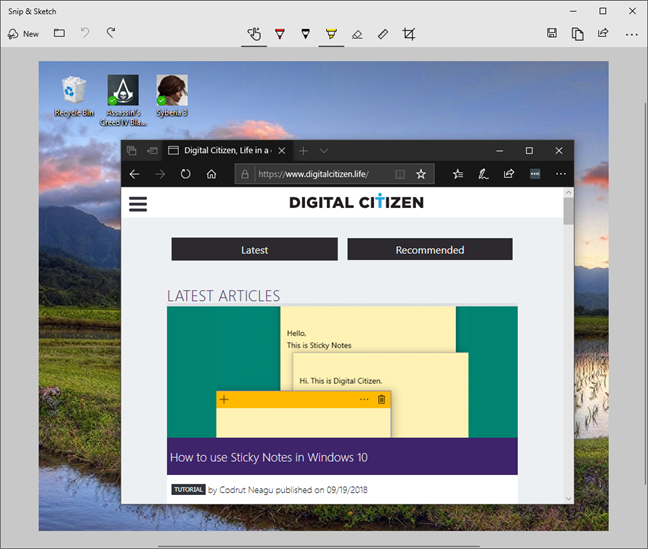
Once you have taken a screenshot or opened an image in Snip & Sketch, you see it loaded in the content area of the window, like in the image below:
To edit and make annotations on the screenshot or image, Snip & Sketch offers a few options. Let's cover them one by one:
How to enable touch-based input and annotations
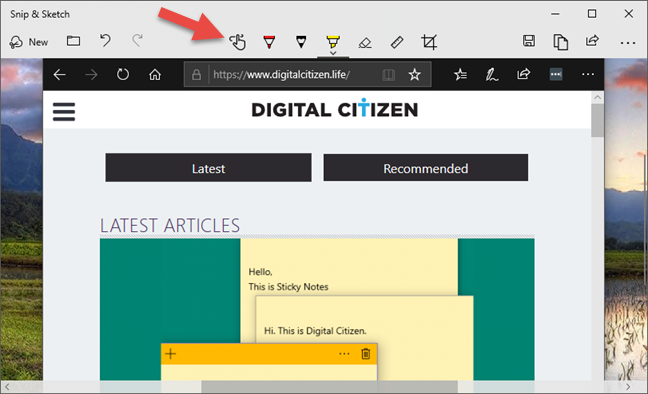
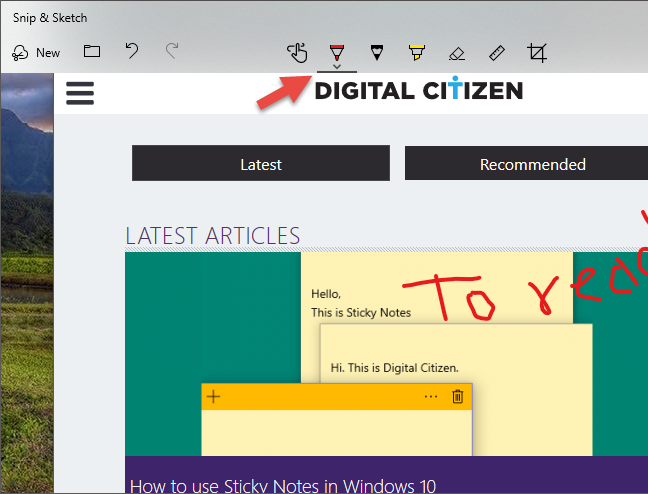
The top menu of the Snip & Sketch app lets you select the type of input that you prefer using. If you have a tablet or 2-in-1 device with a screen that supports touch input, you can choose to use that type of input in Snip & Sketch. This feature is useful to owners of Surface devices, for example. To switch between mouse input and touch input, click or tap the Touch Writing button highlighted below. When this button is enabled, you can use touch to edit your screenshot.
How to annotate screenshots or images in Snip & Sketch
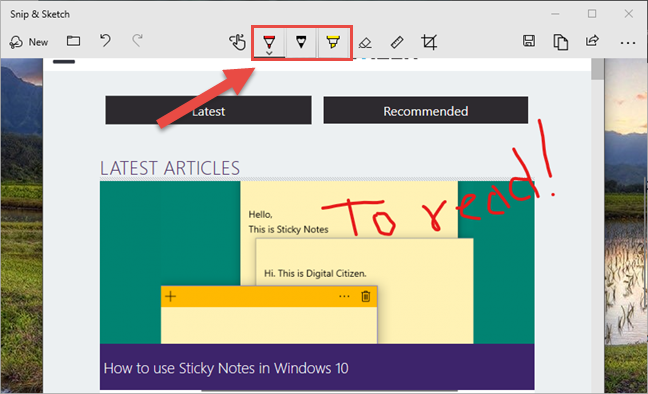
Snip & Sketch lets you write annotations or make any kind of doodles on your screenshots and images. To do that, use your pen, mouse, or touch the image and drag the cursor on the image.
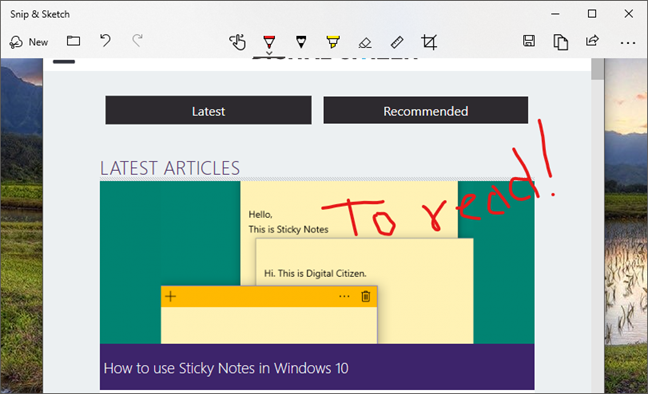
Note that, by default, Snip & Sketch uses a red Ballpoint pen, like in the image above. However, there are other types of pens that you can use and many other colors to choose from.
How to select the type of pen that you are using to write on screenshots and pictures
Snip & Sketch offers three different types of pens that you can use: Ballpoint pen, Pencil, and Highlighter. You can choose the one you prefer by clicking or tapping on their buttons from the menu at the top. It is easy to identify which is which because their icons resemble real-life pens.
The type of pen that is currently selected is marked by a thin dark line under its button.
How to select the color and size of the pen that you are using
You can also choose what color and size you prefer for the pen. To do that, right-click or tap and hold the pen that you use. Snip & Sketch should then show a popup in which there are multiple color options and, at the bottom, a slider for choosing the size of the pen.
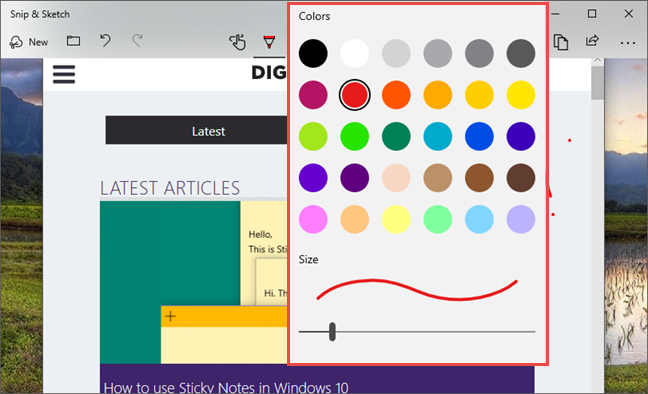
Click or tap the color you prefer and drag the slider to the left or to the right to choose the pen's size.
How to erase annotations in Snip & Sketch
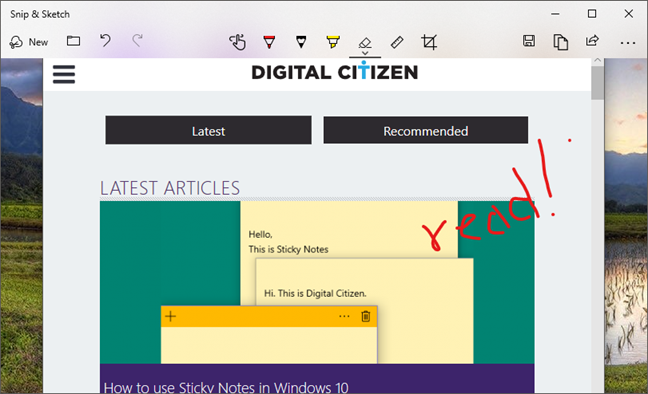
The Snip & Sketch app also includes an Eraser tool that you can use to delete annotations or doodles from the screenshot or image that you are editing. To select the Eraser, click or tap on its button from the menu.

Then, drag the pen, mouse cursor, or your finger, on the annotation(s) that you want to erase.
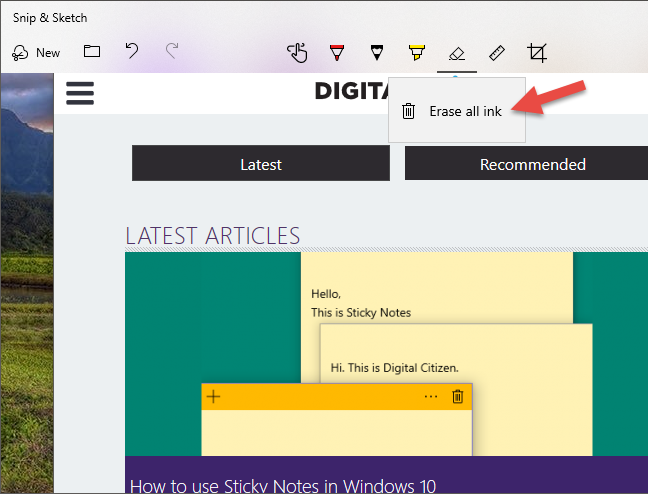
If you want to delete all the annotations you have made, select the Eraser tool and click/tap on it once more. This shows you a second option called Erase all ink. Click or tap on it and all annotations are gone. Another method is to right-click or tap and hold the Eraser button, for the same result.
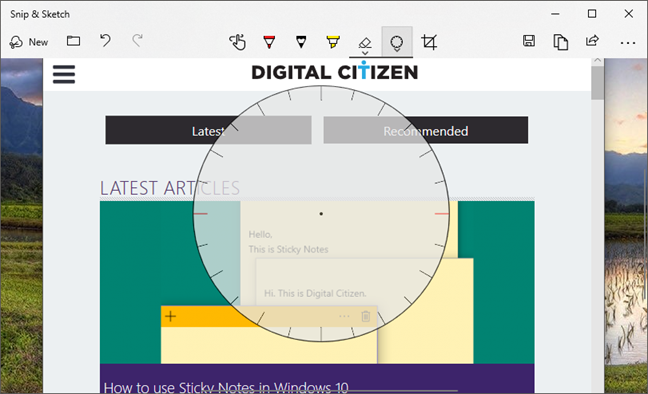
How to use the ruler and protractor
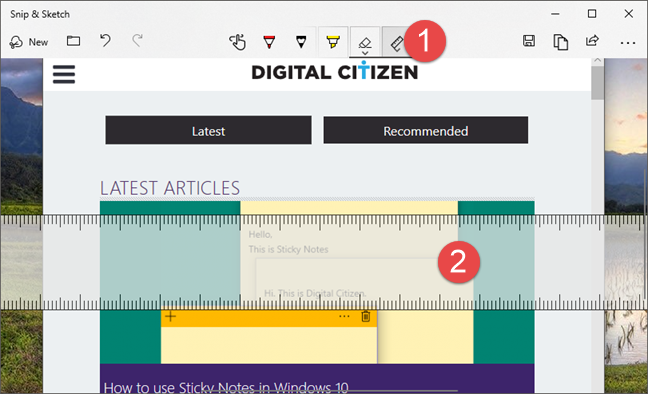
Snip & Sketch includes a virtual ruler and a virtual protractor which you might want to use in certain situations. For example, if you want to measure something, if you want to draw straight lines, or if you want to measure angles.
To open the ruler, click or tap the Ruler button from the top menu, and the virtual ruler should appear in the center of the Snip & Sketch window.
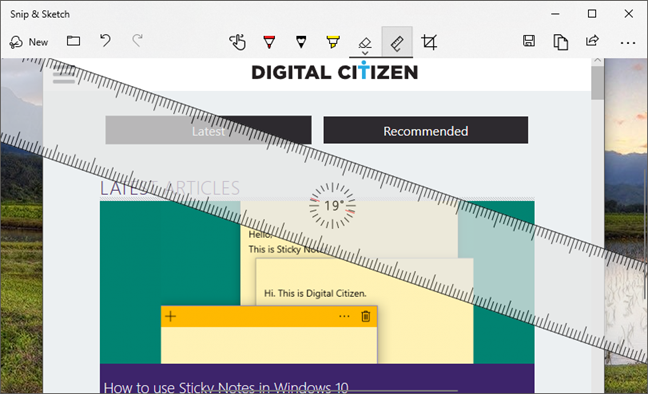
To move the ruler, drag it around with the mouse, your finger or the pen. Furthermore, if you want to rotate the ruler, use the mouse scroll wheel or use two fingers on it.
If you need to use the protractor, click or tap once more on the Ruler button from the menu. In the menu that opens, choose Protractor, and the virtual protractor tool should appear.
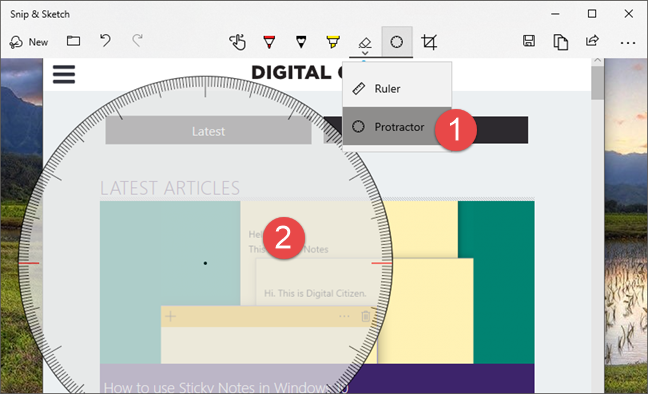
To move the protractor around, drag it where you want it to be. Using the mouse scroll wheel or two fingers on it makes the protractor smaller or larger.
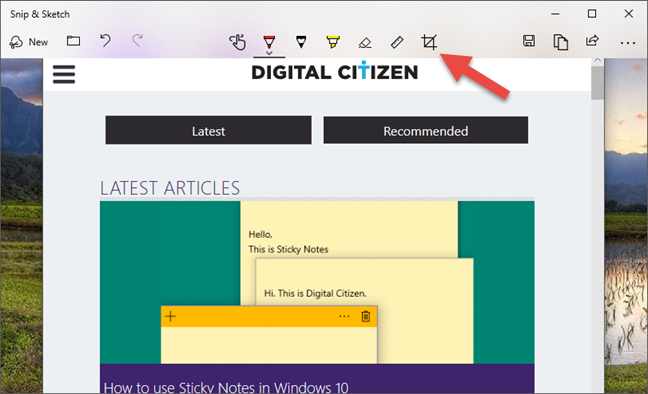
How to crop screenshots and images in Snip & Sketch
Sometimes you may want to also crop a screenshot or image. To do that, in the Snip & Sketch menu bar, click or tap the Crop button.
Then, drag the large white dots shown on the screenshot or image, to select the area that you want to keep.

When you are done, press the check button from the top-right corner of the window.
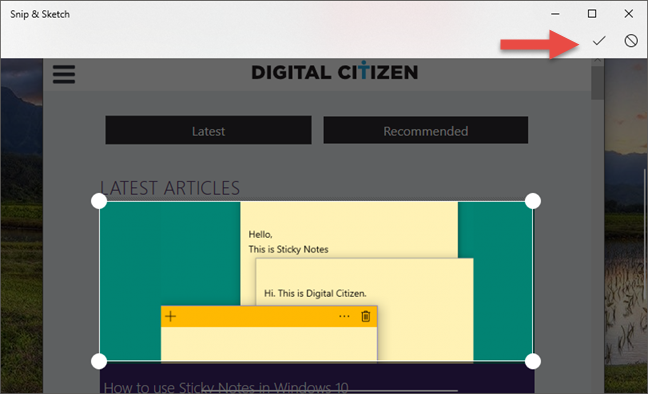
If you changed your mind and no longer want to crop the screenshot/image, click or tap the Cancel button.

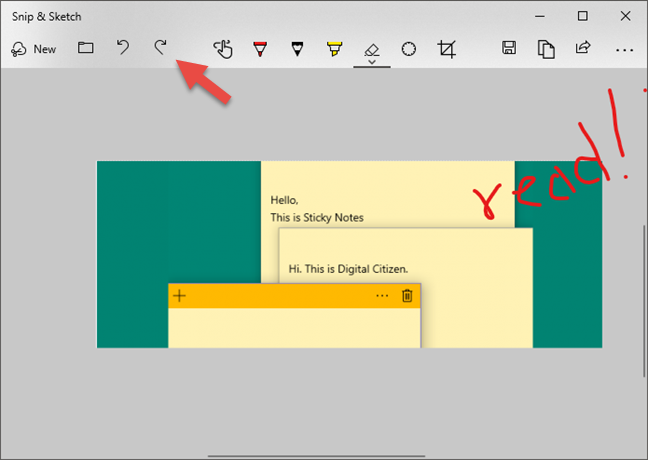
How to undo or redo your edits
If you changed your mind about an edit you made on the screenshot or image, click or tap on the Undo button from the menu bar. Alternatively, you can also use the keyboard shortcut Ctrl + Z.
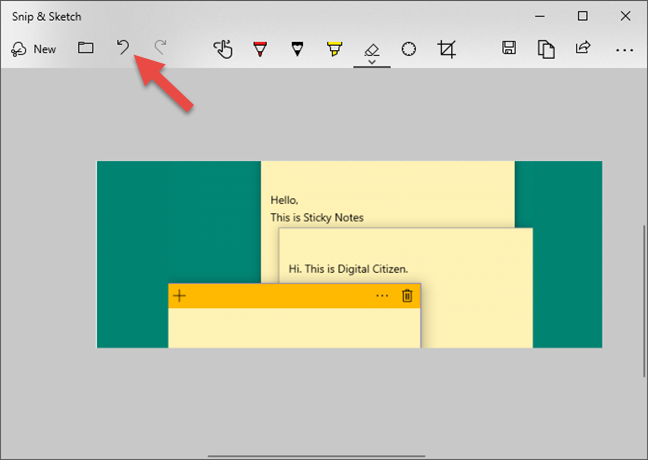
To redo an edit, press the Redo button or use the keyboard shortcut Ctrl + Y.
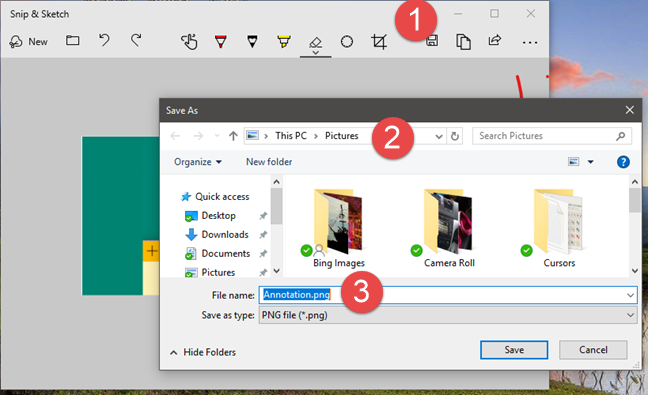
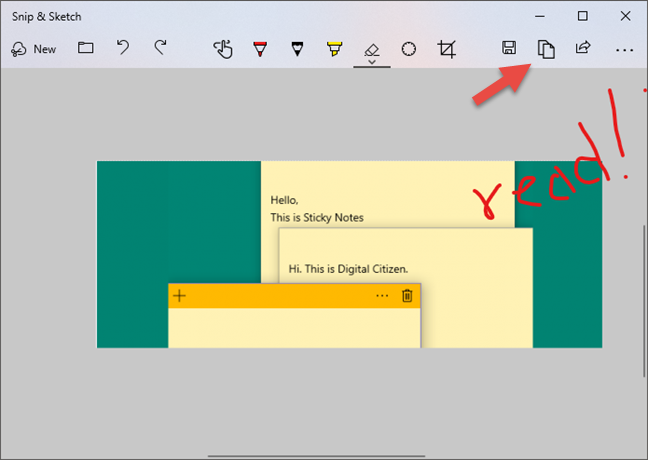
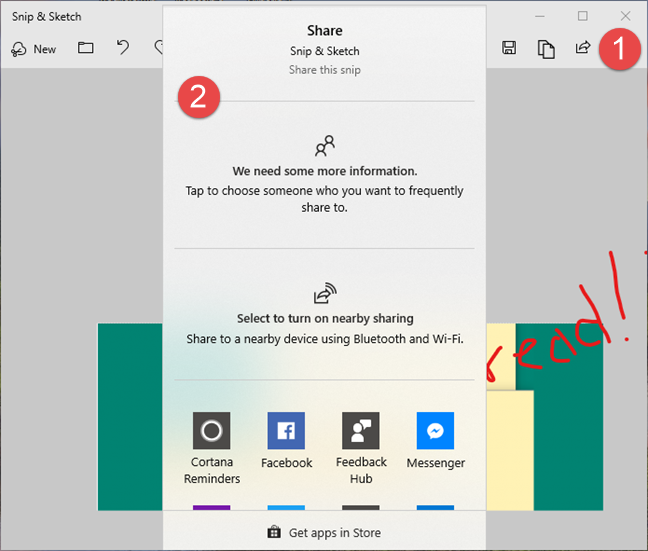
How to save, copy or share your edited screenshot or image
In the Snip & Sketch app, on the top menu, you can also find buttons for Save as, Copy and Share. If you want to save your edited screenshot or image, click or tap Save as, choose the name for the file, and the location on your PC where you want to save it. Do not forget to press Save in the Save As window.
If you want to copy the edited screenshot or image to your clipboard, click or tap on Copy.
If you want to share the edited screenshot or image with someone else, click or tap Share and select to whom or where you want to share it.
Do you like the way you can edit screenshots and images in Snip & Sketch?
Now you know what you can do with the built-in image editor from Snip & Sketch. Do you like how it works? Does it offer the tools you need? Are there any other editing tools that you would want to be added to it? If you have any questions or recommendations to make on this subject, write a message in the comments section below.