


Windows 11 and Windows 10 both have some exciting new options that allow you to change the mouse pointer size and color. Have you grown tired of the dull white or black mouse pointer? Are you having trouble seeing the standard size mouse cursor on your screen? Would you prefer one in a lively color, maybe one that matches your wallpaper? How about making it up to three times bigger or making it thicker when typing? Here is how to get to the mouse size settings and how to change your pointer’s size and color in Windows:
NOTE: We wrote this tutorial using the initial release of Windows 11 (version 21H2 build 22000), as well as Windows 10 (version 21H2 build 19044). If you’re using an older version of Windows 10, you might have to install the latest updates to get access to all the features presented.
 Mouse pointer and touch in the Settings app
 The Ease of Access section of the Settings app
Select Mouse pointer in the list of options on the left.
The Ease of Access section of the Settings app
Select Mouse pointer in the list of options on the left.
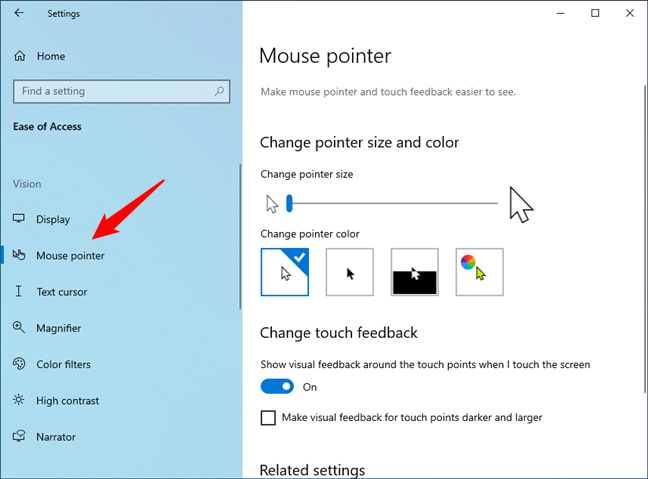 Windows 10’s Mouse pointer settings
NOTE: From here on, the steps to change the pointer size, color, and thickness are similar (almost identical) in Windows 11 and Windows 10.
Windows 10’s Mouse pointer settings
NOTE: From here on, the steps to change the pointer size, color, and thickness are similar (almost identical) in Windows 11 and Windows 10.
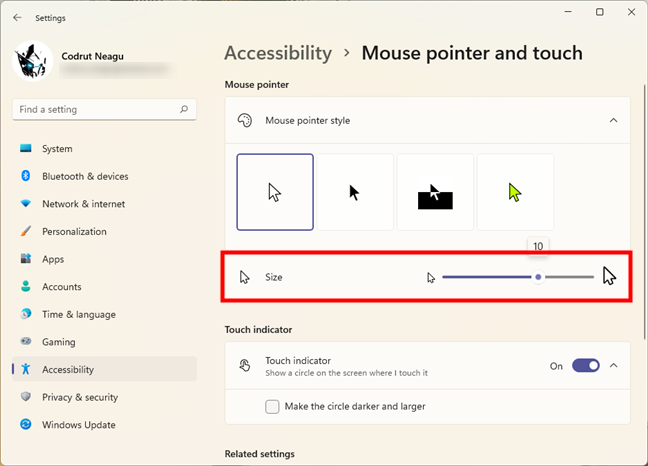
 Use the slider to change the pointer's size
As indicated by the graphics, moving the slider to the right makes the pointer bigger, while dragging it to the left turns it into a smaller one.
Use the slider to change the pointer's size
As indicated by the graphics, moving the slider to the right makes the pointer bigger, while dragging it to the left turns it into a smaller one.
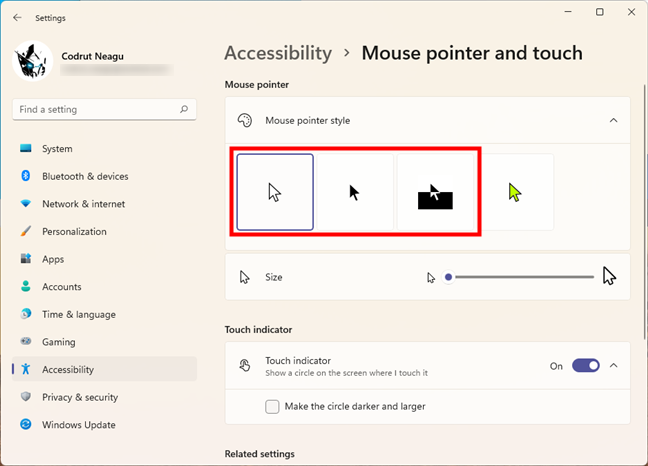
 Change the pointer color in Windows
As indicated by the graphics used, the first two options are white with a black border (which is the default) and black with a white border. The third, illustrated as black on a white background and white on a black background, has an inversion effect, ensuring your mouse pointer is always visible, by changing it to a color complementary to the color you’re hovering over. This does not just happen for black and white: hovering with your pointer on a blue background makes it turn orange, a red background turns it cyan, and so on.
Change the pointer color in Windows
As indicated by the graphics used, the first two options are white with a black border (which is the default) and black with a white border. The third, illustrated as black on a white background and white on a black background, has an inversion effect, ensuring your mouse pointer is always visible, by changing it to a color complementary to the color you’re hovering over. This does not just happen for black and white: hovering with your pointer on a blue background makes it turn orange, a red background turns it cyan, and so on.
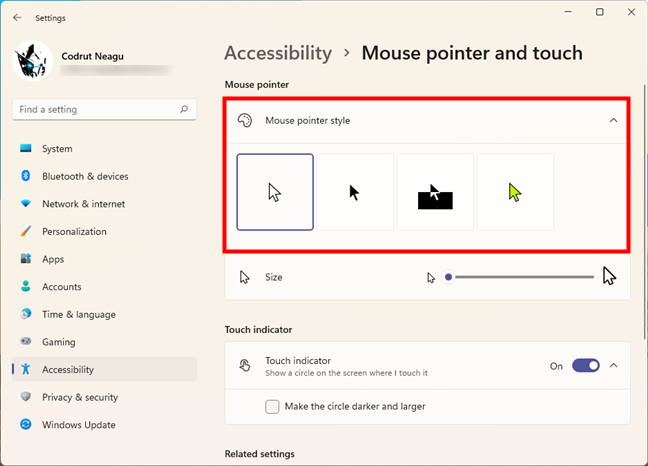
 The first three mouse pointer styles are predefined
The fourth and last mouse pointer style adds a black border to the color of your choice. Clicking or tapping on it reveals a rainbow of recommended pointer colors you can choose from. If you like a color from the list, click or tap on it.
The first three mouse pointer styles are predefined
The fourth and last mouse pointer style adds a black border to the color of your choice. Clicking or tapping on it reveals a rainbow of recommended pointer colors you can choose from. If you like a color from the list, click or tap on it.
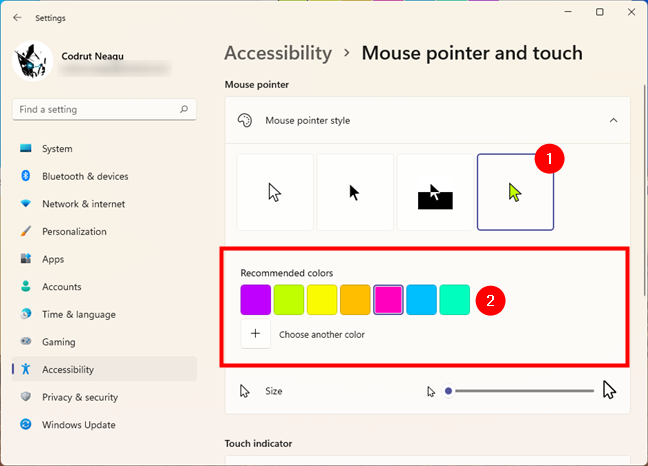 Choose one of the recommended pointer colors for a fun cursor
If you have a different color in mind, click or tap the plus button under the recommended colors. In Windows 11, it’s called “Choose another color,” while in Windows 10 it’s named “Pick a custom pointer color.”
Choose one of the recommended pointer colors for a fun cursor
If you have a different color in mind, click or tap the plus button under the recommended colors. In Windows 11, it’s called “Choose another color,” while in Windows 10 it’s named “Pick a custom pointer color.”
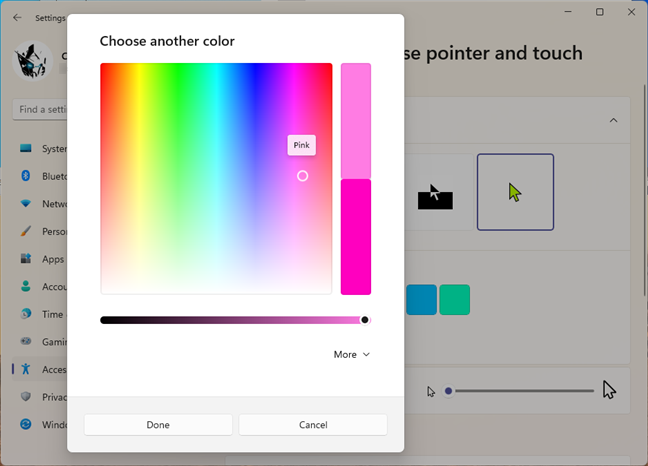
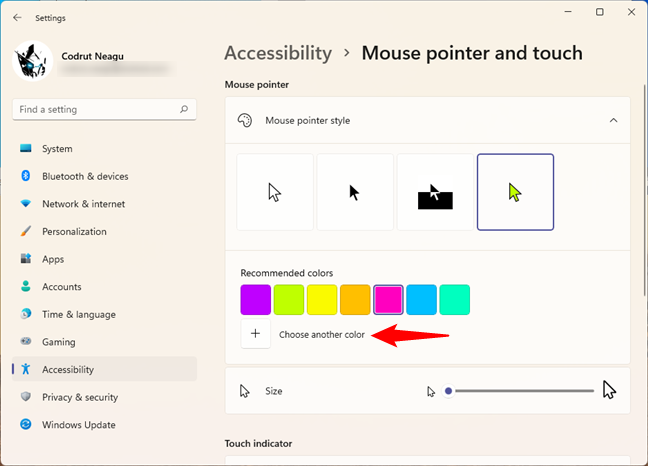 Choose another color for the mouse pointer
In the new color selection window that pops up, choose any color you like from the whole RGB spectrum. You have absolute freedom in your choice, and a slider at the bottom helps you fine-tune the color you choose.
Choose another color for the mouse pointer
In the new color selection window that pops up, choose any color you like from the whole RGB spectrum. You have absolute freedom in your choice, and a slider at the bottom helps you fine-tune the color you choose.
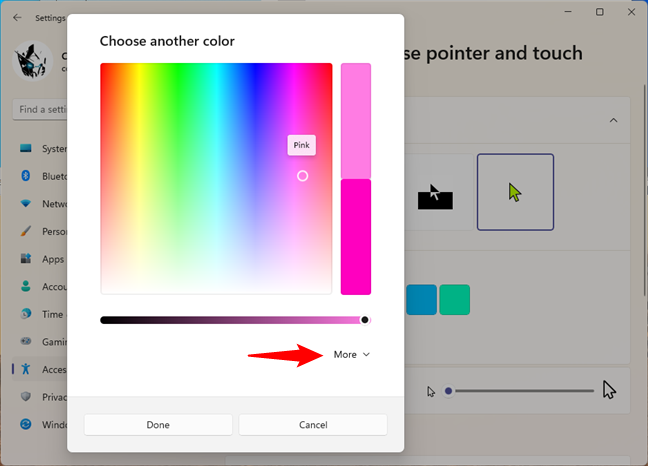
 Click or tap anywhere to select a color and see its name
If you need to be accurate, and you already know the RGB code of the color that you want to use, click or tap More.
Click or tap anywhere to select a color and see its name
If you need to be accurate, and you already know the RGB code of the color that you want to use, click or tap More.
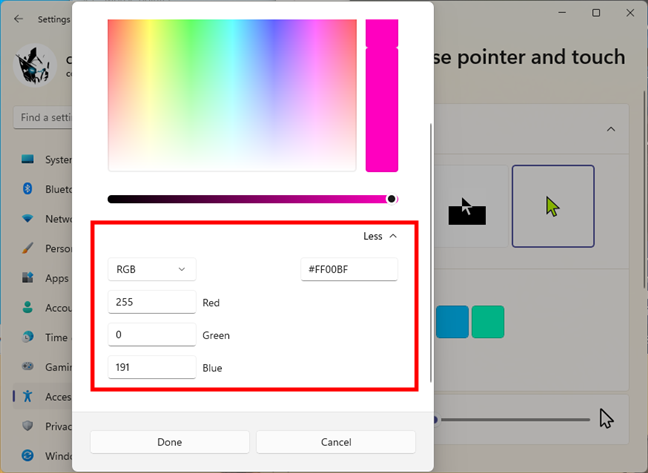
 Pick a custom mouse pointer color
Additional options are shown, where you can enter the code of the color that you want to use. Your changes are displayed in real-time, so, when you are satisfied, press Done and enjoy your new pointer.
Pick a custom mouse pointer color
Additional options are shown, where you can enter the code of the color that you want to use. Your changes are displayed in real-time, so, when you are satisfied, press Done and enjoy your new pointer.
 Enter the code for a custom mouse pointer color
NOTE: If you are not satisfied with your pointer’s appearance, see how to use custom mouse cursors and pointers in Windows. And, if you want to learn more about personalizing your mouse, read: How to configure the mouse in Windows.
Enter the code for a custom mouse pointer color
NOTE: If you are not satisfied with your pointer’s appearance, see how to use custom mouse cursors and pointers in Windows. And, if you want to learn more about personalizing your mouse, read: How to configure the mouse in Windows.
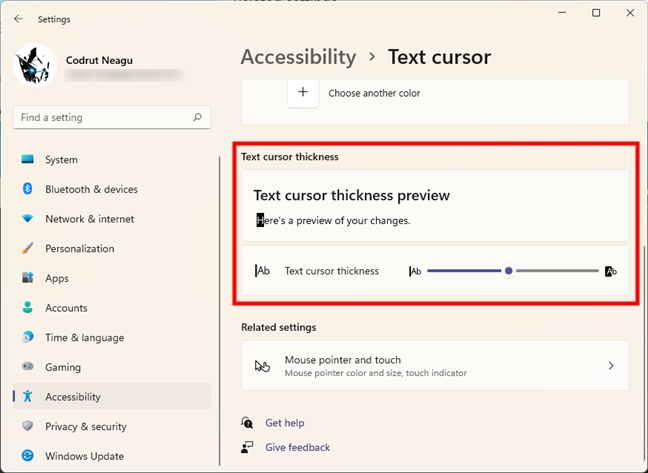
 Open the Text cursor settings
In either operating system, scroll on the right side of the Settings window until you find the slider called “Text cursor thickness.” Move the slider and watch the preview box to make your decision.
Open the Text cursor settings
In either operating system, scroll on the right side of the Settings window until you find the slider called “Text cursor thickness.” Move the slider and watch the preview box to make your decision.
 Move the slider to adjust the cursor’s thickness
From now on, the mouse cursor while typing will be as thick or thin as you’ve decided, hopefully making it easier for you to write on your computer.
Move the slider to adjust the cursor’s thickness
From now on, the mouse cursor while typing will be as thick or thin as you’ve decided, hopefully making it easier for you to write on your computer.
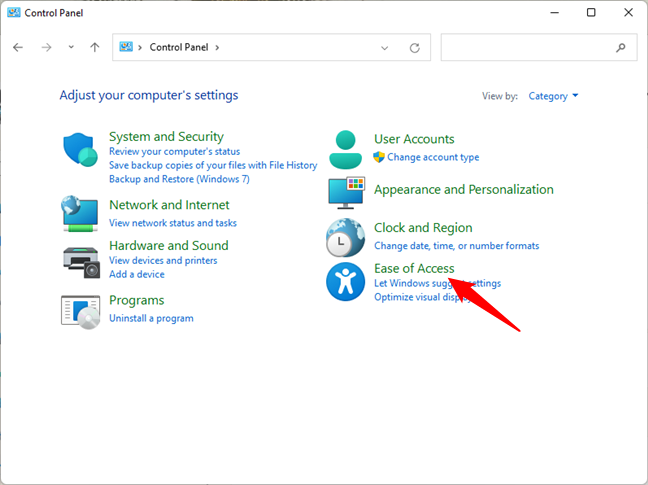
 The Windows 11 Control Panel
In the section called “Ease of Access Center,” click or tap on the “Change how your mouse works” link.
The Windows 11 Control Panel
In the section called “Ease of Access Center,” click or tap on the “Change how your mouse works” link.
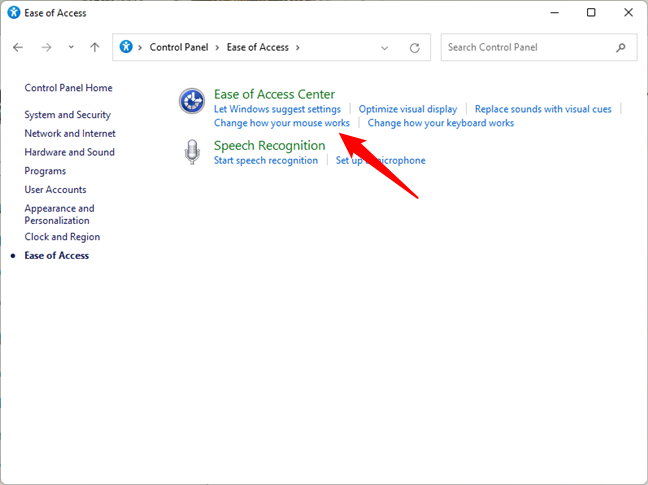 Ease of Access settings
A window named “Make the mouse easier to use” opens. Here you can find a series of mouse-related settings, starting with the size and color of your mouse pointer. In the Mouse pointers section, you can choose from three different mouse cursor colors and from three different sizes for each color. The third one has an inversion effect, which changes your mouse color for maximum visibility, depending on what color you are hovering over. Choose the size and the color that you want to use.
Ease of Access settings
A window named “Make the mouse easier to use” opens. Here you can find a series of mouse-related settings, starting with the size and color of your mouse pointer. In the Mouse pointers section, you can choose from three different mouse cursor colors and from three different sizes for each color. The third one has an inversion effect, which changes your mouse color for maximum visibility, depending on what color you are hovering over. Choose the size and the color that you want to use.
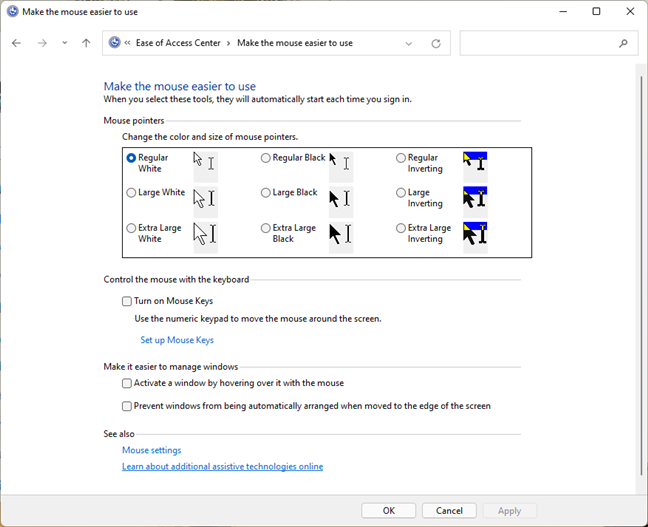
 Make the mouse easier to use in Windows
Do not forget to press OK or Apply for your changes to take effect. You can now close the Control Panel and enjoy using your new mouse pointer.
Make the mouse easier to use in Windows
Do not forget to press OK or Apply for your changes to take effect. You can now close the Control Panel and enjoy using your new mouse pointer.
How to access the mouse size settings in Windows
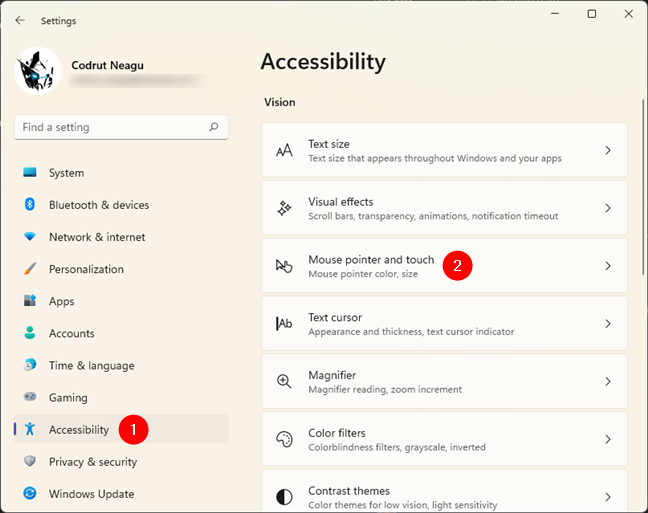
First, we’ll show how this is done in Windows 11 and then in Windows 10. Scroll to the section that fits your version of Windows.1. Go to the “Mouse pointer and touch” settings in Windows 11
In Windows 11, in order to change the mouse pointer size, color, or thickness, you’ll need to first get to the appropriate page from the Settings app. Fortunately, that’s easy to do: open Settings (press Windows + I on your keyboard), select Accessibility on the left sidebar, and click or tap on “Mouse pointer and touch” on the right side of the window.2. Go to the “Mouse pointer” in Windows 10
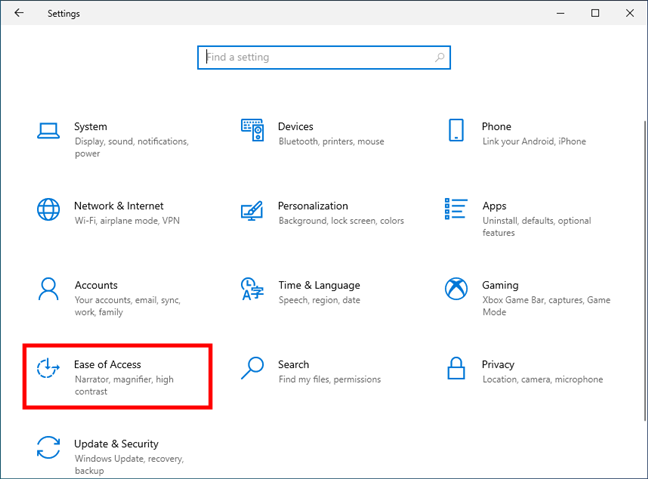
If you’re using Windows 10, open the Settings app on your Windows 10 PC or device. A quick way to do that is to press Windows + I on your keyboard. In Windows Settings, click or tap Ease of Access.How to change the size of the mouse pointer
If you’re on Windows 11, look at the Mouse pointer area from the Mouse pointer and touch settings page. There, you’ll find a slider called simply Size. In Windows 10, the slider is called “Change pointer size” and is found in the “Change pointer size and color” section from the Mouse pointer page. By default, both Windows 11 and Windows 10 use the smallest pointer size available, but you can use the aforementioned slider to choose any dimension from 1 to 15, which can make your pointer up to three times bigger than the standard size.How to change the mouse pointer color
Don’t close the Settings app yet: on the same page, you’ll also find the color options for your mouse pointer. In Windows 11, it’s called “Mouse pointer style,” while in Windows 10, it’s called “Change pointer color.” It’s the same thing, even if the naming is slightly different. All you have to do to change your mouse cursor color is to choose one of the four available options.How to change the text cursor thickness when typing
There is one other pointer setting that you might want to customize, and it’s important, especially if you spend time writing on your Windows computer or device: the blinking cursor used when typing text. If you spend a substantial amount of time in the company of letters or numbers, as we do, you might appreciate the option to make this cursor more visible, by adjusting its thickness. In the Settings app, go back to the Accessibility section in Windows 11, or Ease of Access in Windows 10. Then, click or tap on Text cursor.Bonus for old-school users: How to change the mouse pointer size and color from the Control Panel
You can also customize your pointer from the more limiting options available from the Control Panel, although these are less useful than those from the Settings app. To customize the mouse cursor’s size and color, open the Control Panel and go to the “Ease of Access” section.

Discussion (15)
thank uuuuuuuuuuuuuuuuuuuuuuuuuuuuuuuuuuuuuuuuuuuuuu so coolllllllllllllllllllllllllllllllllllllllllllllllllllllllllllllllllllllllll
Mine doesn’t have the color option
I follow all the steps but I do not have a color option under change pointer size and color. How do I get that?
I’m starting with yellow encased in black border
Not a bad choice 😉
Windows 10 version 1903 does not allow the pointer color to be changed as you have stated. Allows white, black, and inverted. Sure would like to have color change so that I could make the pointer bright yellow.
FOUND A WAY!!!
Click on SETTINGS
Click on DEVICES
Click on MOUSE
Click on RELATED SETTINGS
Click on CHANGE POINTER COLOR
Click on the box that has the color circle in it
Click on a color or click on PICK A CUSTOM COLOR
Hey, worked for me. I now have bright yellow pointers on all Windows 10 systems.
Black isn’t really a color; we want red, pink, fuschia, green mouse pointers
want to make pointer red in color unavailable
font size is too small in windows 10
everything on screen should be on fontsize12
(normal) and 14 largeand 16 extra large u shoud b able to set this quickly.
there should be a button at bottom to change brightness manullay anytime
greyed out gthings shoul b ein bold grey . even though it is greyed u should be able to read without strain on eyes.
u are programmed that grey does not work tthats all
windows shoukd be easy on eyes communicate my msg to icrosoft.
also most people use only 10 pct of windows design a simpler system and set an option simple interface and comlete ointerface using f1 key
Microsoft and the mouse creators are not ‘getting it’, their mouse pointers are far too small.
On the largest Windows 7-10 can have, it’s still smaller than it really needs to be on the large displays we have now where a pointer just gets lost.
Very frustrating on Windows 10. Even at maximum allowed size, the “I” bar (not the arrow) is TINY and very hard to see. This is what lets you know where you exactly are on a page, and it is so small that it sometimes gets impossilbe to see. Please advise!!!!!!
Problem seems to have now resolved.
Glad to hear that. 🙂
your screens for Windows 10 don’t match my Windows 10 screens!!
Can you share a screenshot of how things look on your end?