


In both Windows 11 and Windows 10, OneDrive is embedded into the operating system, and it serves as the default service for storing your files to the cloud, synchronizing them with other devices, syncing your Windows settings, etc. Some of the most common questions when working with it are: “Where is OneDrive located on my computer?” and “How do I change OneDrive’s folder location?”. If you want to find out where your OneDrive data is located on your Windows PC and how to move your OneDrive folder to store your files in another location than the default, read on:
 The default folders from a Windows user account
This means that, in Windows, all your OneDrive data is located in:
The default folders from a Windows user account
This means that, in Windows, all your OneDrive data is located in:
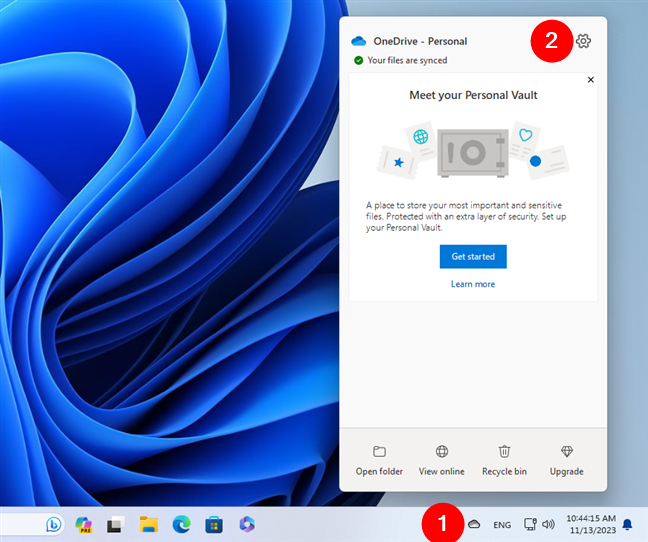
 The OneDrive icon from the taskbar
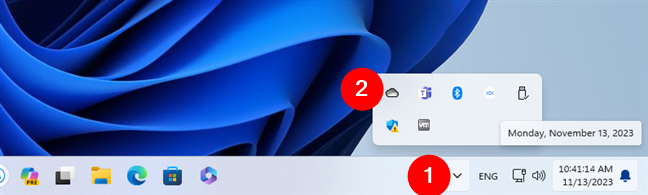
If you don’t see OneDrive there, click or tap the small arrow found to the left of the system tray icons. You’re going to find OneDrive in the list of hidden icons.
The OneDrive icon from the taskbar
If you don’t see OneDrive there, click or tap the small arrow found to the left of the system tray icons. You’re going to find OneDrive in the list of hidden icons.
 The OneDrive icon in the hidden icons list
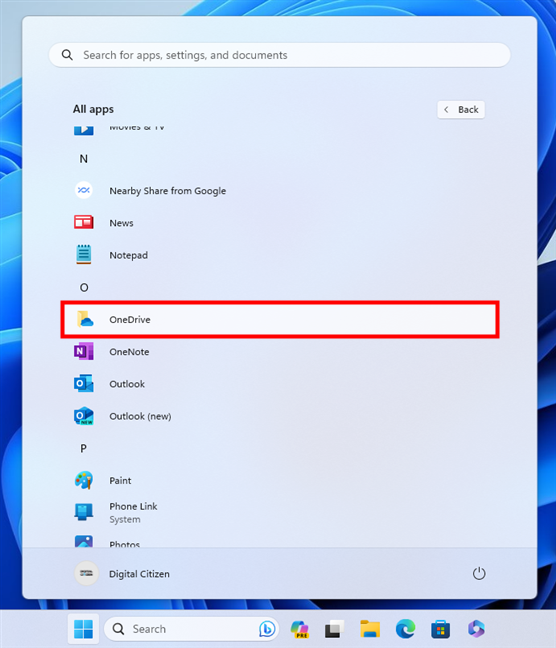
TIP: If the OneDrive icon is nowhere to be found in the system tray or among the hidden icons, open the OneDrive app from the Start Menu. Its shortcut is in the list of apps starting with the letter O.
The OneDrive icon in the hidden icons list
TIP: If the OneDrive icon is nowhere to be found in the system tray or among the hidden icons, open the OneDrive app from the Start Menu. Its shortcut is in the list of apps starting with the letter O.
 Opening OneDrive from the Start Menu
The previous action opens a pop-up window with details about OneDrive and its last actions on your Windows computer. Click or tap the Help & Settings button.
Opening OneDrive from the Start Menu
The previous action opens a pop-up window with details about OneDrive and its last actions on your Windows computer. Click or tap the Help & Settings button.
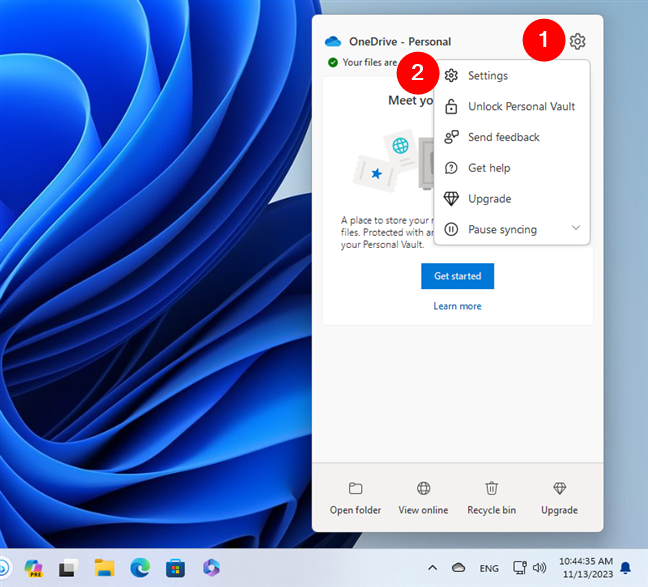
 Help & Settings in the OneDrive window
This brings up a menu with various options: select Settings from it.
Help & Settings in the OneDrive window
This brings up a menu with various options: select Settings from it.
 Opening the Settings for OneDrive
TIP: Did OneDrive stop syncing on your computer? Here’s how to force OneDrive to sync in Windows.
Opening the Settings for OneDrive
TIP: Did OneDrive stop syncing on your computer? Here’s how to force OneDrive to sync in Windows.
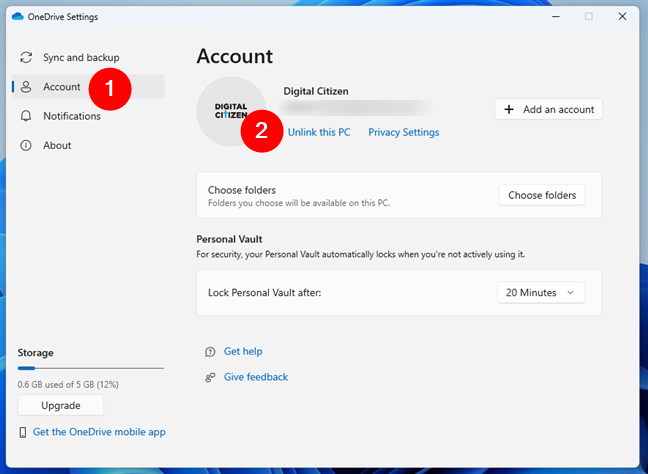
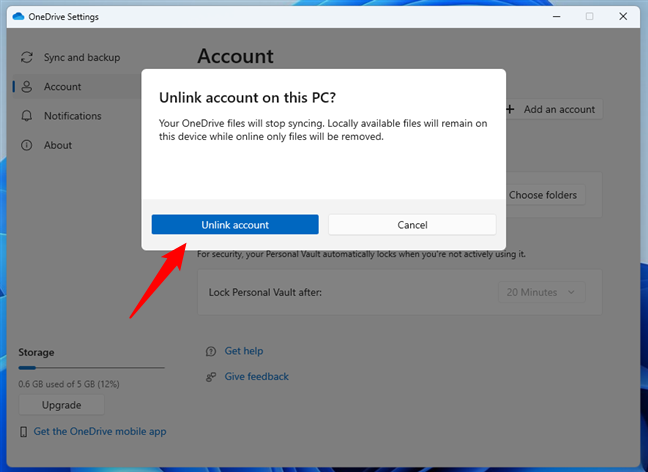
 Choosing to Unlink this PC from OneDrive
When OneDrive asks you if you’re sure that you want to unlink your PC, confirm the action by pressing the Unlink account button. This makes OneDrive stop syncing your files, and it’s a mandatory step if you want to move the OneDrive folder somewhere else.
Choosing to Unlink this PC from OneDrive
When OneDrive asks you if you’re sure that you want to unlink your PC, confirm the action by pressing the Unlink account button. This makes OneDrive stop syncing your files, and it’s a mandatory step if you want to move the OneDrive folder somewhere else.
 Unlink account from OneDrive
After you confirm that you want to unlink your computer, Windows will prompt you to log in or create a Microsoft account to use OneDrive on your PC. Ignore it for now, but leave the window open, as you’ll need it later.
Unlink account from OneDrive
After you confirm that you want to unlink your computer, Windows will prompt you to log in or create a Microsoft account to use OneDrive on your PC. Ignore it for now, but leave the window open, as you’ll need it later.
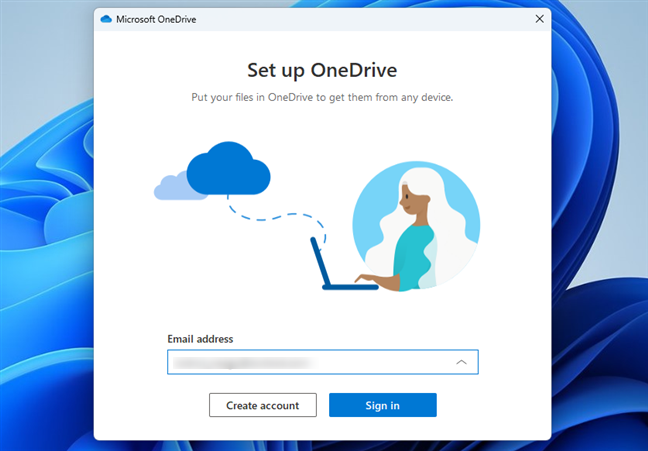
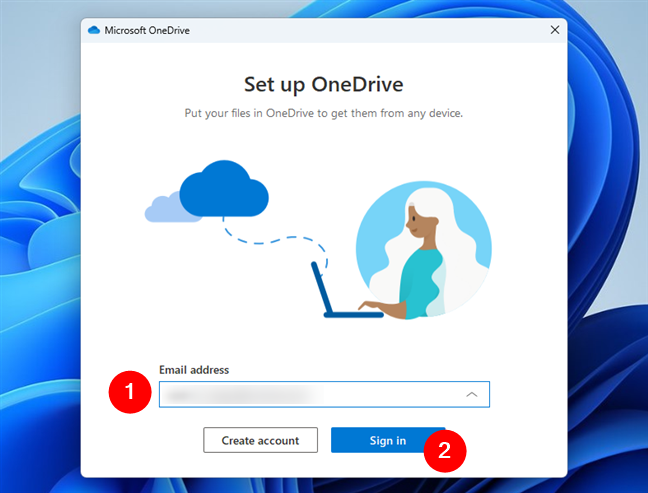
 Set up OneDrive
TIP: Do you dislike OneDrive and would like to get rid of it from your computer? Here’s how to disable and remove OneDrive from Windows.
Set up OneDrive
TIP: Do you dislike OneDrive and would like to get rid of it from your computer? Here’s how to disable and remove OneDrive from Windows.
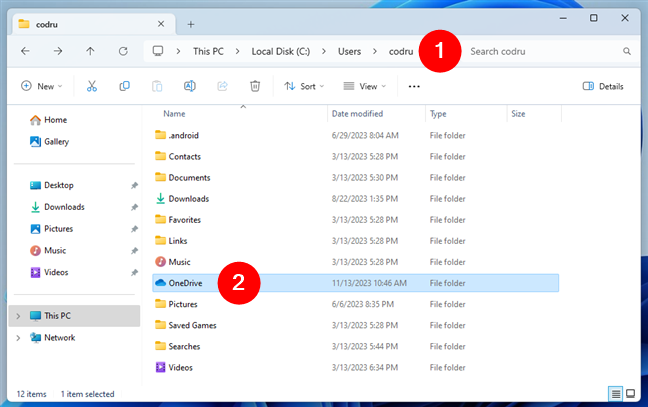
 Go to the location of the OneDrive folder
Once you’ve found it, right-click (or press and hold) the OneDrive folder and select Cut in the context menu. Alternatively, you can select the folder and press Ctrl + X on your keyboard.
Go to the location of the OneDrive folder
Once you’ve found it, right-click (or press and hold) the OneDrive folder and select Cut in the context menu. Alternatively, you can select the folder and press Ctrl + X on your keyboard.
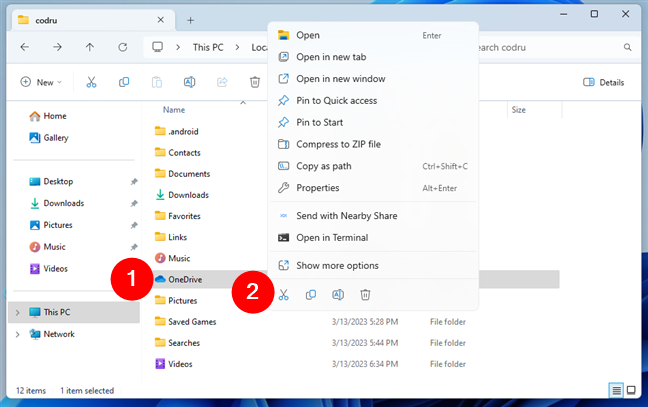 Cut the OneDrive folder
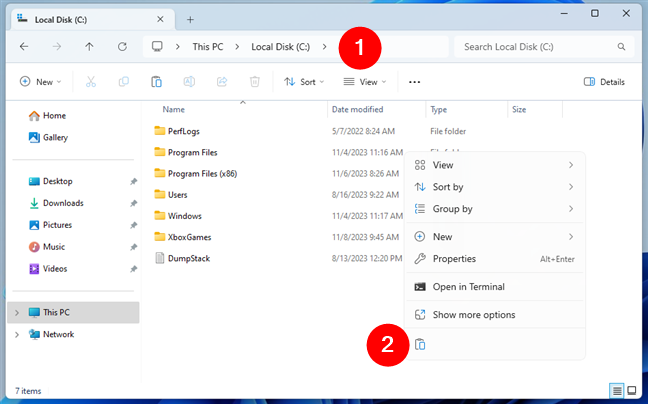
Next, use File Explorer to browse through your Windows computer and select the drive, partition, or folder where you want your OneDrive data to be located from now on. Once you get there, right-click (or press and hold) to show the context menu, and choose Paste to move the OneDrive folder.
Cut the OneDrive folder
Next, use File Explorer to browse through your Windows computer and select the drive, partition, or folder where you want your OneDrive data to be located from now on. Once you get there, right-click (or press and hold) to show the context menu, and choose Paste to move the OneDrive folder.
 Paste the OneDrive folder
Wait for Windows to move your OneDrive folder and all its data to the new location. Depending on the number and size of your files, this step might take a while.
Paste the OneDrive folder
Wait for Windows to move your OneDrive folder and all its data to the new location. Depending on the number and size of your files, this step might take a while.
 OneDrive's folder new location
After the operating system finishes moving your OneDrive folder, you can close File Explorer.
OneDrive's folder new location
After the operating system finishes moving your OneDrive folder, you can close File Explorer.
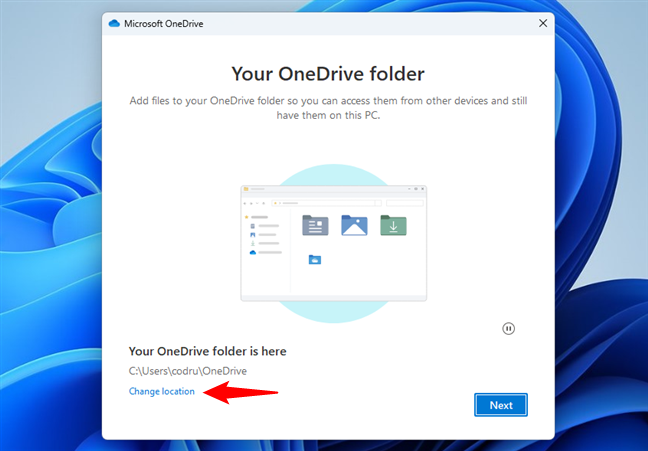
 Sign in with your Microsoft account
Once you’ve signed in, OneDrive shows you where it intends to store your files. As you want to change the location of your OneDrive folder to something other than the default file path, click or tap the Change location link.
Sign in with your Microsoft account
Once you’ve signed in, OneDrive shows you where it intends to store your files. As you want to change the location of your OneDrive folder to something other than the default file path, click or tap the Change location link.
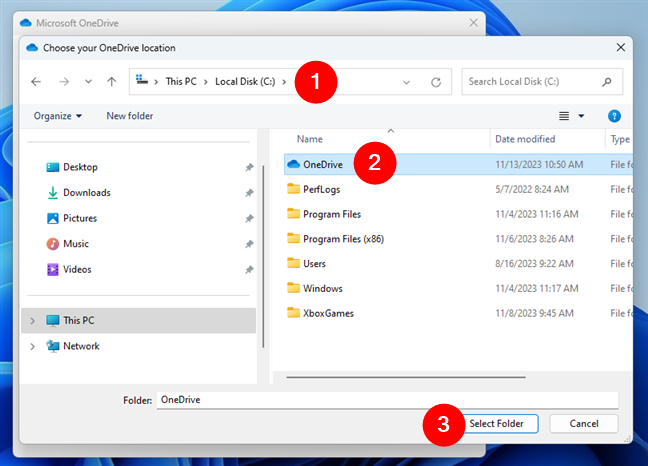
 Selecting to Change location for OneDrive
OneDrive now opens a File Explorer window called “Choose your OneDrive location.” Use it to browse through your Windows computer to select the place where you moved your OneDrive folder earlier. Once you’ve done that, press the Select Folder button.
Selecting to Change location for OneDrive
OneDrive now opens a File Explorer window called “Choose your OneDrive location.” Use it to browse through your Windows computer to select the place where you moved your OneDrive folder earlier. Once you’ve done that, press the Select Folder button.
 Browsing to the new OneDrive location
OneDrive will detect that “A OneDrive folder already exists on this PC.” You now have to confirm that you still intend to “Use this folder.”
Browsing to the new OneDrive location
OneDrive will detect that “A OneDrive folder already exists on this PC.” You now have to confirm that you still intend to “Use this folder.”
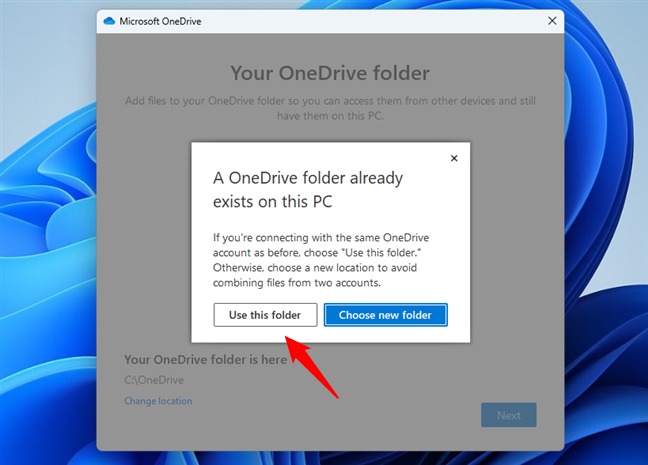
 Choosing to Use this folder for OneDrive
Now you should see that the location of OneDrive was changed according to your instructions. Click or tap Next to continue.
Choosing to Use this folder for OneDrive
Now you should see that the location of OneDrive was changed according to your instructions. Click or tap Next to continue.
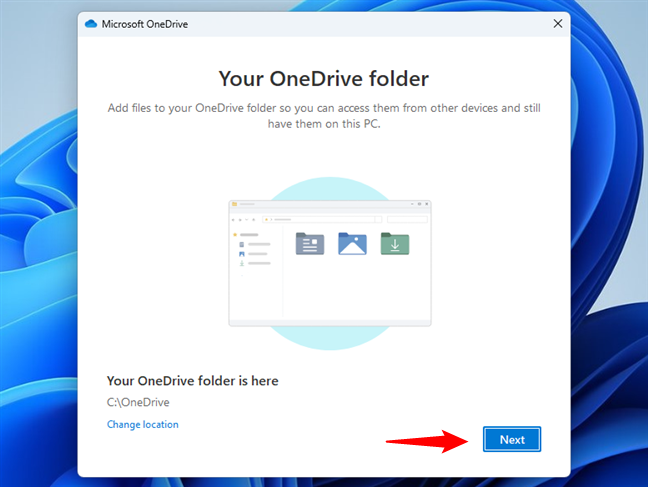
 The location of OneDrive has been changed
Although the location of your OneDrive folder is now modified, there is still one thing left to configure. That’s to select whether you want to back up your Documents, Pictures, Desktop, Music, and Videos folders to OneDrive. Choose the ones you want, and click or tap the Start backup button. If you don’t want to do this now, you can click/tap on “I’ll do it later.”
The location of OneDrive has been changed
Although the location of your OneDrive folder is now modified, there is still one thing left to configure. That’s to select whether you want to back up your Documents, Pictures, Desktop, Music, and Videos folders to OneDrive. Choose the ones you want, and click or tap the Start backup button. If you don’t want to do this now, you can click/tap on “I’ll do it later.”
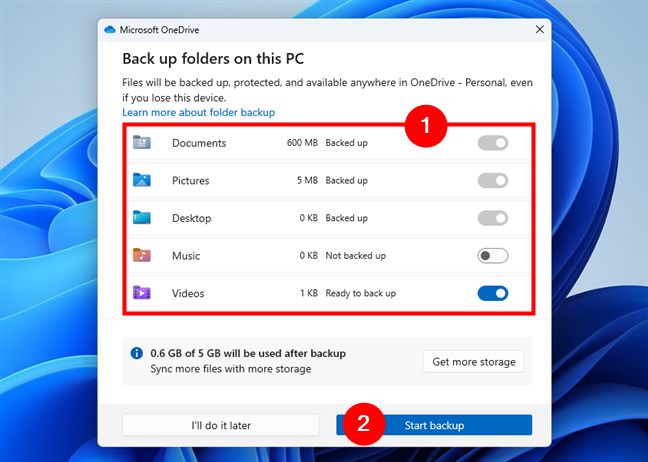
 Choosing what folders are backed up to OneDrive
Then, OneDrive shows you a few slides with some information about it and the benefits of upgrading to a paid plan if you’re using the free one. Go through the slides by clicking or tapping the Next button a few times until you see the last one telling you that “Your OneDrive is ready for you.” Click or tap “Open my OneDrive folder.”
Choosing what folders are backed up to OneDrive
Then, OneDrive shows you a few slides with some information about it and the benefits of upgrading to a paid plan if you’re using the free one. Go through the slides by clicking or tapping the Next button a few times until you see the last one telling you that “Your OneDrive is ready for you.” Click or tap “Open my OneDrive folder.”
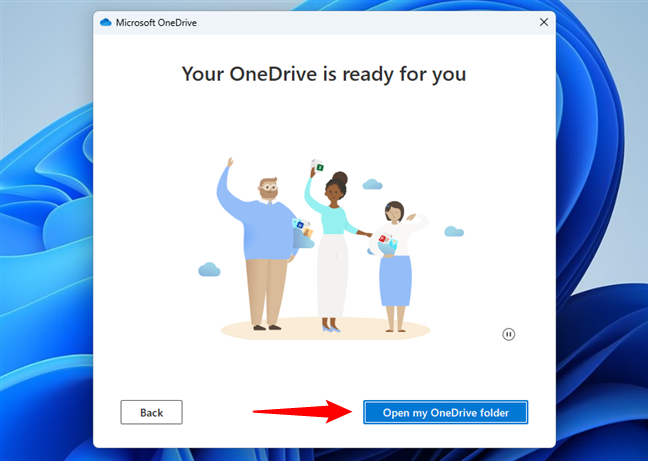
 Open my OneDrive folder
This makes File Explorer launch and take you to your new (changed) OneDrive location.
Open my OneDrive folder
This makes File Explorer launch and take you to your new (changed) OneDrive location.
 The new OneDrive location
That was all: your OneDrive folder is now moved to where you wanted it to be.
The new OneDrive location
That was all: your OneDrive folder is now moved to where you wanted it to be.
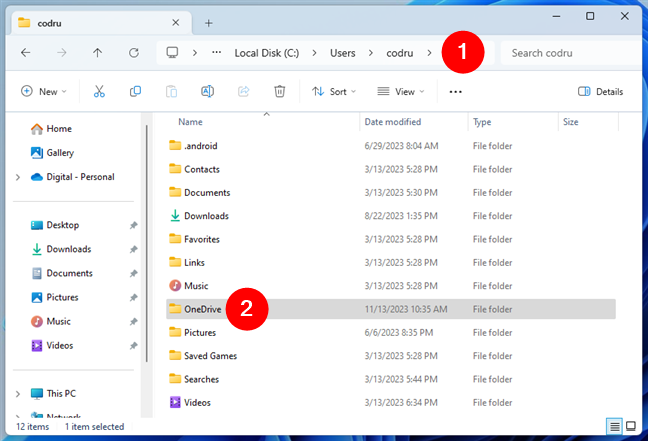
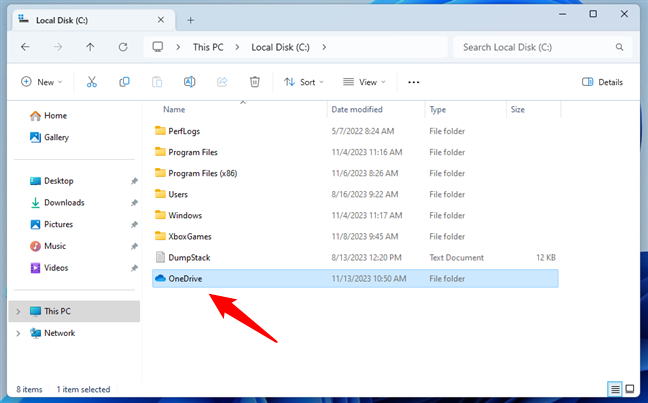
Where is OneDrive data located by default?
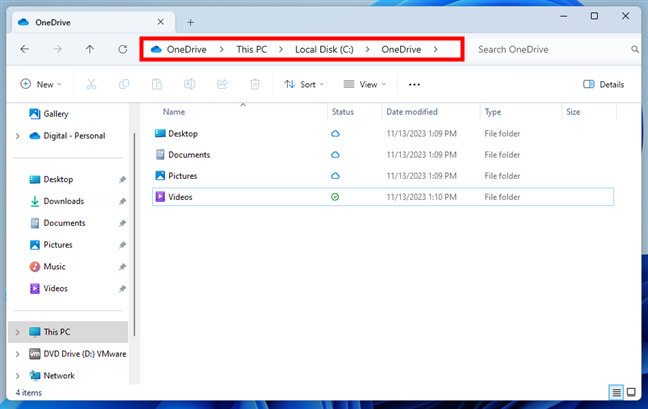
Regardless of whether you’re using Windows 11 or Windows 10, OneDrive is also a user folder. What does that mean? If you open File Explorer (Win + E) and go to the drive where Windows is installed, you’ll find a folder called Users. Access it, and then open your user account folder. There, you’ll see all your standard user folders: Documents, Pictures, OneDrive, and others.C:\Users\Your User Account\OneDrive
If you want to move the OneDrive folder to store your files on another drive, partition, or folder, there’s no obvious way to change OneDrive’s location. You might assume this folder’s location change works the same as for other user folders, but that’s not true. Here’s what you’ll need to do:
How to change OneDrive’s location in Windows
Regardless of whether you have Windows 11 or Windows 10, if you want to change the location of your OneDrive folder, follow these steps:Step 1. Open OneDrive’s settings
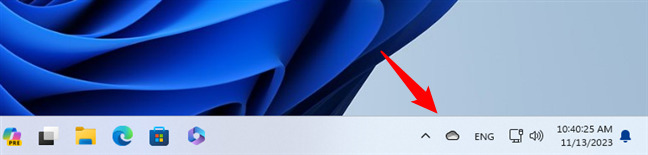
Start by looking for OneDrive’s icon in the system tray, on the right side of the taskbar. It shouldn’t be hard to identify; it looks like a small cloud. Once you find it, click or tap on it.Step 2. Unlink your Windows PC from your OneDrive account
Next, Windows shows you another window called OneDrive Settings. Select the Account tab on the left sidebar, and click or tap “Unlink this PC” on the right side of the window.Step 3. Move the OneDrive folder to another location (file path)
The next step is to move your OneDrive folder from its original location to the one where you want it to be. Open File Explorer and navigate to OneDrive’s current location. As you know now, OneDrive’s default file path is:C:\Users\Your User Account\OneDrive
Step 4. Set up and change OneDrive’s folder location
Go back to the OneDrive login window, which you left open earlier. In it, enter the email address associated with your Microsoft account. Then, click or tap Sign in and, if requested, type your password or use an alternative way of authentication, such as your Microsoft Authenticator app, to access your account.

Discussion (23)
No location tab in Windows 10.
Is there another way?
Thank you for the detailed and precise instructions. Managed to do it on the first trial.
Thank You Very Much for the explanation.
I want more space in drive C, and i’m worry once my PC get a trouble and need to be formated it’s affect on files in OneDrive.
ur explanation is Clear and very usefull .
Cheer
Thank you. Perfect explanation and I got it done 1st try with no fuss.
Skydrive demands NTFS. I can’t move it to my SD card.
Got it to work. In Hardware settings I have set the drive to Better Performance. Next I used CMD Convert to reformat the SD card to NTFS without having to make a backup of the card. After a restart I could transfer OneDrive to the SD card.
Thank you for the post. Can the original Onedrive folder be deleted after changing the default location? Will it have any impact on the changed drives?
Is there a way to use another account instead of the current account?
You sign into Windows 8.1 with another account and you can use OneDrive for that account separate from your main account.
I’m in line behind Jimmy G. I’m not interested in the default opening of File Explorer to “This PC”. Please explain a work-around for this if at all possible.
Thanks for all the -understandable- info on OneDrive. Very nice to be able to understand information for a change 🙂
Nice work here, but maybe I am not approaching the problem correctly. I want to have File Explorer in Win 8.1 (Update) open by default in OneDrive/Documents, which is the default when I click “Save.”
Right now when I open File Explorer it defaults to “This PC.” How do I change the default? TIA Jim
Can i move sky drive to my external hard drive which will be plugged into my computer at all times to save space on the computers hard drive?
I haven’t tried it but it should work. Try it out and share the results with us. I’m sure others will find your experiment useful.
I used your guide on how to move my Skydrive folder to another disk (d:skydrive). Thank you. But then I found that the folder content is available for the Guest user (which I activated so that friends can use the PC for simple browsing.) Why is that? I assume the default location restricts access? And what’s the easiest way restrict access to just me ?
Thanks
Ivar
Use this guide to remove the permissions to that folder, for the Guest user:
https://www.digitalcitizen.life/take-ownership-and-change-permissions-files-and-folders
Ciprian, I followed your instructions but I don´t have the Location tab in Skydrive folder properties.
How come?
Tks
What exact Windows version are you using?
Ciprian, I´m using Windows 8.1 Pro preview.
Tks
As I mentioned in earlier comments – this feature doesn’t exist in Windows 8.1 Preview. It was implemented only in the final RTM version which will be launched globally on October 18th.
The steps you have provided is for Windows 8; not for 8.1 Preview. You are liar!
There is no lie in this article. In Windows 8.1 Public Preview you cannot change the SkyDrive folder by design. Simply because Windows 8.1 wasn’t finished at that point.
In the final version of Windows 8.1 (RTM), the folder can be changed using the procedure mentioned in this article.
you are making personification easy with Windows 8.1 tips, thanks for sharing your valuable knowledge
I’m glad you found this article useful.