16.11.2023
Windows assigns drive letters for all the hard disk drives, solid-state drives, optical media units, removable drives, and memory cards connected to your computer. Because the operating system does that on its own, you might be tempted to think that these drive letters cannot be changed. However, that is not true because Windows lets you change the drive letter of any drive as long as it is not already used for another. Here is how to change a drive’s letter in Windows 11 and Windows 10:
NOTE: Except for the first method in this guide, which only applies to Windows 11, all the other methods for changing a drive’s letter work the same both in Windows 11 and Windows 10. Before you go ahead, keep in mind that changing the letter of the drive where Windows is installed is not recommended and cannot be done following the instructions in this guide. Also, you should know that changing a drive letter is generally safe and shouldn’t result in any data loss. That is… unless you’ve installed apps or games on the drive whose drive letter you want to change. In this case, those apps or games may stop running correctly.
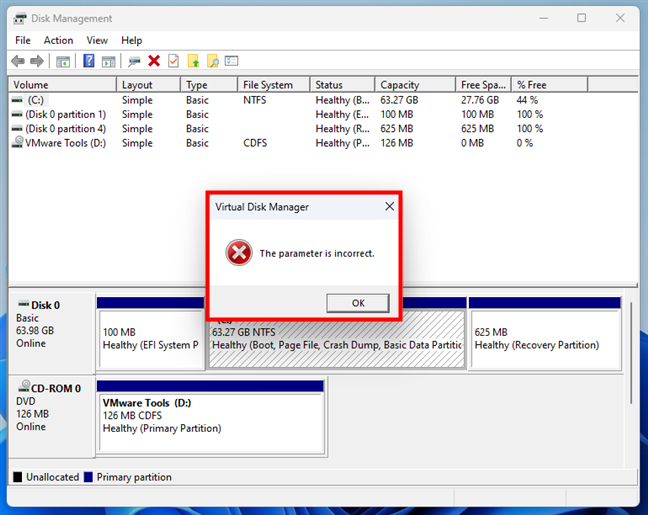
Attempting to change the OS drive letter results in error
How to change a drive’s letter in Windows 11’s Settings
If you’re using Windows 11, a straightforward way to change the drive letter of a partition or removable drive is offered by the Settings app. Open Settings (Win + I) and select System in the left sidebar. Then, on the right side of the window, click or tap on Storage.
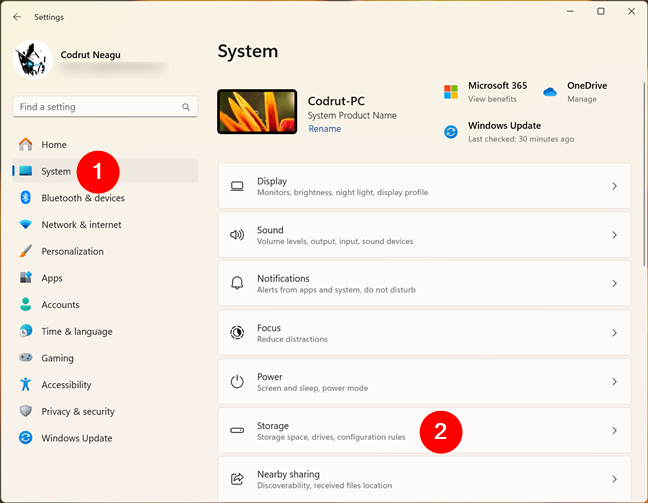
Open Settings and go to System > Storage
Scroll down to locate the Storage management section. Then, click or tap on the Advanced storage settings.

Head to Advanced storage settings
In the expanded list of Advanced storage settings, click or tap on Disks & volumes.
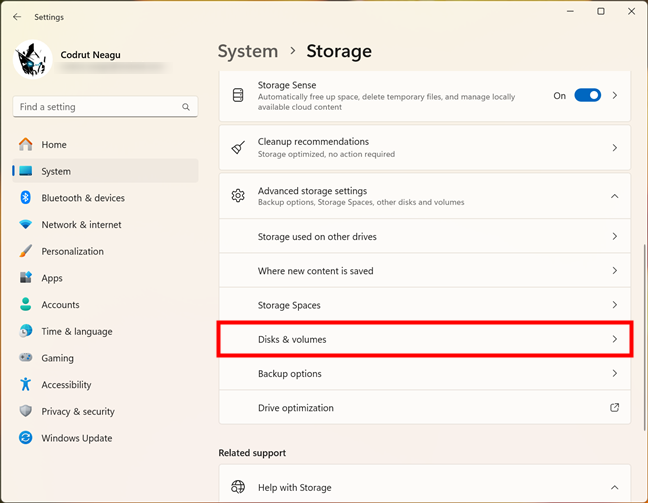
Open the Disks & volumes
This opens a new page where you can “View and manage properties of your disks and volumes.” Find the partition whose drive letter you want to change and click or tap the Properties button next to it.
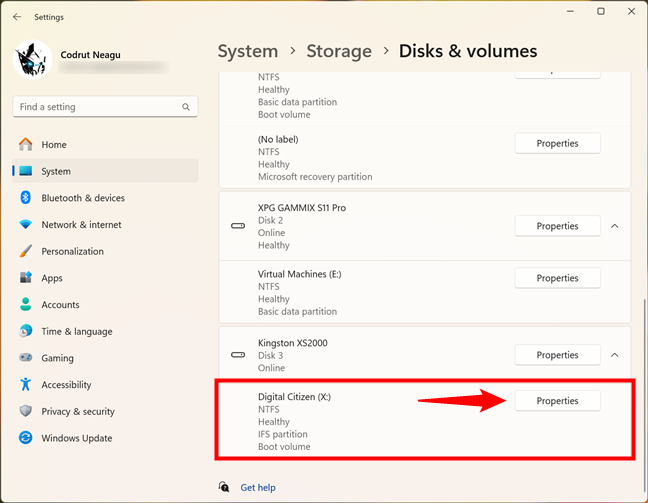
Click Properties next to the drive
This loads a new page in the Settings app where you can see and change some options regarding the partition or volume you’ve chosen. To set a new drive letter for it, click or tap the Change drive letter in the Volume data section.
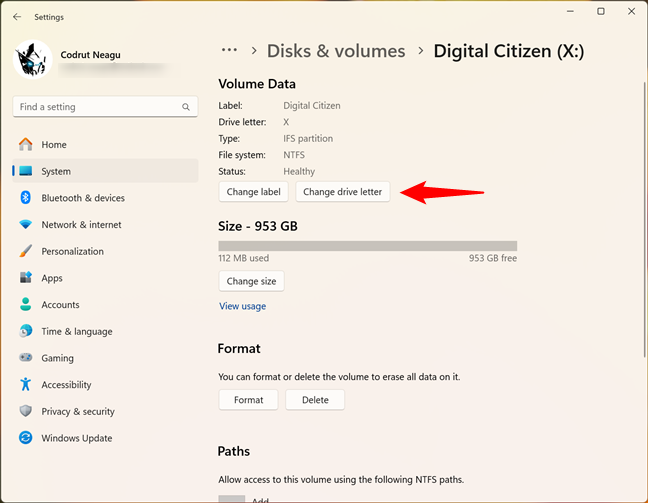
Click Change drive letter
Windows 11 will then ask you to “Choose which drive letter to use for this volume.” Click or tap on the currently displayed letter.
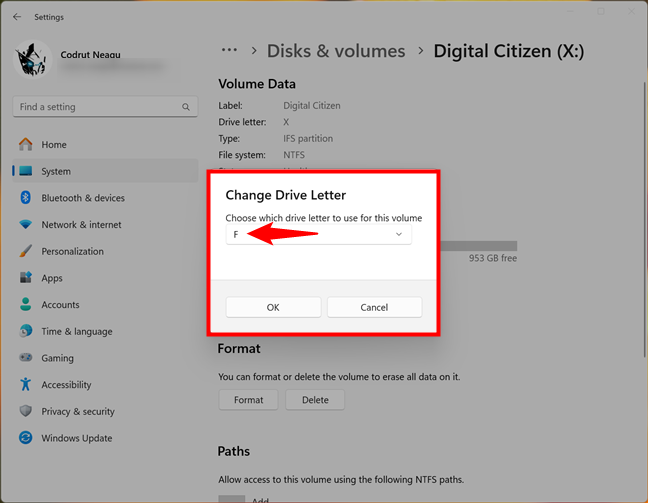
Choose which drive letter to use for this volume
Select the new drive letter you want to use.
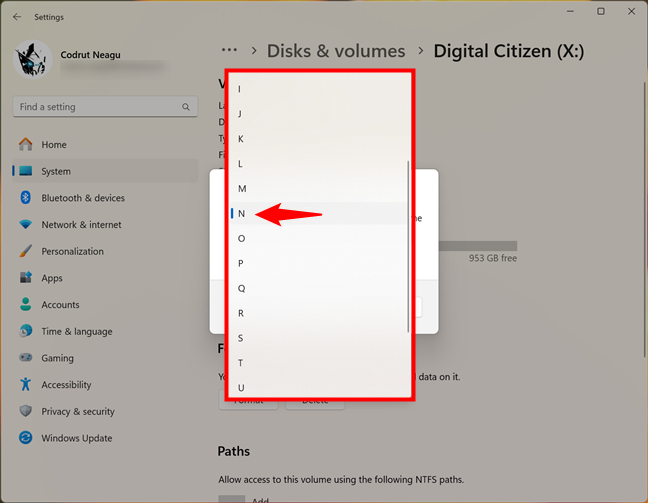
Select the new drive letter
The new drive letter is now selected. To save your changes and assign the drive letter, click or tap on OK.
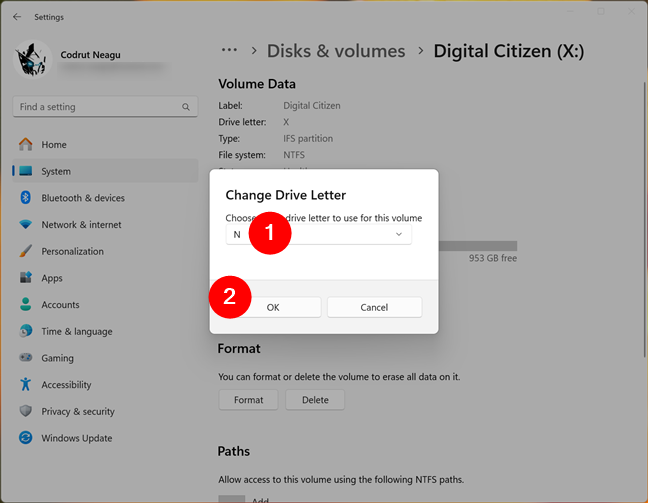
Assign the new drive letter
The drive letter has been changed. You can now close the Settings app and continue your work on your Windows 11 PC.
How to change a drive’s letter using Disk Management
Another way to change the drive letter of a partition or removable drive is available in the Disk Management tool. Open the Disk Management: a quick method that works the same in both Windows 11 and Windows 10 is to use the WinX menu: right-click (or tap and hold) the Windows button on the taskbar and select Disk Management in the menu.
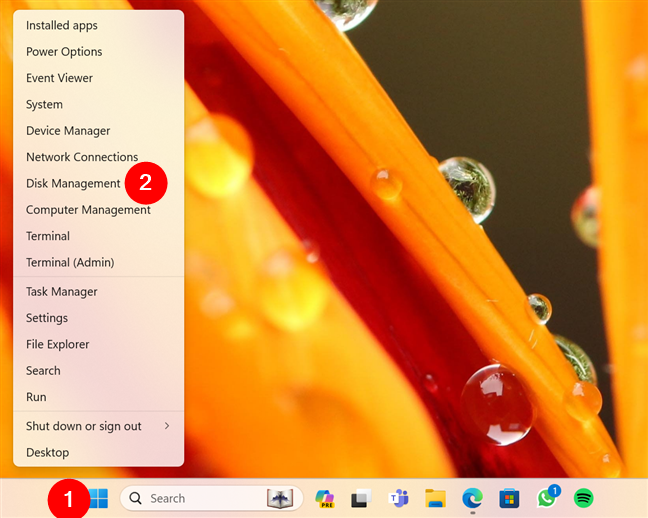
Open Disk management
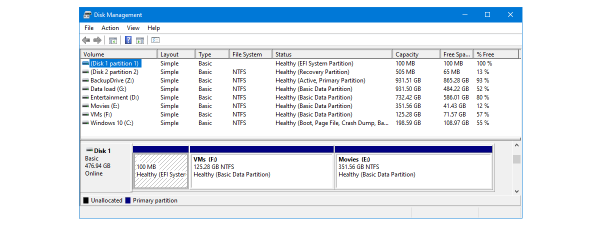
The Disk Management tool opens, and it should look similar to the screenshot below.
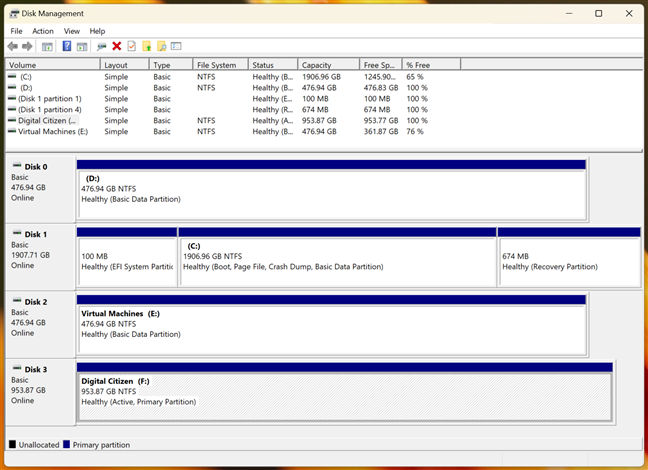
The Disk Management window
Find the drive whose drive letter you want to change and right-click on it (or press and hold on it if you are using a touchscreen). This action opens a context menu similar to the one in the next screenshot. In the menu, click (or tap) on the “Change Drive Letter and Paths” option.
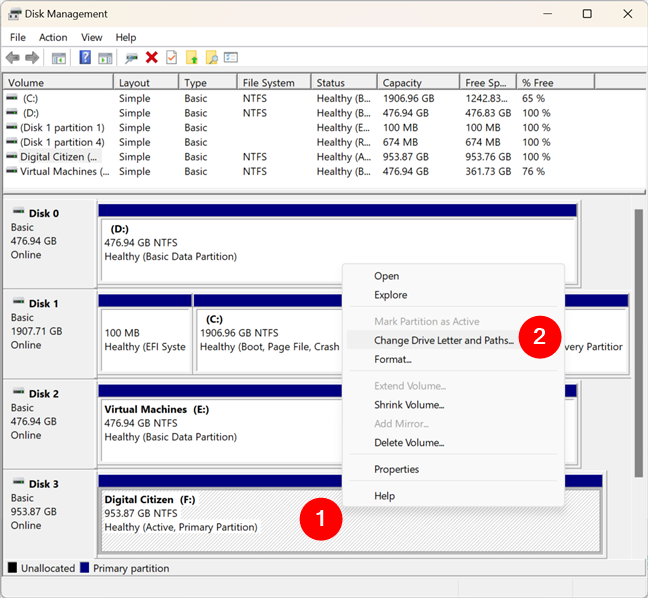
Right-click the drive and select Change Drive Letter and Paths
Disk Management opens a small window called “Change Drive Letter and Paths for [Drive Letter]:.” In the field called “Allow access to this volume by using the following drive letter and paths,” you can see the letter that is presently used for that drive. For instance, one of my USB solid-state drives used the drive letter F.
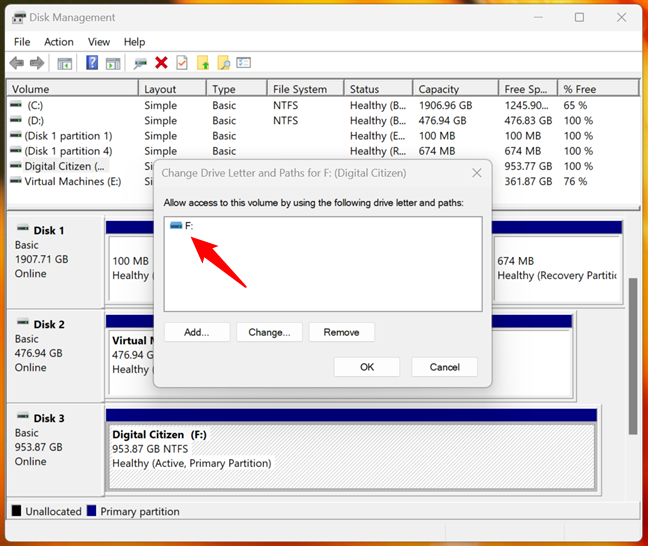
The current drive letter
Click or tap the Change button.
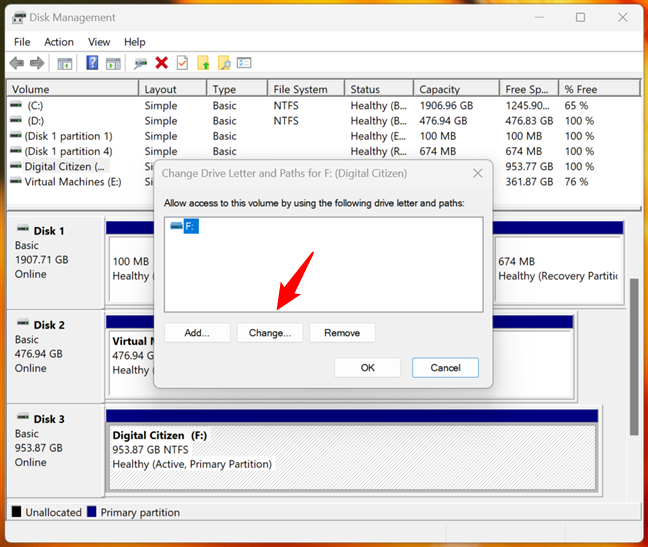
Click the Change button
Another dialog window, Change Drive Letter or Path, opens. In it, there’s an option called “Assign the following drive letter.” On the right, you’ll find a list with all the letters of the alphabet that aren’t in use. The default value is the drive letter that is currently used by the drive you selected.
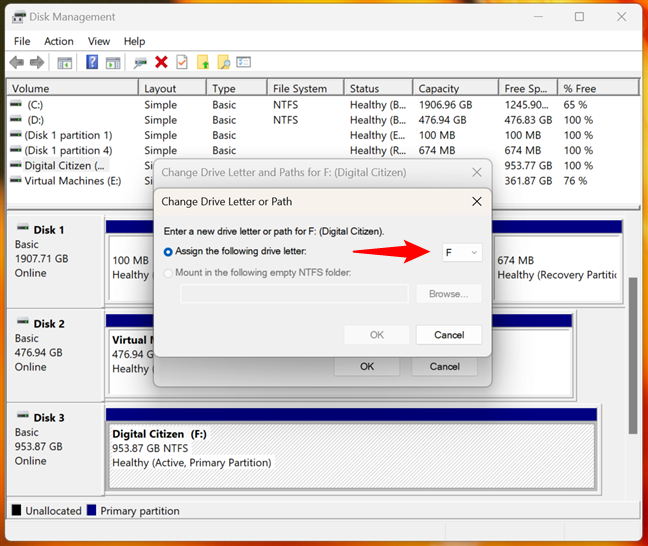
Assign the following drive letter
Click or tap on the drive letter list and select the new drive letter that you want to assign to the drive.
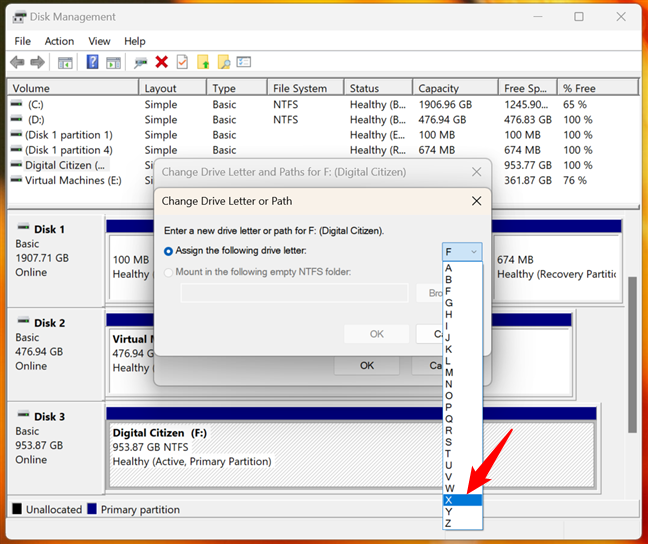
Choose the new drive letter
After you select the new drive letter, click or tap OK.

Assign the new drive letter
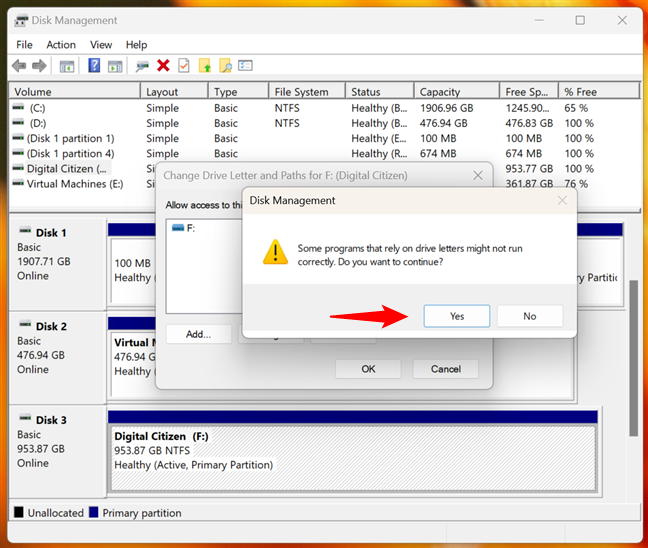
Windows might alert you to the fact that “Some programs that rely on drive letters might not run correctly.”. You should know that, in most cases, changing the drive letter is not an issue, and modern apps should not stop running correctly. If you’re using older programs, they may have problems running correctly if they need access to the drive in question. Windows gives you the option to continue or not. If you are still determined to change the drive letter, go ahead and press Yes.
Some programs that rely on drive letters may not run correctly
If you’ve chosen to continue, the drive letter is instantly changed to the one you selected.
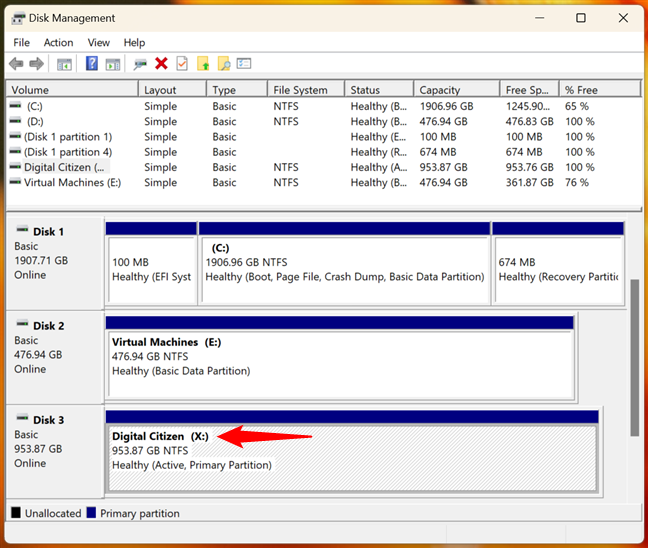
The drive letter was changed
The drive letter has been changed so you can carry on with whatever you want to do on your Windows 11 or Windows 10 computer.
How to change a drive’s letter in CMD (Command Prompt)
Did you know that you can change a drive’s letter in Windows using the command line, too? Here’s how it all works:
As an administrator user, open the Command Prompt or, if you prefer, launch Terminal and open a Command Prompt tab in it. Then, run this next command to access the disk partitioning tools:
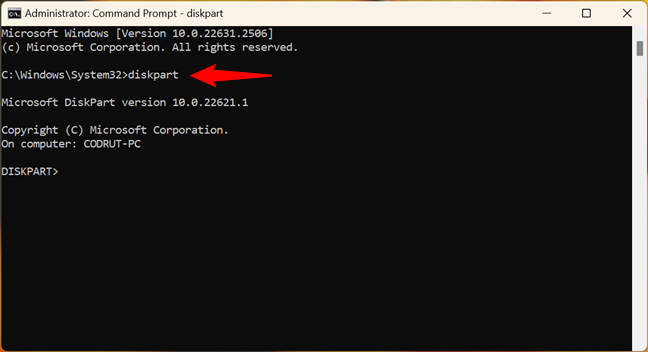
Running diskpart in CMD
To see all the volumes on your Windows 11 or Windows 10 computer, execute this next command:
In the output, find the volume you want to assign a new drive letter. In the example below, you can see that the one I want to change is marked as Volume 5 on my computer, and its current drive letter is N.
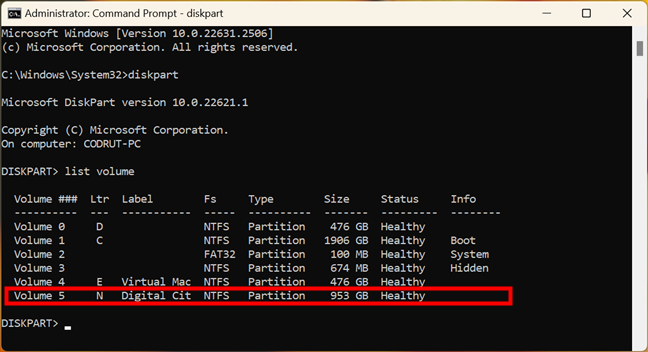
Find the volume
Once you’ve identified the drive that you want to change the drive letter for, you need to select it. To do so, run this command replacing [number] with the real number of your volume:
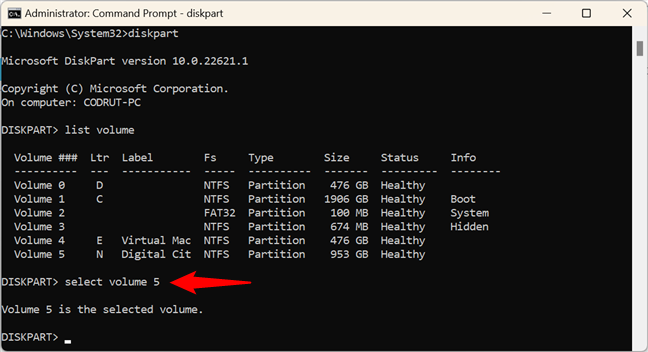
Select the volume
Finally, to change the drive letter of the selected volume, run this command replacing the letter X with the one you prefer:
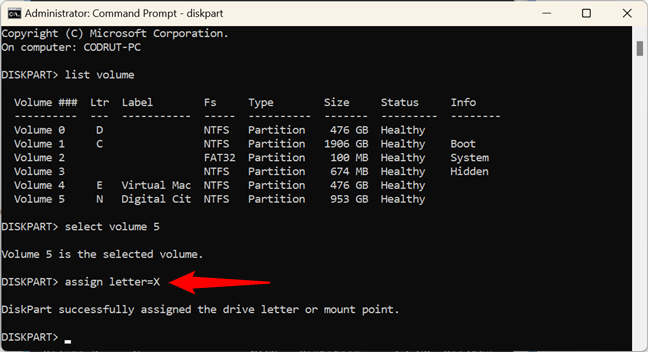
Change the drive letter
That’s it: the drive letter has been changed. You can now either continue using diskpart for other disk operations, or you can close Command Prompt and continue working on your Windows PC.
How to change a drive’s letter with PowerShell
PowerShell can also help you change drive letters in Windows, and using it actually feels a bit more structured. That’s because the sequence of commands in PowerShell follows more closely the real structure of a drive. The drive is the physical device that stores data, aka the hard disk or the solid-state drive. But to actually have access to the storage, a drive must have at least one partition, which is a logical division of the drive that, in turn, must also have at least one volume on it. The volume is the logical representation of the partition that can be accessed and used by the operating system and to which you can assign a drive letter.
Having said all that, to change a drive letter, launch PowerShell as admin or open a PowerShell tab in Windows Terminal. Then, run this command to see the drives installed on your Windows PC:
Once the results are in, identify the drive where the volume you want to change the drive letter is found. It shouldn’t be hard to find it, considering that you get to see the names of your drives as well as their size in the list. For instance, in the next screenshot, the drive I’m looking for is the one marked with the number 3, which is my portable 1TB solid-state drive.
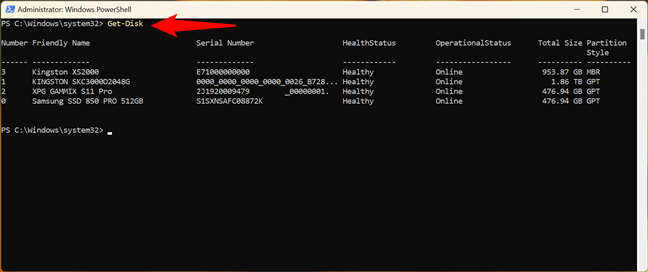
See the drives installed
Now that you know the drive, you need to find some information about the partition(s) on it. For that, run this command replacing the disk [number] with the one that applies to you:
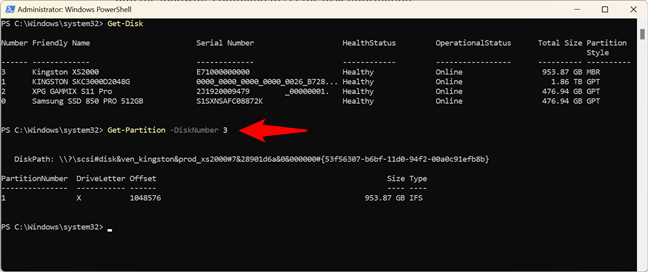
Get information about the partitions
In the output of the command, identify the partition you’re interested in: its current drive letter is listed in the DriveLetter column.
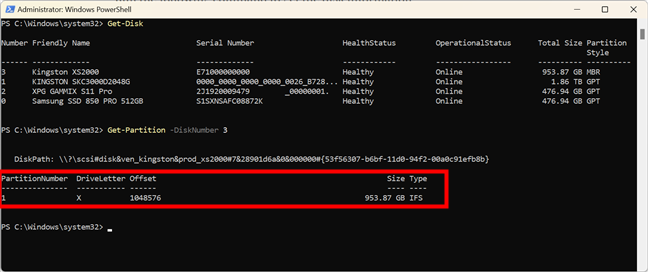
Identify the partition
Now that you’ve gathered all the required information, you can change the drive letter. To to that, run this command replacing the [disknumber] and the [partitionnumber] with the ones you’ve identified earlier, and change the [driveletter] with the one you want to set:
In my case, for example, because I want to change the drive letter to N, the command looks like this:
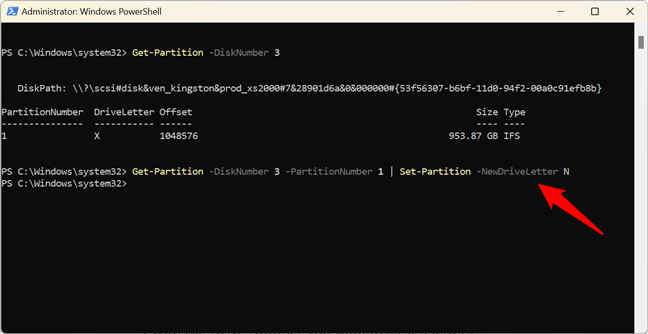
Change the drive letter in PowerShell
The action is performed immediately, and if all goes well, you shouldn’t get any feedback from PowerShell. Thus, you can close it and carry on with whatever it is you want to do on your Windows computer.
Did you change any drive letters in Windows?
As you have seen, changing drive letters in Windows is something you can do in a multitude of ways. If you want to organize your drives by changing their letters, now you know how to do it. Do you have something to add to this guide? For any additions or questions, don’t hesitate to leave a comment in the section below.